
After I acquired my 2018 Jeep Wrangler JK Unlimited Rubicon at the turn of the year, I was looking into organized trail runs with local Jeep and off-road clubs. One of the common requirements for these organized runs is a CB radio for communications with the group. I actually was looking into a CB radio for my range vehicle(s) because of the lack of cellular coverage at my ranges. Granted, a ham radio would be better for range, but that is a whole other topic all together.
For several weeks I had been continuously researching CB radios, antennas, and what it would take to get the components installed in my Wrangler JK.
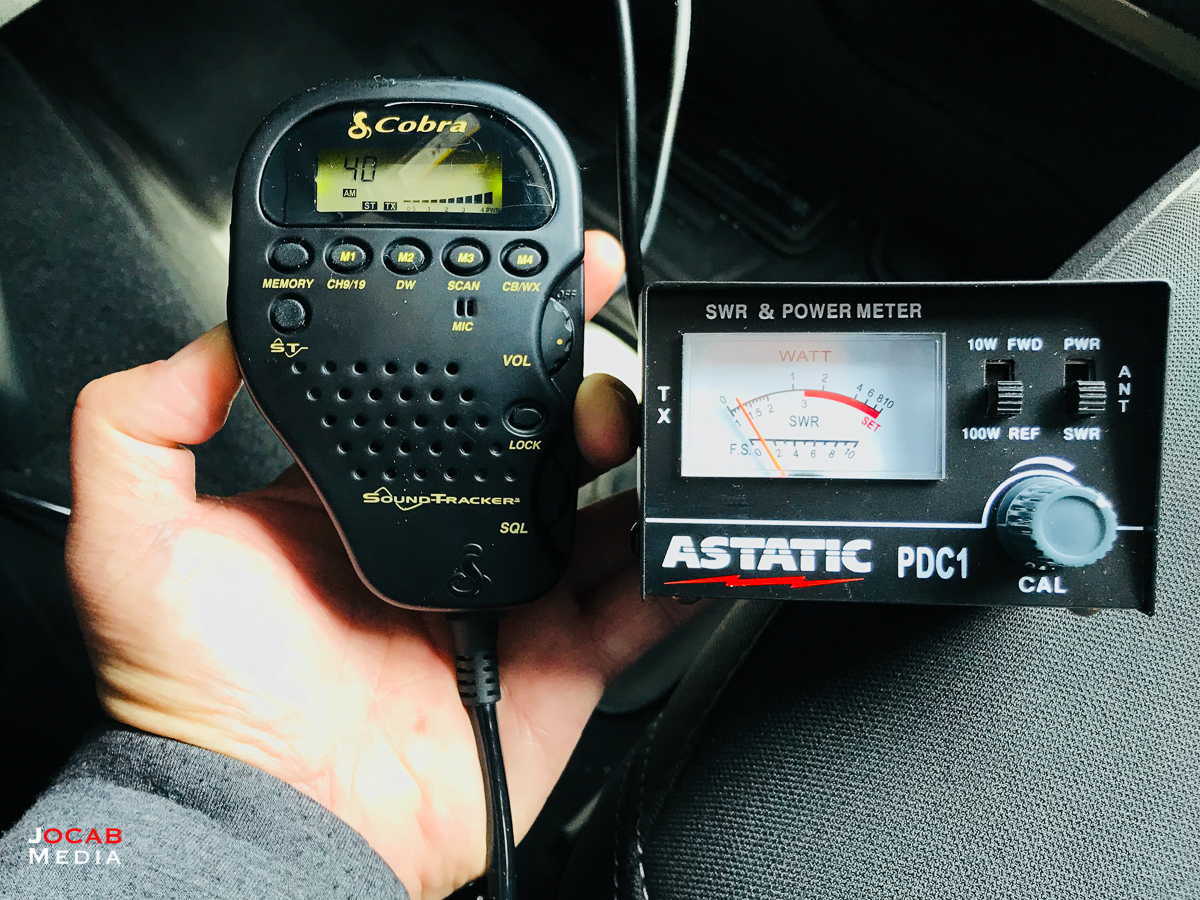
From online forums, it became apparent that the Cobra 75 WX ST appeared to be the most popular CB radio installed in Jeep Wranglers simply due to the form factor and the unit’s solid performance. Unlike typical CB radio units, the Cobra 75 WX ST is split into two components: a connector box which is mounted in a concealed area (e.g. underneath seat) and the actual handheld microphone (transceiver) which has all of the control buttons. I liked this design because it can maintain a very clean area in the cabin, and save cabin real estate for mounting other devices whenever necessary.
Sometime in early March 2018, the San Diego Jeep Club announced a trail run for March 24th of the Bradshaw Trail and Red Canyon Jeep Trail just northwest of the Salton Sea.
The trails are rated as easy (to moderate) and so this looked like a nice trail run to participate in with my stock Rubicon suspension. With just over a couple of weeks of lead time, I decided to kick the CB radio install into gear and ordered the Cobra 75 WX ST CB radio and the Mopar Jeep Wrangler JK antenna kit.
The Mopar Jeep Wrangler JK antenna kit is arguably more expensive than piecing together parts separately, but the kit had everything I needed ready to go (antenna mount, antenna, and coaxial cable) and Amazon could get it to me in a couple days. I was actually looking at a Firestik antenna which is highly regarded, but no one had the 4 foot Firestik in-stock and/or deliverable with enough lead time to test prior to the trail run date.
The install is actually fairly straightforward, but it helps to know what you need to do ahead of time so you can be prepared for the work.
The components and parts that I used for the CB radio install in my 2018 Jeep Wrangler JK Unlimited Rubican are as follows:
- Cobra 75 WX ST CB radio
- Mopar Jeep Wrangler JK antenna kit (JKANTKIT)
- Two (2) inline mini-blade (ATM) fuse holders
- Two (2) 5A mini-blade (ATM) fuses
- Four (4) 12 gauge weather resistant butt connectors
- Two (2) 12 gauge 1/4″ weather resistant ring terminals
- Two (2) 12″ zip ties
I went with 12 gauge for the connectors because I also acquired 12 gauge automotive wire, thinking I would need extra length for the existing electrical wire already connected to the Cobra 75 WX ST controller box. The recommendation is to use thicker gauge wire whenever extending existing wire. Anyway, I ended up not needing to extend the wires since the inline fuse holders added the extra length needed to get to the battery accessory terminals. I also used longer zip ties since I had a bunch laying around, but you should only need a 12″ length or so.
The first thing is to decide where you want to place the Cobra 75 WX ST connector box. While some walkthroughs show mounting the connector box underneath the passenger seat by screwing a self-tapping screw into the floor. But a more popular method is to simply zip tie the connector box to a metal beam behind the glove box.
This is quite secure and gives you a good place for the controller box, because it has a shorter distance to the battery, where you want to power the CB radio from. Many walkthroughs talk about splicing into other 12 volt power sources, including power sources that are tied to the ignition. But the best method for performance is to go directly to the battery, so this is what I planned on doing.
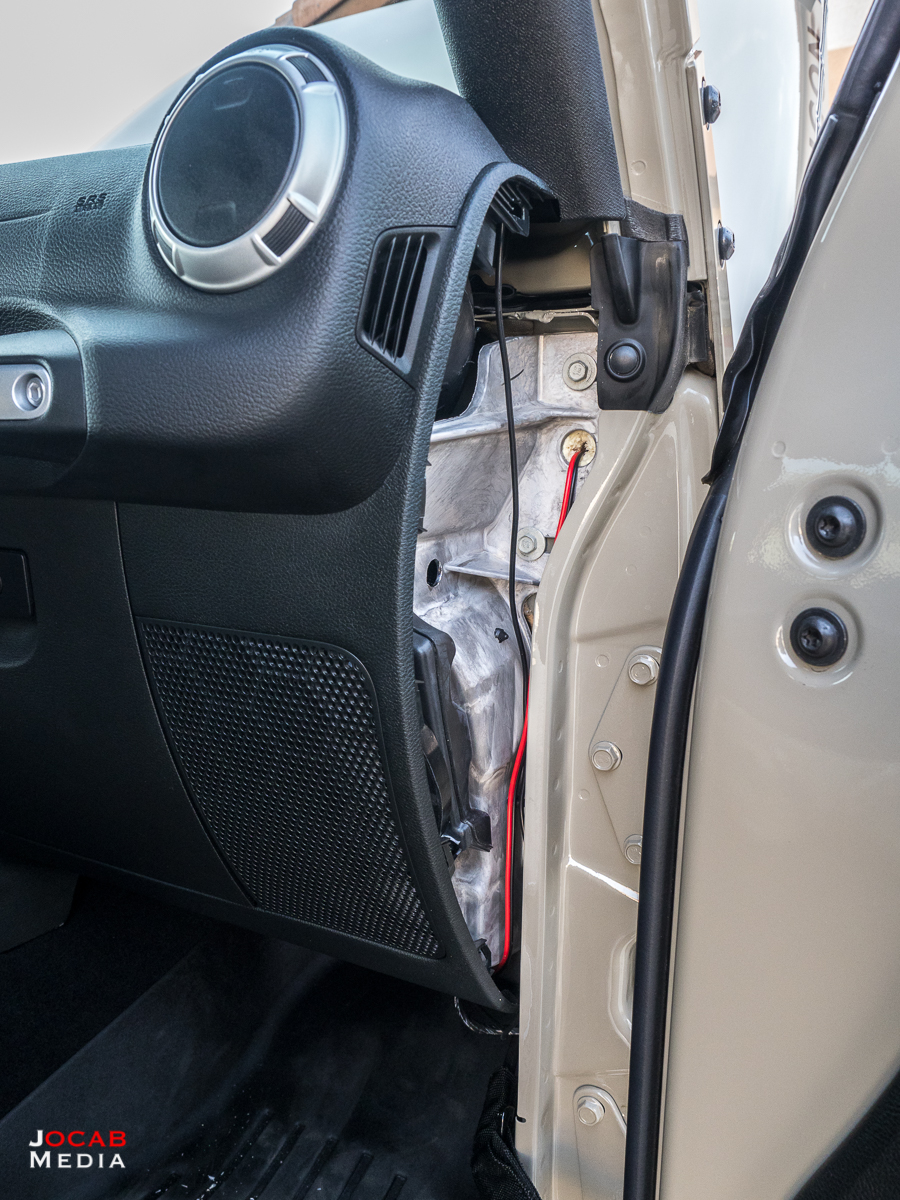
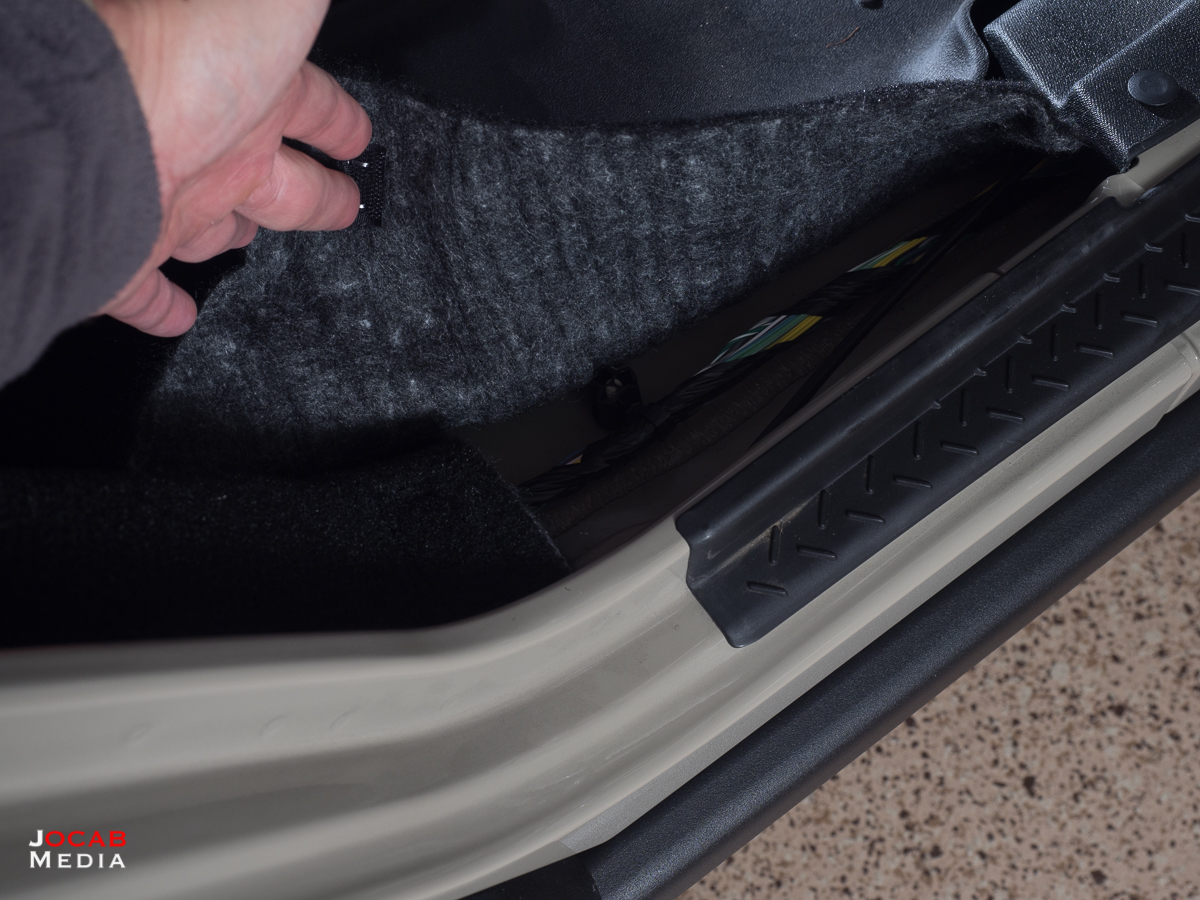
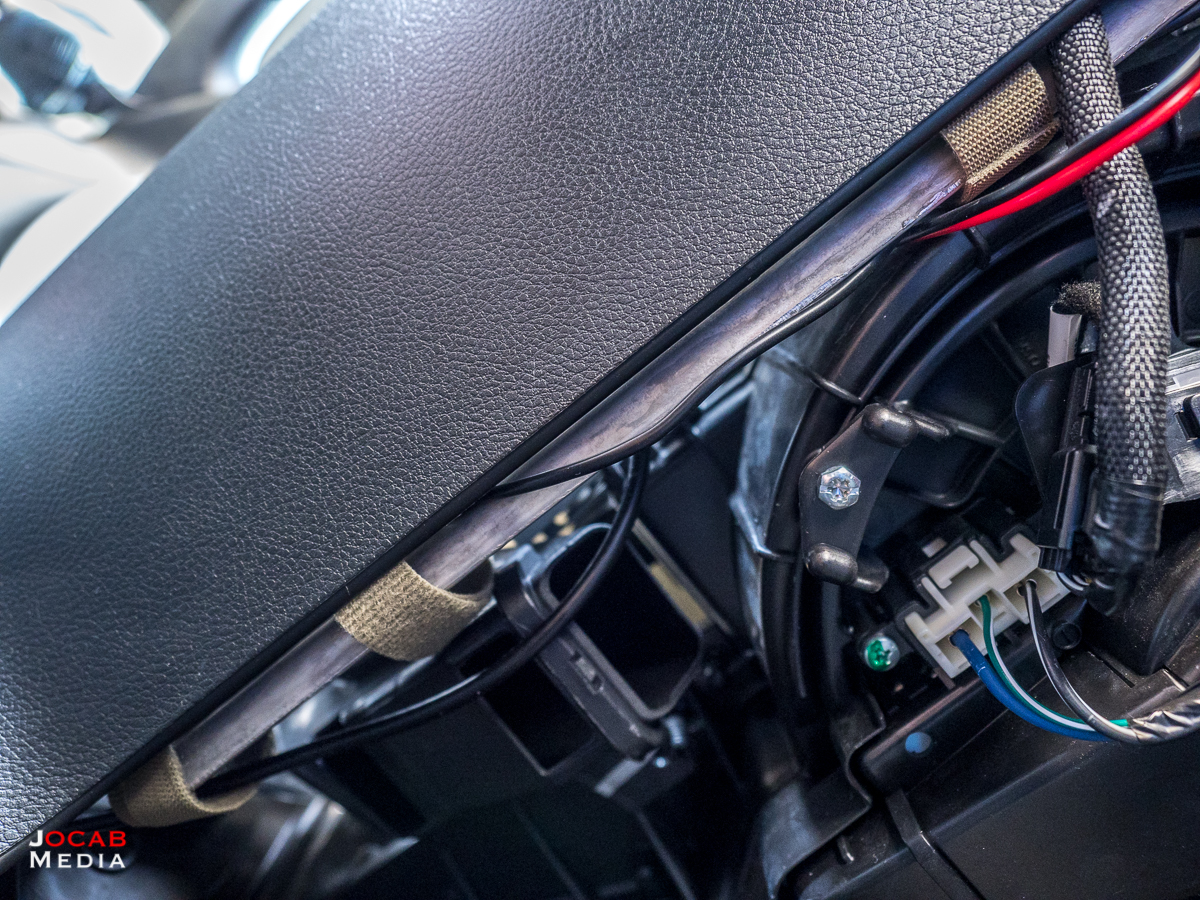
I proceeded to zip tie mount the Cobra 75 WX ST controller box inside the dash, and from there, I routed the positive and ground wires to the engine compartment via the passenger side firewall. Prying open the dashboard side panel reveals a foam covered hole.
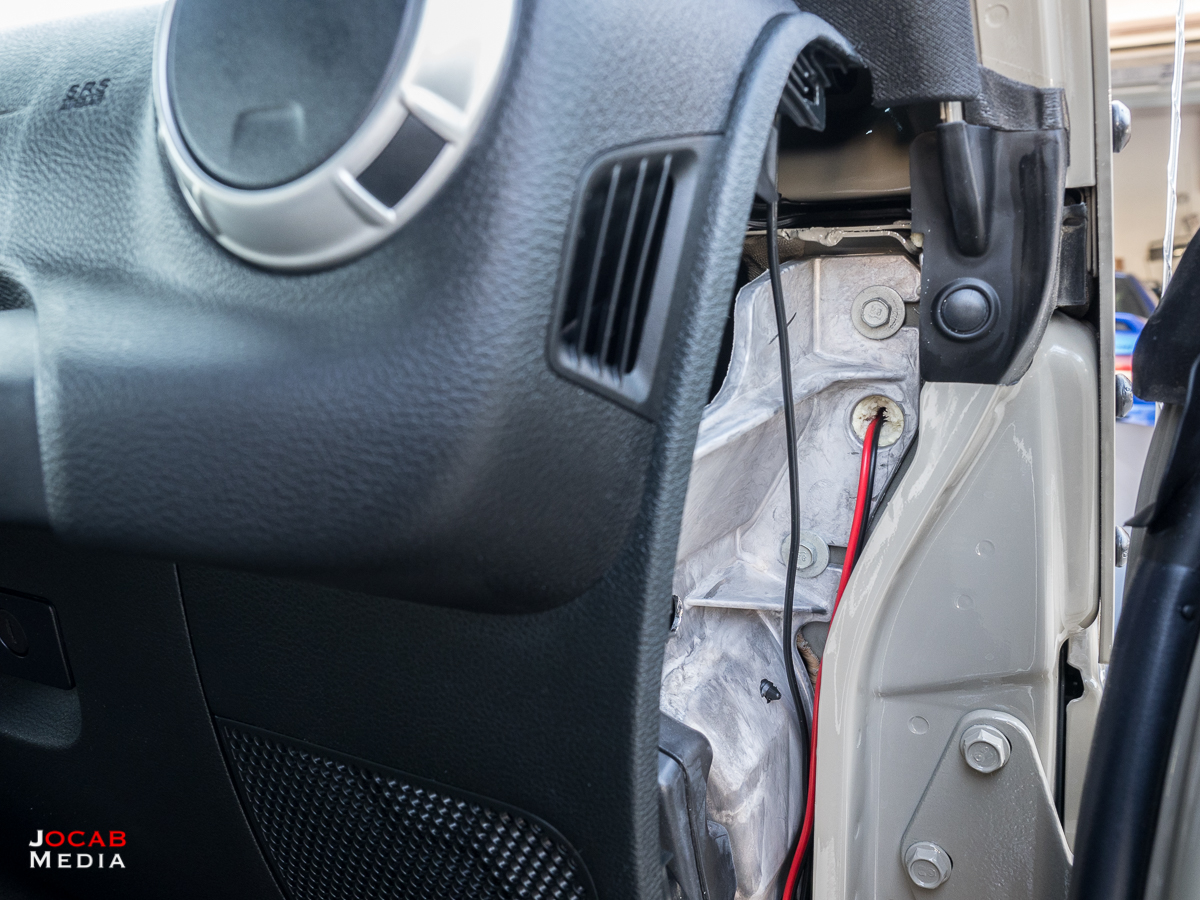
Simply poking a hole through this foam allows one to route the electrical wires out to the front underneath the passenger cowling, and into the engine bay.
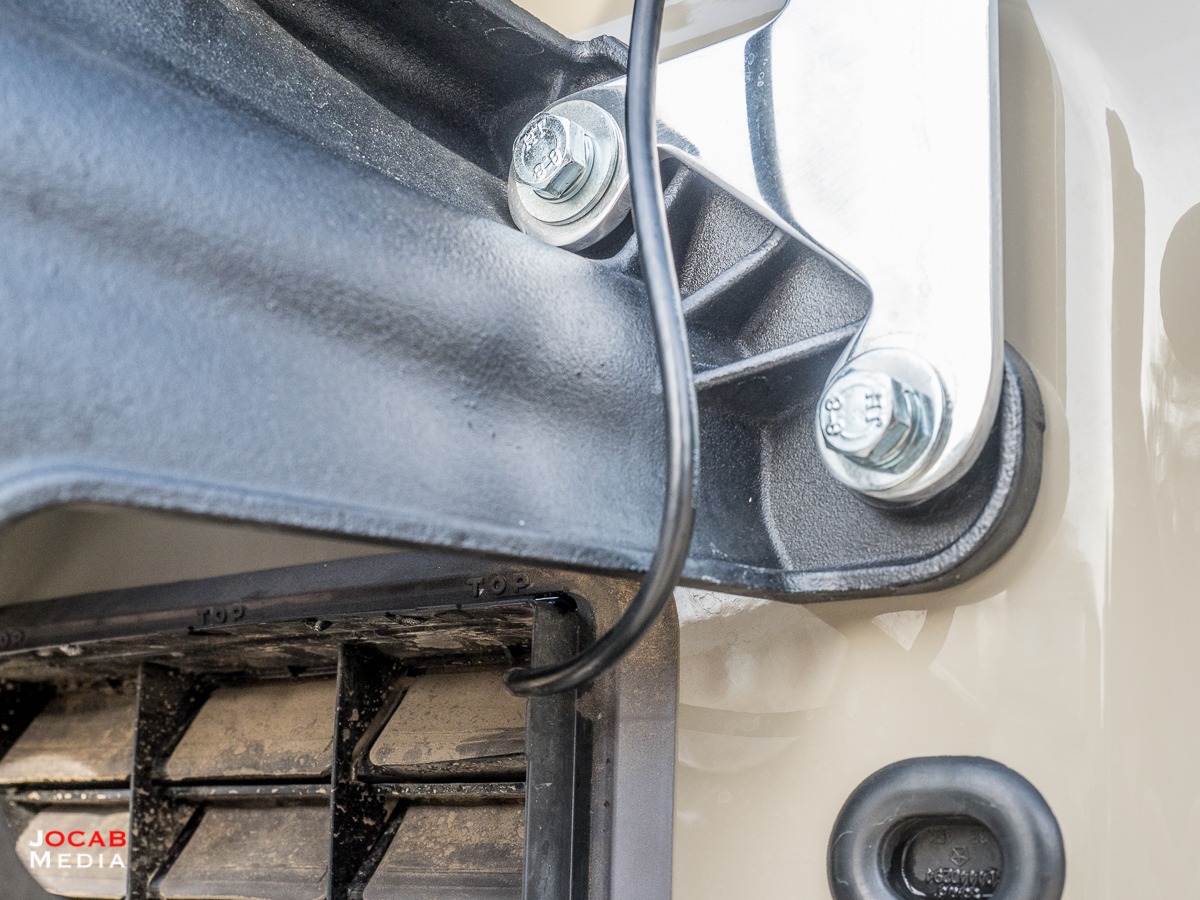
Jumping to the rear of the vehicle, I then installed the antenna and mount. Simply remove the spare tire, and two of the tire carrier mount bolts to place the bracket onto the spare tire carrier.
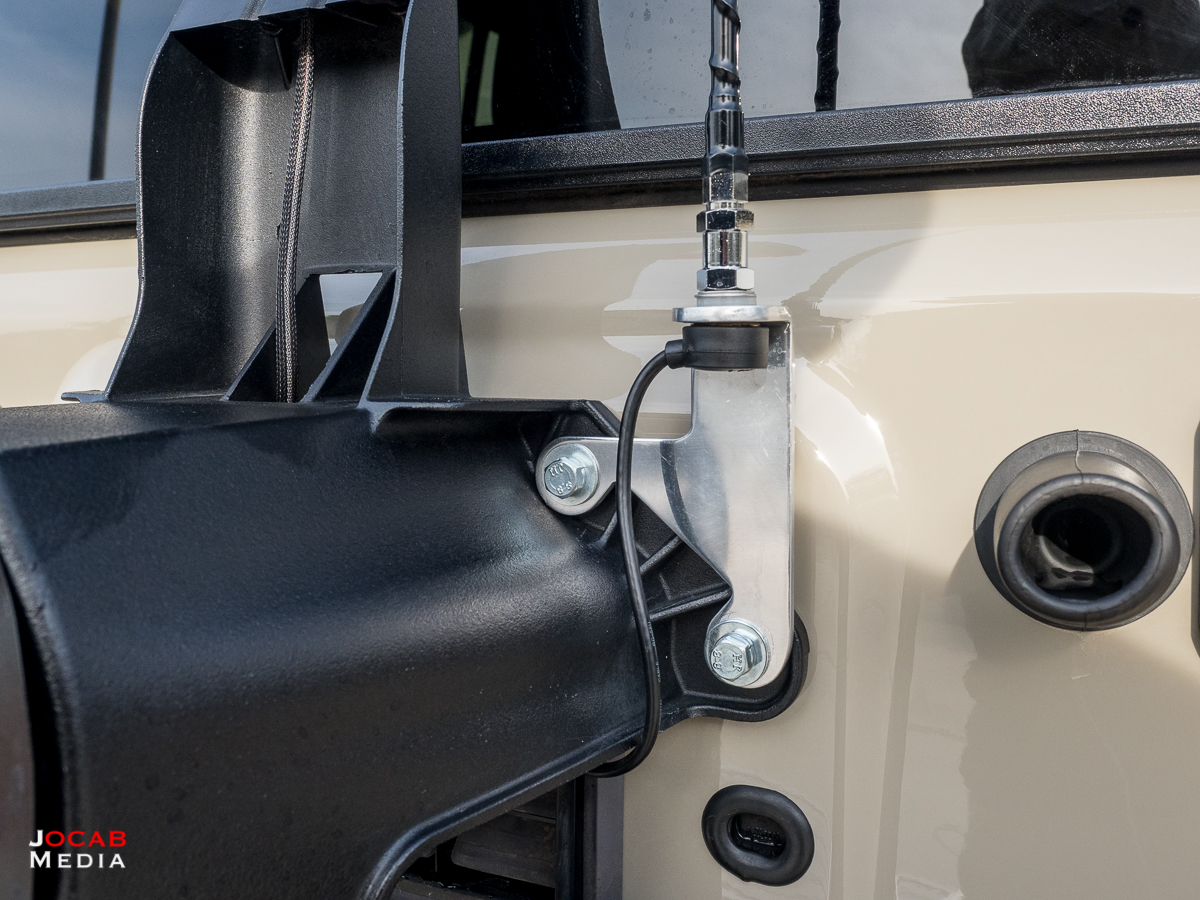
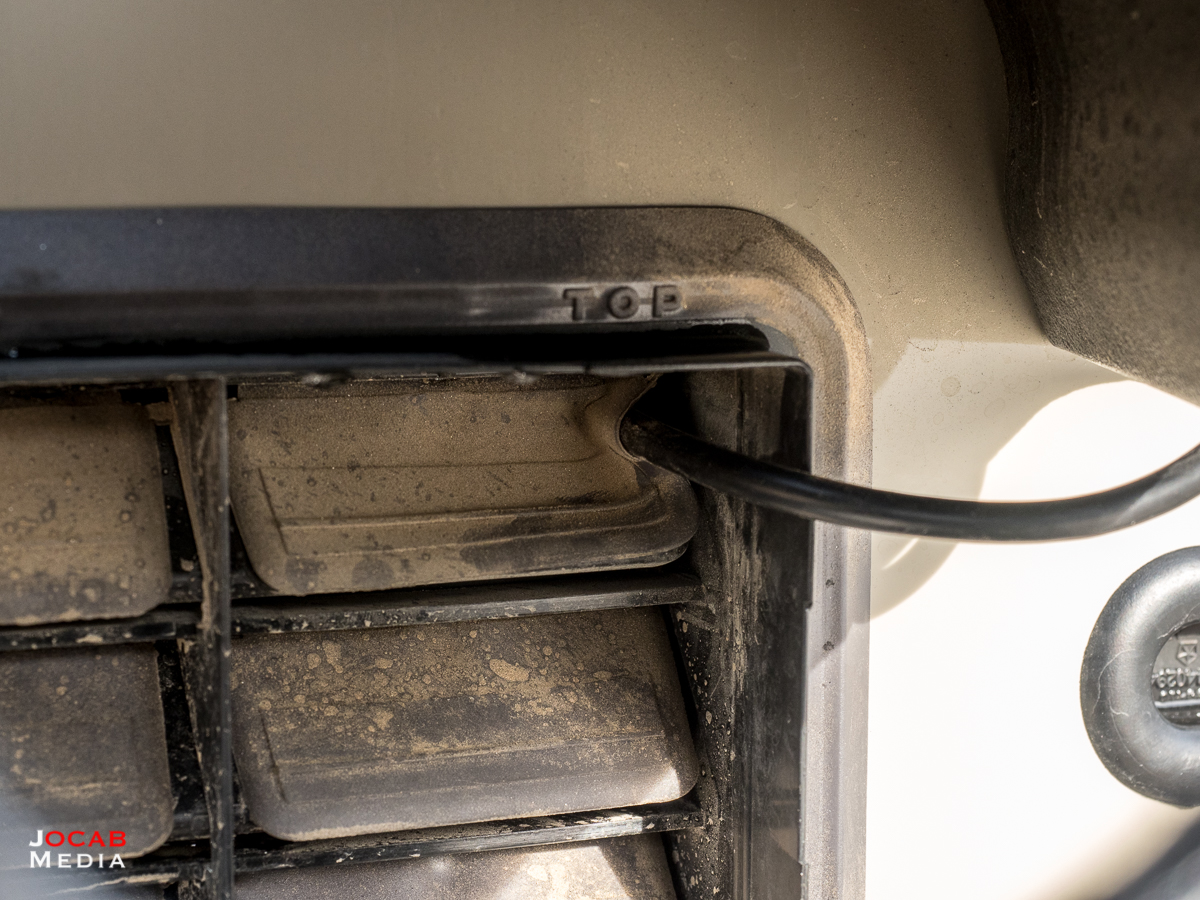
The next step is to get the coaxial cable run into the vehicle. The actual Mopar instructions say to cut a hole in the oval rubber grommet directly below the antenna mount, and to route the coaxial cable through there. I decided to take an alternate approach and ran the coaxial cable through one of the vents in the tailgate.
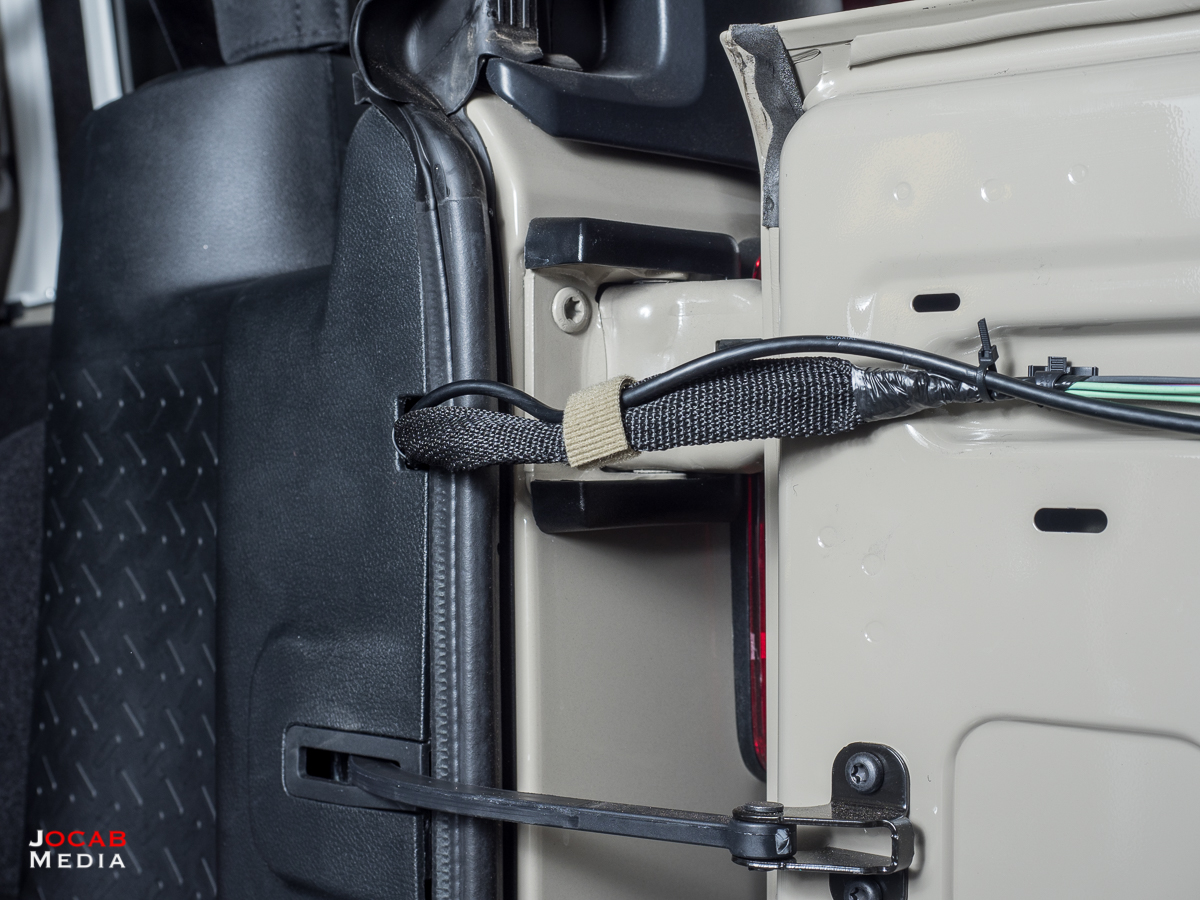
From there, the coaxial cable was routed up through the interior of the tailgate out of a hole on the inside face of the tailgate, and underneath the black trim covering the existing wires.
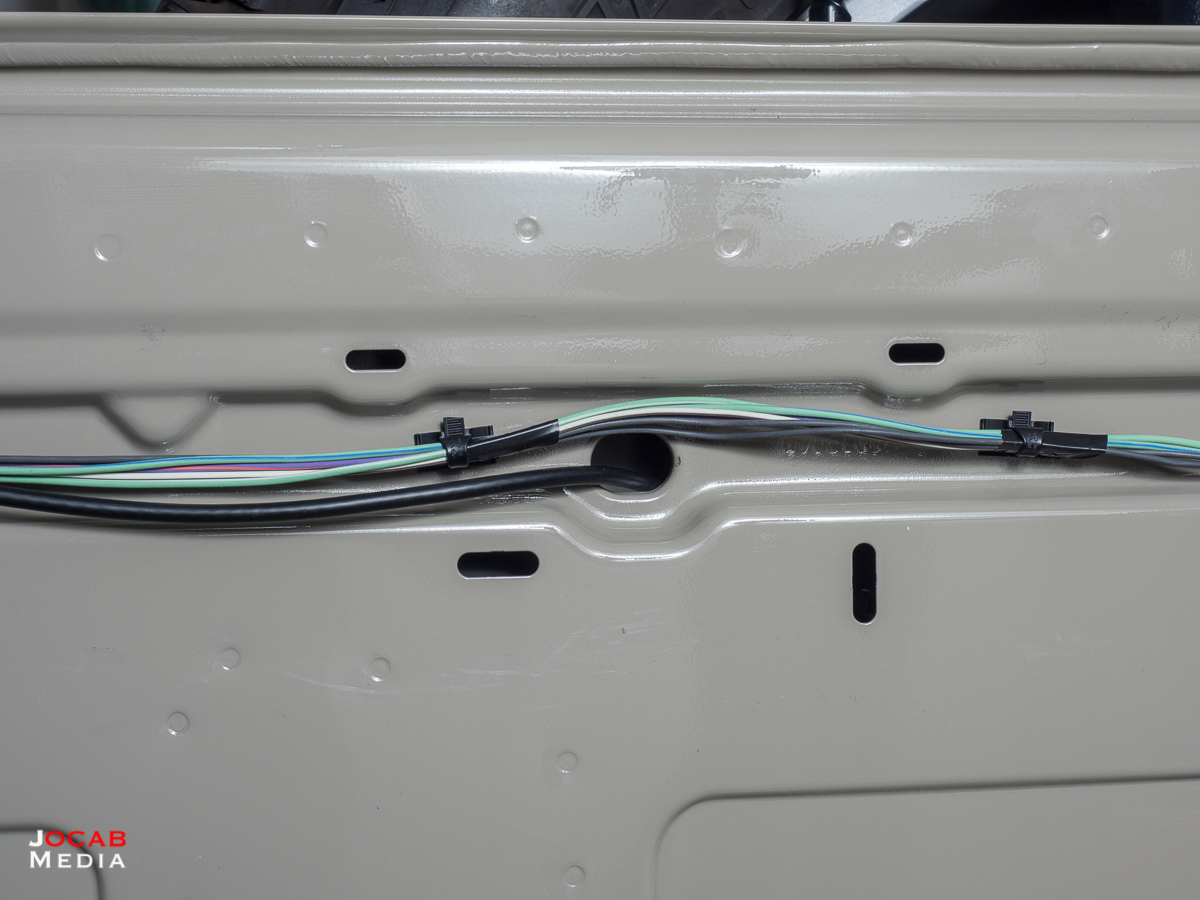
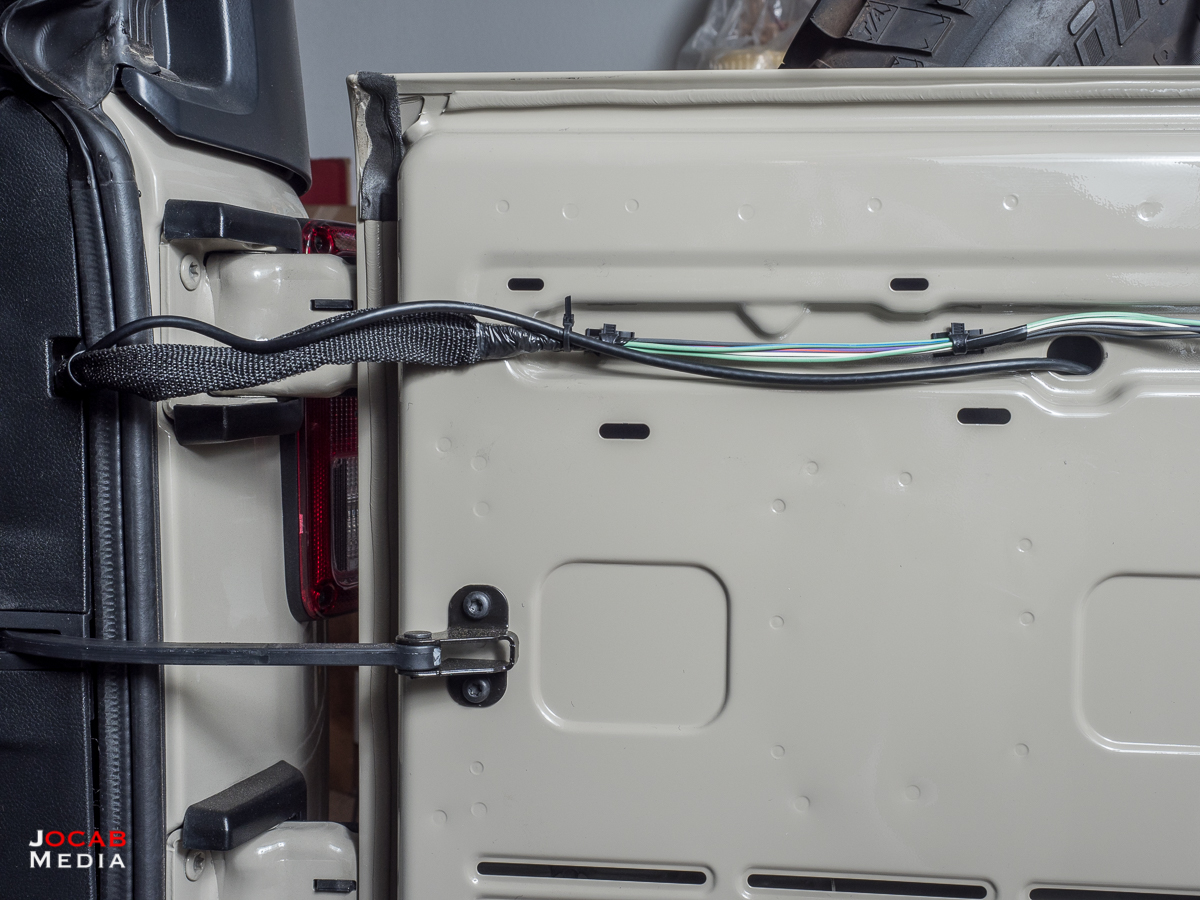
I ran the coaxial cables alongside the wiring to the tailgate, using zip ties and double-sided hook and loop tape (Velcro) to keep it snug with that existing wiring.
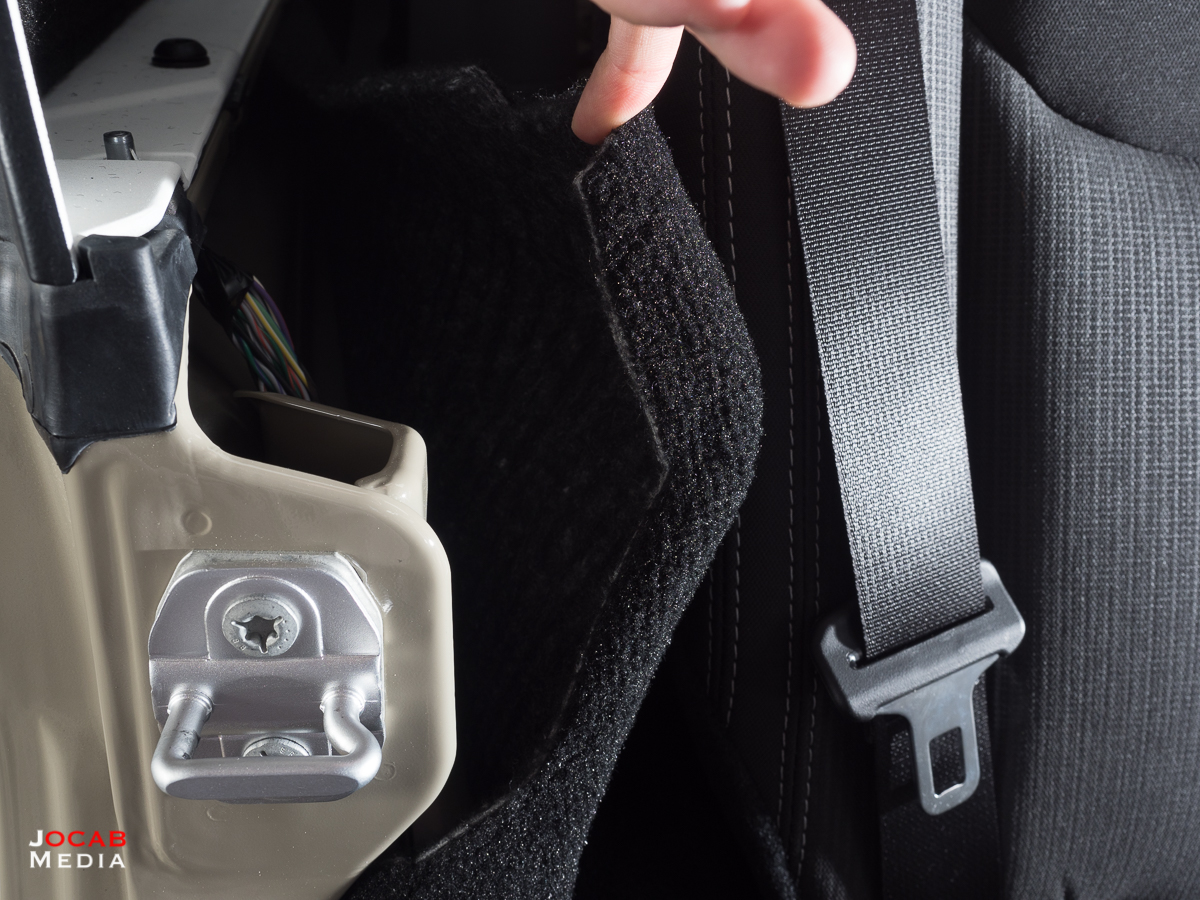
From there, I pried off the trim on the passenger side of the cargo area to run the coaxial cable underneath the trim. The carpeting is easily lifted up allowing the coaxial cable to be maneuvered to the passenger side floor.
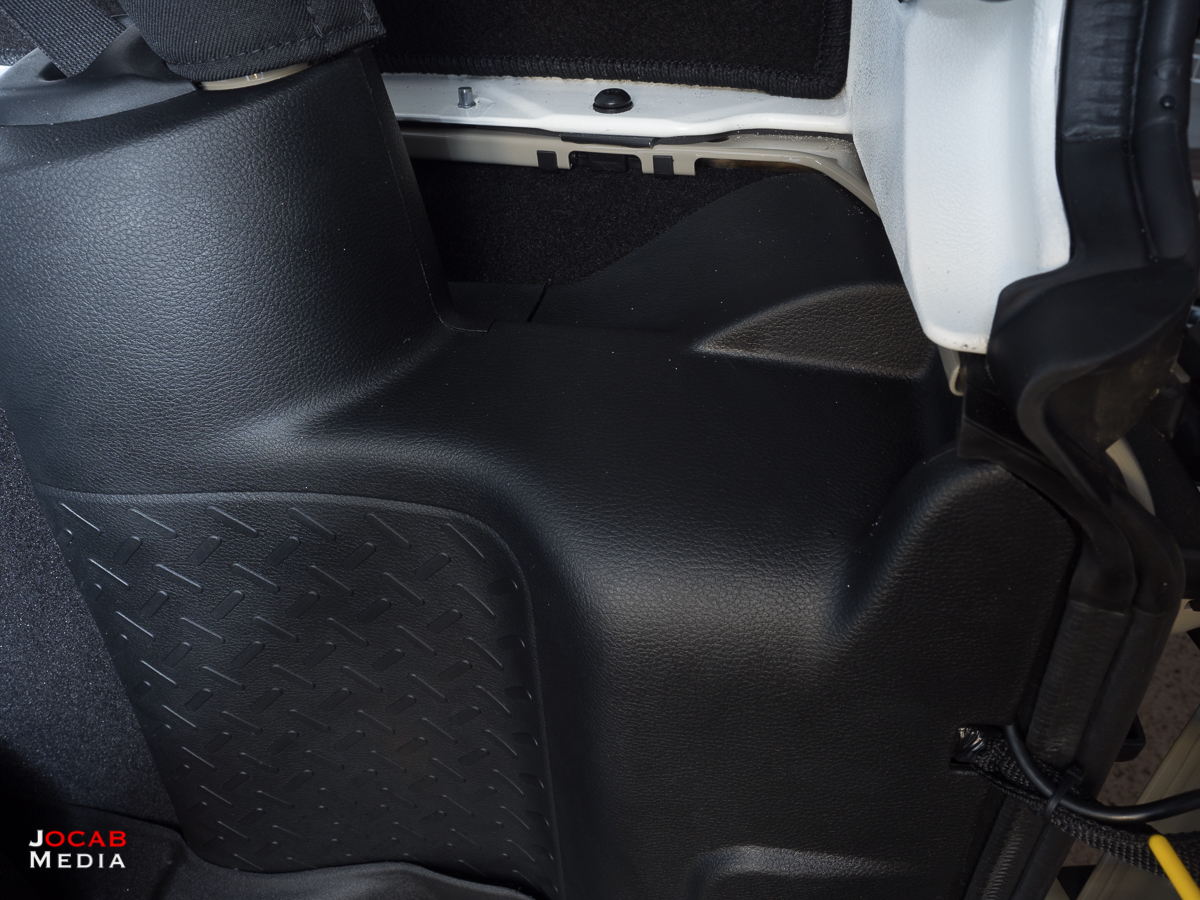

Once you get the coaxial cable routed from the cargo area to the passenger side, it simply runs over the wheel well down towards the passenger floor (rear passenger in my case of a JK Unlimited).
I lifted up the carpeting to guide the coaxial cable forward to the front passenger side.
In the above photo, you can see some existing wiring running to the front of the cabin underneath the trim. I didn’t actually remove the floor trim because I don’t have the proper tool to pry out the plastic retention screws. I ended up just squeezing the coaxial cable underneath the trim to run it towards the passenger front.
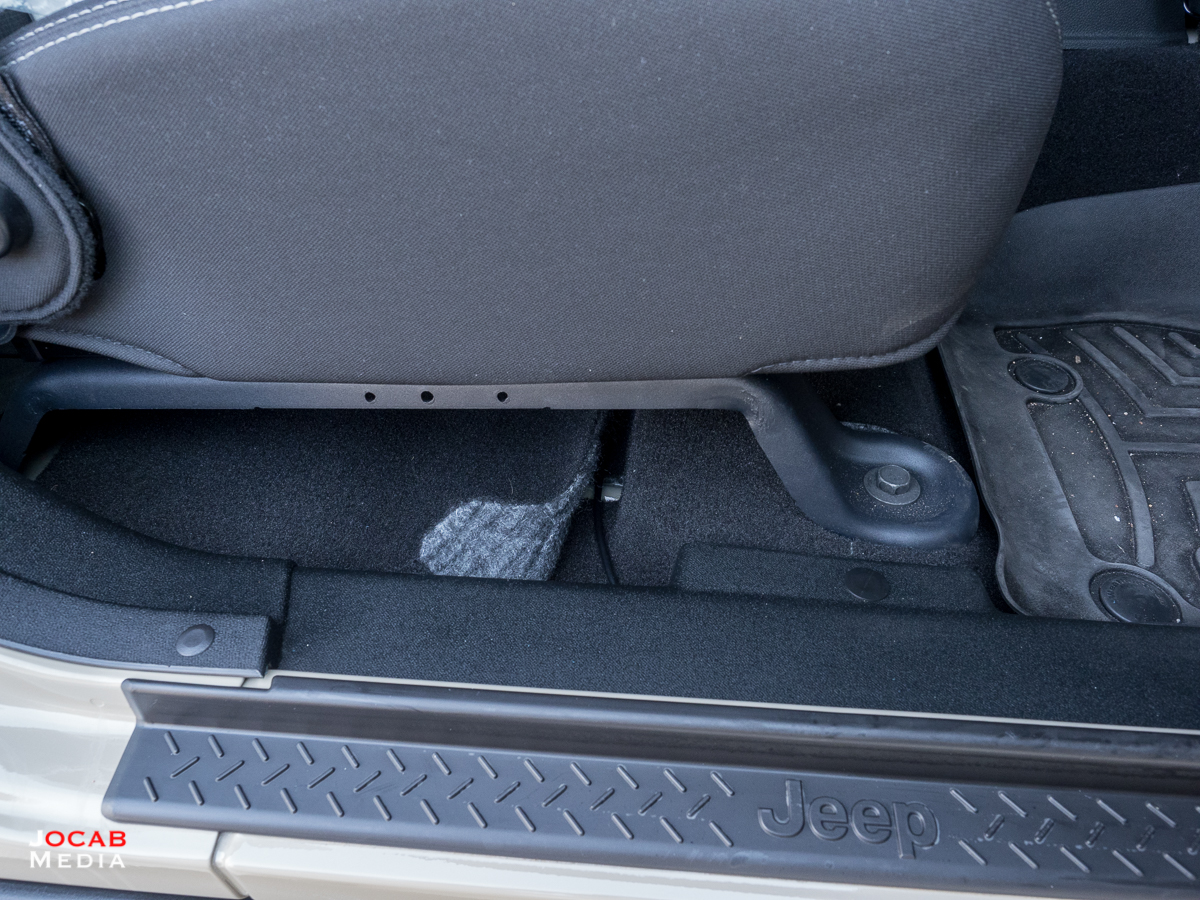
Once underneath the passenger front seat, I decided to route the coaxial cable underneath the front passenger seat towards the center console. The above photo shows the coaxial cable running underneath the top layer of carpet. The coaxial cable was then squeezed underneath the center console and underneath the carpet edge by the center console and center dash, and up to the controller box zip tied earlier in the area behind the glove box.
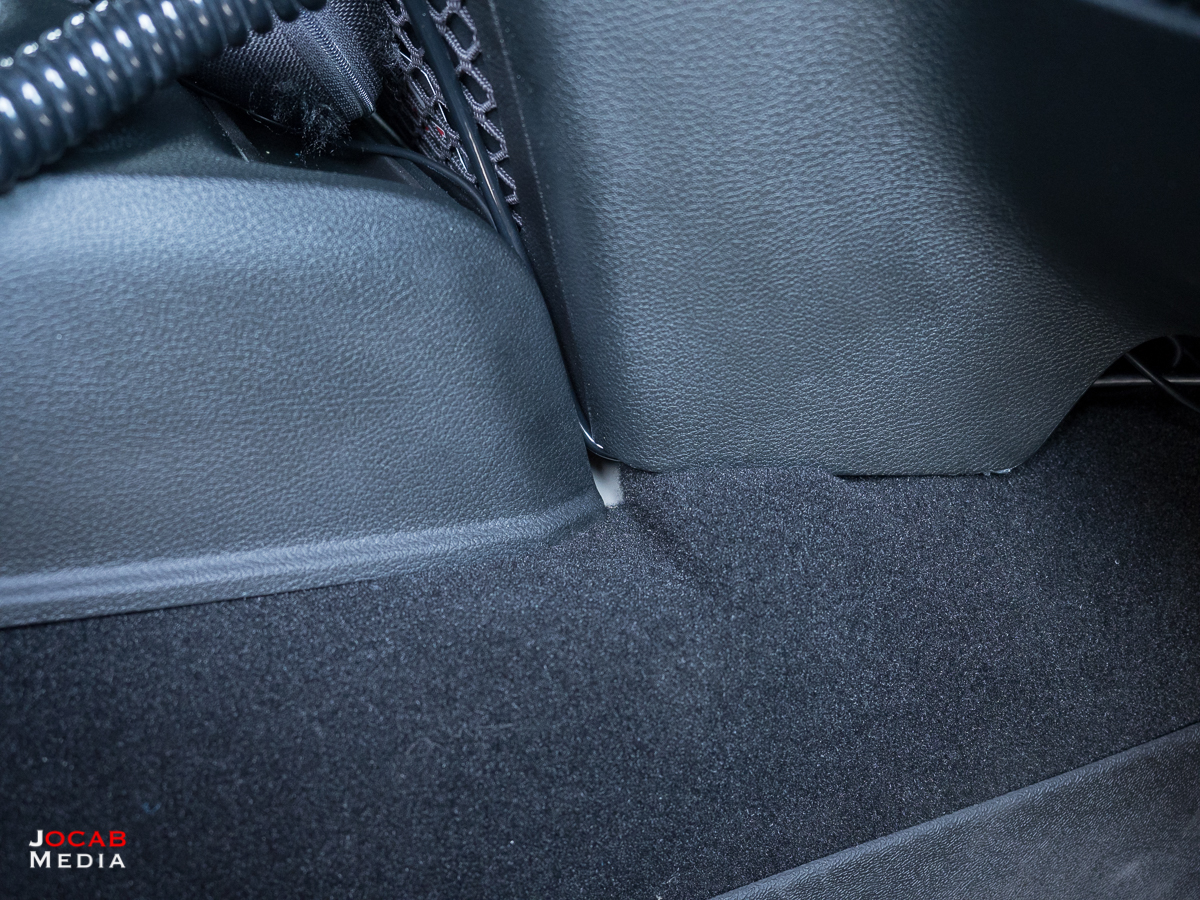
In the above photo, you the coaxial cable is not visible. The two visible cables between the center console and center dash are for the actual CB radio handheld microphone and the USB cable for the Anker ROAV C1 Dashcam.
With the antenna and mount installed, and the antenna routed through the Jeep cabin and plugged into the CB radio controller box, it was time to power it all up.
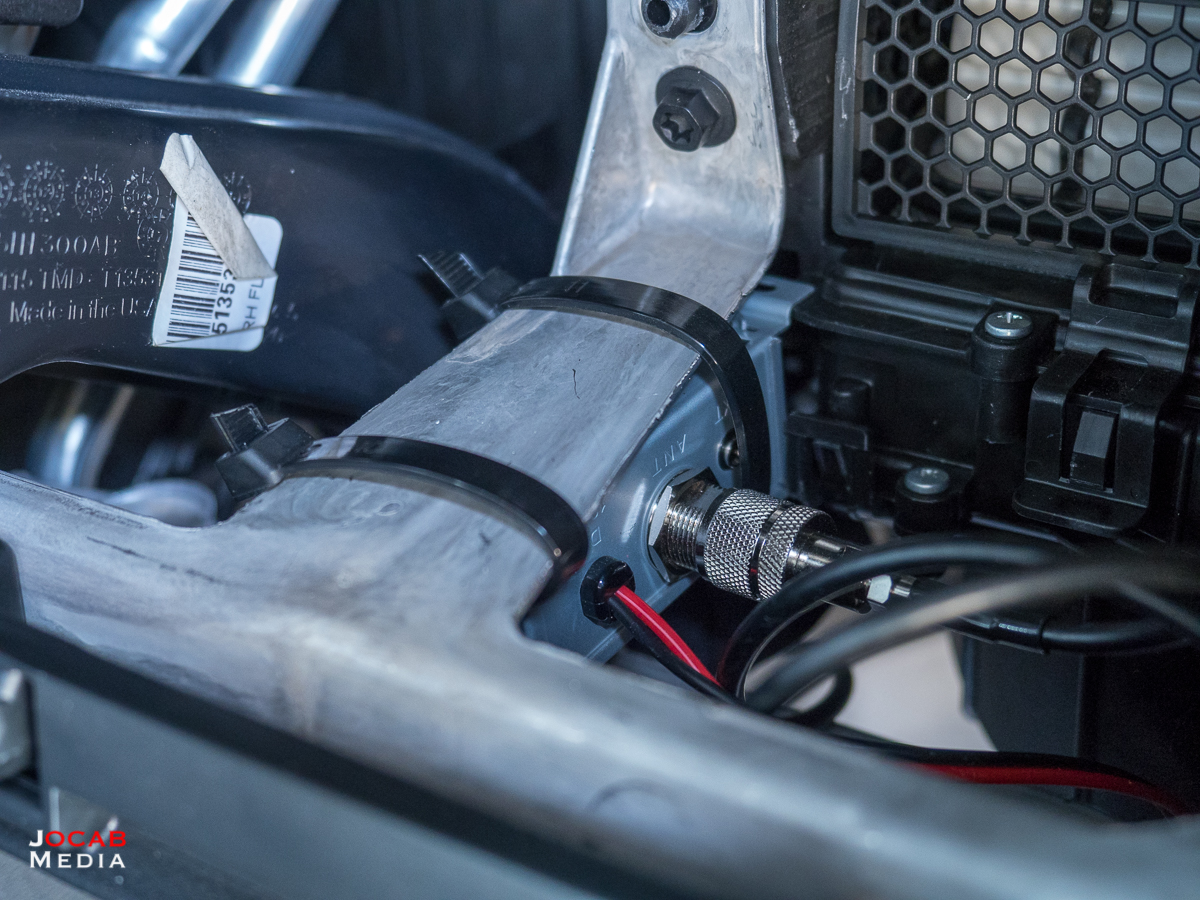
With the electrical wires already routed through the firewall and into the engine bay, I crimped two inline (mini-blade) fuse holders on each the positive and ground wires for the Cobra 75 WX ST controller box with weather resistant butt connectors.
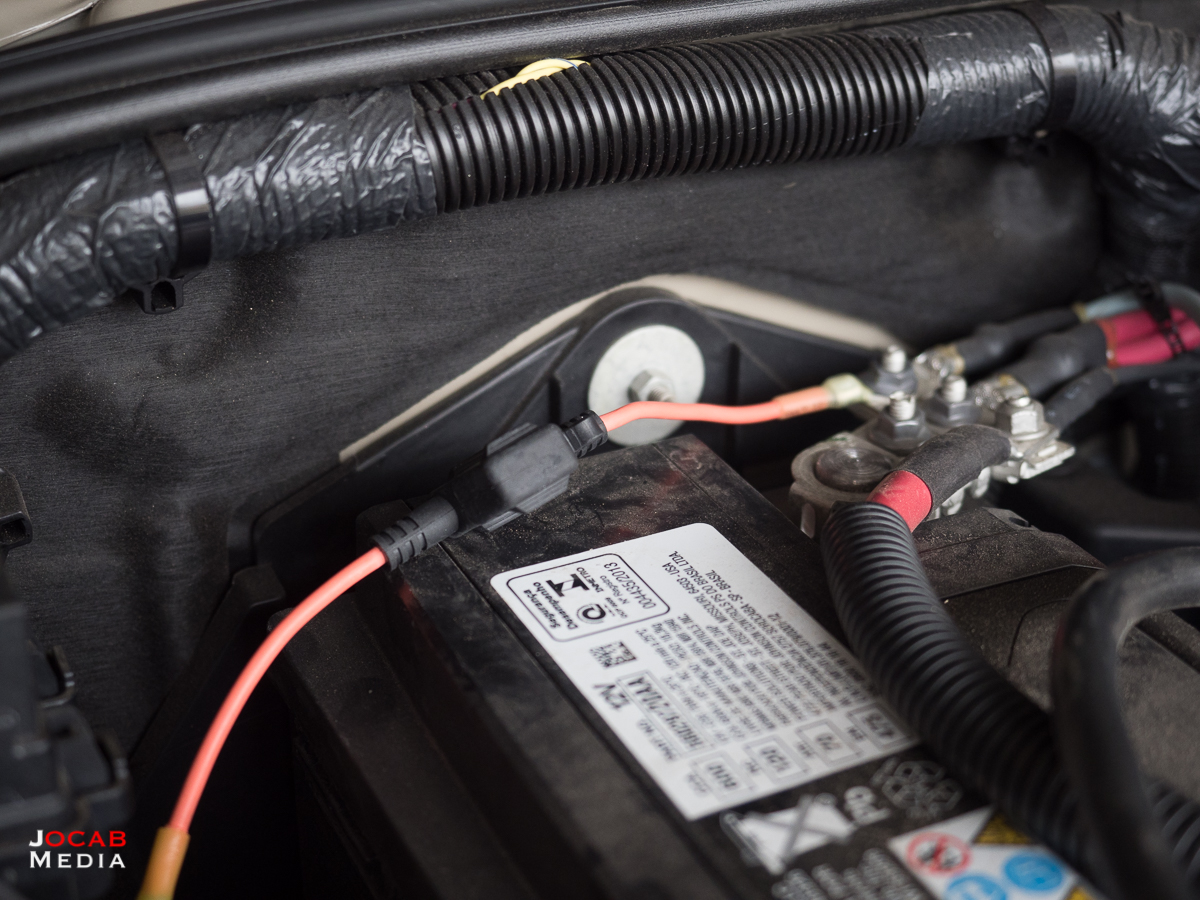
Then I used butt connectors to place 1/4″ 12 gauge ring terminals on the ends of the inline fuse holders. This allowed me to connect the CB radio directly to the accessory terminals on the Jeep JK battery clamps. The positive wire went to the positive terminal (obviously) and I ran the ground wire to the negative accessory terminal on the battery.
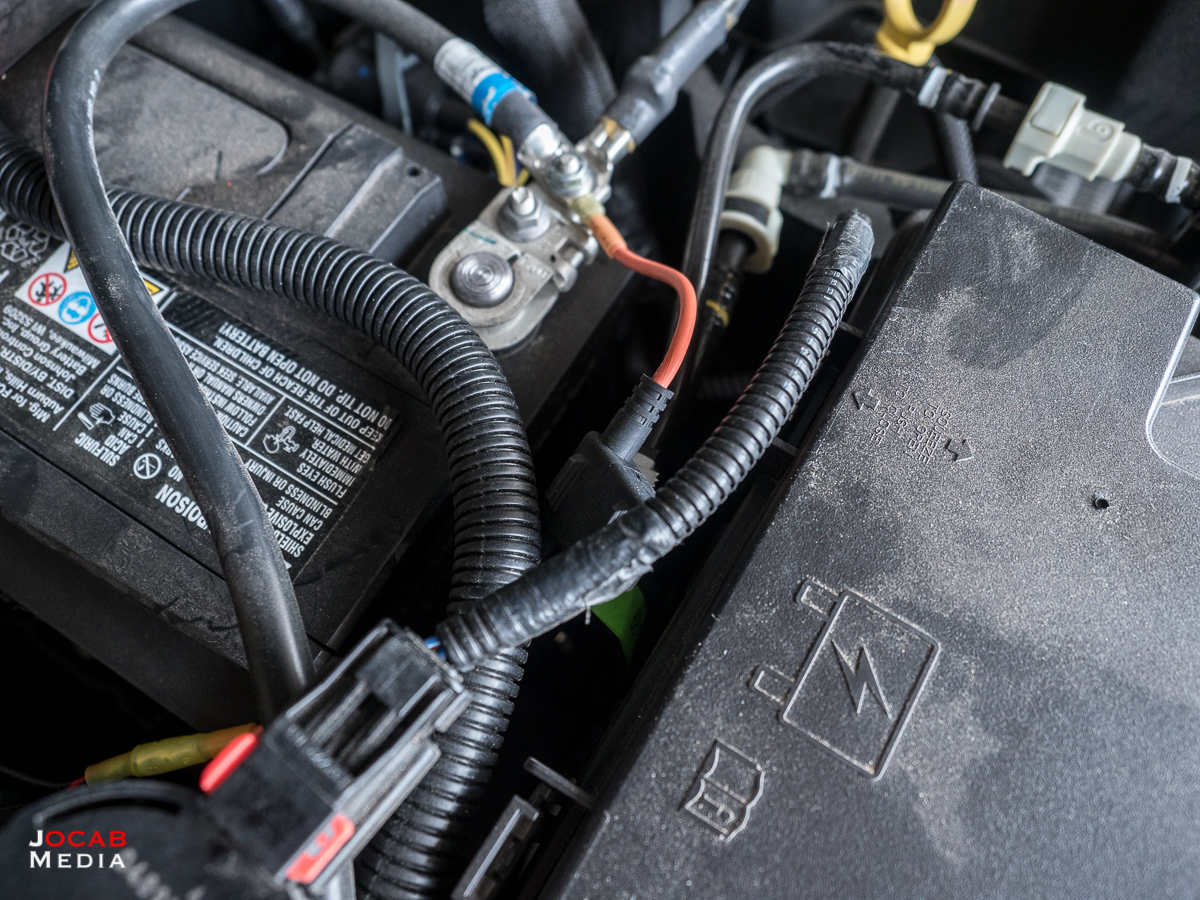
The following photo shows one aspect of the install that I wish I took more time on, and that is the electrical wiring protection. I should have used some heat shrink tubing for the length of the wire from the controller box to the engine compartment. I may clip the butt connectors between the controller box wires and the inline fuses to add the heat shrink tubing, and then re-connect them.
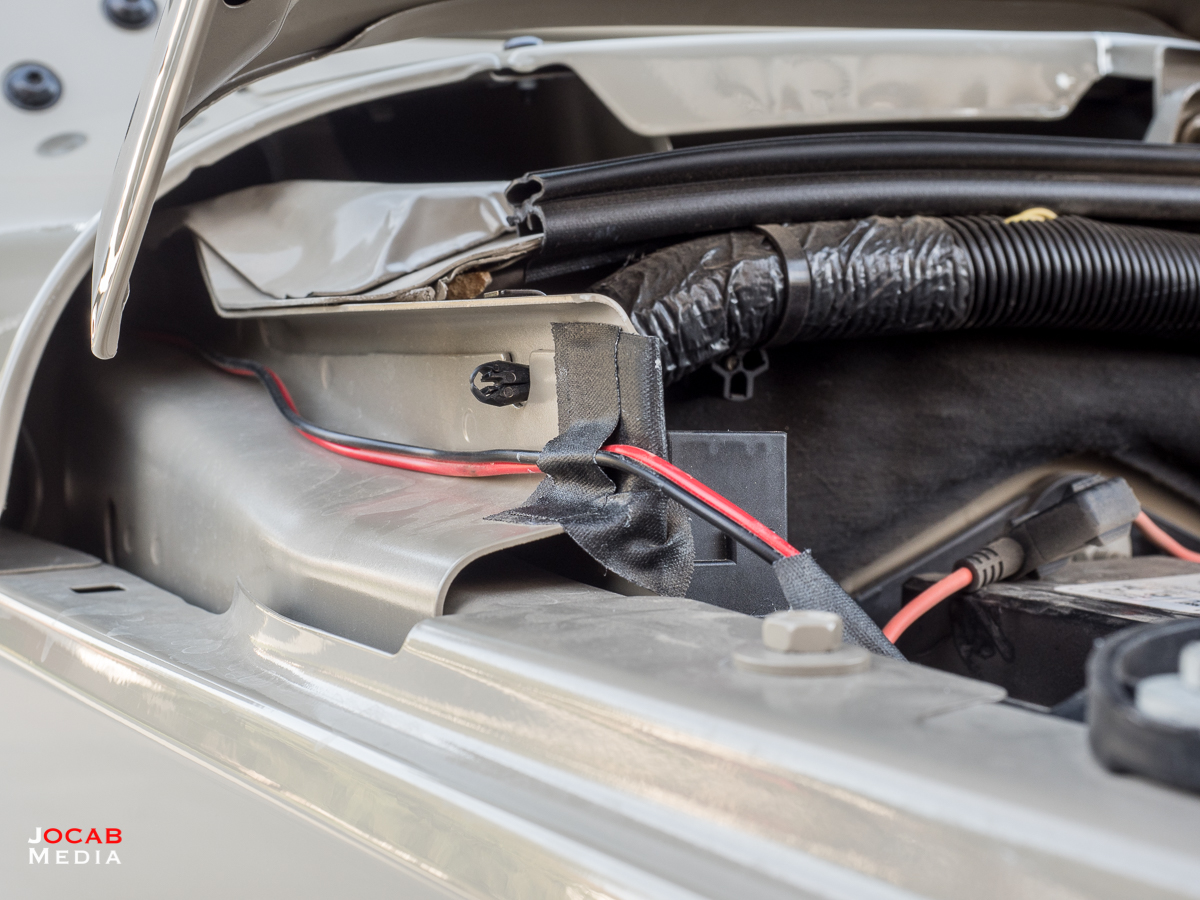
I secured the wires to the side of the engine compartment with black gaffers tape. This is more commonly used in the media production industry to secure cords and cables. The adhesive is supposed to be safe for various surfaces and is not supposed to leave residue, but I have found the residue to remain if the tape is left on for a long duration of time. Thankfully, it cleans off easily with simple isopropyl alcohol. I may look into another method of securing the wiring to the side of engine compartment.
Lastly, the Cobra 75 WX ST radio transceiver was plugged into to the controller box and everything checked out as far as receiving. I didn’t have any way to test to sending since I had no other CB radio. But when I drove around and picked up quite a bit of CB traffic on the freeway and the weather stations came in strong, I decided to forgo the SWR tuning. I do have an SWR test meter, but I have not taken the time to find a flat open area for the tuning.
SWR tuning is an important aspect of a CB antenna install. There are several write-ups on the Internet describing how to tune a CB antenna (search for: SWR tuning). The Mopar Jeep Wrangler JK antenna kit is supposedly tuned for the JK. Given that every JK will be unique, the pre-tuning is most likely based on a given tolerance.
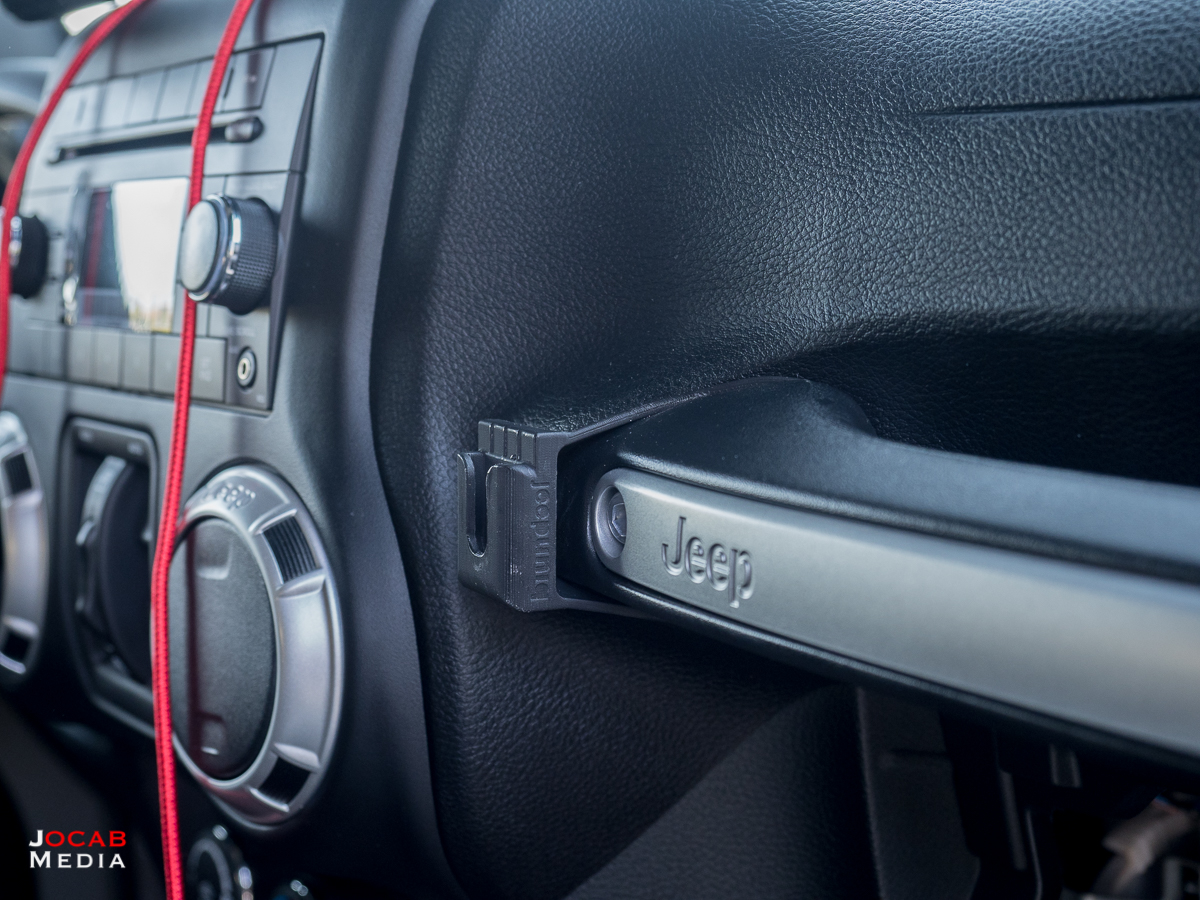
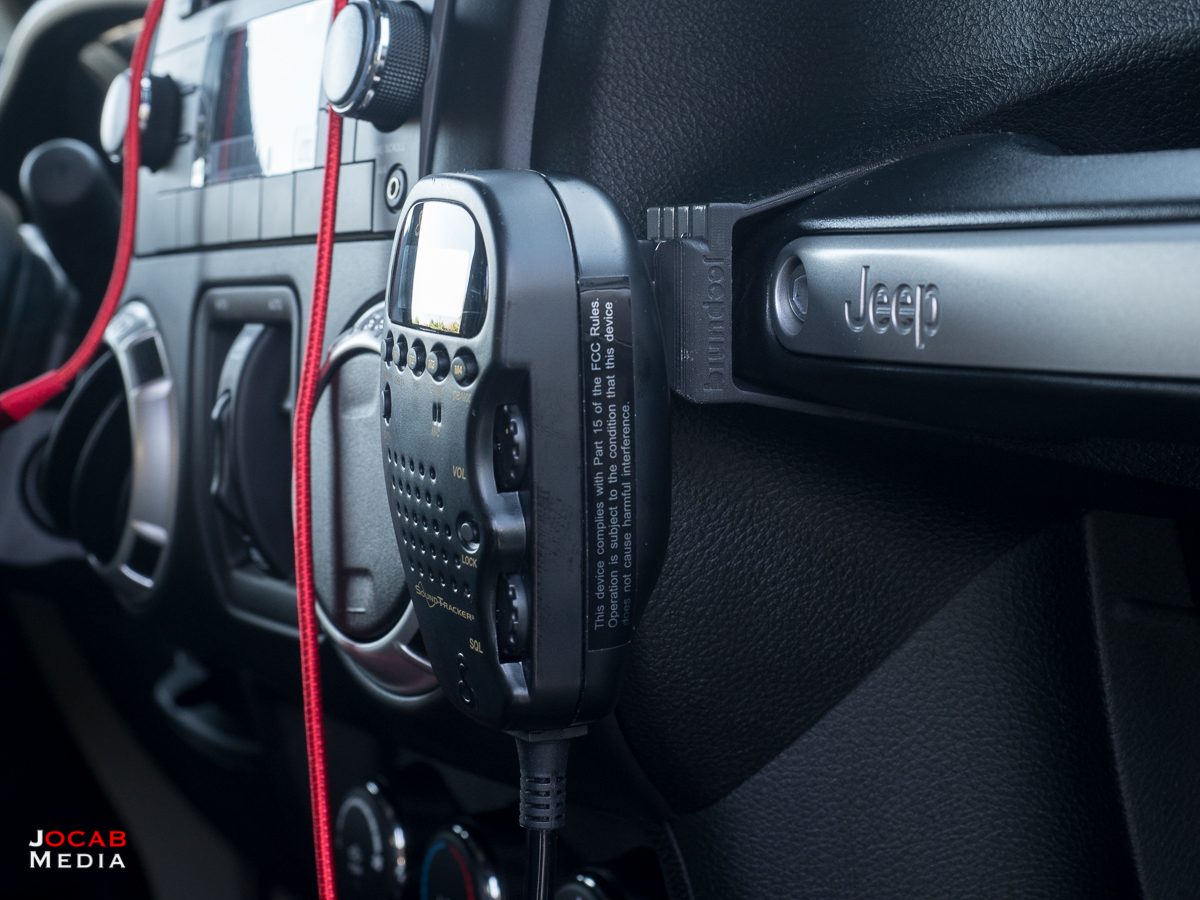
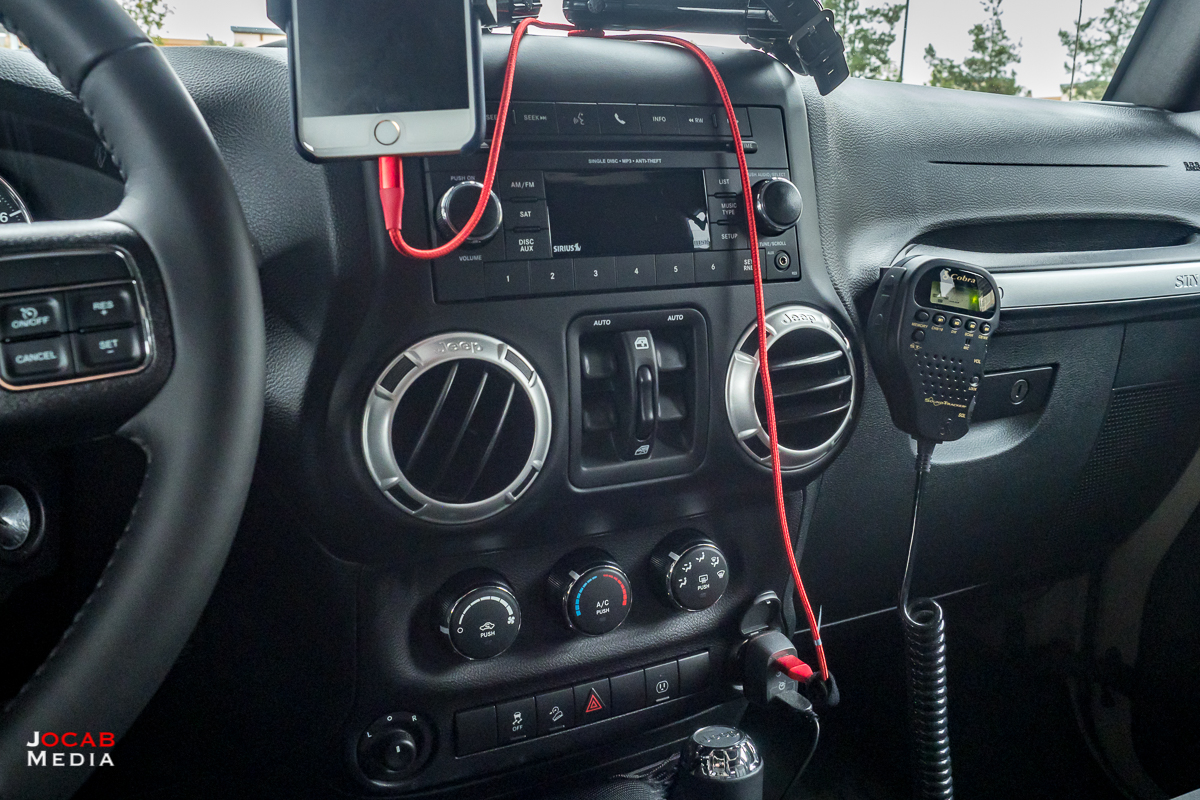
I ended up getting the JeepUniq Cobra 75 WX CB Mic Holder Grab Bar Mount (for 2011-2018 JK). It is a non-permanent, small form factor holder that is easy to install. It fits between the passenger grab bar and the dashboard, providing an easy to reach area for holstering the Cobra 75 WX ST transceiver.
I cleaned up the wires and cables underneath the passenger side of the dashboard with more double-sided hook and loop tape. I used the Velcro tape to secure cabling to the metal cross beam underneath the dashboard to keep the cables from dangling down onto the front passenger leg room area.
When I went out on the SDJC run of the Bradshaw to Red Canyon Jeep Trail on 2018-03-24 with my newly installed CB system, the CB radio performed extremely well. I was able to receive and transmit without issue. In my position near the rear earlier in the run, and then in the middle of a 40+ Jeep convoy during the latter portion, I was able to hear the trail lead without issue the majority of the time.
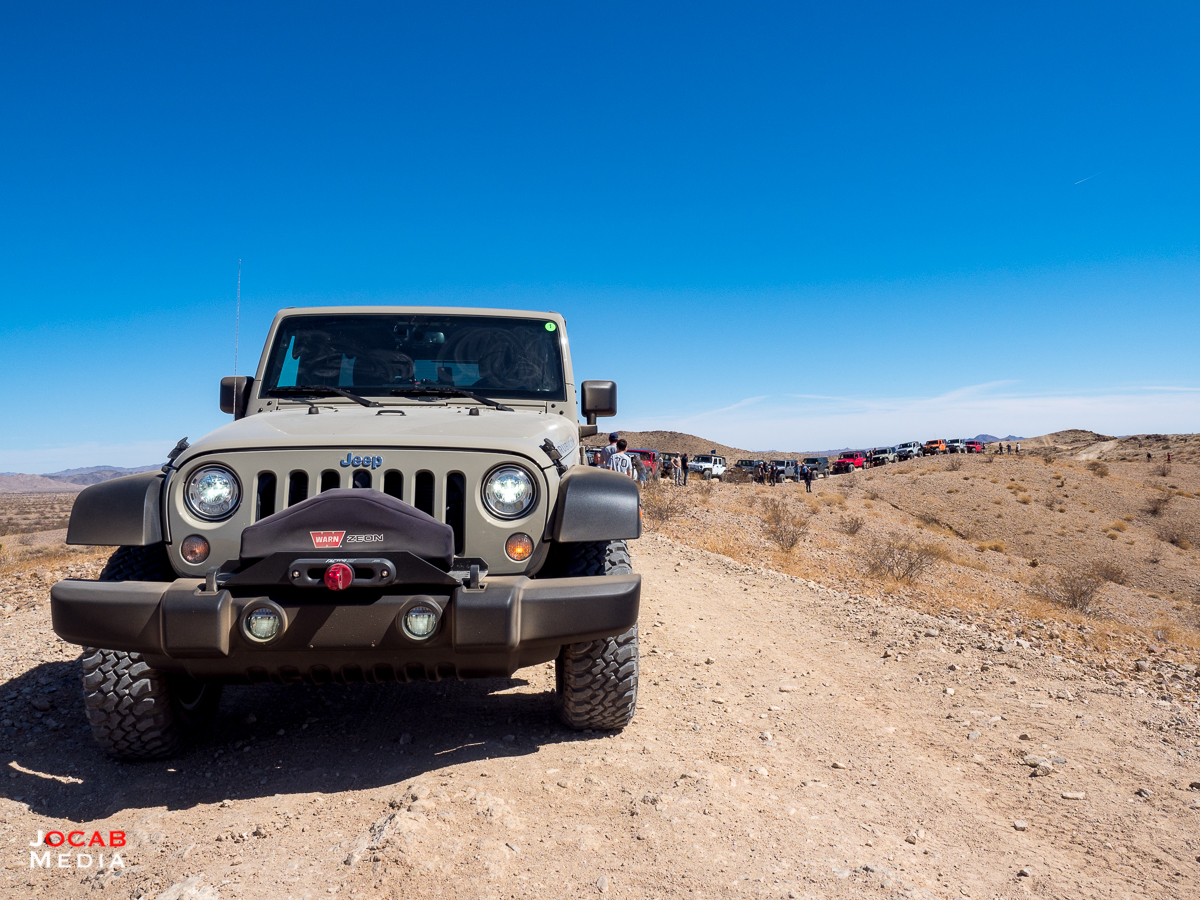
The times the trail lead CB transmissions were weak and unreadable, other people got on to indicate they could not read the trail lead, either.
Anyway, you have read through a walkthrough of the install of a full CB radio rig in my 2018 Jeep Wrangler JK Unlimited Rubicon.
I am quite happy with the setup, but am now intrigued with getting a ham radio license, so I can operate a ham radio for longer distance transmissions. Hopefully this walkthrough helps other Jeep owners who have yet to install a CB radio rig.

Addendum: There is one item of note I did not cover and that is grounding the antenna. Many say that the antenna should be grounded for the best performance. Right now I feel like the CB is functioning well, but perhaps it could be running better if I actually grounded the antenna. One way to do this is to run a grounding wire from the unpainted antenna mount to an unpainted area of the chassis or body. I may decided to this in the future to squeeze more quality of reception and transmission out of the CB antenna.
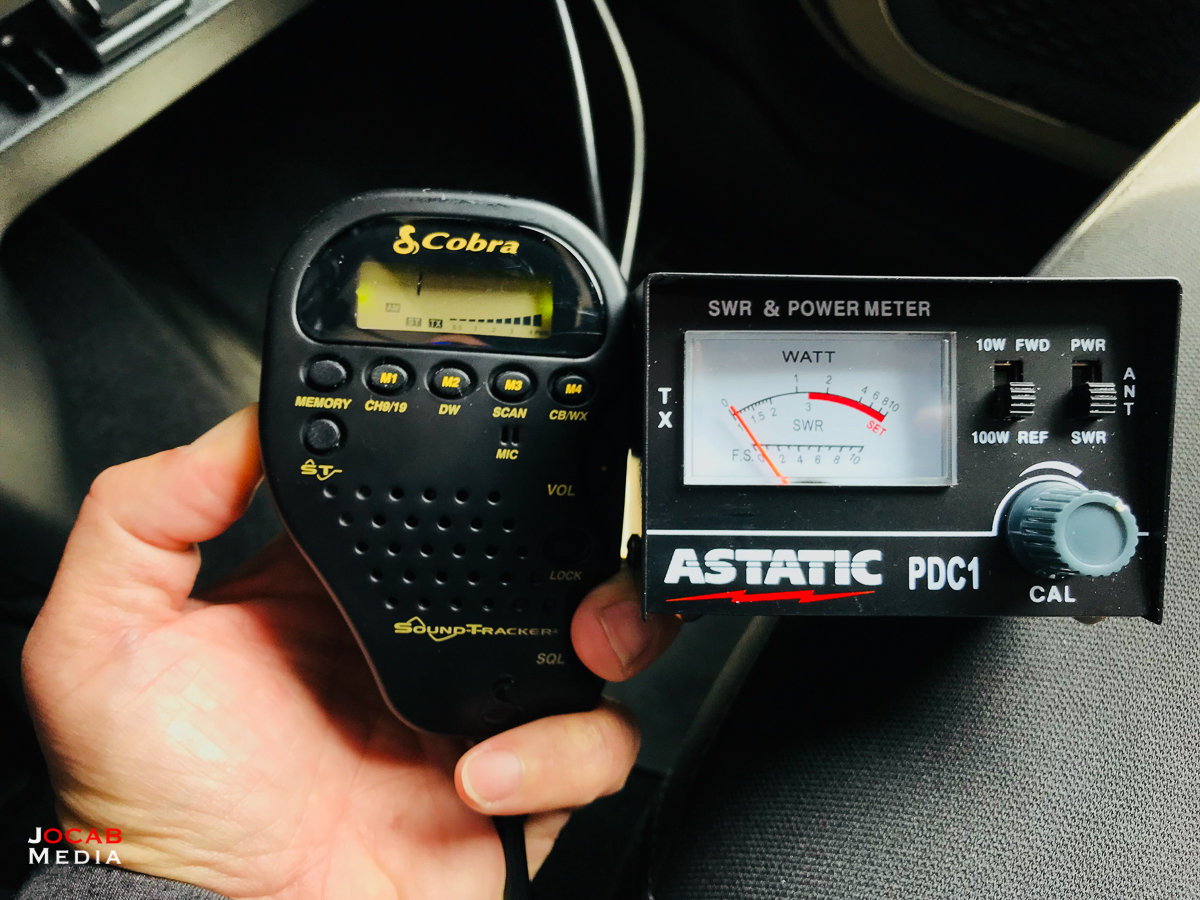
Addendum 2: A few days after I published this article, I decided to find an empty space/area to get the SWR readings because some folks voiced concerned that my antenna is probably causing damage to my CB radio. I ran the tests a several times and they all came out with SWR readings of 1.1 on CH 1 and 1.3 on CH 40. Ideally you want the SWR to be the same for both CH 1 and CH 40 for optimal performance, but a 1.5:1 ratio is acceptable. An SWR reading between 2 and 3 is considered borderline safe, while 3 and above is dangerous to the radio.
So I really lucked out in terms of installing a Mopar Jeep Wrangler JK Antenna Kit straight out of the box with no tuning and no antenna ground. With a 1.3:1.1 ratio, I decided to leave the antenna as is.
Comment on this post