
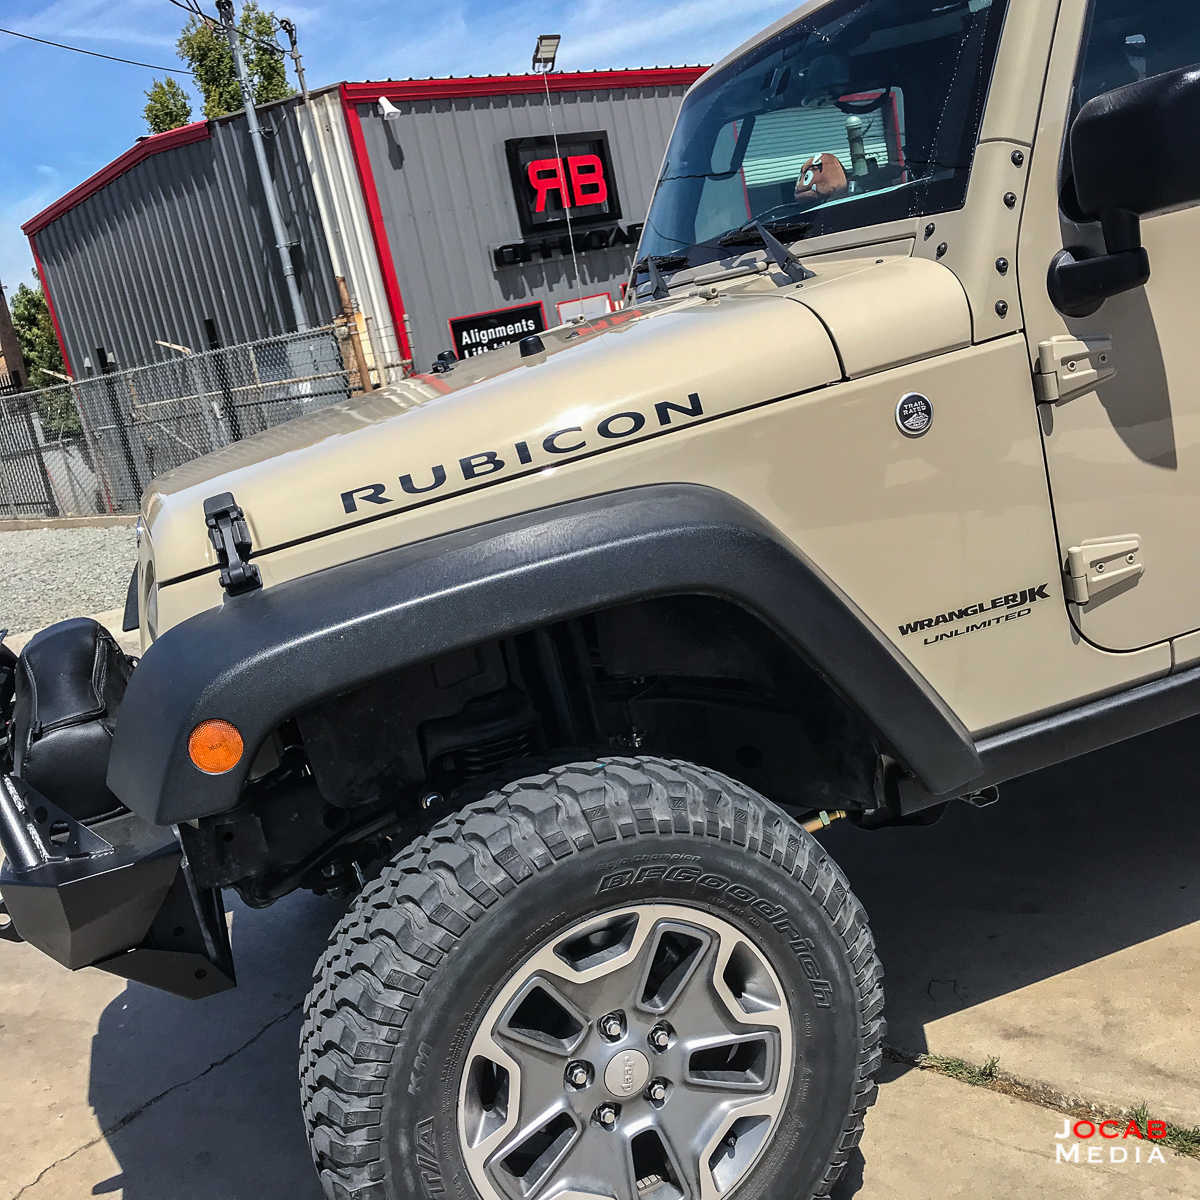
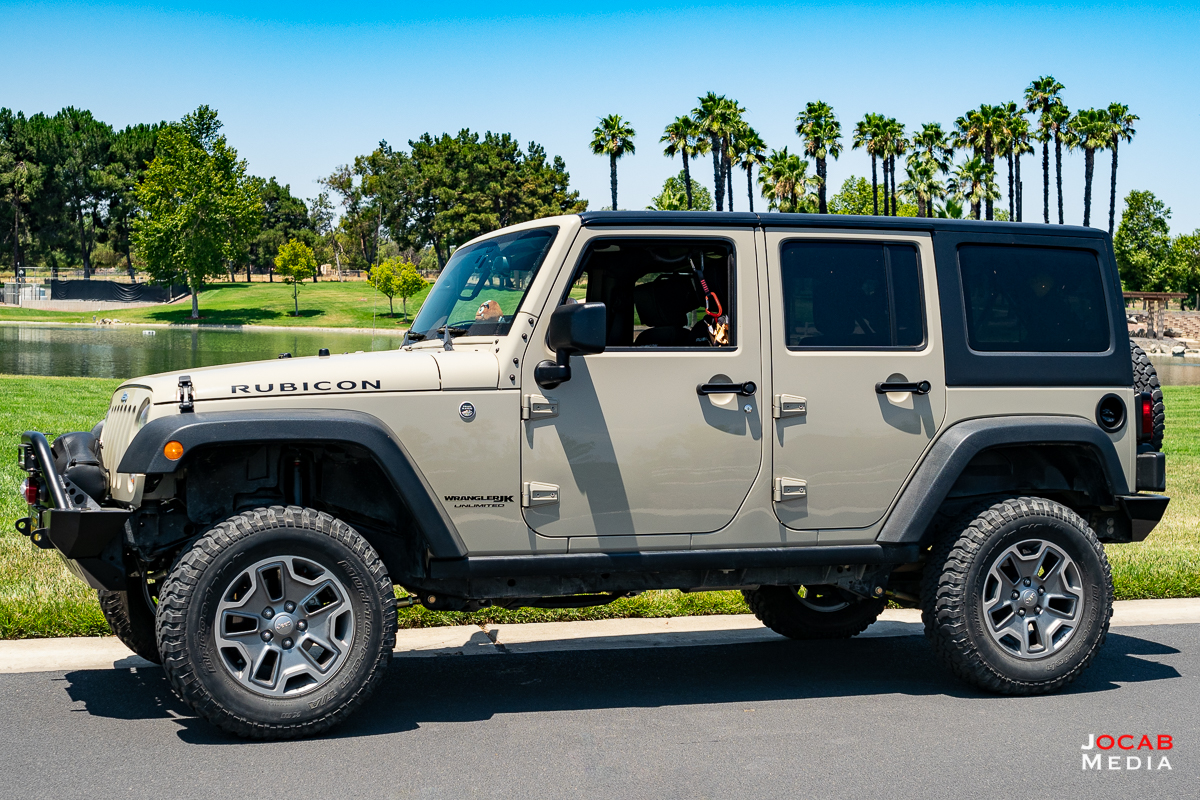
After 30 months of owning my 2018 Jeep Wrangler JK Unlimited Rubicon, I finally got around the installing a suspension lift. The reason why I waited so long to get around to a lift kit is because the primary reason for a lift is to run larger tires. Since I planned on using the factory BF Goodrich KM 32″ tires until they were close to the final 30-40% of their life, I didn’t need to get a lift kit.
But given the COVID-19 lock down and work from home situation during the past few months and a 10% off sale at Metalcloak, I decided to go ahead and order the lift kit in the form of the Metalcloak 2.5″ Game-Changer Suspension Lift Kit with Rocksport shocks.
I had already settled on the Metalcloak Gamechanger lift many month ago. I did a lot of reading online and was able to determine that the Metalcloak Gamechanger was the best option in terms of a properly designed lift combined with build quality and a decent price (comparatively speaking). It seemed very important to get a suspension lift kit that incorporates adjustable control arms for all eight (8) control arms on the Jeep: front uppers, front lowers, rear uppers, and rear lowers. Also, the Game-Changer includes adjustable front and rear track bars.
Research control arm geometry on the web to understand why adjustable control arms are important. Note that you will discover there are geometry correction brackets and other types of devices to help correct geometry after a suspension lift.
I was on the fence for a bit regarding a 2.5″ vs 3.5″ lift. I decided to go with a 2.5″ because it is good for 35″ tires, which is what I’m targeting. If in the event I decide that I want a 3.5″ lift, then I can simply get the 3.5″ rated coils from Metalcloak and swap out the 2.5″ rated coils.
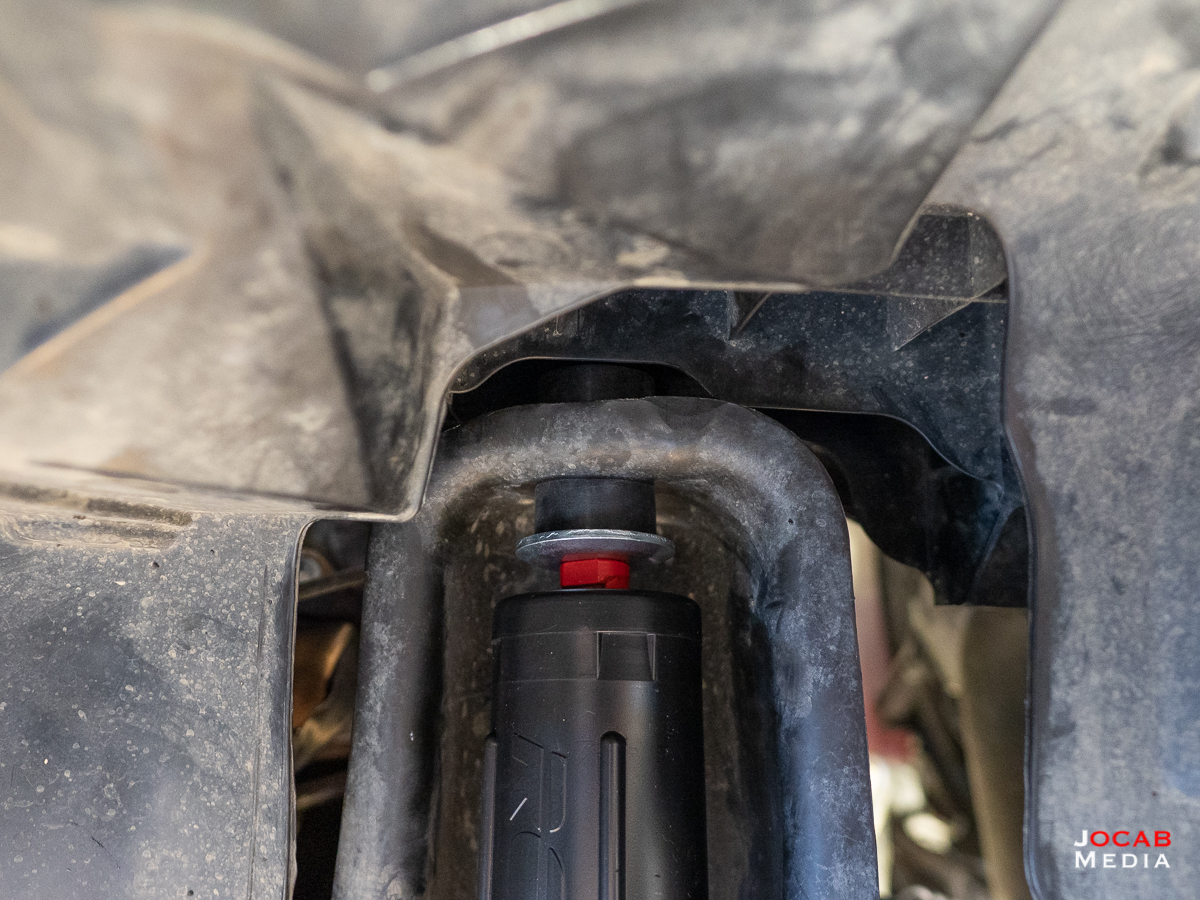
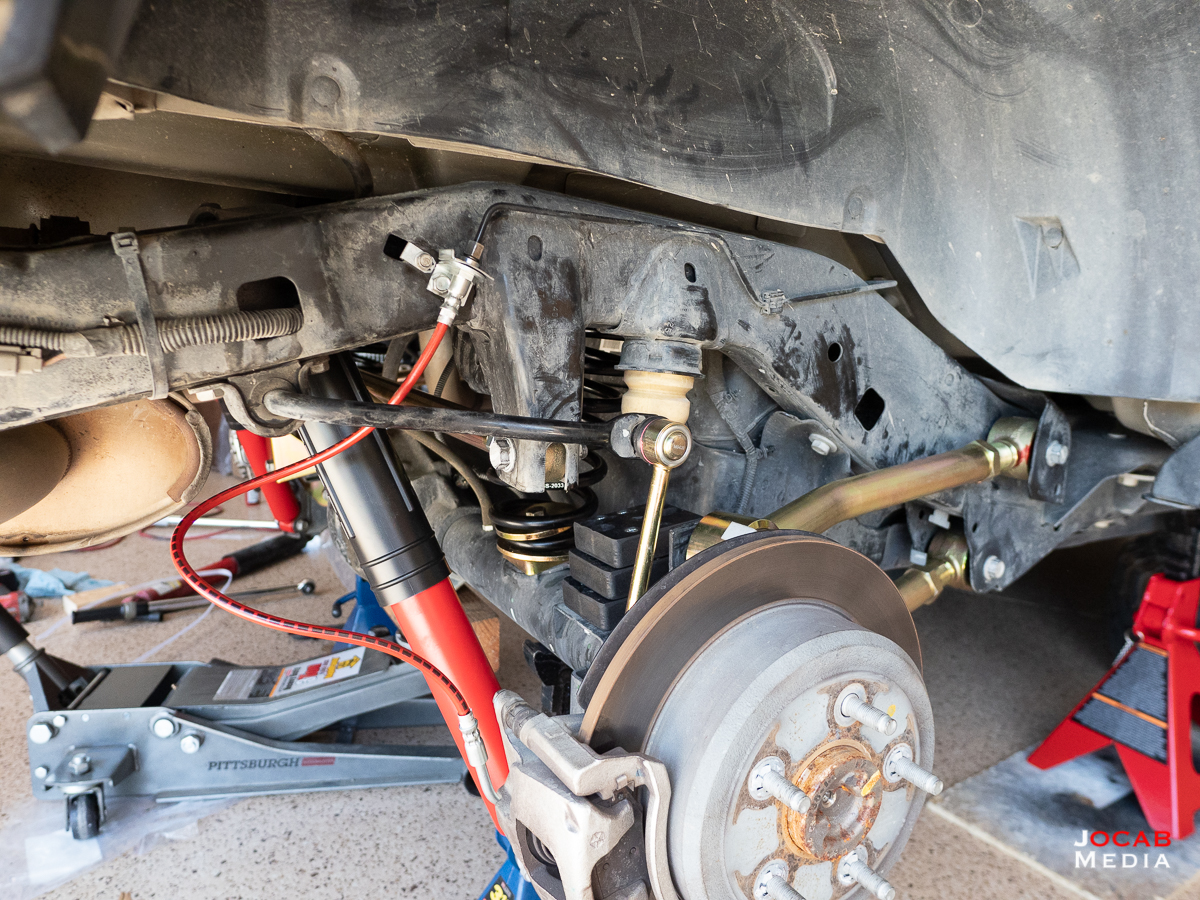
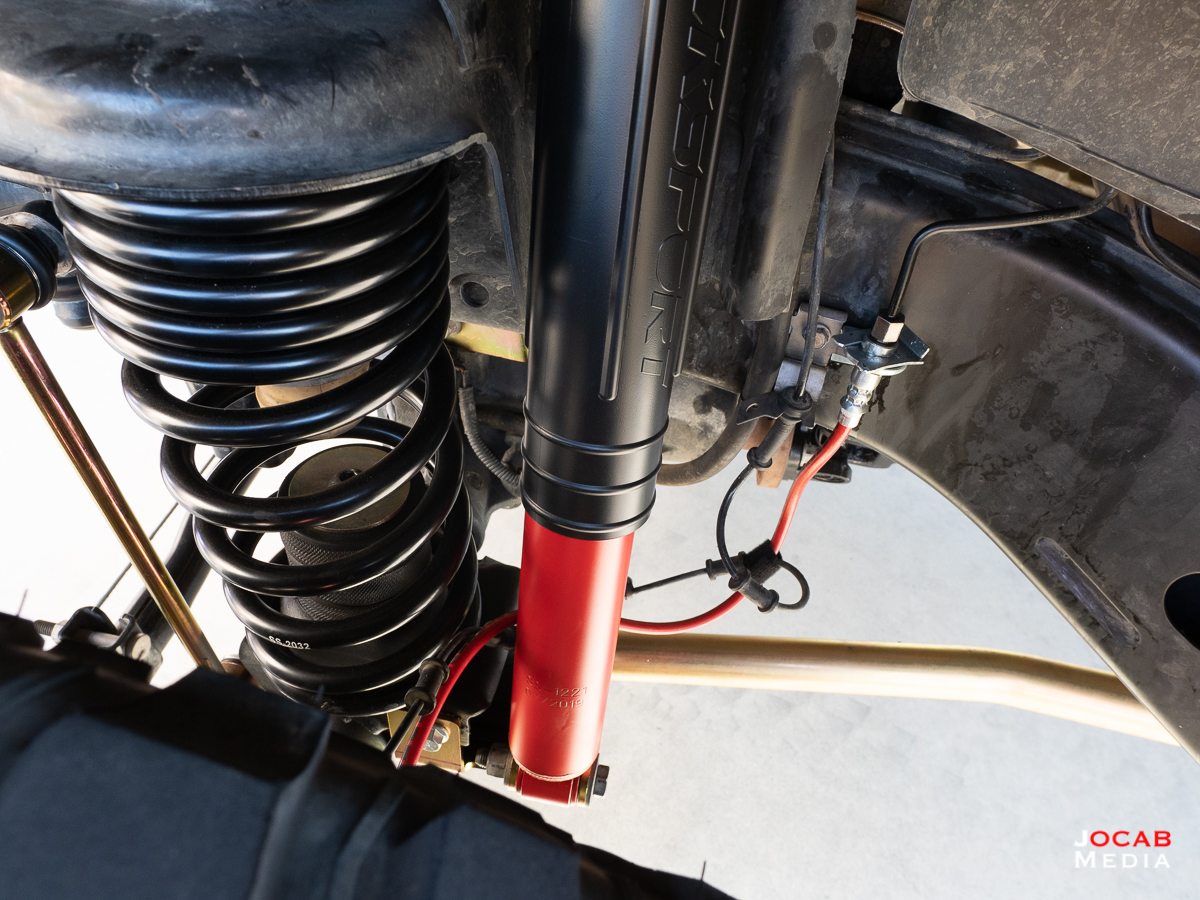
As far as the shocks, I went with the Metalcloak in-house shock dubbed the Rocksport. I spoke with a Metalcloak representative at their booth while attending the Lucas Oil Off-Road Expot a couple years ago and asked about the Rocksport vs Fox Shocks. I was told that while the Fox shocks are a solid shock and the ones Metalcloak includes with Game-Changer kits is tuned for their coils, the Rocksport actually has more travel and are slightly less expensive
Given that the main benefit that I saw with the Fox shocks is that I could go to most any off-road shop and pick up a shock, but since Metalcloak has the shocks custom-tuned, then that negates the idea of an off-the-shelf shock. Thus, given the wider travel range and the price, I went with the Rocksport shocks for the kit.
Jeep Wrangler JK’s 2012 and after do have a clearance issue with the driveshaft and the exhaust system when lifting the vehicle. The Jeep OEM driveshaft is thick and has a boot around the driveshaft. This is what tends to hit the exhaust when a Jeep JK is lifted.
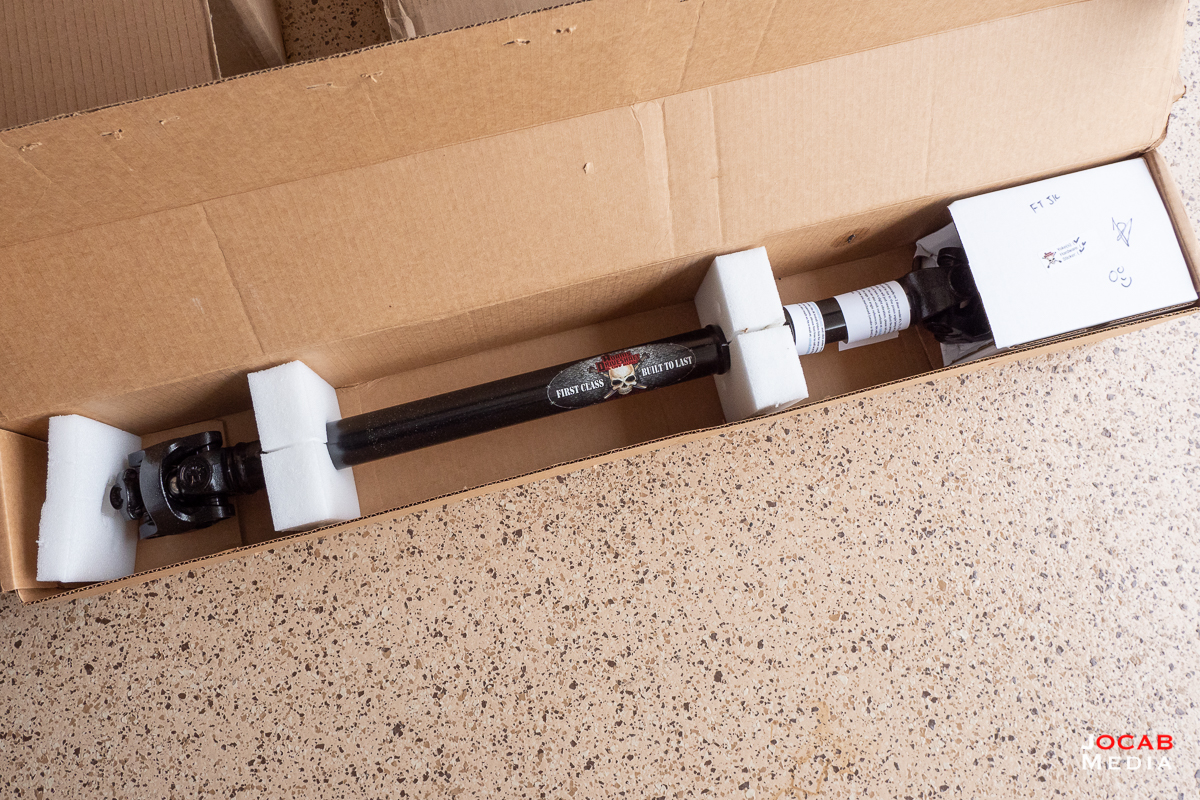
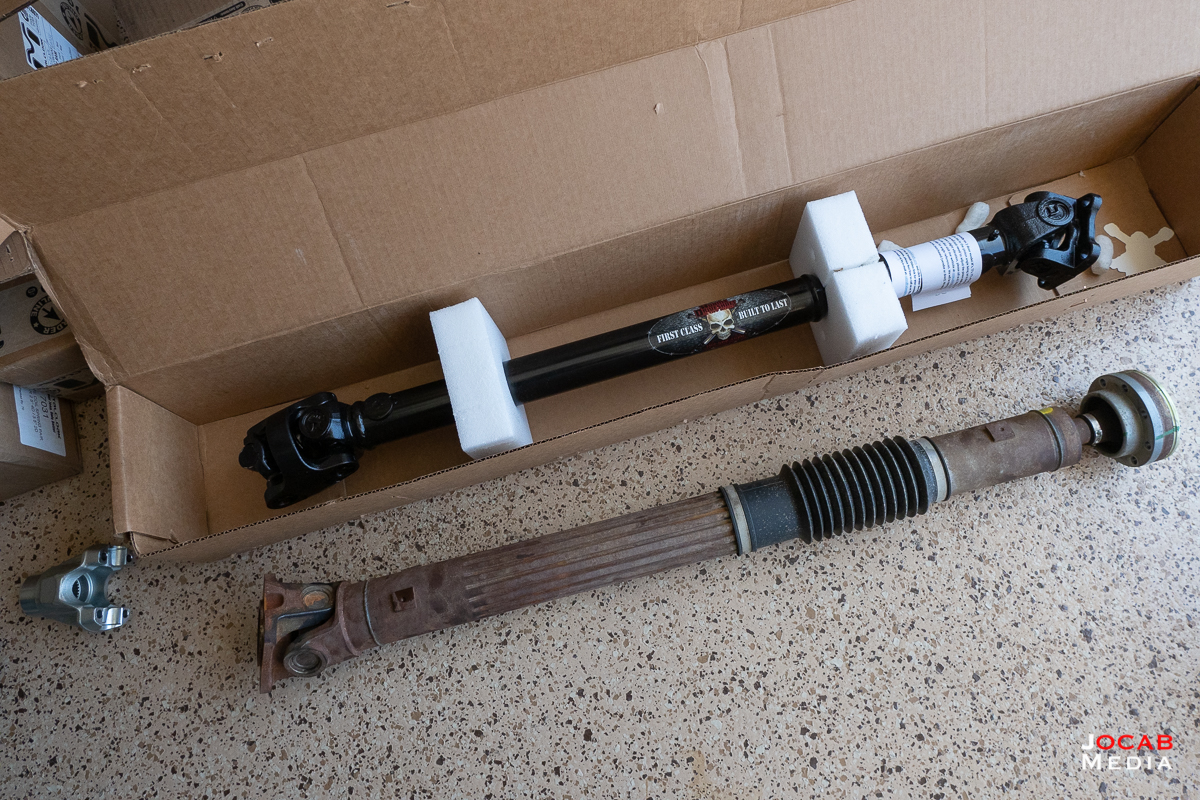
Most people opt for an exhaust spacer which is an added pipe that gives more clearance for the driveshaft. But I took the optimal road by replacing the OEM driveshaft completely. When I ordered the lift, I went to the Northridge 4×4 web site and ordered the Adams 1310 front driveshaft. This gives me a slimmer profile, yet stronger driveshaft that will properly adjust with the angle of the axle after the lift thanks to the double-cardan assembly.
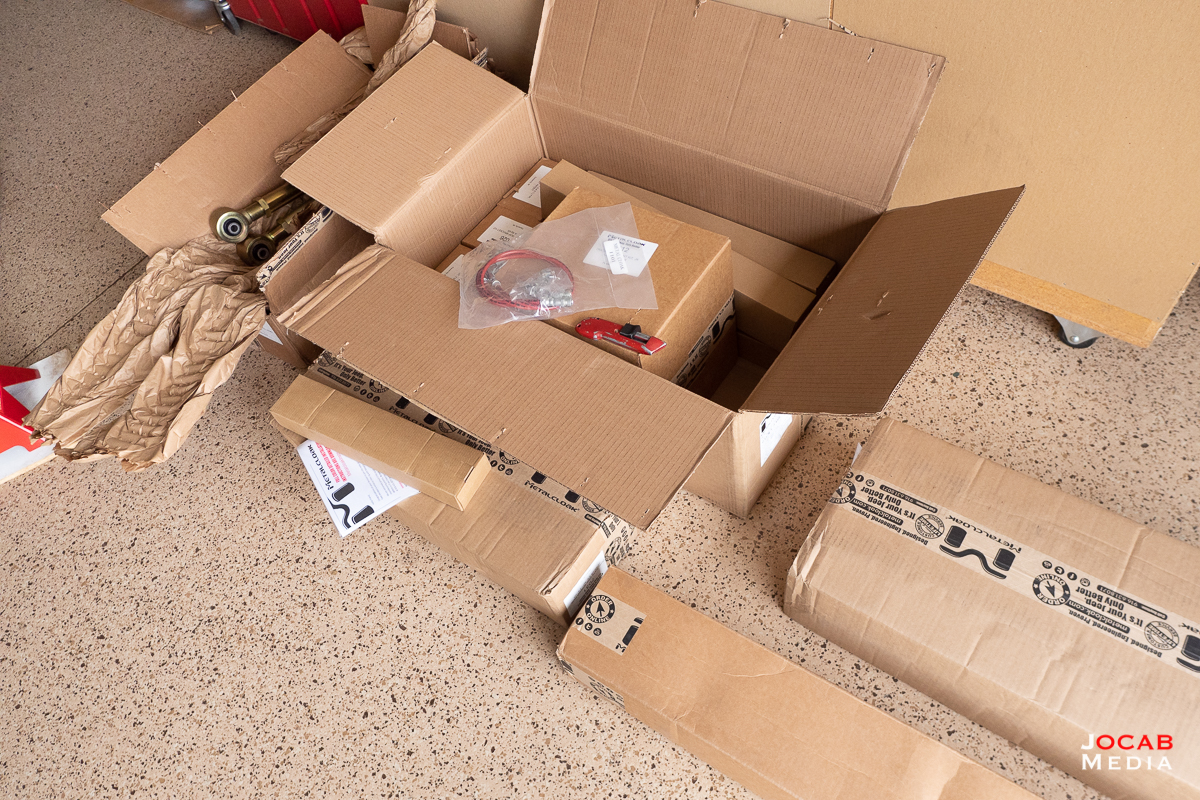
Now this write-up is not meant to be an install walk-through. There are plenty of guides, videos, and instructions on how to install a lift kit on a Jeep. I just wanted to document some observations I made during the install.
First off, the install of the driveshaft is relatively simple. There is a great video by Adams Driveshaft on Youtube that shows the install of front and rear 1310 Adams Driveshafts. Aside from having to get a 1-1/4 impact socket, I had all the necessary tools to install the driveshaft replacement.
As far as the lift install itself, while the instructions for the Metalcloak Game-Changer are pretty good, it is not 100% comprehensive and doesn’t mention some nuances that will be encountered.
First and foremost, other than the tools that the instructions list of that you will need, I highly recommend having:
- 1/2″ drive shallow and deep impact sockets for 21mm and 22mm
- 3/8″ drive shallow and low-profile impact sockets for 21mm and 22mm
- 1/2″ and/or 3/8″ drive impact wrench with 200+ ft-lb breaking torque
- Metric ratcheting wrenches up to 22mm
- Ratchet straps
- Pry bar
- Dremel with cutting wheel
- Keyless chuck (1/4″ hex) or a right-angle drill
- Spring compressors
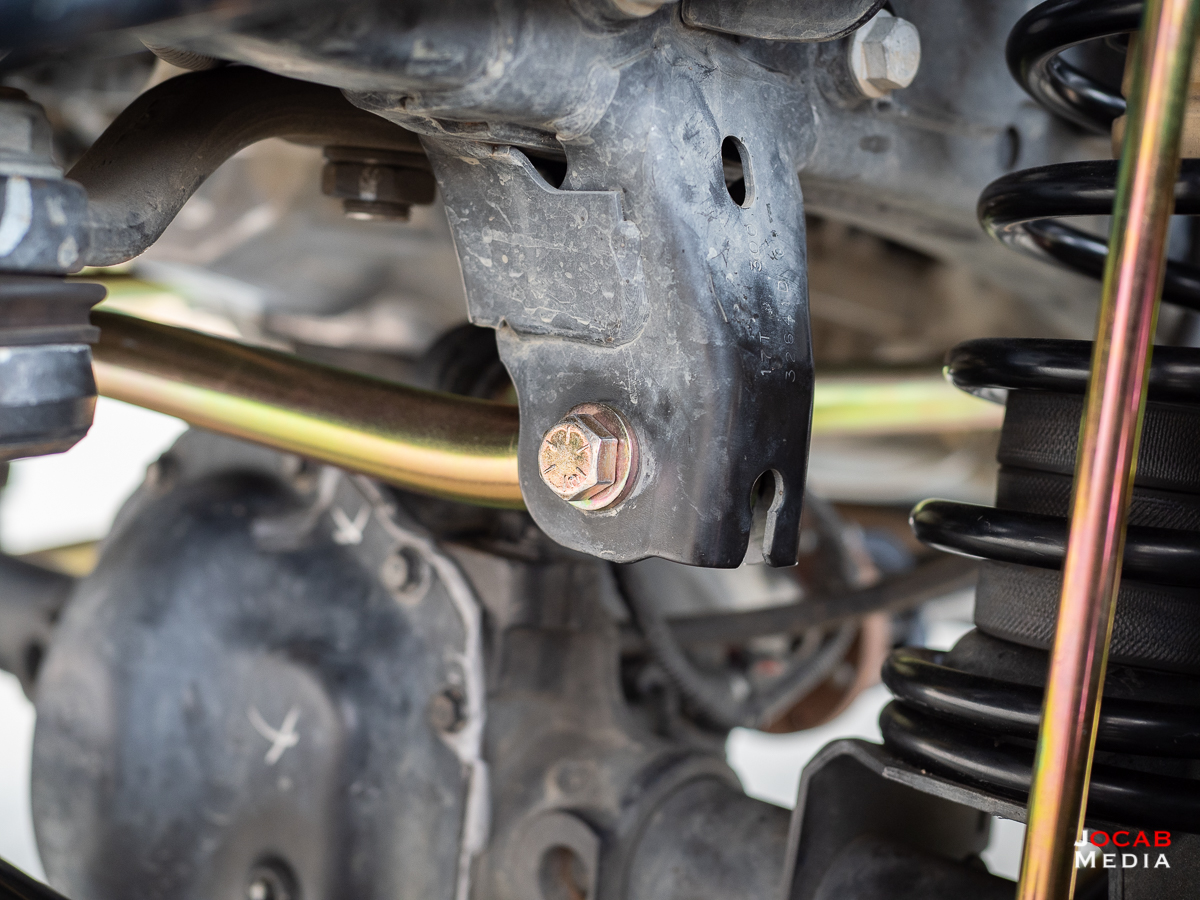
The reason why I recommend having a multitude of different profile 21mm and 22mm sockets and metric ratcheting wrenches is for the control arm and track bar bolts. The factory control arm and track bar bolts and nuts are 21mm all around, but you will encounter tight quarters and will need different profile sockets to make things easier, especially when torquing to spec.
Note: 22mm sockets are not really needed unless you go with 9/16 bolts to replace the control arm and track bar bolts. The nuts will be 22mm (or 7/8). More on this later when discussing grade 8 hardware kits.
An impact wrench will save you a lot of muscle strain so definitely get one. The recently released Milwaukee M12 Fuel Right Angle Impact Wrench is a solid choice for a lift install. I used a gun-style impact and a right-angle would have been a lot more useful in certain situations.
You will want the ratchet strap(s) to help contort the axle position in order to line up the holes for the control arm bolts. A pry bar is useful to help nudge some bolts into position.
The Dremel tool with cutting wheel is pretty much going be needed to trim out the hard plastic inside the fender that is blocking the top of front passenger shock tower. You will not be able to get a wrench on that top shock nut without trimming away that plastic.
Before trimming 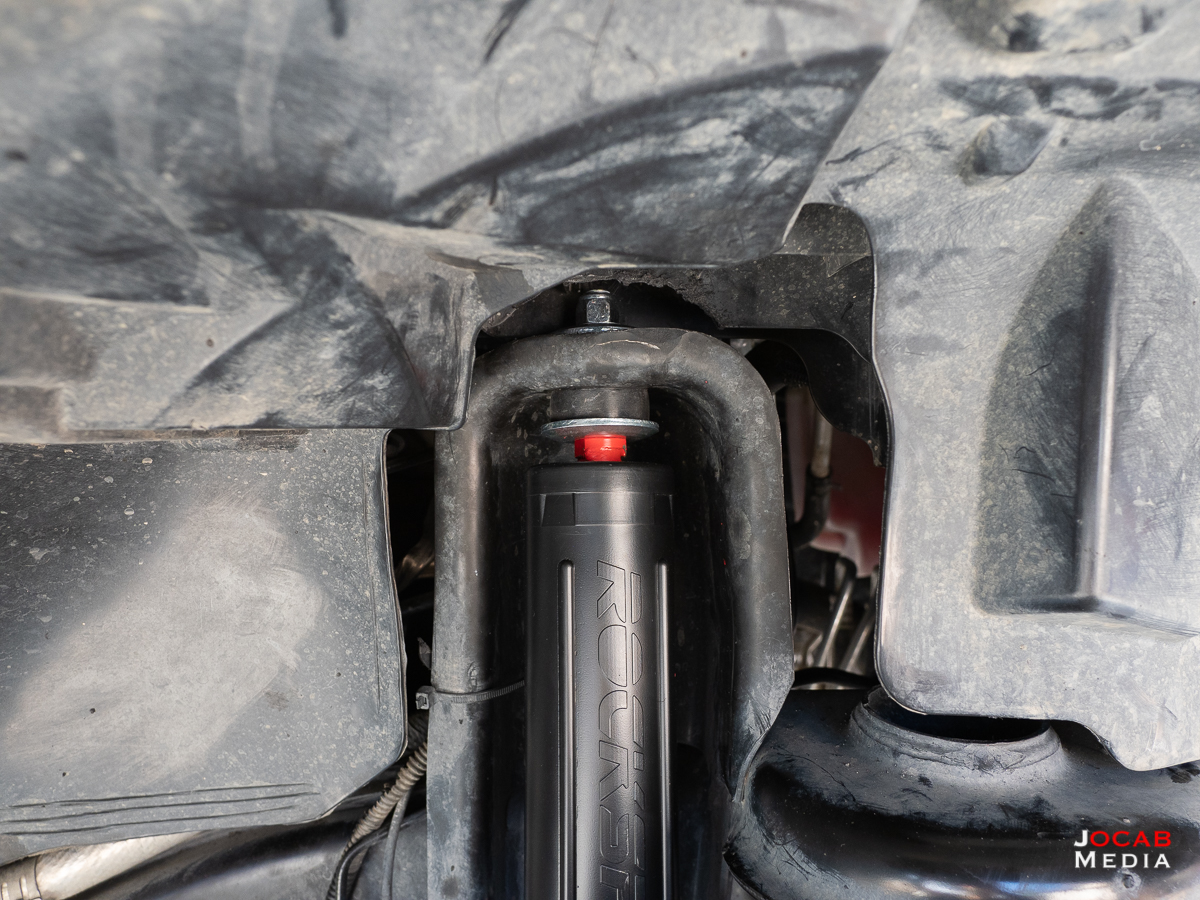
After trimming
As far as the keyless chuck, this is what was used to open up the holes on the axle for the Metalcloak JK front lower outboard shock mount and drill the additional hole for the passenger side shock relocation bracket. I don’t know how Metalcloak or other folks drill out the hole without removing the hub and axle shaft. When I looked online and found a Metalcloak video on Youtube showing how to install the front lower outboard shock mount, they had the hub and axle shaft removed.
Since I wasn’t about to do that for this, the keyless chuck was used (I don’t have a right-angle drill) with a ratchet wrench. Slow but it works.
Do yourself a huge favor and get spring compressors, especially if you’re working by yourself. It is easy to remove the factory coil springs since once you droop the axles and tip to each side, the coil springs will pretty much fall out. But getting the taller springs requires a lot more brute force without compressors. I went to Harbor Freight and bought a set for a little over $30. They’re not the greatest, but they work.
I also want to point out that I did order one additional component along with the Metalcloak Game-Changer Suspension Lift Kit and that is the Metalcloak JK Rear Coil Spring Alignment Correction/Retainer kit.
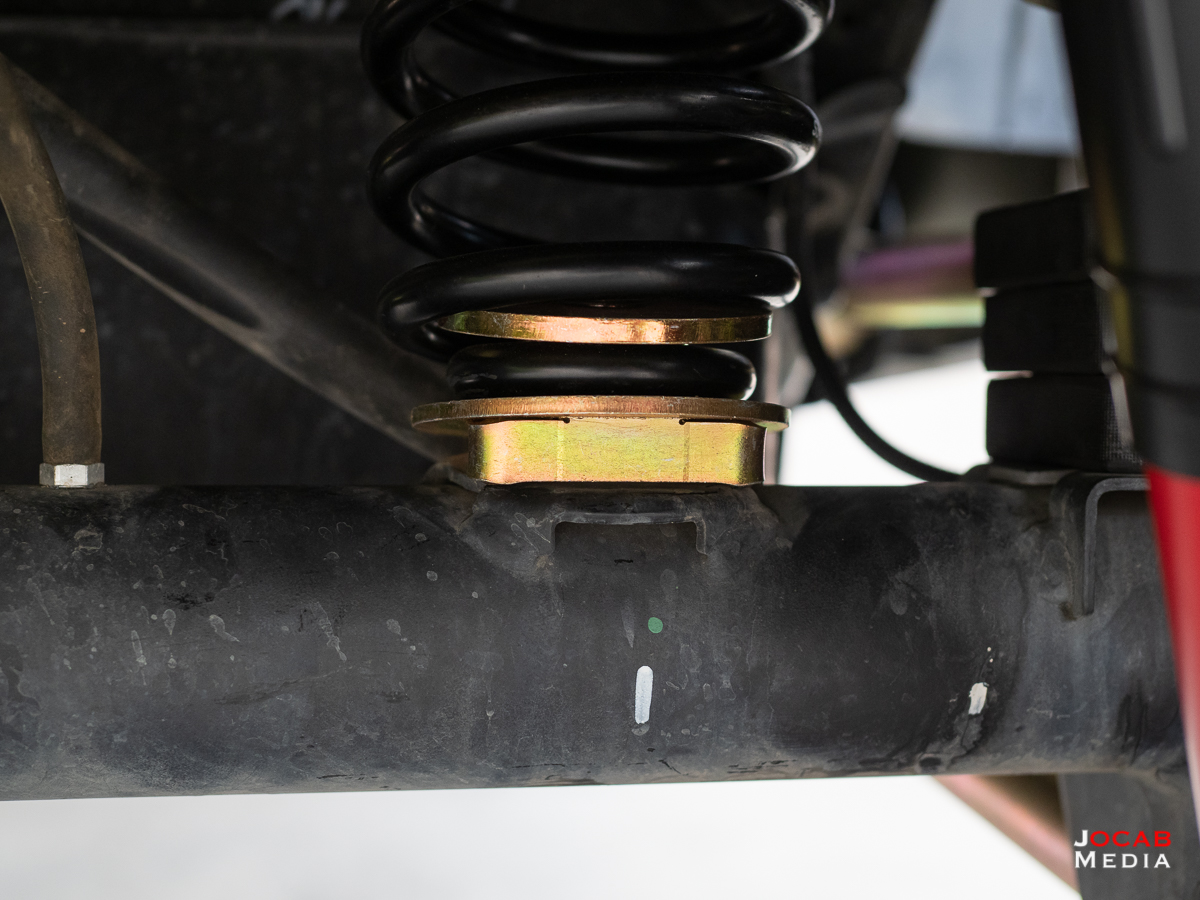
This is basically a metal spacer that fits between the rear coil and the axle to ensure the rear coils are aligned to prevent bowing. It’s not a requirement, but I read some posts on web forums regarding rear spring bowing, so I figured I may as well spend a few extra bucks while I’m installing the lift to ensure things are correctly functioning.
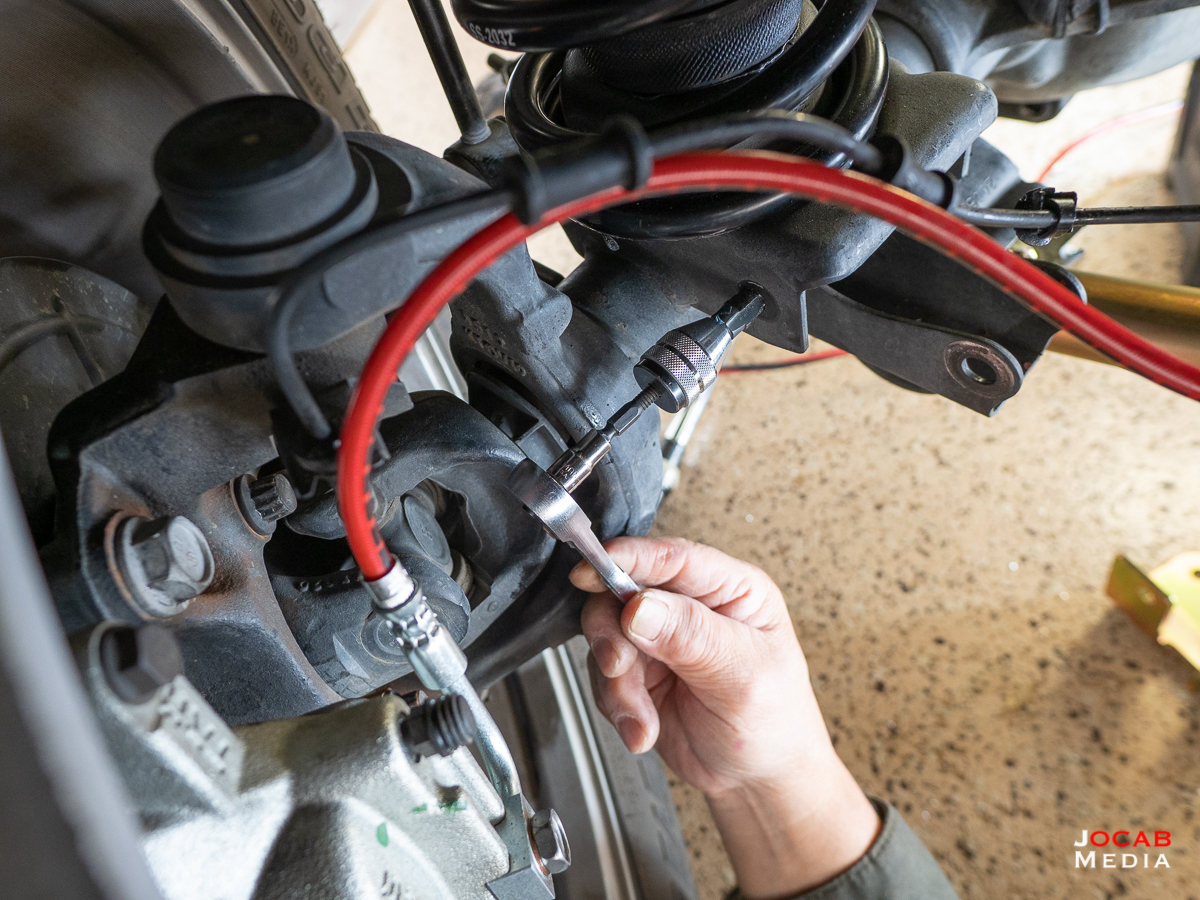
When you install a lift, I highly suggest you extend the brake lines on the front and rear before you start all the other lift component installation. You’re going to need to bleed the brakes, so just get all four brake lines extended and the brakes bled to get it all out of the way.
After the install was done, it was quite satisfying.
Note that I did reuse the stock bolts for the control arms and track bars because I took the Jeep a local off road shop to get the alignment and caster angle set. I figured it would be better to leave the stock hardware before I used the hardware from the Northridge 4×4 Grade 8 Hardware Kit for the JK, which uses Stover nuts.
Anyway, after the off road shop got the Jeep aligned (axles were off and track bars needed significant adjustment along with a couple of the control arms), I swapped out the lower control arm bolts for the front and rear along with the track bar bolts with grade 8 hardware.
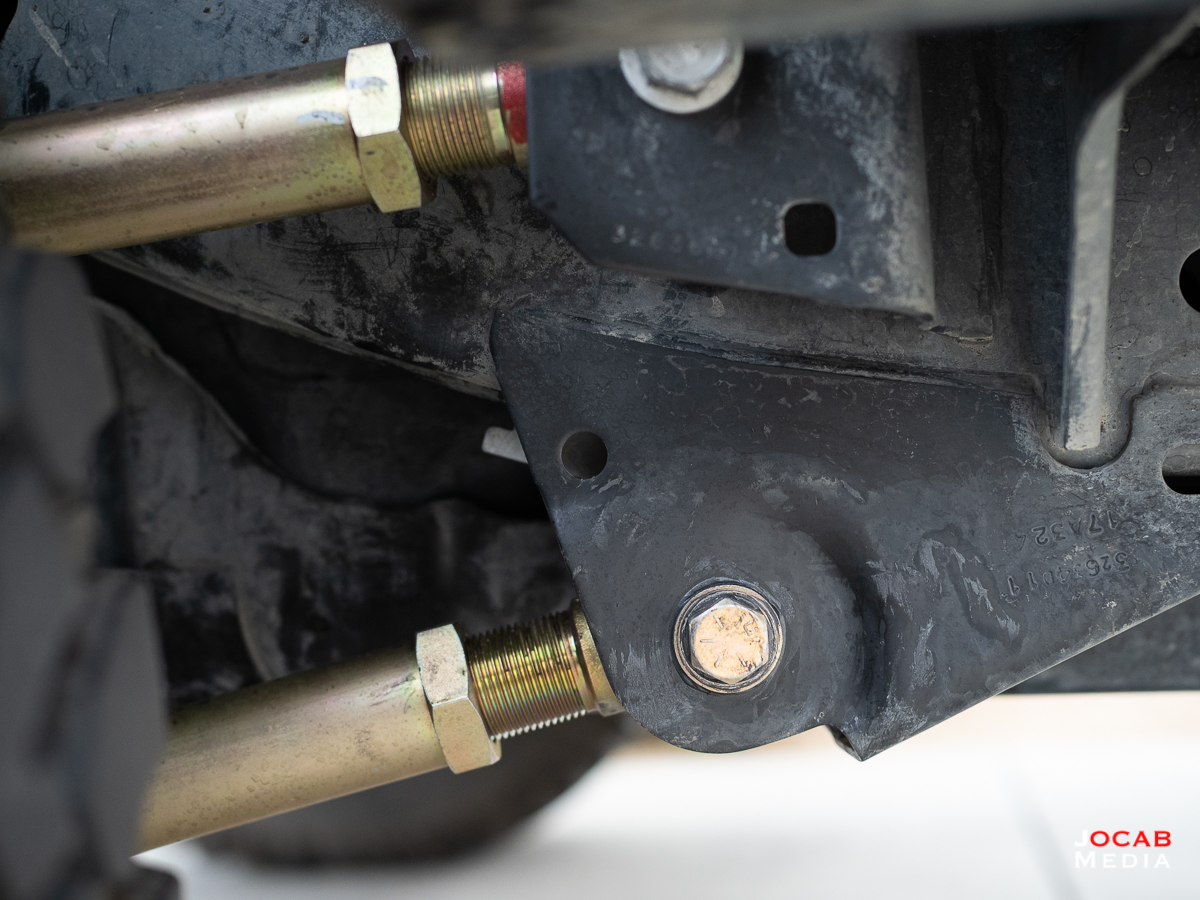
Aside from Grade 8 strength, the bolts in the Northridge 4×4 kit are 9/16-18 bolts that are not fully threaded (shouldered). This helps mitigate the control arm bolt holes in the frame and the track bar bolt holes in the axle and frame from getting chewed up by bolt threads. Also, the holes for the control arms and track bars are actually 9/16″, but the OEM bolts used are 14mm, so you get a slightly tighter fit (9/16 = 14.2875mm).
You can get grade 8 bolts and nuts at a good bolt supply shop, but the Northridge 4×4 kit is actually less expensive than buying the bolts, nuts, and washers yourself at a hardware store.
Right now, my Jeep is sitting on the factory 32″ BF Goodrich KM mud terrain tires on the factory 17″ wheels. I still have plenty of life on the factory tires and as I mentioned before, I really wasn’t going to lift the Jeep until I needed new tires. When the tires wear out, I planned on going larger. That still remains the case, but I may go ahead and shell out on new wheels and tires before the end of the year, regardless of the condition of the factory tires.
I am targeting either the Icon Vehicle Dynamics Vector 5 wheels or the Fuel Nitro 5 D667. Both wheels have 4.5″ backspacing which is the widely accepted backspacing for 35″ tires on the Jeep JK. I am most likely going with the Milestar Patagonia MT in LT315/70R17 (equates to 35X12.50R17LT).
Along with 35″ tires, I want to resolve the fenders. Many folks have indcated that 35″ tires will work with stock fenders, which is true. But the issue at hand is that there is less flex available due to lack of fender clearance and additional bump stops will be required. I’m leaning towards MCE flat fenders right now. They are plastic fenders like the factory fenders, but have a flat, high clearance design. I know a lot of people like metal fenders, but I am not liking the idea of the extra weight of metal fenders.
Note that I did considering the cut fender modification on the factory fenders, but I want to retain the width of the fenders. Cut factory fenders gets more clearance, but less tire debris protection.
As far as the comfort post-lift, I can say that it actually feels less stiff than factory. Also, the front end does not nosedive in heavy breaking as I imagine the Metalcloak coil springs are providing more support for the heavy front end on my Jeep (due to the LOD Offroad Destroyer steel front bumper and Warn Zeon 10-S winch).
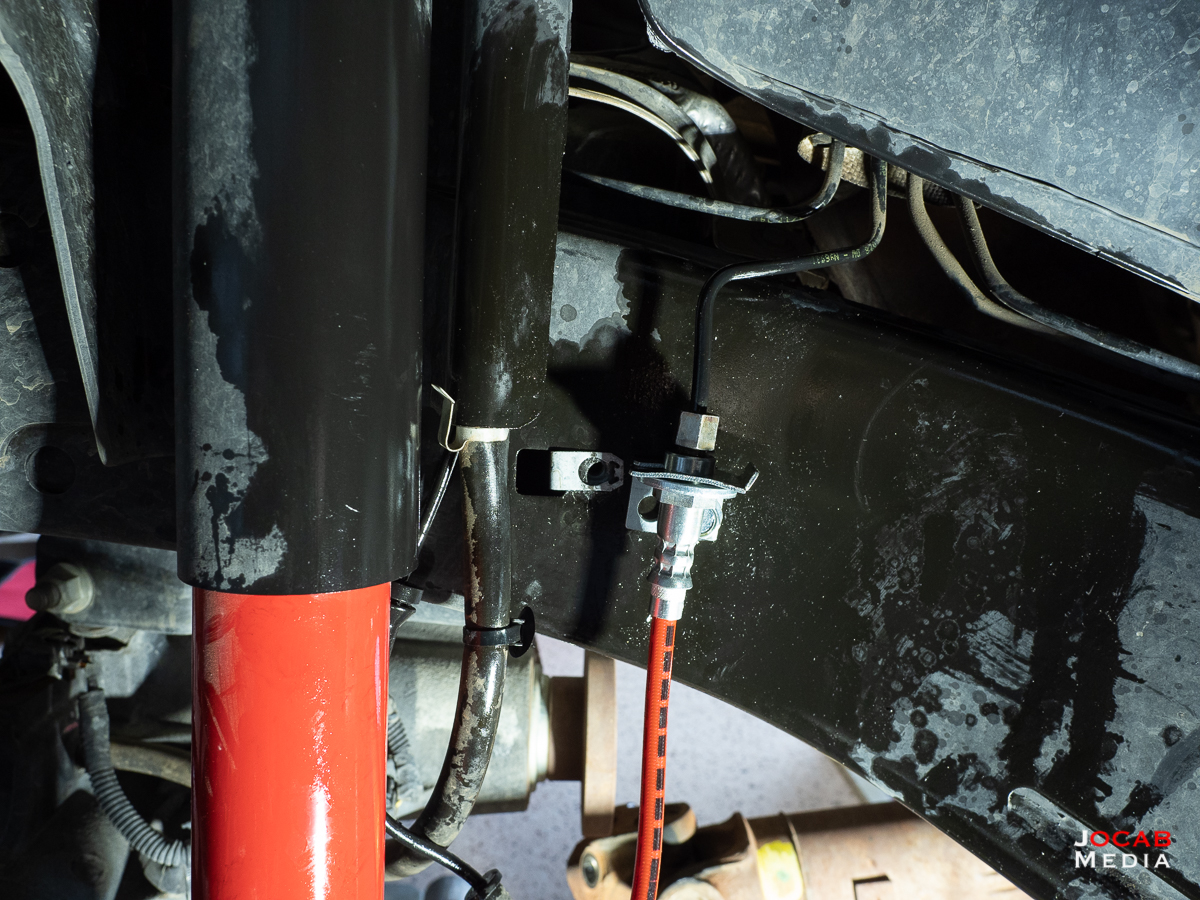
I haven’t taken it off pavement, yet, since I still want to secure the brake lines and extend the axle differential breather hoses at least a foot to account for the extra travel.
But on pavement, the Jeep doesn’t feel like it gets jarred with every imperfection on a road surface (cracks, potholes, etc).
Anyway, that wraps up my thoughts about the Metalcloak 2.5″ Game-Changer Suspension Lift Kit install. Again, this was not meant to be an install guide or walkthrough. I just wanted to write about my latest upgrade on the Jeep with some thoughts.
I know people opt to pay a shop to install a lift kit. A Jeep suspension lift kit like the Metalcloak Game-Changer is not simple, but it’s not overly difficult either. Thus I highly recommend just spending the several hours of wrench time to DIY the lift install. At the very least, you will understand your suspension more and be able to troubleshoot and fix the Jeep more adeptly in the future.
As far as the lift kit, the Metalcloak Game-Changer definitely shows why it is one of the more popular lift kits out there for Jeep Wranglers. The components allow for the adjust ability necessary to get a proper ride and to maximize the comfort and performance of the suspension. There are plenty of other lift kits out there, but whatever you decide on, I highly recommend getting one with adjustable control arms and adjustable track bars.
The Jeep Gets New Kicks: 35-inch Tires and 4.5-inch Backspaced Wheels – ocabj.net
[…] I finally got around to lifting my 2018 Jeep Wrangler JK Unlimited Rubicon (30 months of ownership) with a Metalcloak 2.5…, I said I would ride around on the factory 32″ tires for a […]
chuckisbusy
Hi Jonathon, How long did the keyless chuck/wrench take to open up the holes for the shocks? Secondly, did you have any clearance problems with the Rubi wheels and suspension (sway bar links)?
Jonathan Ocab
Several minutes to do it by hand. As far as the Metalcloak extended rear sway bar links, yes, with OEM Rubicon wheels it will rub the wheels (not just tires, but the actual wheels). When you order the kit and it asks you wheel backspace, if you say factory BS, they will provide rear sway bar link drop brackets which won’t have this problem. But since I planned on running 4.5″ BS wheels, I elected to run the extended rear sway bar links and used 1.75″ spacers with OEM wheels for a short time.
chuckisbusy
I see… I might invested in a right angle drill. I wasn’t aware of the sway bar link drop brackets. Excellent write up, it gives me a heads up on what to expect and is much appreciated. One last ?, What did you use for the jam nuts on the control arms? I was thinking of getting the crows foot jam nut wrench.
Jonathan Ocab
I just used adjustable wrenches since I have a few really old beefy adjustable wrenches that open up beyond 1-1/2″. I do need to get some crows foot jam wrenches since they are smaller to carry in a vehicle kit.
Jeff
I appreciate all the details on this post! After reading this I think I’m going with the Metalcloak. I bought a used JK last October and have been wanting to lift it. With all the recommendations from everyone I had no idea what to go with. After doing a lot of research I cam across the Metalcloak and I think its one I’m going to go with.
MSMliars.
I just installed the 2.5 on my JKU. I am waiting for TJ/XJ brake lines as mine had the teraflex big brake kit on it. The lines included with the JK kit rubs the shock arms due to their angles coming off the calipers. MetalCloak was awesome about this and sent out the new lines that day. Can’t wait to get them in and road test it. The kit overall was a very simple install, with the above mentioned situations to consider. I discussed with them, to consider moving the outboard shock mount hole up a couple of mm, this will allow the installer to utilize the hole already in the Axel mount that was previously used for the brake line retaining clip that is removed. This would eliminate the need to angle drill this hole for the outboard shock mount.
I cannot overstate their commitment to service. By far the best company I have dealt with in a very long time.