
After I installed an sPOD Bantam with HD Smart Panel in my Jeep Wrangler JK Unlimited to prepare for a specific future lighting install, I wanted to try an immediate lighting add-on. A while back I saw the KC HiLites Universal 2-Light Under Hood lighting kit and I thought it looked very useful. This kit is relatively inexpensive at around $120 give or take, depending on the retailer. But given that I have an sPOD, I don’t necessarily need the wiring harness, relay, and switch that come with these lighting kits.
Note: I understand that having a physical switch for under hood lighting would probably be most ideal to have in the engine bay, but I felt utilizing the sPOD for the switch/relay and wiring kept things cleaner and simpler. Not to mention it is quick to check if the under hood lighting is turned off with the sPOD HD Smart Panel (or smartphone app) if the hood is closed.
I looked at the individual KC HiLites Cyclone LED lights and discovered that I could get them for under $30 each. So I decided to get a couple of the Cyclone LED lights with the intention of installing them under the hood of my Wrangler and wiring them up to the sPOD.

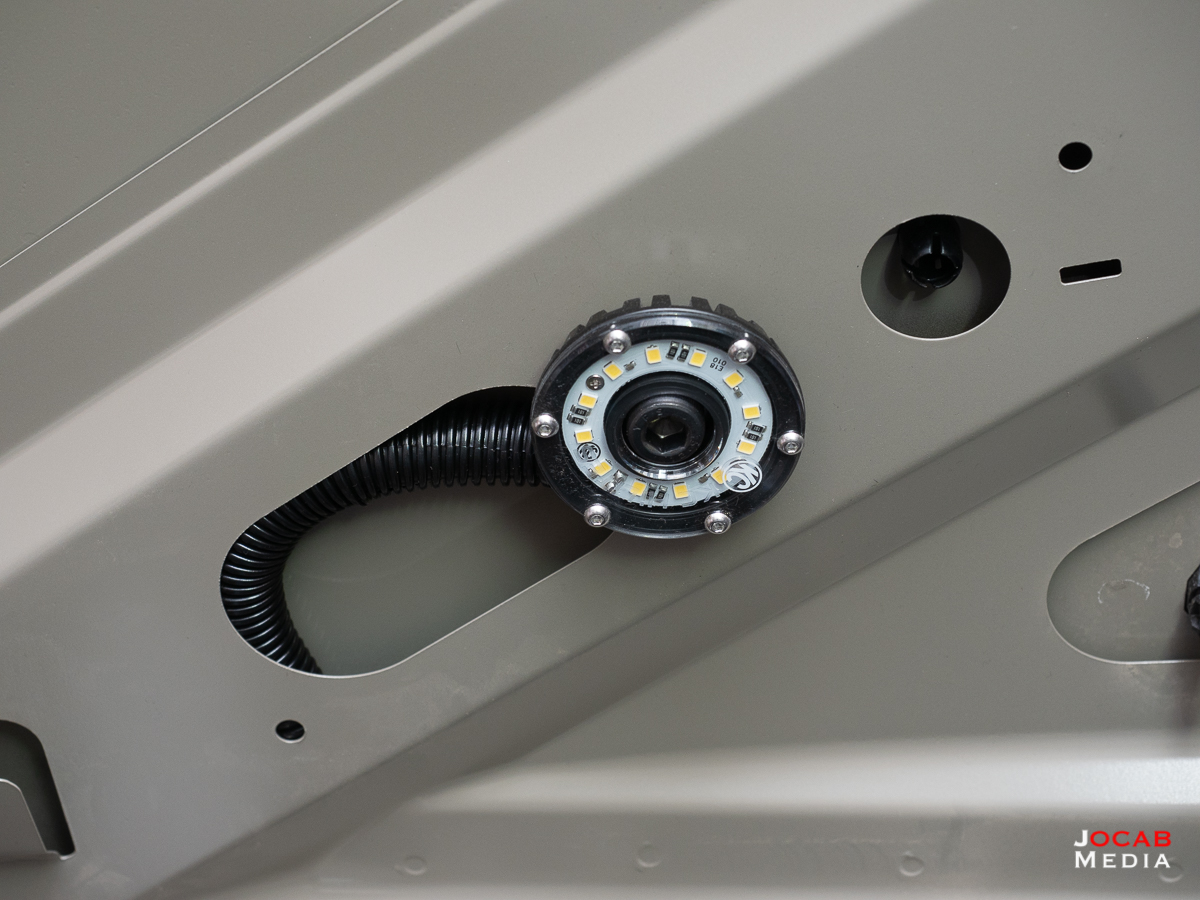
At only 2.2″ in diameter and .53″ thick, the KC HiLites Cyclone is a very compact light with versatile mounting options.
If you buy a KC HiLites Cyclone LED by itself, it only comes with bullet connectors to splice with additional primary wire to go to whatever power/ground it will be tapped into.
For my specific use case, I planned on using 18 AWG primary wire to extend the included bullet connectors to connect each Cylcone LED to the sPOD via insulated blade terminals. That is actually the easy part.
The hard part was figuring out how to mount the Cyclone LEDs to the hood.
The hole in the center of the Cyclone LED is .39″ or 9.9mm. I ended up getting some M10 hex drive socket cap screws from Home Depot. I also found some small diameter M10 washers, which fit inside the channel of the Cyclone exactly. I secured the bolt with a M10 nylon lock nut.
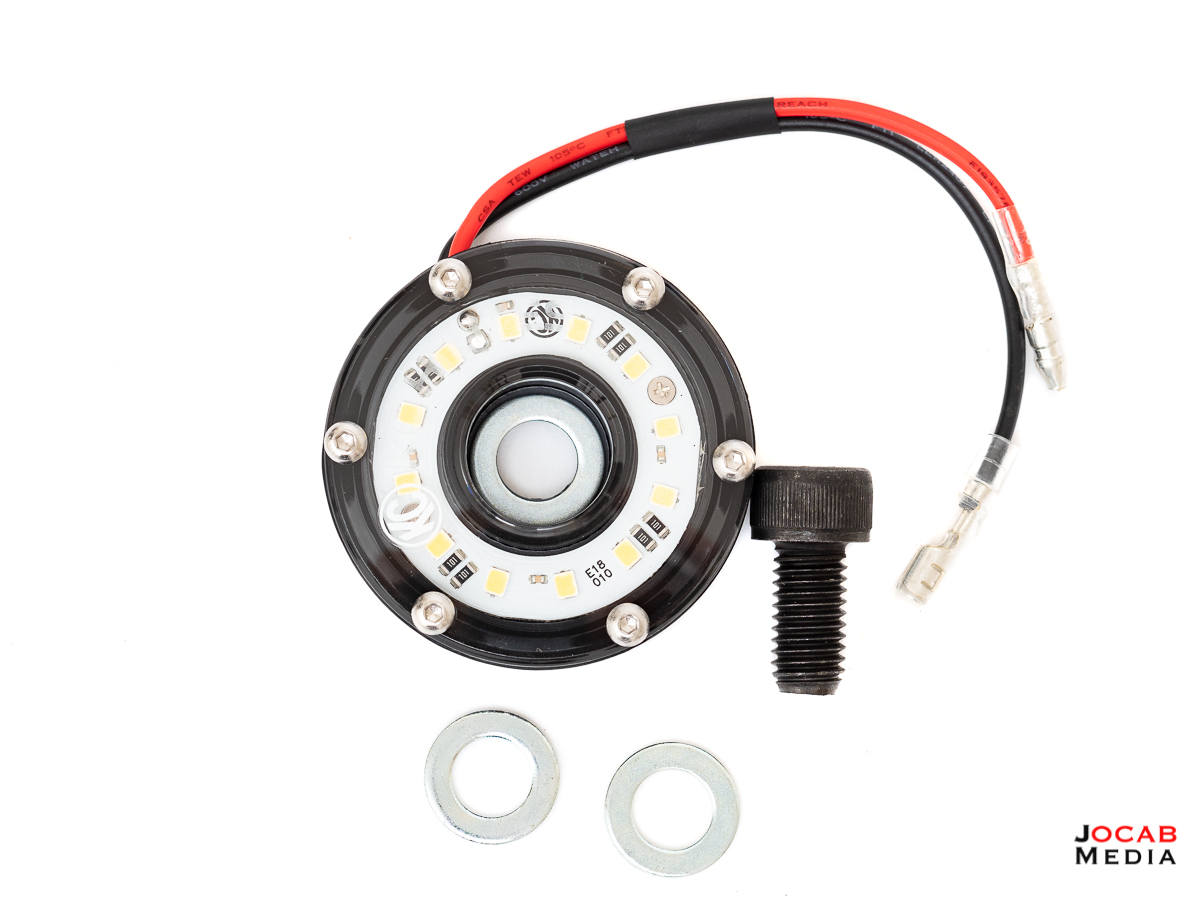
For the record, I used an M10x20, which is just short enough to not hit the actual hood, but just to be safe, I put a couple of washers to act as spacers between the Cyclone and the hood rib surface, to get shorten the bolt shaft to the actual hood.

This helps to make sure the bolt shaft will not make contact with the hood, especially if some weight is placed on the hood above the lights, such that the hood may bow or flex into the bolt shaft. I am sure if you have access to a better bolt selection, you can come up with more appropriate fasteners for the Cyclone, but I was able to work with the M10 hardware.
Once the hardware was acquired, next was drilling the mount points. This sounds pretty straight forward, but it is not.
Note: Mounting locations can increase if you decide to use a self-tapping screw. I am personally not a fan of self-tapping screws for this type of scenario, which is why I opted for a nut and bolt
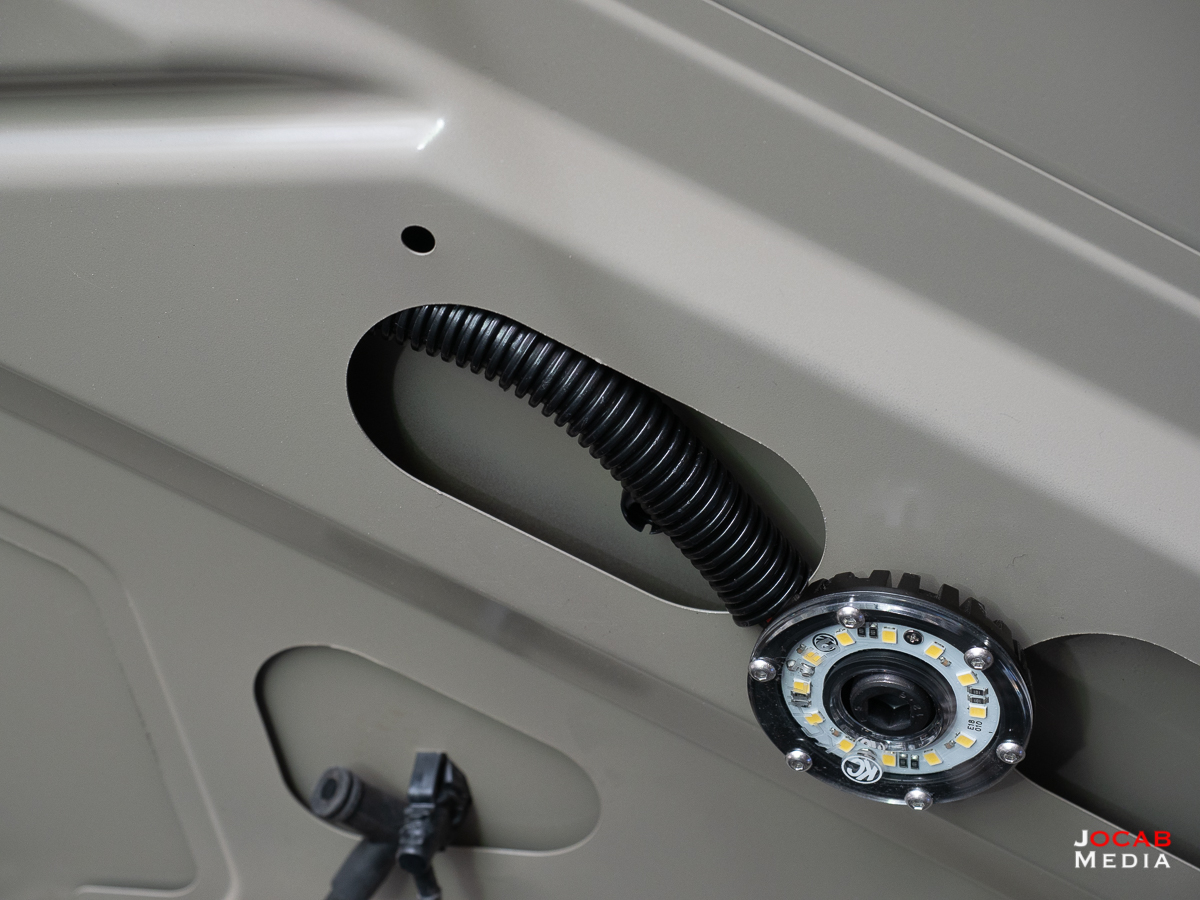
If you look at the Jeep Wrangler hood, it is actually not symmetrical with regards to the ports in the ribs of the hood.
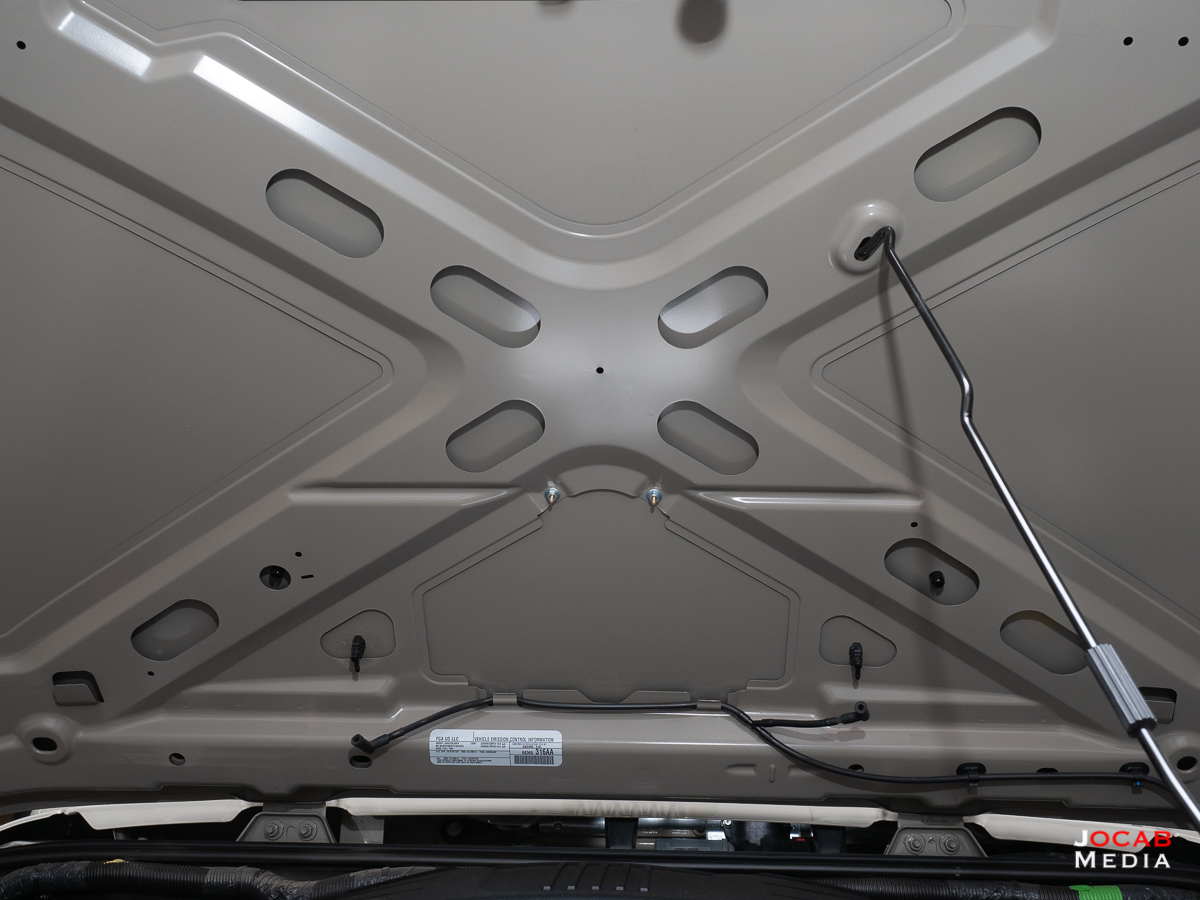
If you notice in the previous photo, the left side has more surface area than the right on the rib portion because it only has a small hole for accessing the nut for the hood bumper, whereas the right side has a larger oval hole.
This does impact where you will mount the lights, assuming you want them symmetric with one another for aesthetics.
I ended up selecting a location a little lower on the ribs than I wanted, but I would rather have the lights farther apart from each other than closer together.
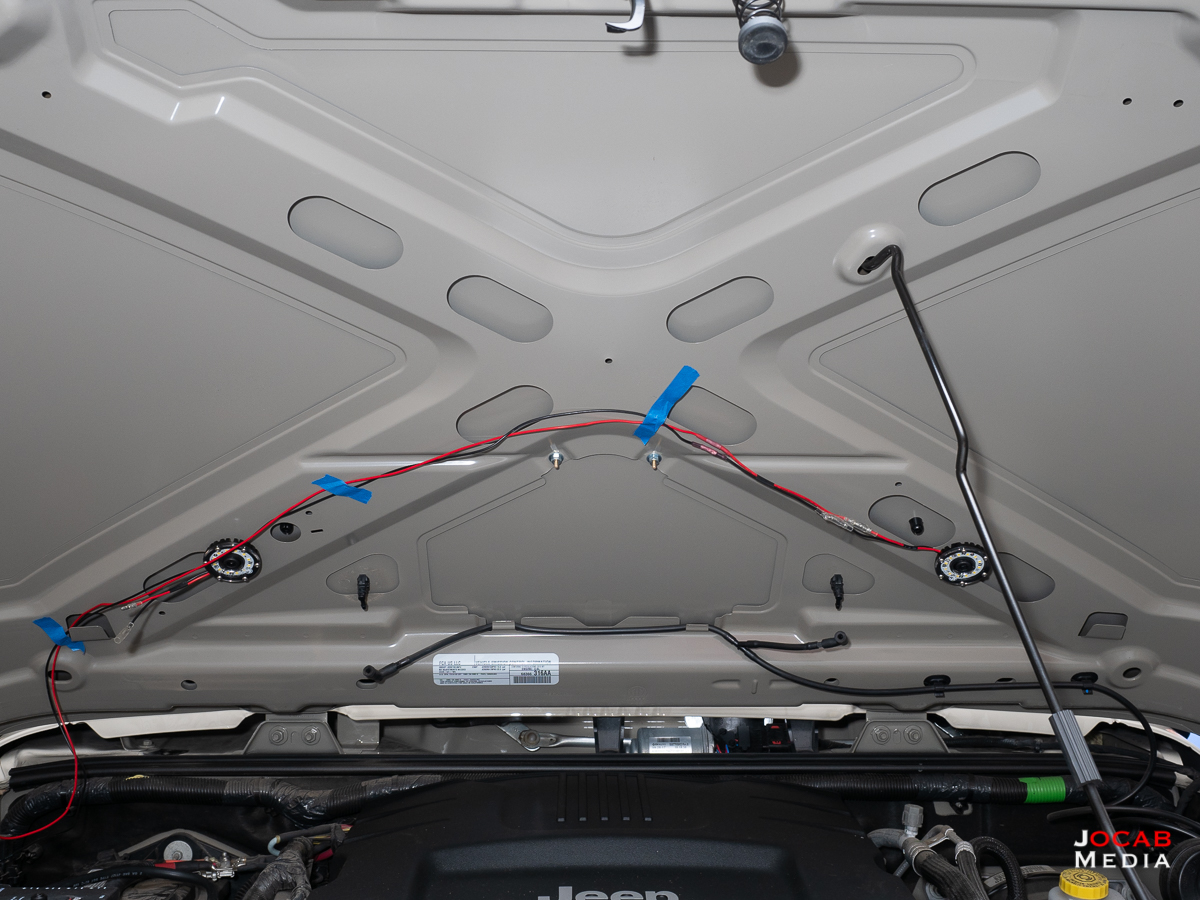
After holes were drilled and the lights mounted, I staged the wiring to check for length. Once they were cut and the blade terminals were attached to the end, the lights were plugged into to test before running the wires for the actual install.
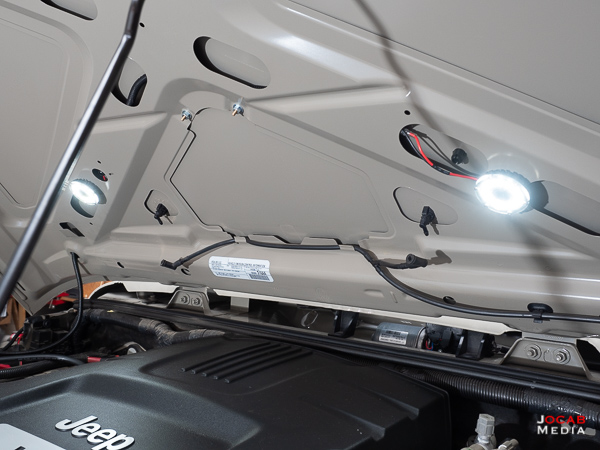
The wires were re-routed through the ribs towards the passenger side and out the small hole on the bottom passenger side of the hood.
Half-inch diameter split loom was used for the wiring at the base of each Cyclone LED to protect the wires from the edges of the hood ribs. I needed 1/2″ split loom in order to wrap around the bullet connectors.
Quarter-inch split loom was used for the wire that exited the hood and to the sPOD.
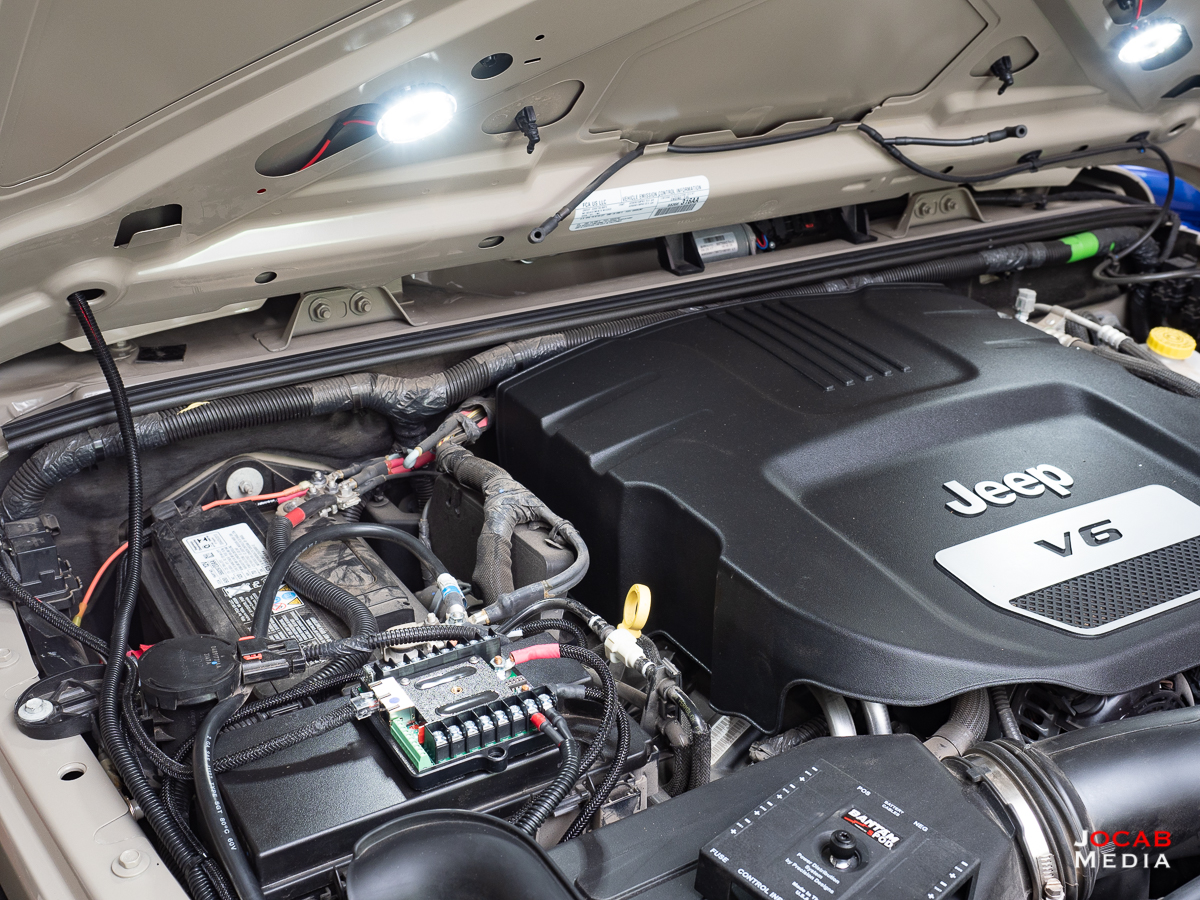
Both Cyclone lights were connected to the same blade terminals to be on a single sPOD switch (I chose #8). The sPOD came with spade terminals and heat shrink tubing, which were used for this install. But I used a piece of red and black Gaffer tape on the positive and negative/ground ends, respectively, just for a quick identifier in the event the cables are removed and then reinstalled to the sPOD.
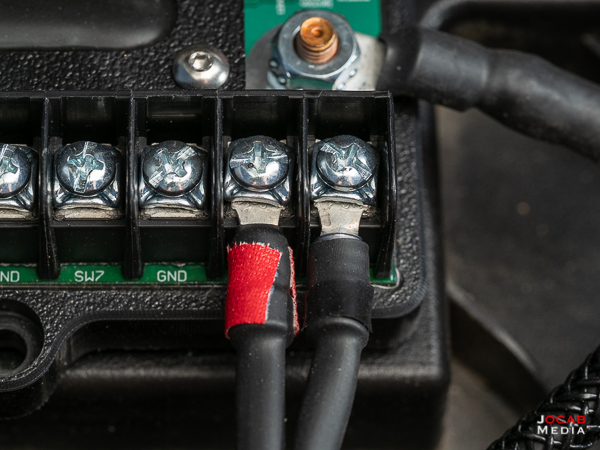
It might seem redundant to put black tape on black tubing, but I did this in the event the red tape peels off. I will still (hopefully) have the black tape on the negative/ground end to distinguish the negative/ground cable from the (red) tape-less positive cable.
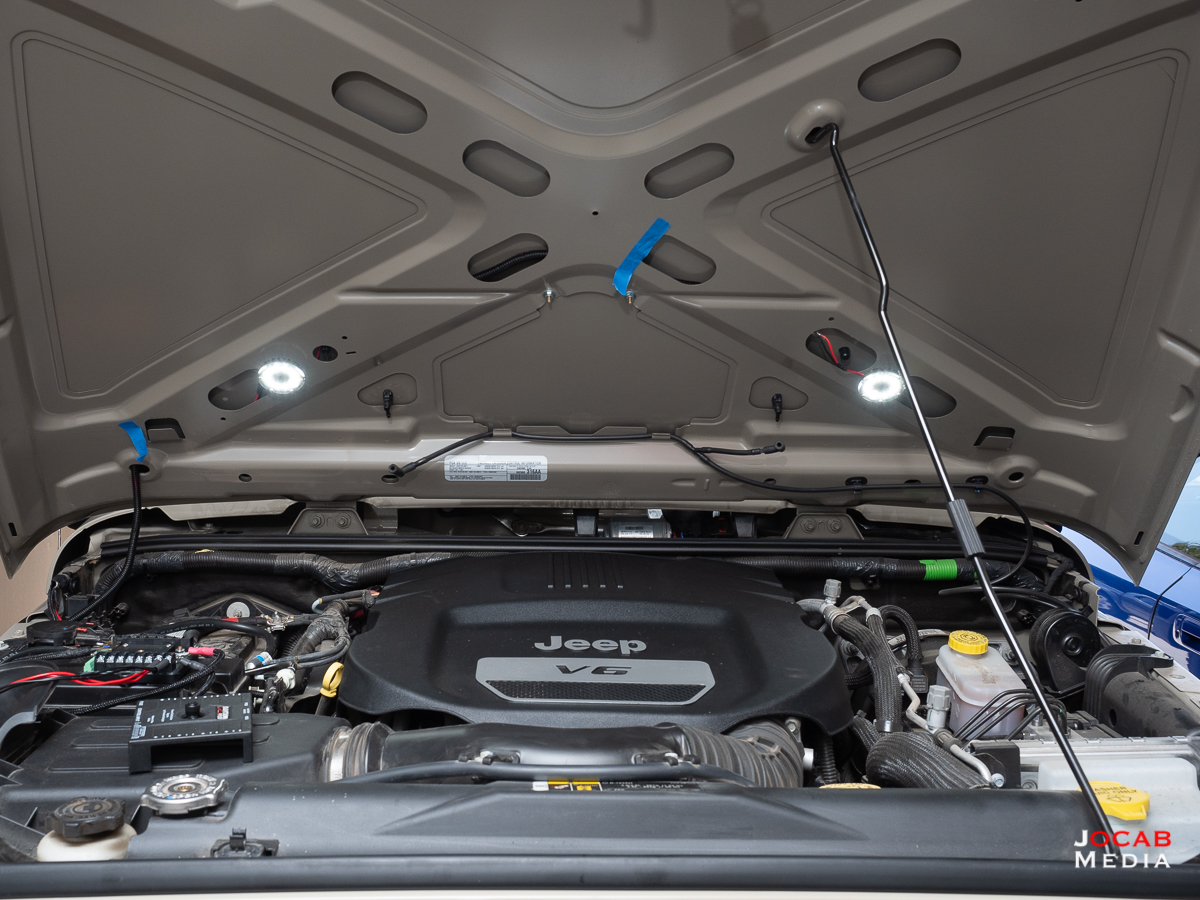
Anyway, this pretty much completed the install. All that was left was cutting out holes in the hood silencer (insulation) for the lights and then re-installing the silencer material.
If you recall earlier that I put two washers between the Cyclone and the hood rib surface to get some clearance for the bolt shaft. Well this incidentally had a positive benefit with regards to the Cyclone LED light and the hood silencer/insulation.
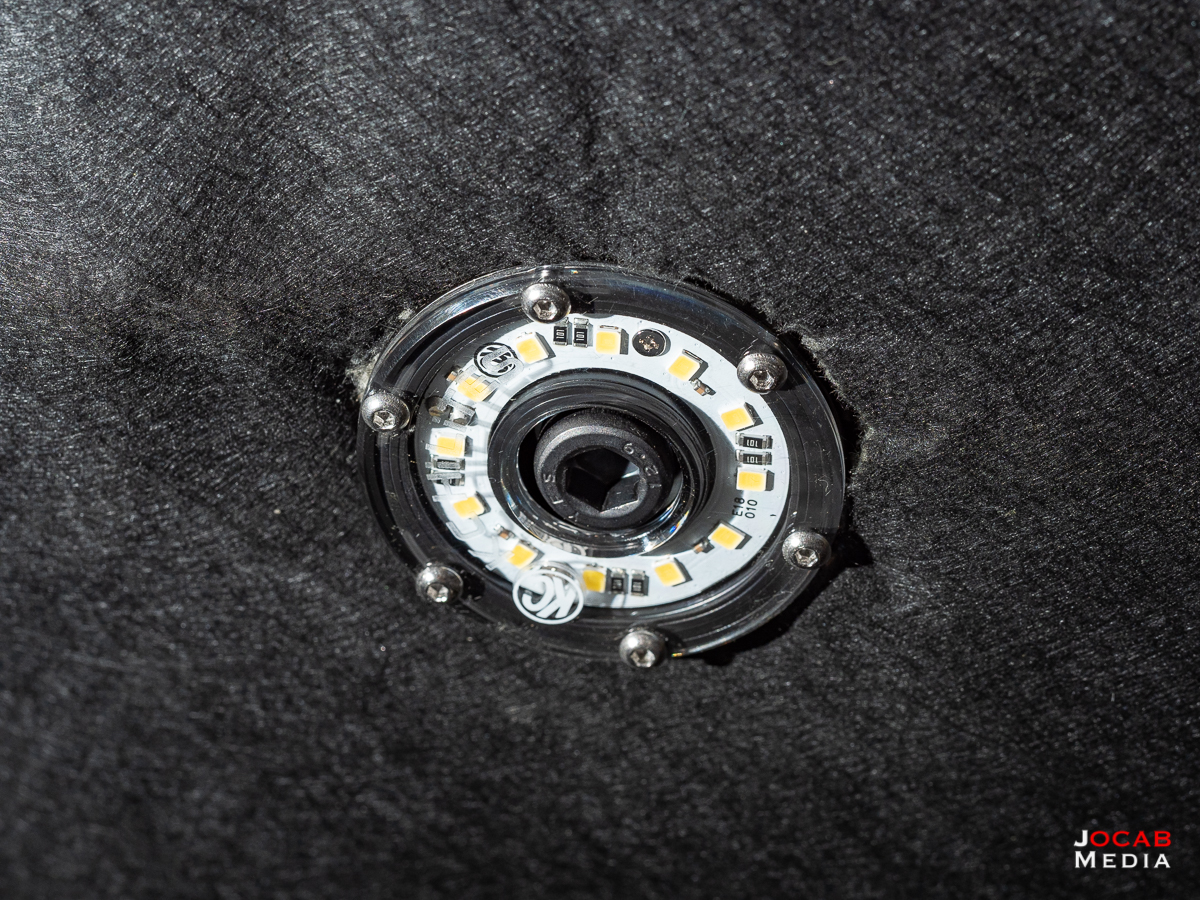

Those washers not only shorten the bolt shaft’s travel to the hood, but it also inadvertently added more height for the Cyclone off the surface of the hood rib, thus giving it slightly more elevation to get past the hood silencer material.
All-in-all this turned out to be a nice utilitarian, yet aesthetically clean add-on to the Wrangler. The two 516 lumen KC HiLites Cyclone LED lights provide a nice under hood illumination which will be useful whenever I need to get under the hood in dim or dark situations.

If you have a vehicle that lacks under hood lighting and you want to be prepared for situations where might have to spend time under the hood in poor lighting conditions, the KC HiLites Cyclone LED lights are excellent, easy to install add-ons for this. KC HiLites has the under hood lighting kits available in a one-light package or two-light package, both of which include a wiring harness and switch. Or you can opt to do what I did and acquire individual Cyclone LED lights and provide your own mounting, wiring, and switch/relay solutions (e.g. sPOD).
Chris Krafcik
I’m wiring newbie, and I’m installing the same lights into my 2017 JK with SPOD. How did you splice in the new wire to the two lights to have one lead going into your spod?
ocabj
If you’re running only two Cyclones to one SPOD switch, the ends of your wires for two lights should fit in the presupplied blade terminal connectors. I think I used 18 AWG wires which fit into the blade terminal connectors which might have been for 16-18.
2018 Jeep Wrangler JK Unlimited Rubicon: The First 365 Days – ocabj.net
[…] KC HiLites Cyclone LED Under Hood Install […]