
A few months ago Think Tank Photo, the company renowned for their photography bags, announced a new addition to their already popular ‘Airport’ product series, the Airport Navigator.

The Airport Navigator is another rolling bag, but what sets this specific rolling bag apart from the others in Think Tank Photo’s existing product line such as the Airport International, is the accessibility of the contents of the bag. A traditional rolling bag must be laid on its back on a (fairly) horizontal surface in order to open the front flap and access the compartment.
But the Airport Navigator is no traditional rolling bag.

As you can see in the above photo, the Airport Navigator’s compartments can be accessed from both the top and front of the bag, without having to lay the bag down horizontally on its back. I can tell you right now that the accessibility design is the one feature alone that caught my eye, and convinced me to shell out my hard earned money to get a closer “hands-on” look at the bag and try it out.
When I saw the Navigator on the Think Tank Photo website, I was excited about the idea of having a rolling bag to carry a fairly sizable kit (e.g. two bodies), but being to operate out of the bag in an expedient fashion and with a minimal footprint.
The core specifications of the Airport Navigator as listed on the manufacturer product page are as follows:
- Outer Dimensions: 16” W x 15.5” H x 10” D (40.6 × 39.4 × 25.4cm)
- Inner Dimensions: 15” W x 13” H x 6.8” D (38.1 × 33 × 17.3cm)
- Laptop Compartment: 14.8” W x 11” H x 1.5” D (37.6 × 28 × 3.8cm)
- Weight: 8.1-9.2 lbs (3.7-4.2 kg)
Think Tank Photo rates this bag as being suitable for two (2) pro-size bodies (cameras with battery grips) with 70-200 lenses attached in addition to 3 to 6 more lenses and/or accessories, along with a 15″ laptop and a tablet (e.g. iPad).

As you can see above, I setup the bag so I directly get to my camera bodies from the top access flap. But what about the rest of the dividers in the main compartment?

The front panel for the main compartment is held in place by retention straps when it is fully unzipped, keeping the door open at around 30 degrees. This is great because it mitigates the ‘disaster’ of gear spilling out into the floor when you open the front panel, and still gives you access to all the gear.
I set up the bag such that one body (Canon 5D Mark III, primary) has the Canon EF 70-200 f/2.8L IS II attached and the rest of the dividers are setup for a Canon EF 24-70 f/2.8L (hood reversed), Canon EF 85 f/1.2L II, and wireless flash triggers (PocketWizard MiniTT1, FlexTT5 x 2, PowerMC2 x 2, AC3, Plus III, and Paul C Buff Cybersync). A backup body (Canon 5D Mark II) without a lens also sits at the top. Inside the table pocket I have my iPad and inside the laptop pocket I actually have gels and gel holders for the Paul C Buff LiteMOD system.
Furthermore, unhooking the retention straps to open the panel all the way reveals a Canon 580 EX II Speedlite, accessory pouch (full of sync cords), two 77mm filters, and cleaning supplies.

I got the opportunity to use the bag on a location shoot in Downtown Los Angeles this past weekend to run it through its paces.

So what do I like about this bag?
- I thoroughly appreciate the form factor and design because it fits my style of shooting. When I’m at location shoot, I tend to have a lot more than my camera bag. I have more bags for my lights, modifiers, and light stands. So with all those bags strewn about, it’s nice to have a camera bag with a small footprint that I can actually work out of. It helps keep my gear sane.
- It holds just enough. I’m pretty much a location shooter. I don’t have my own studio, so I try to streamline where I can. I used to go to locations with my Think Tank Photo Airport International because I wanted to bring a second body. But after a while, I started trimming down and going with just a single body kit and switched to a Think Tank Photo StreetWalker Pro. Then after I started using the StreetWalker Pro I began using Easy Release for iOS to handle model releases. My iPad became a regular tool at photo shoots the fact that the Airport Navigator holds a tablet easily *AND* a laptop if I choose so is a huge plus and turns the Navigator into a nice, small, portable studio for when I go on multiple day location shoot.
- The bag is excellent quality. This is standard fare with Think Tank Photo products and you shouldn’t expect anything less when you buy one of their bags.
That said, the Airport Navigator is not perfect. There are a couple of minor things that I did notice when I was setting up the compartment for my gear.
- The long (column) dividers are about a half-inch to a full inch longer than they need to be. When I setup the bodies to be at the top of the bag so they could directly accessible via the top zipper flap, they are flush with or just slightly under the zipper line of the bag, which is a solid fit. But the problem is that the top flap has two zippered pockets and if you try to put anything in them with about a half-inch in thickness, closing the flap feels a lot more snug because those items are pressing against the backs of the camera bodies.

For reference, the camera bodies that I have are the Canon 5D Mark II and Canon 5D Mark III both with the respectable Canon BG-E6 and BG-E11 grips and Really Right Stuff L-plates. Anyway, I ended up not placing my filters (Singh-Ray Vari-ND and B+W Circular Polarizer) in the top flap inside pockets. Don’t get me wrong, they will fit and the top flap will zipper shut closed. But it just ‘feels’ too snug for my taste. Plus, I am concerned that if I am rolling the bag around and decide to place an object on the top of the bag while I’m ‘carting’ around, I’ll be pressing all those pocketed objects into the backs of the camera bodies. If some how the column dividers were shorter so the camera bodies could sit in the compartment a half-inch to full inch lower, this could alleviate any issues or concerns (or make the compartment an inch taller). Perhaps I’m am worrying over nothing. - The hooks on the retention straps for the front compartment panel are made of plastic. I’m actually not concerned about the plastic hooks being unable to hold the weight of a laptop+tablet. I’m more concerned about user carelessness when (un)hooking the strap from the panel and possibly breaking the hook. Going with metal hardware for this might have been a better option.


Other than those two minor issues, I am smitten with the Think Tank Photo Airport Navigator. It is a great new addition to the Think Tank Photo Airport rolling bag series and is an excellent option for photographers that transport and use their bags in a manner that will benefit from the style and design of the Navigator.
I highly recommend the Think Tank Photo Airport Navigator. Photographers that want to carry a couple of camera bodies with a couple of lenses and extra accessories with a laptop and/or tablet in a convenient, mid-sized rolling bag should definitely consider this bag.
For me, I’m definitely going to hang on to the Airport Navigator. I actually think this will see more use than my Airport International v2 because of the way I operate.
Think Tank Photo Pixel Pocket Rocket Giveaway
[…] visit the recently posted product review of the Think Tank Photo Airport Navigator rolling bag review on my blog and leave a comment on the review with your name and a legitimate email address because […]
Melanie Castle
Great review. Love all the images of your packed setup.
Commenting for the giveaway too.
Phil Lambert
Looks pretty solid, I’m a TTP Streetwalker Harddrive myself but this has some very cool features.
Linda Davison (@DutchbrosLuv)
Great review and love that you can reach in the bag while in your seat on a plane. I would love to owe a Think Tank Photo Airport Navigator. Anyone that has to carry a couple of cameras, lenses and extra accessories definitely should consider this rolling bag.
hang li
Wondering If i can fit couple of Einsteins in there with all my reflector and stuff. I am going to try.
brownspank
Never had a luggage-style camera bag to try out, but I’m a fan of customizable compartments.
Demian
cool review. I´ve already bought one. I am waiting for it!
Randy Oleson
Thanks for the informative review.
Lara lee
I love think tank :)
(Giveaway entry: Lara Sonday. Behindthelensbylaralee@gmail.com)
Ron Lee
Thanks for the perfect hands on review. I’ll be putting this TTAN on my list for the new year. Happy holidays and thanks for the good work.
Feroz Khan
Finally a good review about this bag. Really contemplating about getting this one for myself.
Tony
Nice review of a nifty bag!
Mike Borduas
Great looking bag… is about to make it on my must-get list…
David L
Looks like a great product. Fantastic review!
Varun
Nice review, I was considering this but went with the ThinkTank Shape Shifter instead for my “trimmed gear” bag. I don’t need an immediate access to gear and the fact that this comfortably fit my 17.3″ laptop was a plus.
Duy Nguyen
very insightful, love thinktank products. How you think this will hold up with a loaded urban disguise 60 on the handle?
Marco Averion
thanks for the awesome review! And it does really appeal to me as a bag to bring for location shoots
Jeff C
Am an airport guy but I like
Bob Bradley
I’ve been in the market for a roller bag. Thanks for the info.
Loris KIM
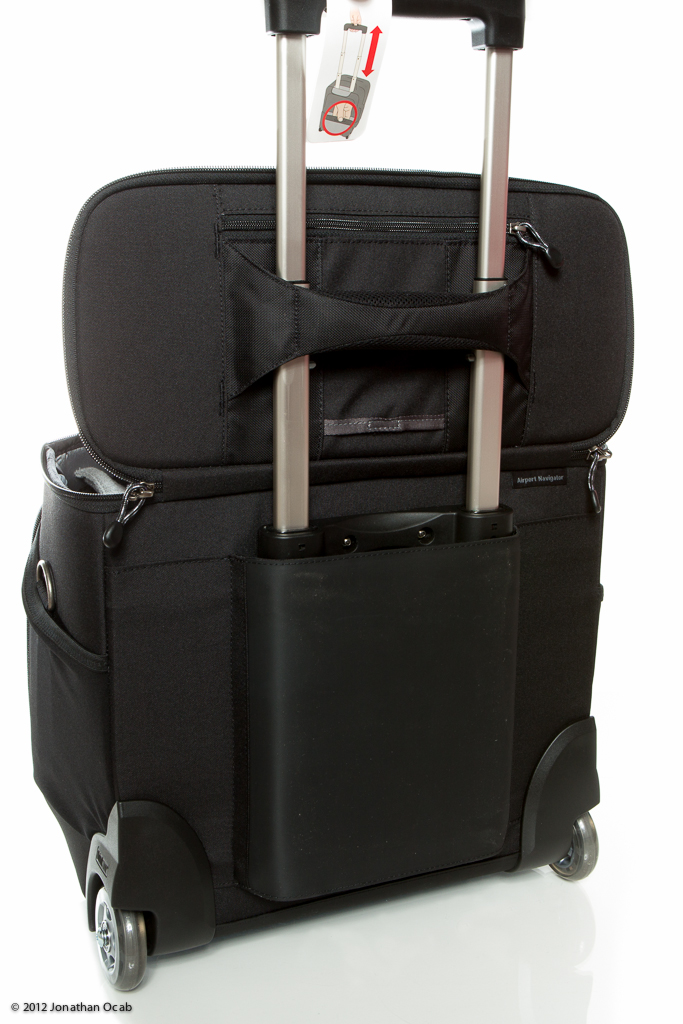
Nice review. I would have been interested in a picture of the back of the bag to see the footprint of the retractable handle. Some comments on the rollability of this bag would be interesting as well (how the wheels behave when going down the sidewalk or doing a sharp turn).
PS: the picture with the model is the real photo geek test: is your attention on the model or on the bag???
ocabj
I added a photo of the rear of the bag.
ocabj
The handle has some play in it, but I think it should hold up nicely.