
Bubble level accessories for rifles have been around for many years. The purpose of a bubble level on a rifle is to allow the shooter to know if a rifle is canted and re-orient the rifle accordingly. A canted rifle (tilted to one side) can affect accuracy, or the point of impact, over long distances.
In the past couple decades, the most common bubble levels would attach to the scope base (rail) via Weaver or Picatinny mount. Then bubble levels were made as attachments to bodies via rings. Later, bubble levels appeared integrated into actual scope mounts and then into stocks and chassis systems. These bubble levels are all based on the same traditional technology of an air bubble in a cylinder filled with liquid.
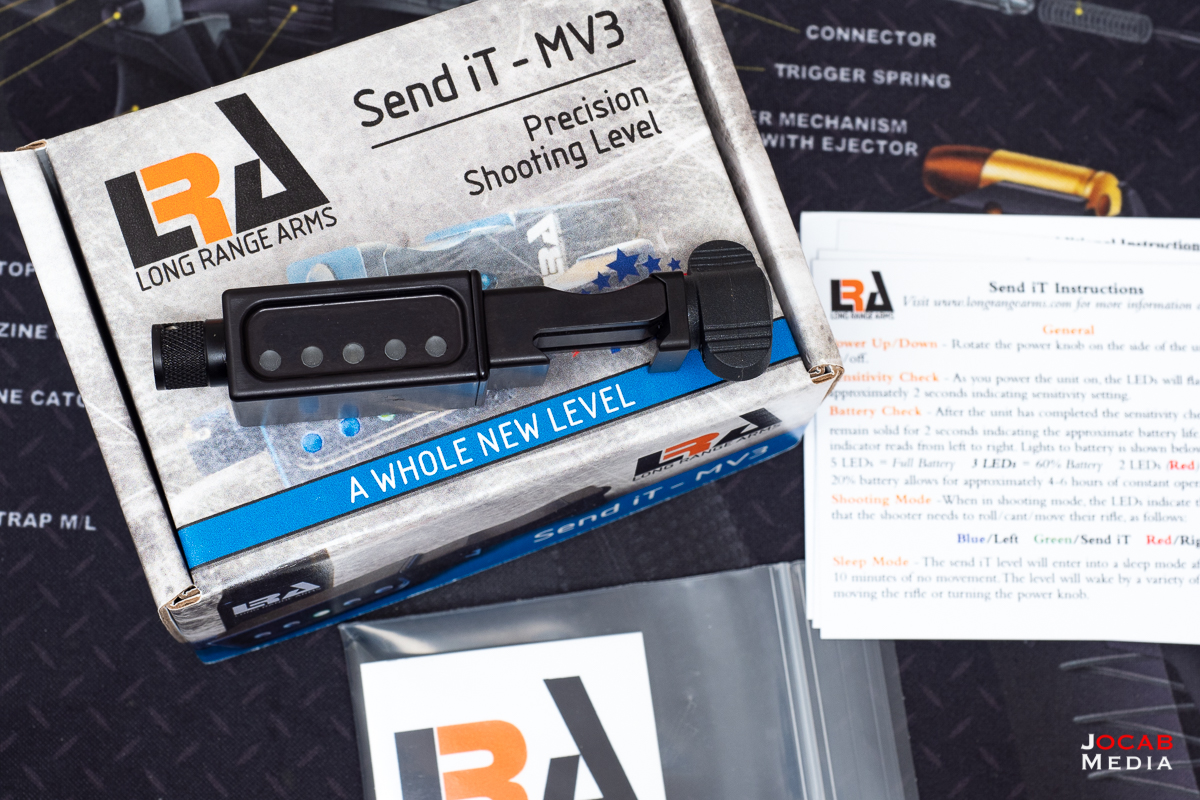
In the past few years, the electronic level called the Send iT manufactured by Long Range Arms has become widely used among the shooting community. After researching into how the LRA Send iT level works, I acquired one in the form of their MV3 model variant.
The issue at hand when you start looking at all the types of level accessories out there is what exactly is the user indexing the ‘zero’ of the level against?
When it comes to what is level, the scope reticle is what people are focused on. When a shooter levels the rifle to target, the shooter is leveling their sight picture, or reticle, to the target. There is no argument that the sighting system should be level to gravity.
The dilemma is how is the reticle leveled or squared off to the rifle itself.
If you look at a rifle where it has a bubble level included from the factory in the chassis and a bubble level built into the scope mount, more often than not the two levels will not be the same zero. So placing bubble levels or inclinometers on various points of a rifle platform will give different feedback to the shooter as to whether or not the system is level.
At which point people then focus on trying to mount a scope in a manner level to the rifle. What this really means is up to debate. Some people will focus on putting some type of level on the scope rail/base or the scope mount (one-piece) and then mount the leveled scope (reticle referenced against a plumb bob) to a leveled scope base or mount, and ignore anything on the chassis or stock.
This can get quite confusing to even experienced shooters.
The beauty in the LRA Send iT is that the unit can be zeroed by the operator after it is mounted. If the rifle is placed/fixed into a known level position, the Send iT is then calibrated or zeroed by the operator and it is ready to go.
So essentially, the shooter will position the rifle with the Send iT level attached such that the crosshair / reticle is completely level (use a plumb bob in the distance), go through the zeroing process on the Send iT, and now the level is correctly zeroed to the reticle being level to gravity. No messing around with other reference levels on other parts of the gun. It is a very quick process and only takes 30 seconds or so after the rifle is fixed into the level position the shooter desires.
In summary:
- Install scope such that the user is relatively confident the scope is ‘square’ or level to the rifle’s action.
- Install LRA on rifle platform.
- Set up a plumb bob at distance and position / manipulate the rifle until the reticle is in line with plumb bob.
- Zero the LRA Send iT.
- LRA Send iT level is now set to zero that corresponds to a level reticle that is squared to the rifle.
The LRA Send iT is available in a few different variants and the Send iT MV3 can be mounted in multiple different orientations including horizontal on left side of rifle, horizontal on right side, vertical positions, inverted, etc.
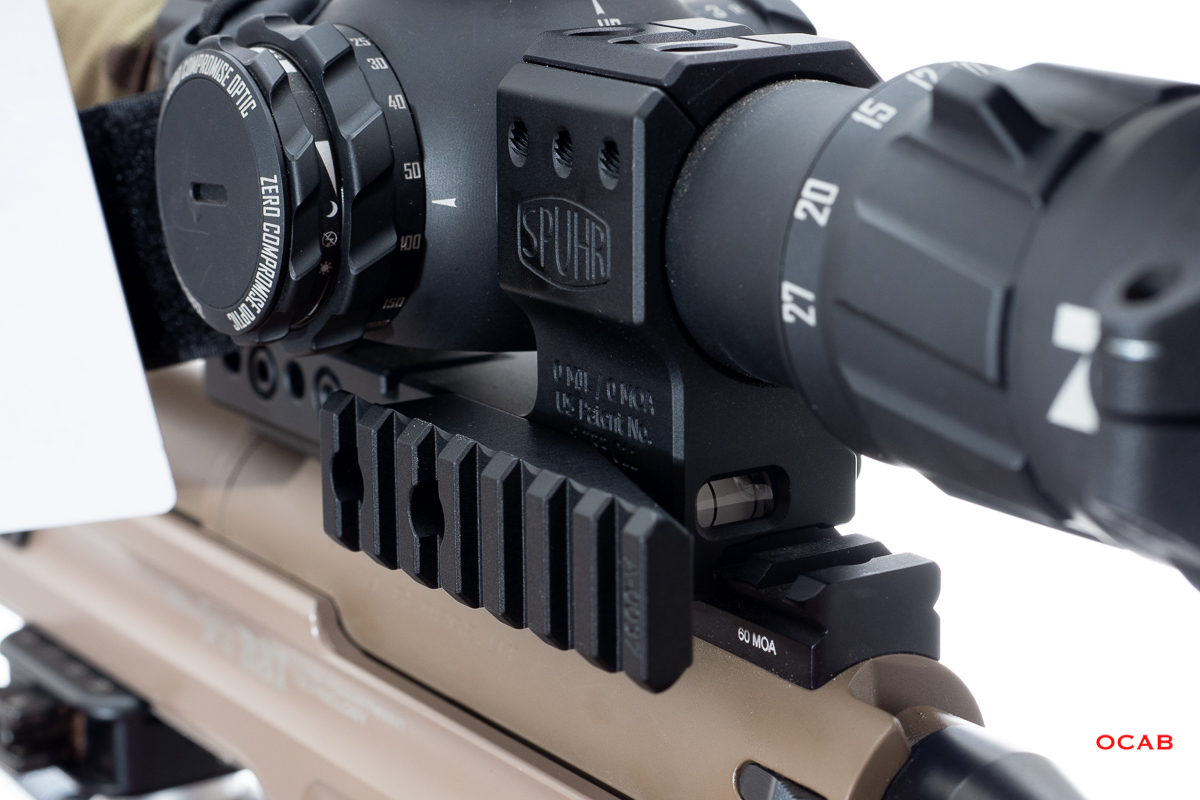
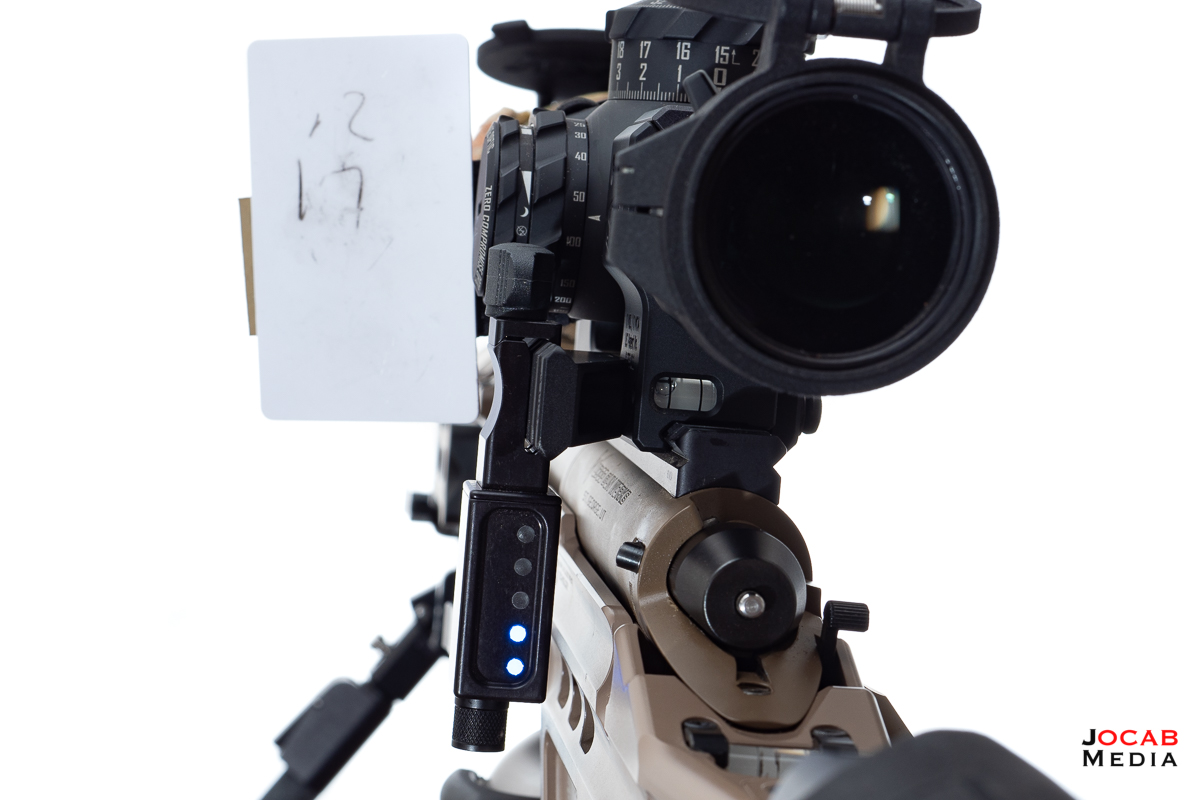
I acquired the LRA 90 degree Spuhr adapter which is designed to attach to the accessory points of a Spuhr ISMS and allow the Send iT MV3 to be mounted to the adapter in a vertical position.
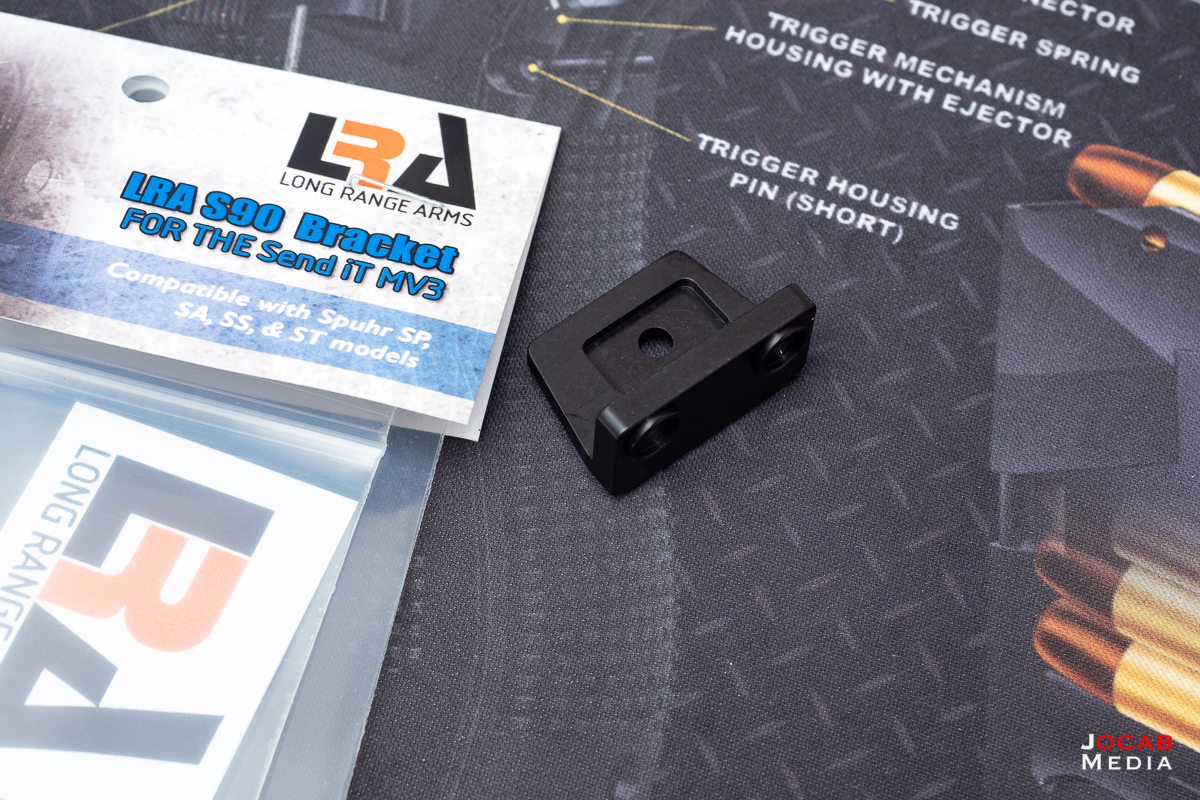
Unfortunately, I did not realize that the Spuhr ISMS SP-6002 accessory mount points in the rear were not all the way to the rear like on other ISMS models, and is closer to the center. This meant that the LRA 90 degree adapter would result in the Send iT MV3 being blocked by the parallax knob of the scope.
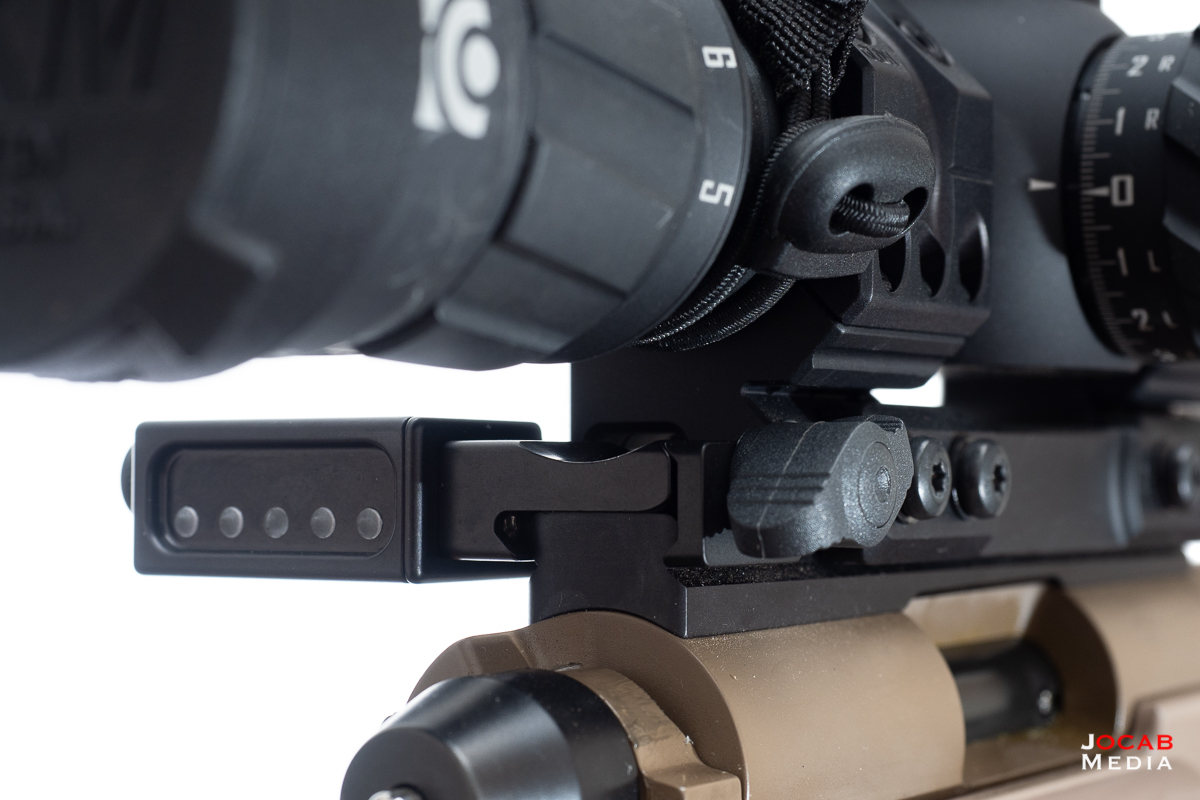
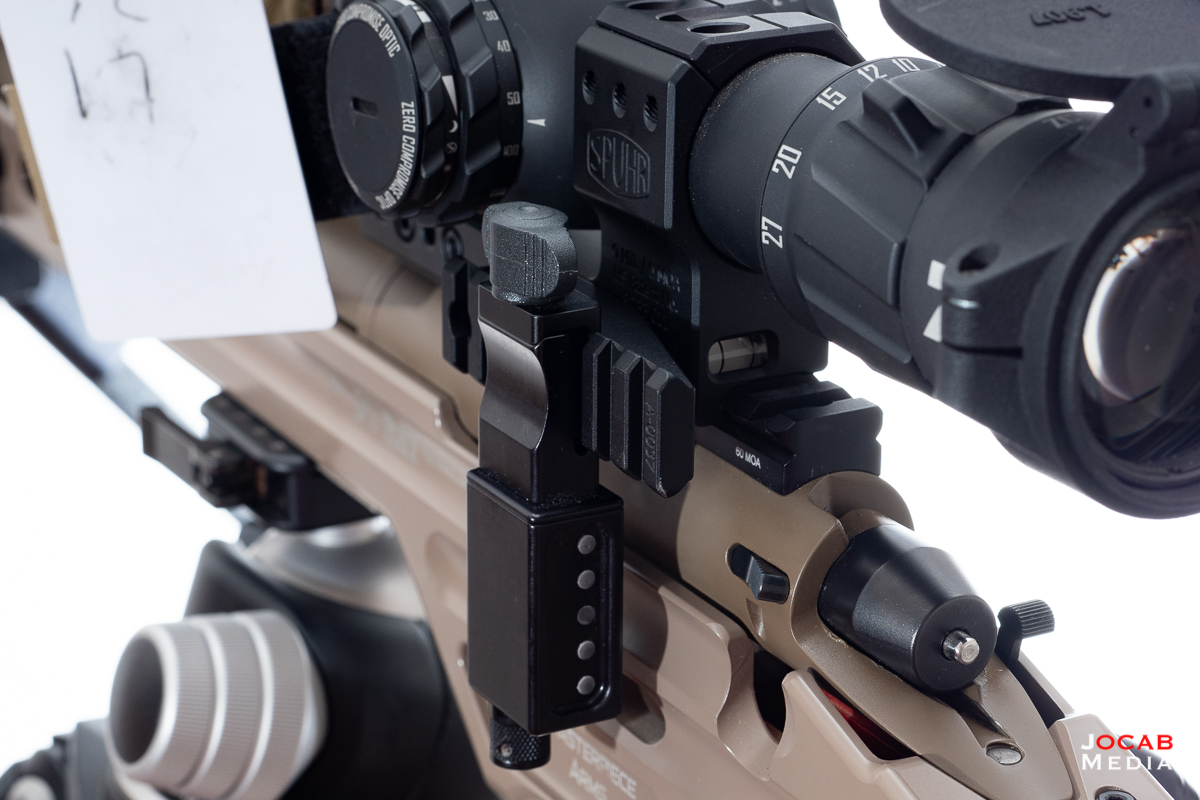
I had just enough space on the scope base of my Vudoo V-22 but the bolt handle was making contact with the Picatinny thumb screw of the Send iT MV3 slightly during operation. While I could grind down the thumb screw for clearance, i wanted a vertical mounting solution anyway since I am not a fan of levels protruding horizontally from the rifle.
I decided to acquire a Spuhr Picatinny rail accessory mount. Spuhr makes multiple Picatinny rails that can be attached to a Spuhr ISMS for mounting other accessories (e.g., red dot sight, laser designator). I acquired a Spuhr 20mm tall (75mm long) Picatinny rail to attach to the left side of the ISMS.
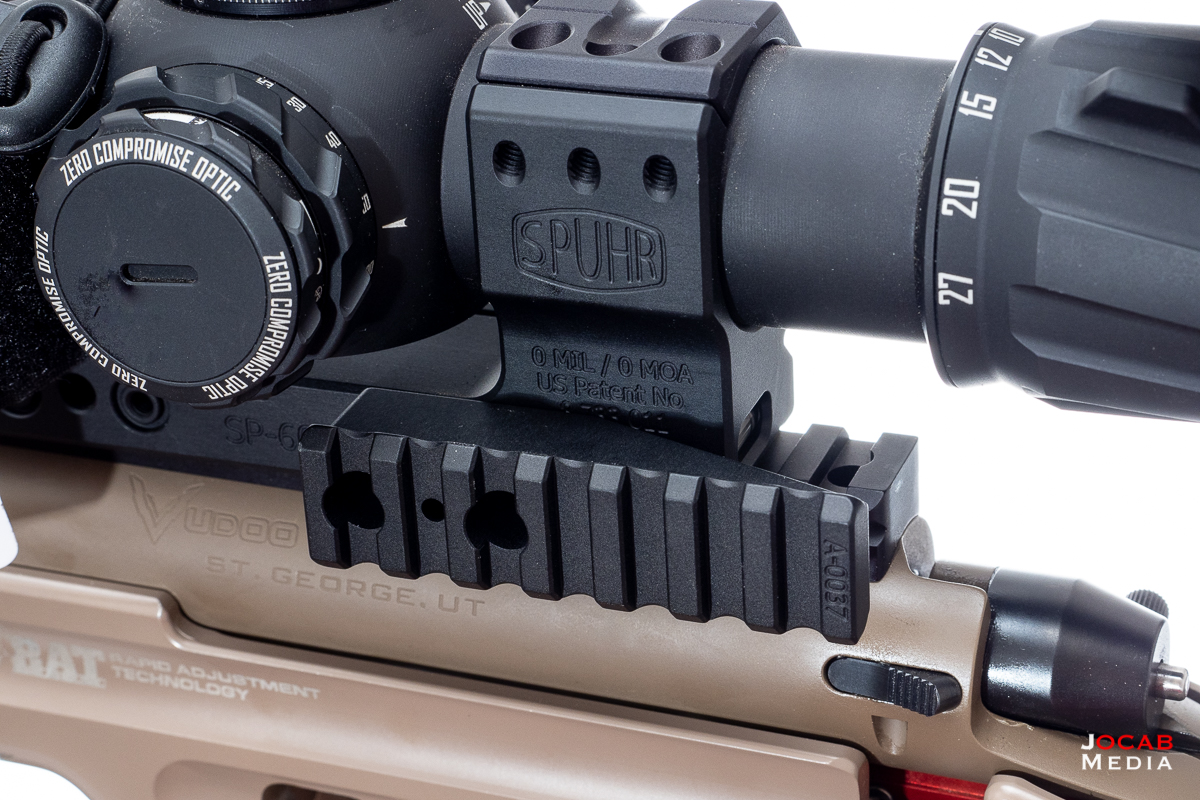
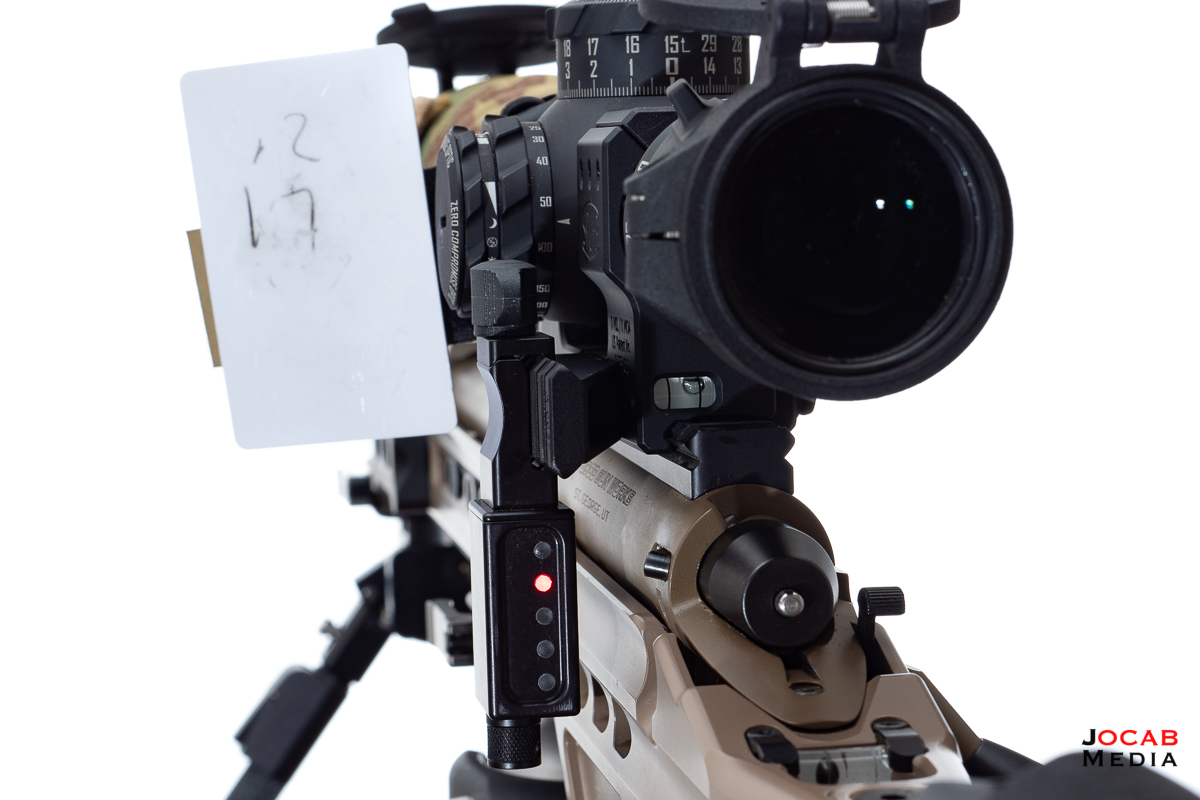
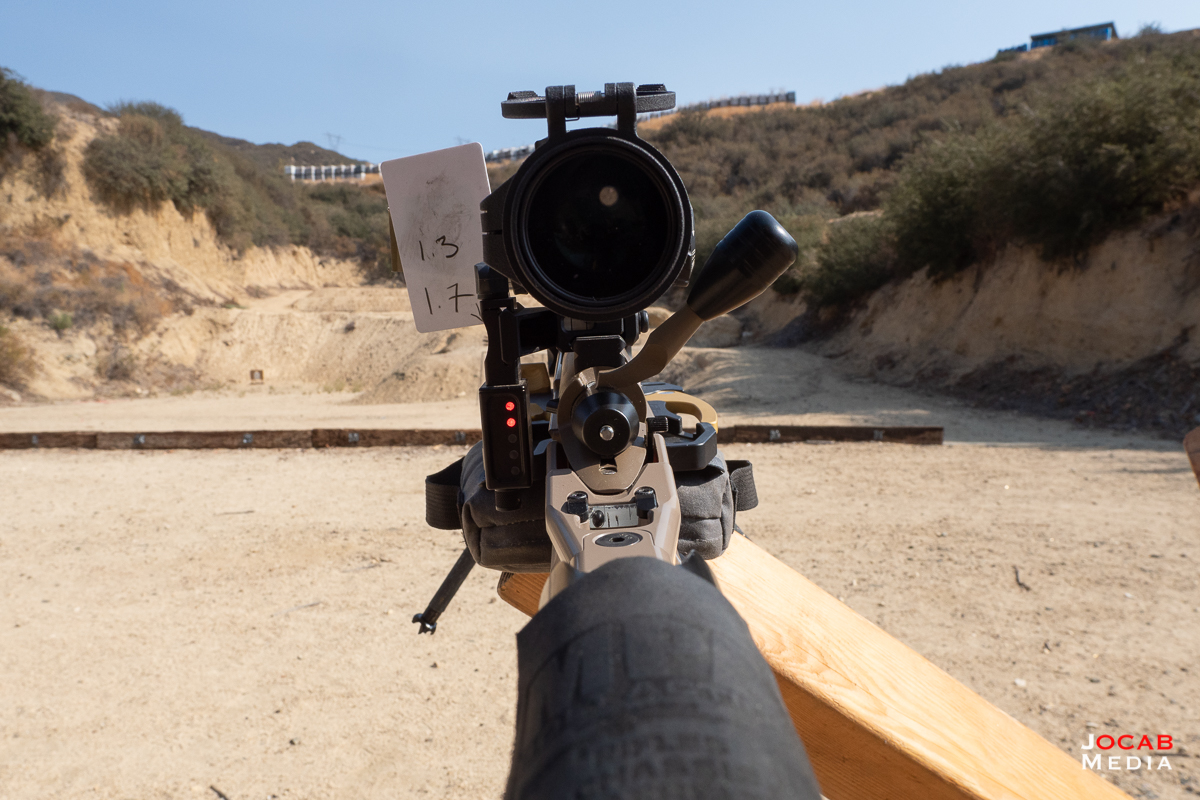
From there, I simply clamped the LRA Send iT MV3 to the rail with the level vertical and running towards the 6 o’clock position.
Once the Send iT level is mounted and zeroed, it’s intuitive to use. In the standard horizontal position, if the rifle is canted towards the right, the blue lights towards the left will light up and if the rifle is canted towards the left, the red lights on the right will light up.

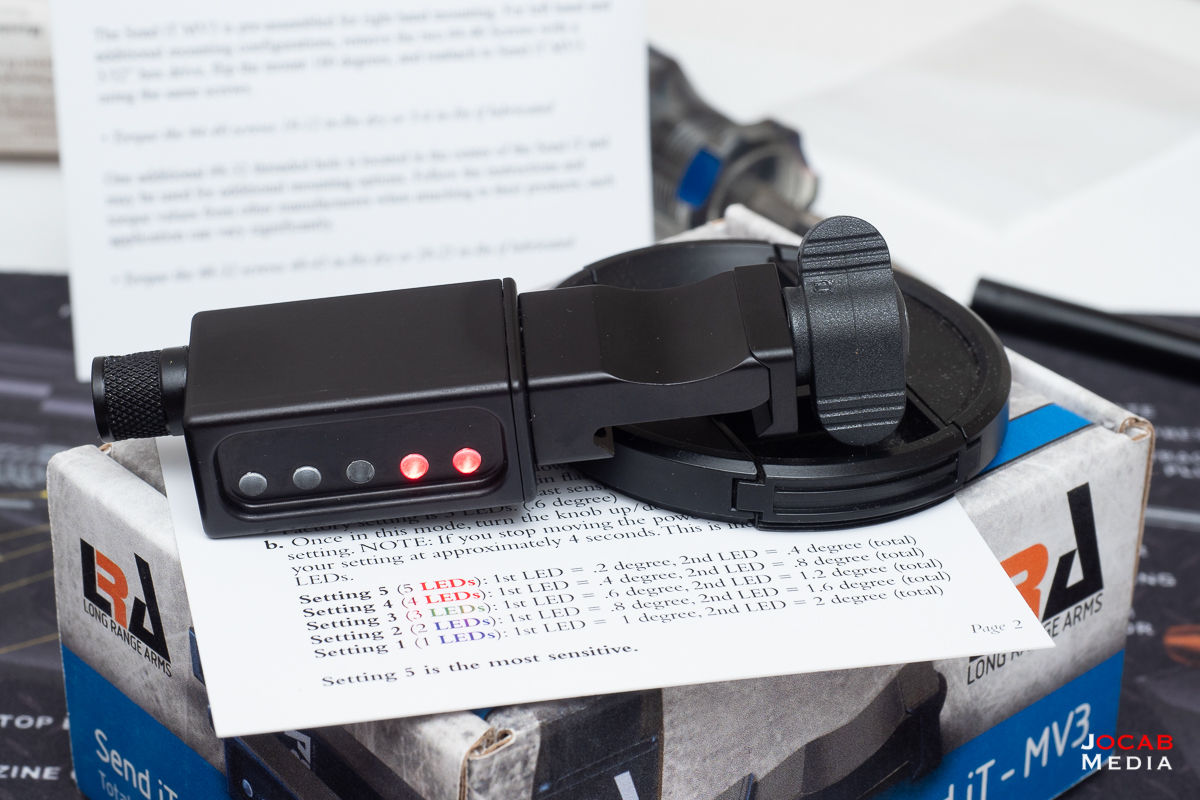
The reason why I find this intuitive is due to how I perceive the indicators. Regardless of the color of the LED lights, if the lights are on the left, it means I need to maneuver or cant the rifle towards the left to level it out. If the lights are on the right, it means I need to maneuver or cant the rifle towards the right to level it out.
In a vertical mounted orientation, the same concept applies.
If the LED lights are lit towards the top, then I need to cant the rifle clockwise (up). If the LED lights are lit towards the bottom, then I need to cant the rifle counter-clockwise (down).
Essentially, the operator will cant the rifle in the direction of the lit LED light(s) until the center (green) LED is lit.

The LED lights are easily visible in bright daylight on maximum brightness.
I am happy with the Long Range Arms Send iT MV3 so far as I have run it in a couple of matches and it keeps well aware of my rifle cant. The fact that the Send iT can be zeroed by the operator after it is mounted and the rifle is placed in what the operator feels is a level position makes the Send iT very effective.
My only complaint is LRA’s customer service in that I didn’t get any response to an inquiry I made about the 90 degree Spuhr adapter design and whether or not they will manufacture an adapter that offsets the MV3 more to the rear for Spuhr mounts that don’t have the mounting hole flush to the rear.
The Long Range Arms Send iT MV3 currently sells for $230 USD and is quite an investment considering other bubble levels for optics sell for far less. But the Send iT is definitely more advanced than standard bubble levels and I am confident that anyone that uses one will see the advantages of the Send iT over traditional levels.
Comment on this post