
I ended Part 1 of the Savage 10FP project series of articles by stating that I would continue the project by ordering a new barrel for the Savage. On 2016-10-18, I ended up calling Northland Shooters Supply to place an order for the barrel and spoke with James Kessler, the current proprietor of NSS.
When James took my order, he did indicate that he was out-of-stock on all 6.5 Creedmoor barrels. I actually thought he was reaming the barrels himself, but I believe he gets them reamed and chambered directly from Shilen (and Criterion). He told me the possible lead time on both Criterion and Shilen and he actually told me that he was unsure of when Shilen would get him his next shipment of barrels and Criterion might actually be quicker. While I was willing to try Criterion on the Savage (I have a Criterion on a rebuilt M1 Garand), I really wanted to give Shilen a whirl so I still went with Shilen even with the unknown lead time.
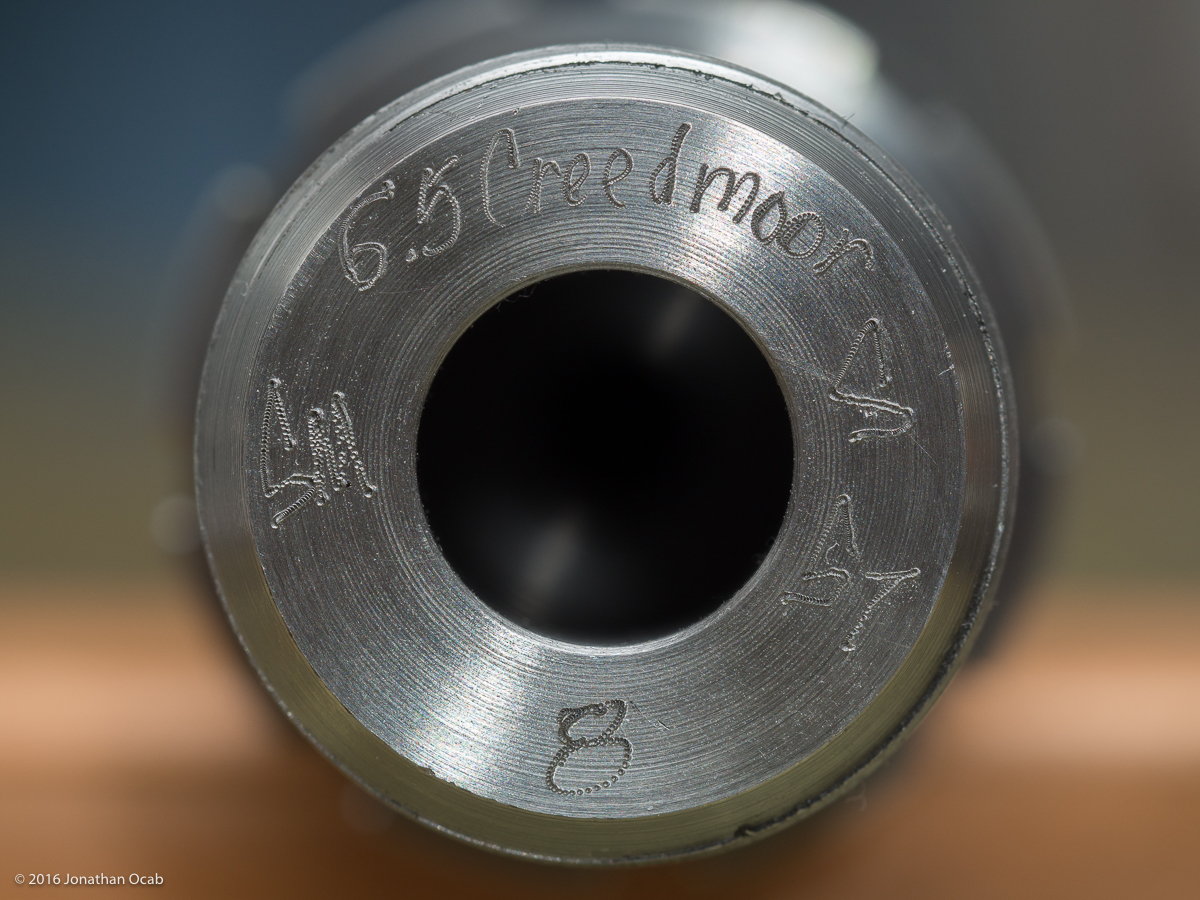
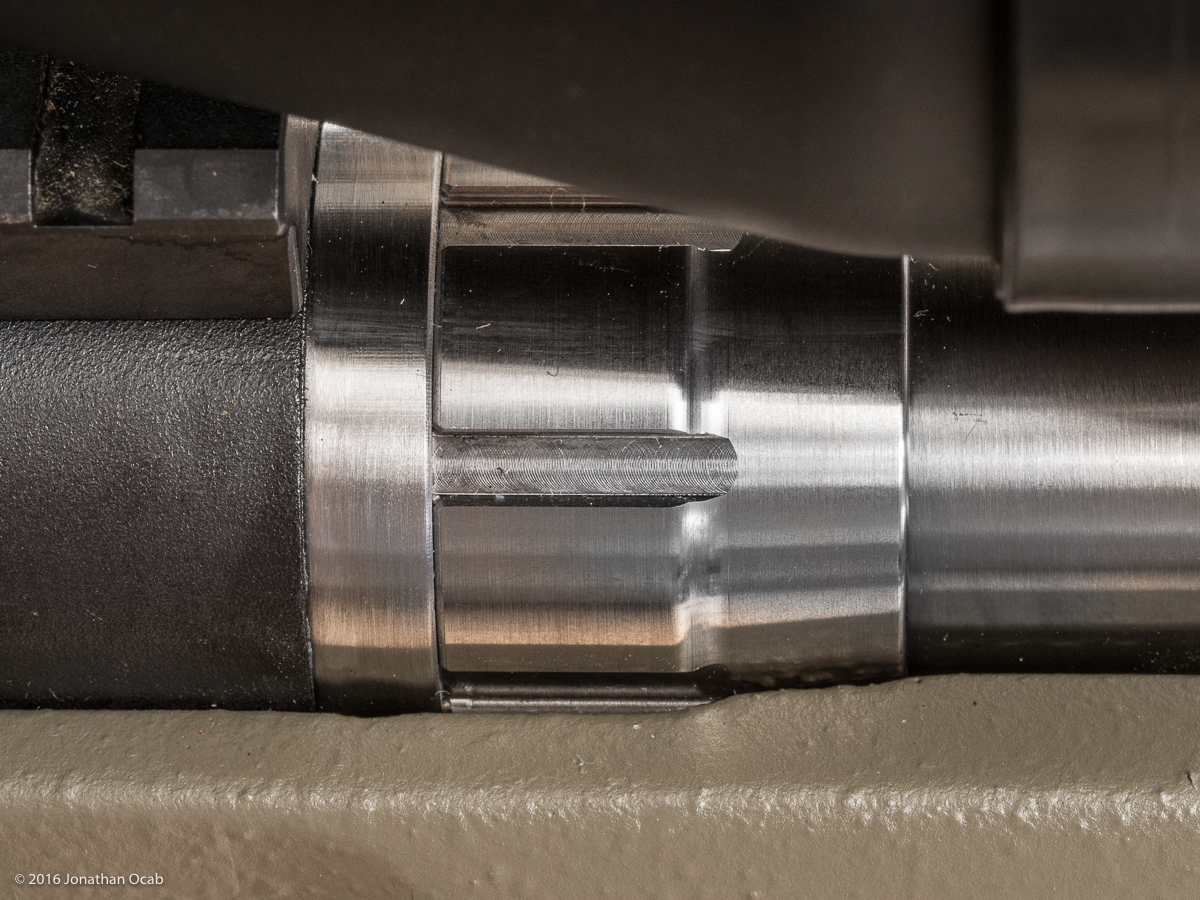
I specified that I wanted a Shilen stainless steel Select Match barrel chambered in 6.5 Creedmoor, 24 inches in length, 1-8″ twist, recessed crown, with a Savage Varmint contour for a small/standard shank Savage action.
The 26″ length is the defacto standard he stocks, so the 24″ length I was asking for pretty much implied that I would be committed to the order (no cancellations, if I understood correctly) which was fine with me.
Since I am rebarreling the rifle, it made sense to replace the factory nut and lug with a more precisely produced nut and lug, so I also requested to include a Northland Shooters Supply barrel nut and recoil lug for Savage actions on the order.
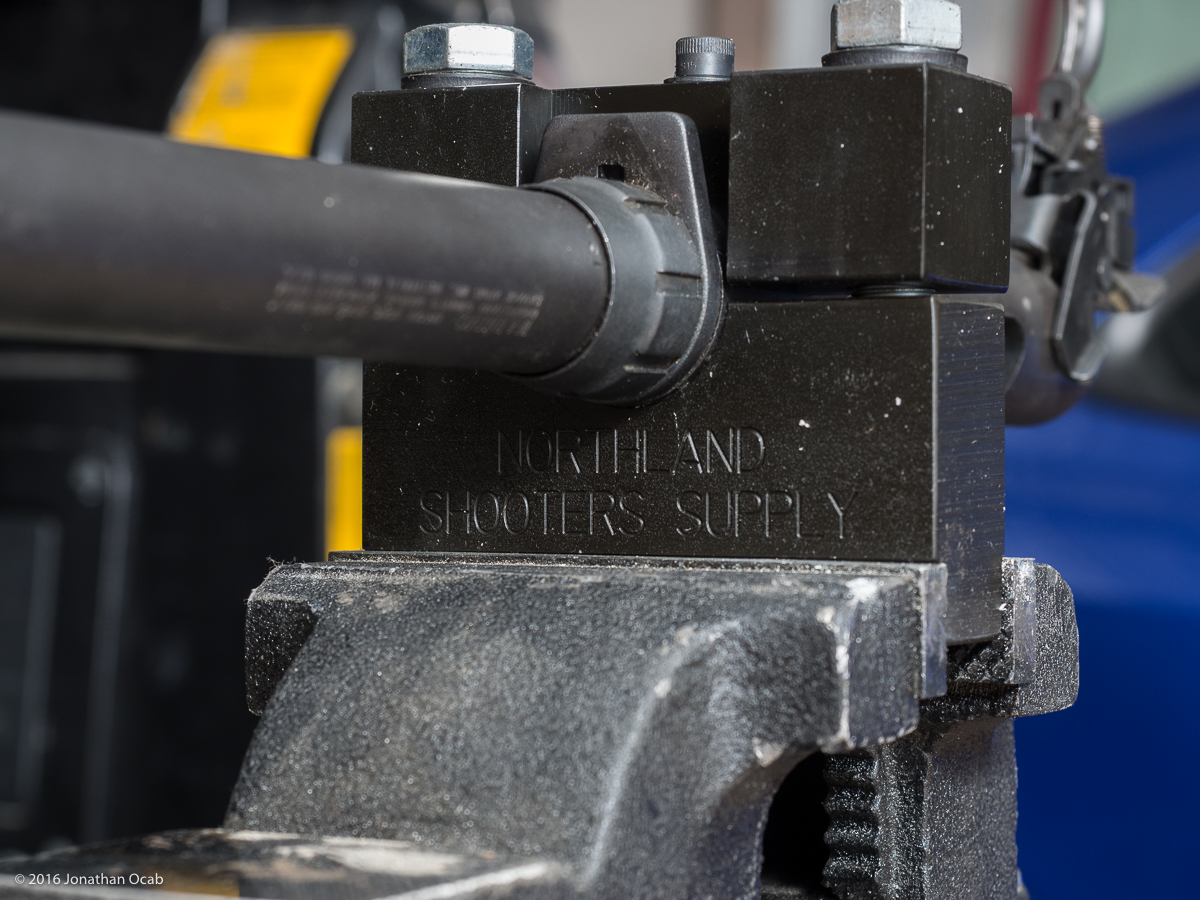
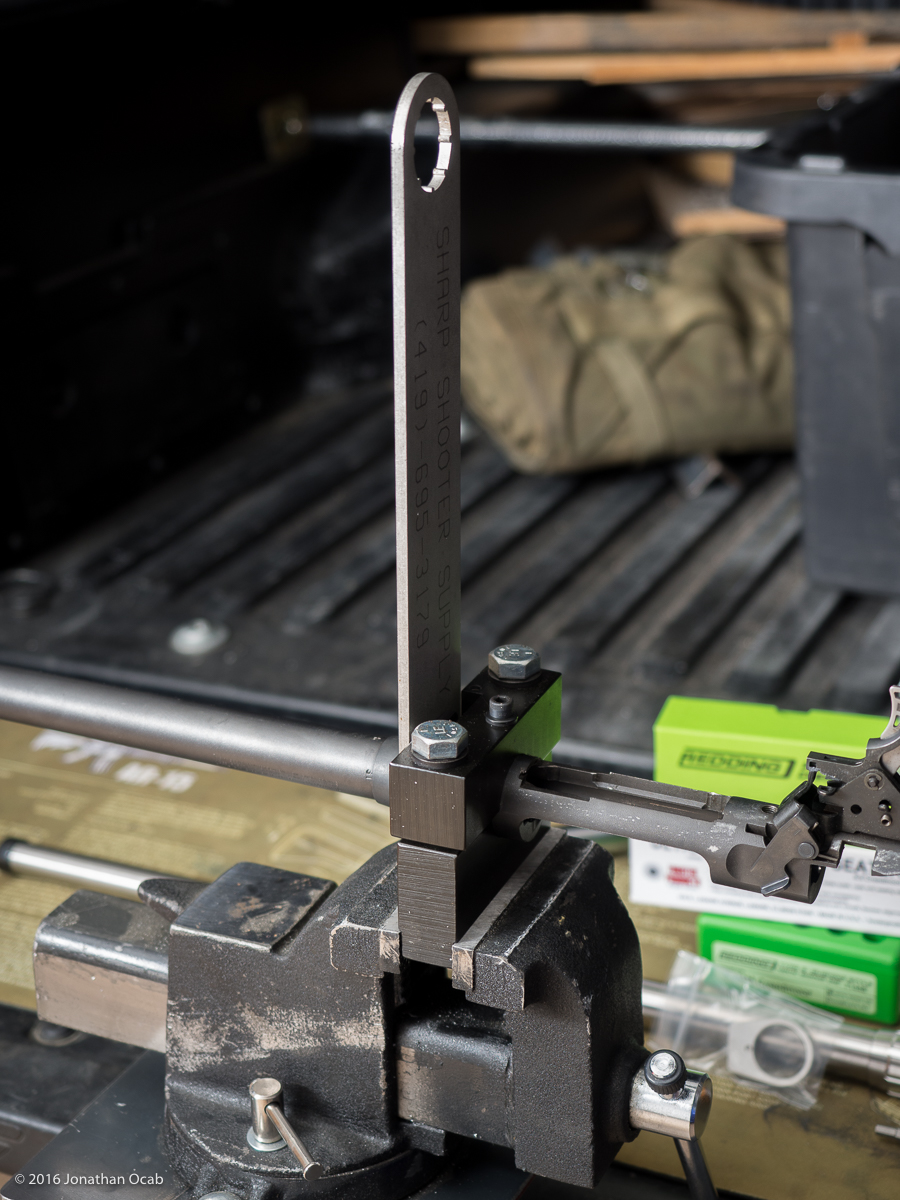
I also requested the NSS Savage action wrench / vise block because I don’t have an actual barrel vise and have in the past just made my own barrel vise blocks out of a hard wood. For this specific rifle, I was unable to get the barrel vise blocks to clamp down tight enough to break the barrel nut loose with my Sharp Shooter Supply Savage barrel nut wrench. So I definitely needed an action wrench. Granted I could have purchased a barrel vise from Brownells, but I prefer the stability of an action wrench.
I was hoping to receive the barrel before the Christmas break, but was expecting the backorder to stretch into 2017. But I ended up getting an email from James at NSS on 2016-11-08 to contact him at my convenience. I gave him a call and it just so happens he had my barrel ready, but Shilen messed up one specific item. They put on an 11 degree target crown instead of the recessed crown that I had asked for. He asked me if I wanted that to be fixed and I just told him to go ahead and ship the barrel as is since I didn’t really care about the crown style. I use 11 degree target crowns on my White Oak Armament service rifle barrels and I’ve actually smacked my practice gun’s muzzle against concrete a few times and the 11 degree crown provides plenty of protection.
So after the call, he got my barrel on the big brown truck and I received the new barrel, barrel nut, recoil lug, and the NSS action wrench the following Monday (2016-11-14), less than a month from when the order was placed.
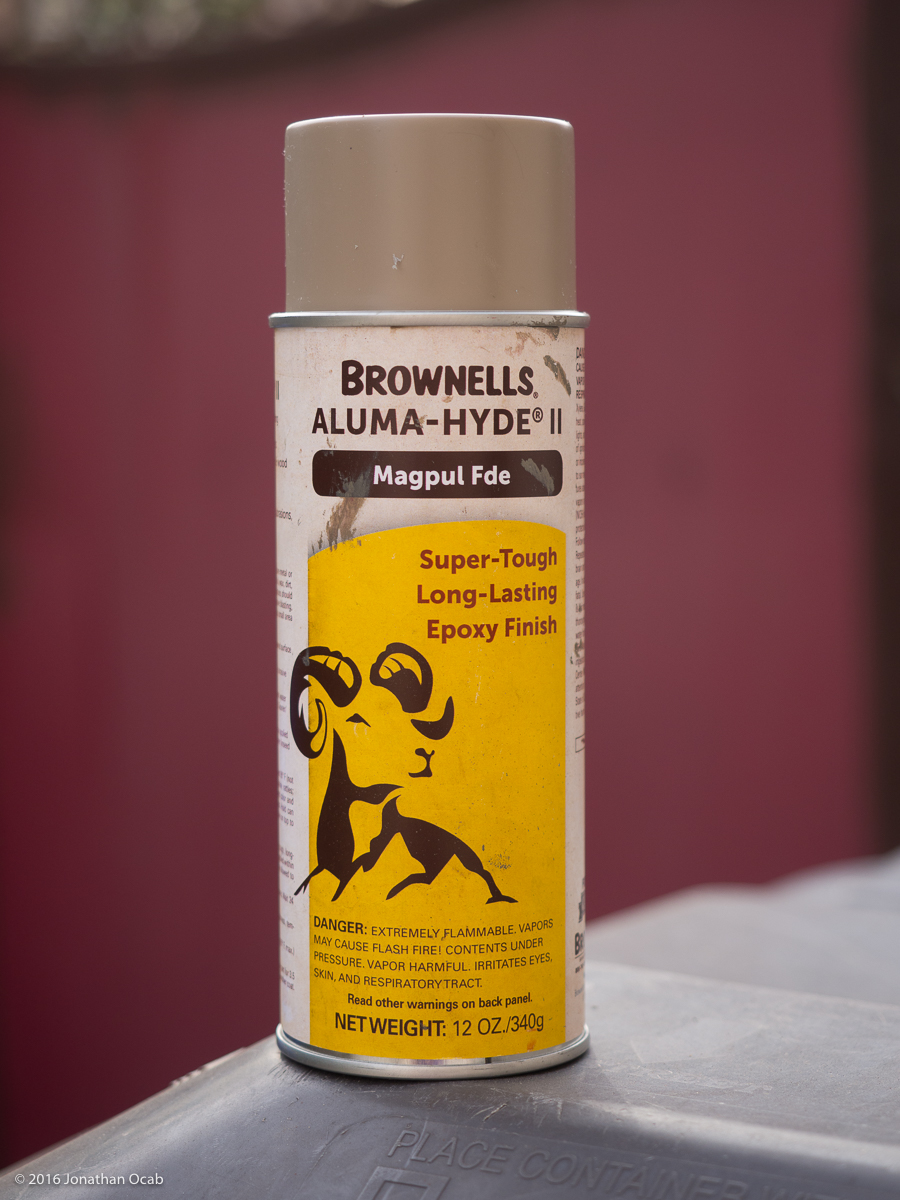
The weekend following the notice that NSS shipped out the barrel (and before it arrived), I ended up tearing down the Savage 10FP so I could repaint the stock. I had originally planned on getting the whole thing Cerakoted locally, but ended up changing my mind to go with a simpler and cheaper route: Aluma-Hyde II.
The DIY digital camouflage style pattern I have on the stock now was done in Aluma-Hyde II with OD Green and Desert Tan and I have been quite pleased (and surprised) at how resilient Aluma-Hyde II is to solvents.
I have spilled some copper solvents and other cleaners on the stock in the past and it hasn’t been marred at all. I would have kept the stock as is, but I honestly didn’t realize how light in color Aluma-Hyde II Desert Tan ended up being. Had I gone with something darker like Coyote or Earth Brown I might have kept the paint job as is.
I didn’t have any Coyote on hand and ended up placing an order with Brownells for a can of Coyote and a can of what they are calling Magpul FDE. I searched online and people indicated that Aluma-Hyde II Coyote is extremely close to the actual Flat Dark Earth Magpul products. I honestly wasn’t trying to match Magpul products, but it wasn’t clear what the shade was like for Aluma-Hyde II Coyote (very difficult to gauge with online photos unless people post items in all shades in the same photo).
After receiving the both Coyote and Magpul FDE Aluma-Hyde II, I did a quick spray test and from what I could tell on cardboard, the Aluma-Hyde II Coyote and Magpul FDE are nearly identical. I decided to run with the Aluma-Hyde II Magpul FDE paint on the McMillan A-5 stock. Even though the weather in Southern California took a dip in recent weeks, the weekend I decided to paint hit temperatures in the mid-80s (Fahrenheit), so that was fortunate for me in terms of painting since it allowed me to let it sit outside in the sun after painting.
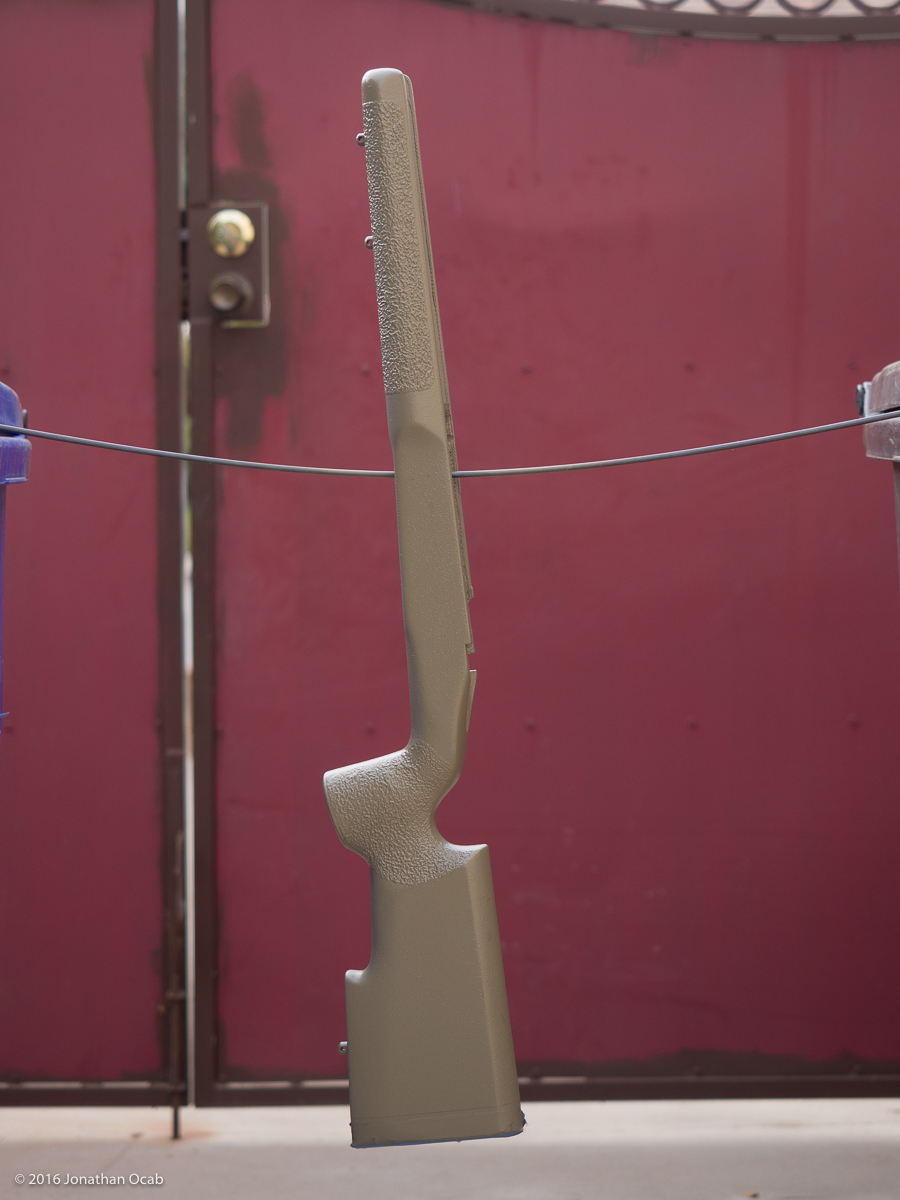
I didn’t bother to try to strip the original paint job on the McMillan stock. I just cleaned it with acetone and hit it with an air compressor then went to painting. If I decide to repaint this stock again, I am definitely going to try and remove the DIY paint job.
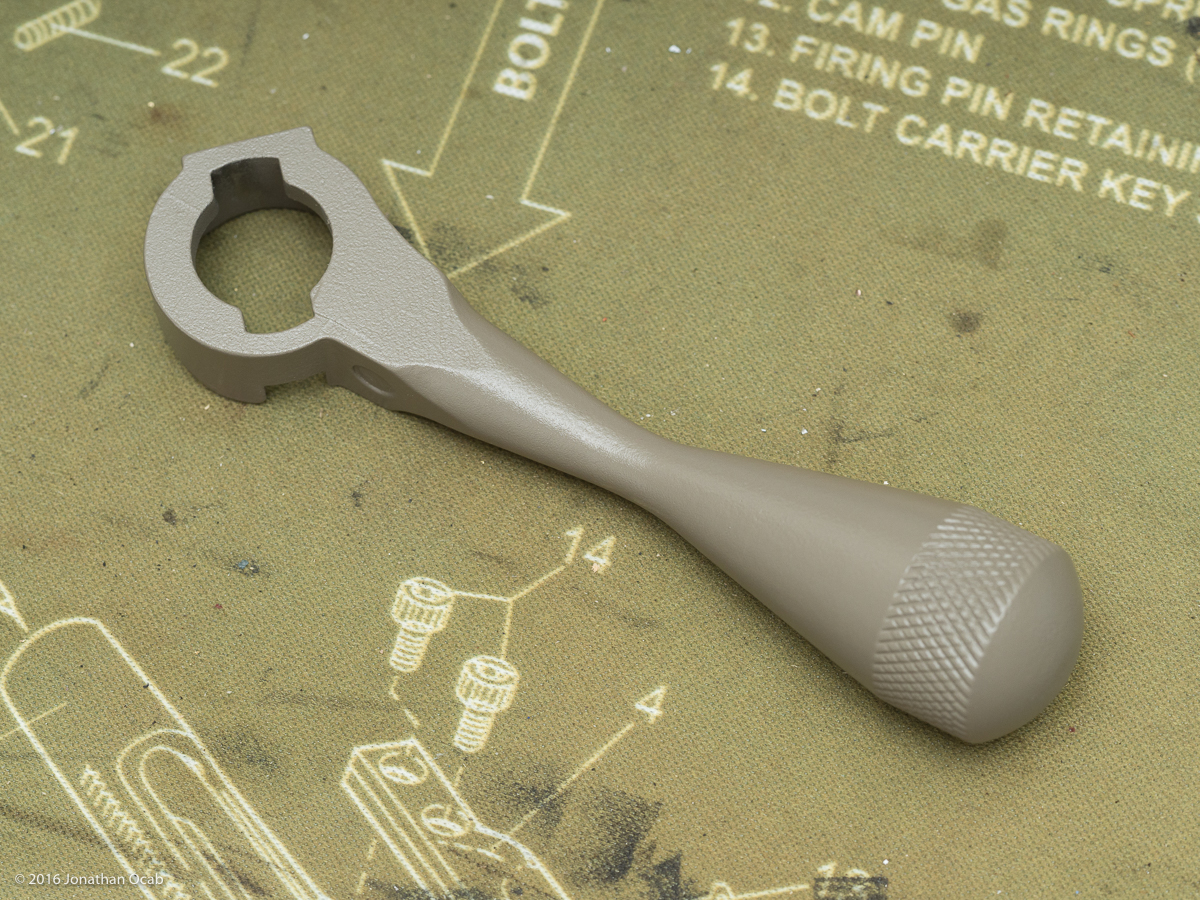
I also painted the bolt handle which was sourced from Sharp Shooter Supply and was purchased in the white back in 2004 or so. I had painted it black with Krylon and it was wearing away on the knurled surfaces so I stripped the old paint off the bolt handle and sprayed it with the Aluma-Hyde II.
During the time I was waiting for the barrel to ship from Northland Shooters Supply, I was also acquiring several items that will be needed in the cartridge transition since this will be my first 6.5 Creedmoor rifle. These items include:
- Redding S-Type Neck Sizing Die for 6.5 Creedmoor
- Redding Body Sizing Die for 6.5 Creedmoor
- Forster Ultra Micrometer Seater Die for 6.5 Creedmoor
- Redding .288″ titanium sizing bushing
- Manson Precision 6.5 Creedmoor Go and No-Go gauges
- LE Wilson trimmer (new and neck sized only) shell holders for 6.5 Creedmoor
- Hornady 6.5 Creedmoor 140gr ELD Match ammo
- Prime 6.5 Creedmoor 130gr ammo
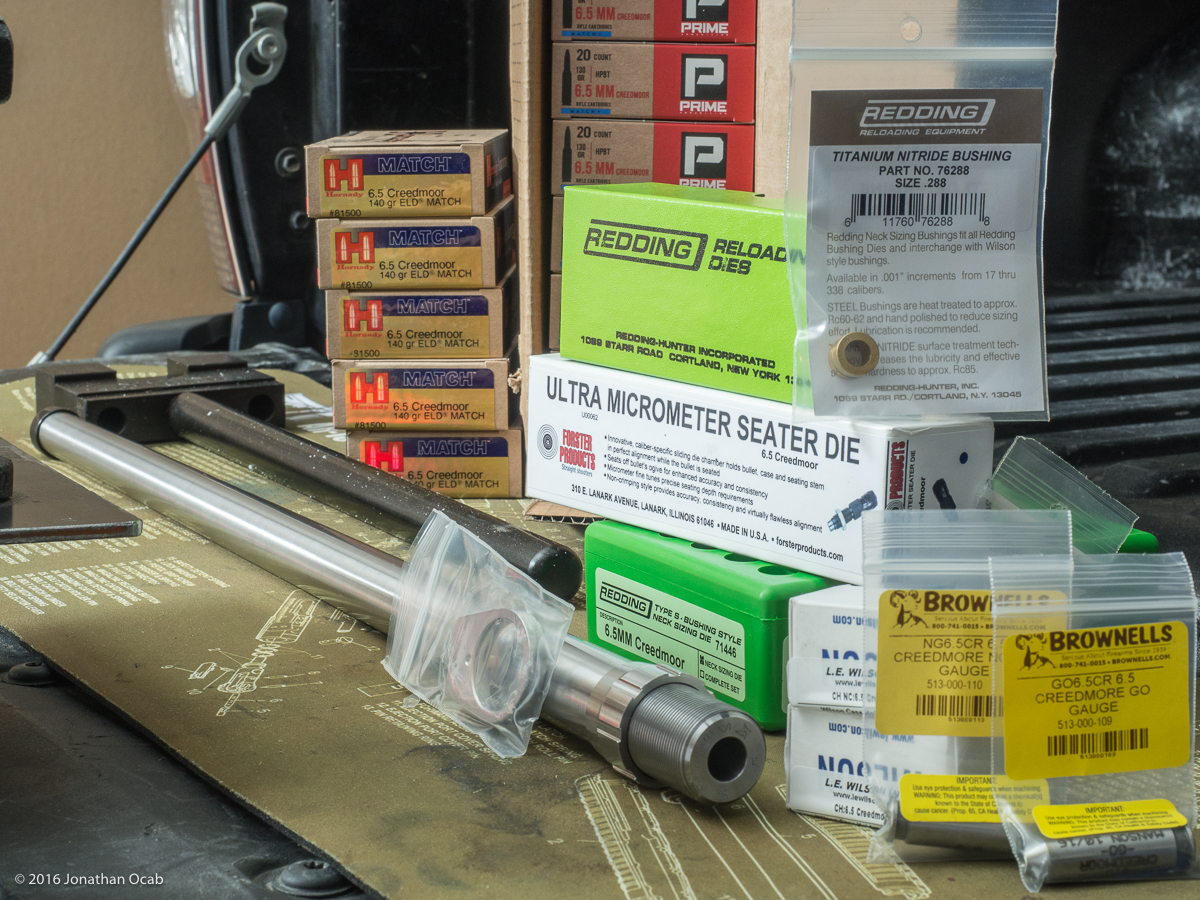
I was going to acquire some brass, but decided on just getting some factory ammunition to source brass for reloading. I needed to get some known good ammunition in order to create a baseline with the new barrel, anyway. So it made sense to just get a couple hundred rounds of factory ammo as an initial source of brass.
I have yet to acquire some 6.5 bullets, but I am looking at Berger 130gr AR Hybrid OTM Tactical and Berger 140 gr Hybrid Target. Although Hornady does claim the 140gr ELD Match has a higher G7 BC than the Berger line of bullets. But even then, Hornady has been known to have some inflated BC values (22cal 75gr BTHP) and BC on paper is not be all, end all.
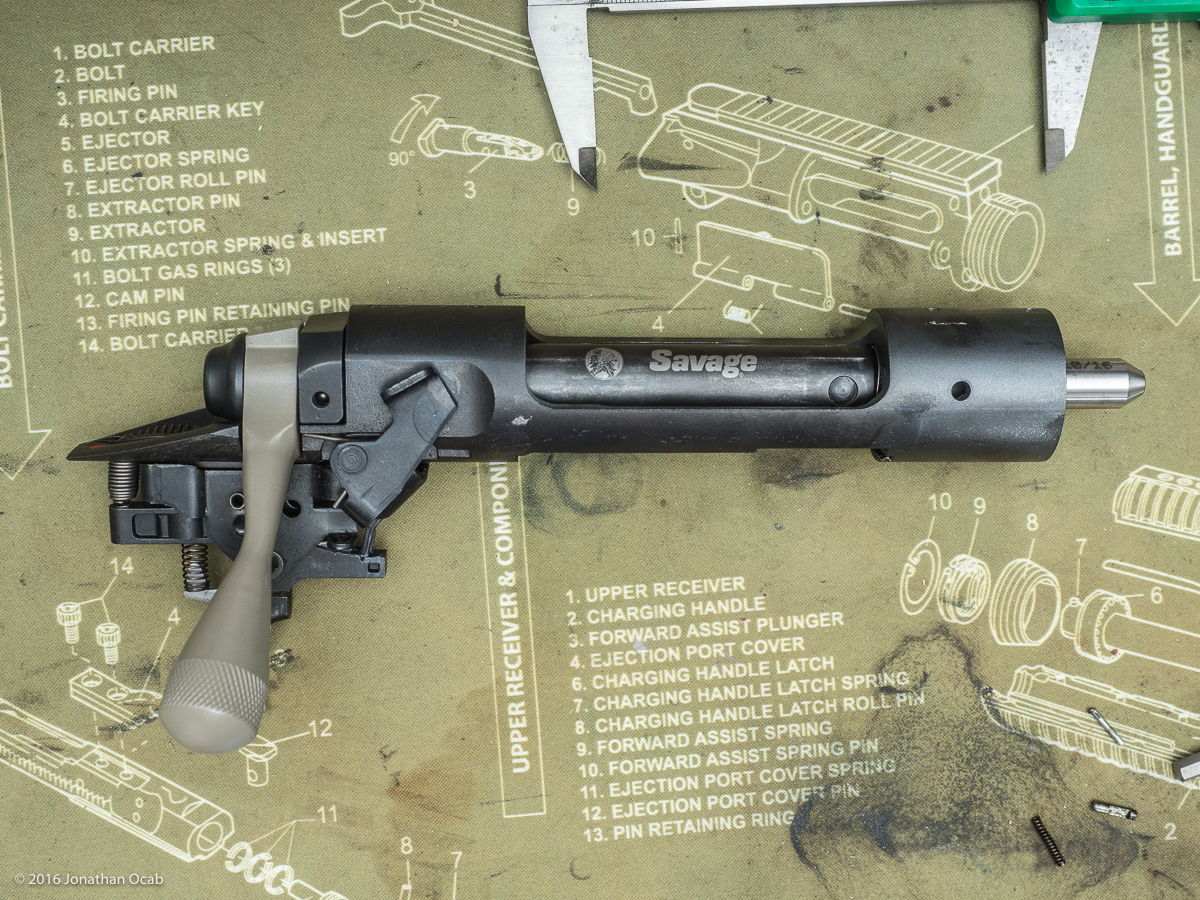
Anyway, I received the barrel items and action wrench from NSS and immediately removed the factory barrel from the receiver to clean up the action.
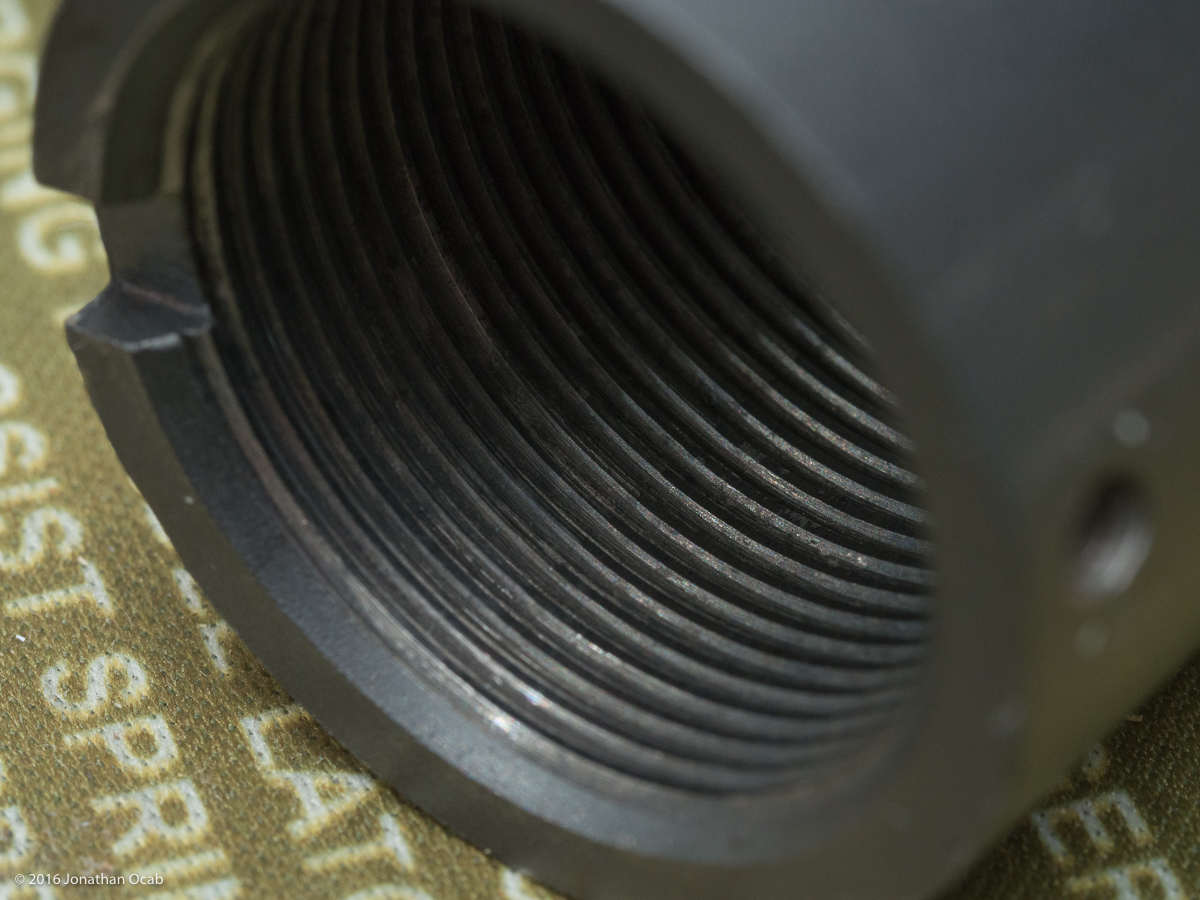
I pretty much wanted to clean off all of the crud from within the receiver where the bolt lugs would sit as well as all of the anti-seize compound put on the receiver threads by the factory before I installed the new barrel.
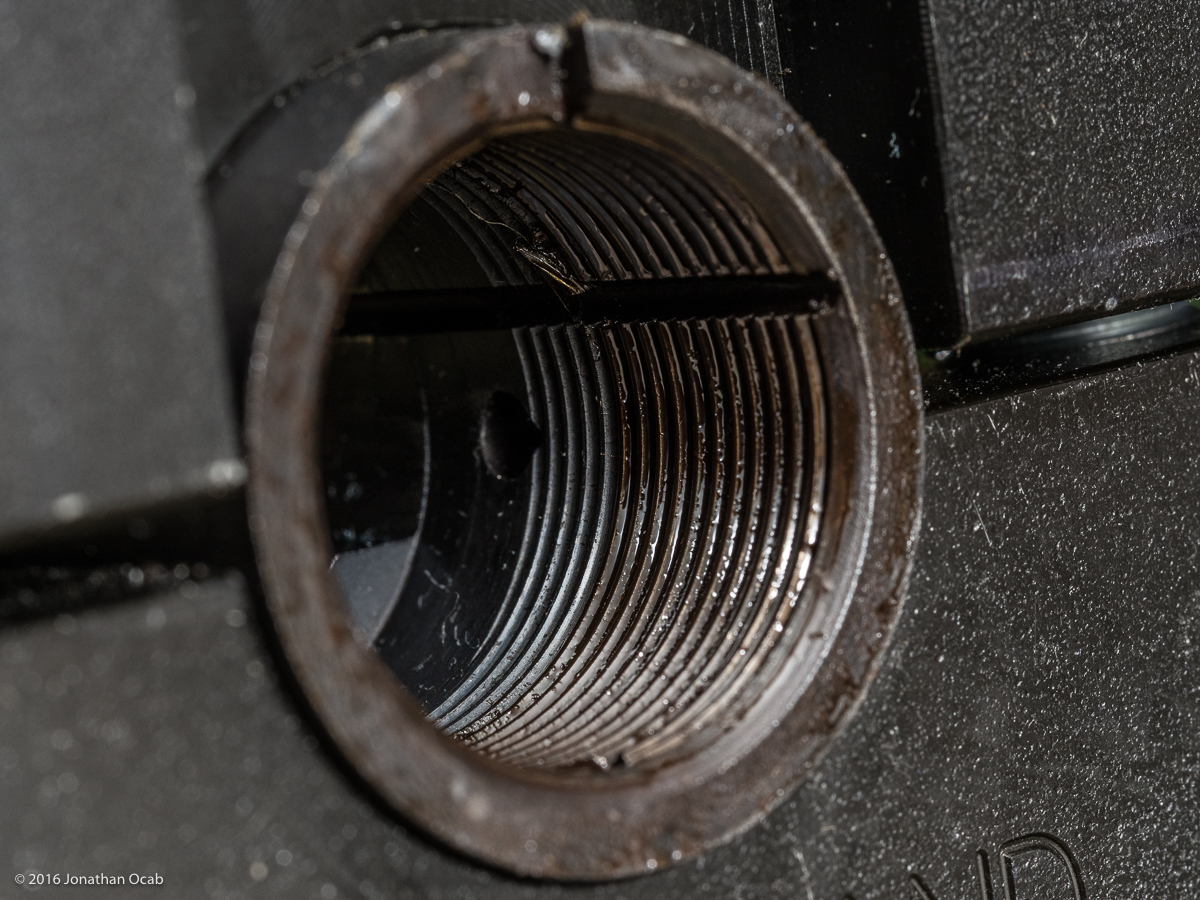
Some liberal cleaning with MPro-7 and a nylon brush, along with break cleaner made quick work of the gunk on the receiver threads.
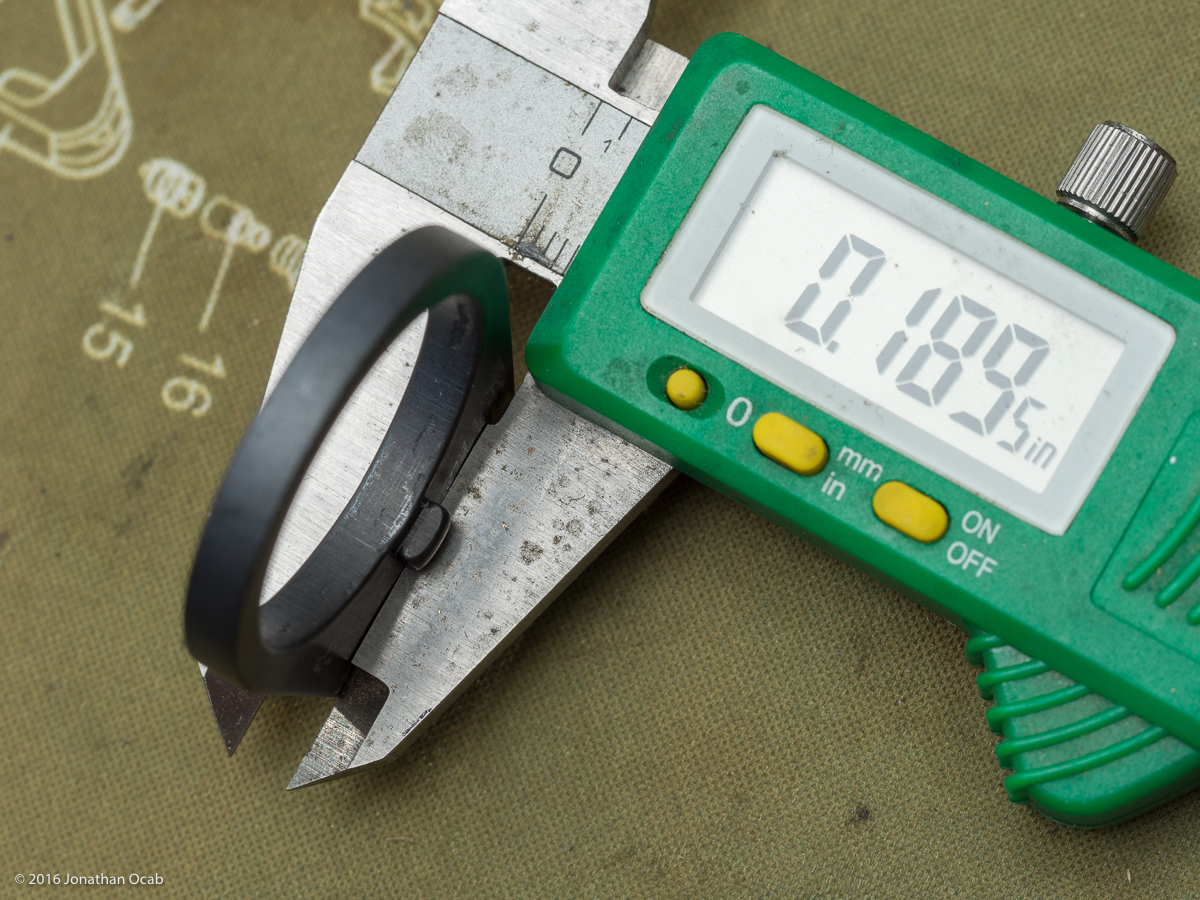
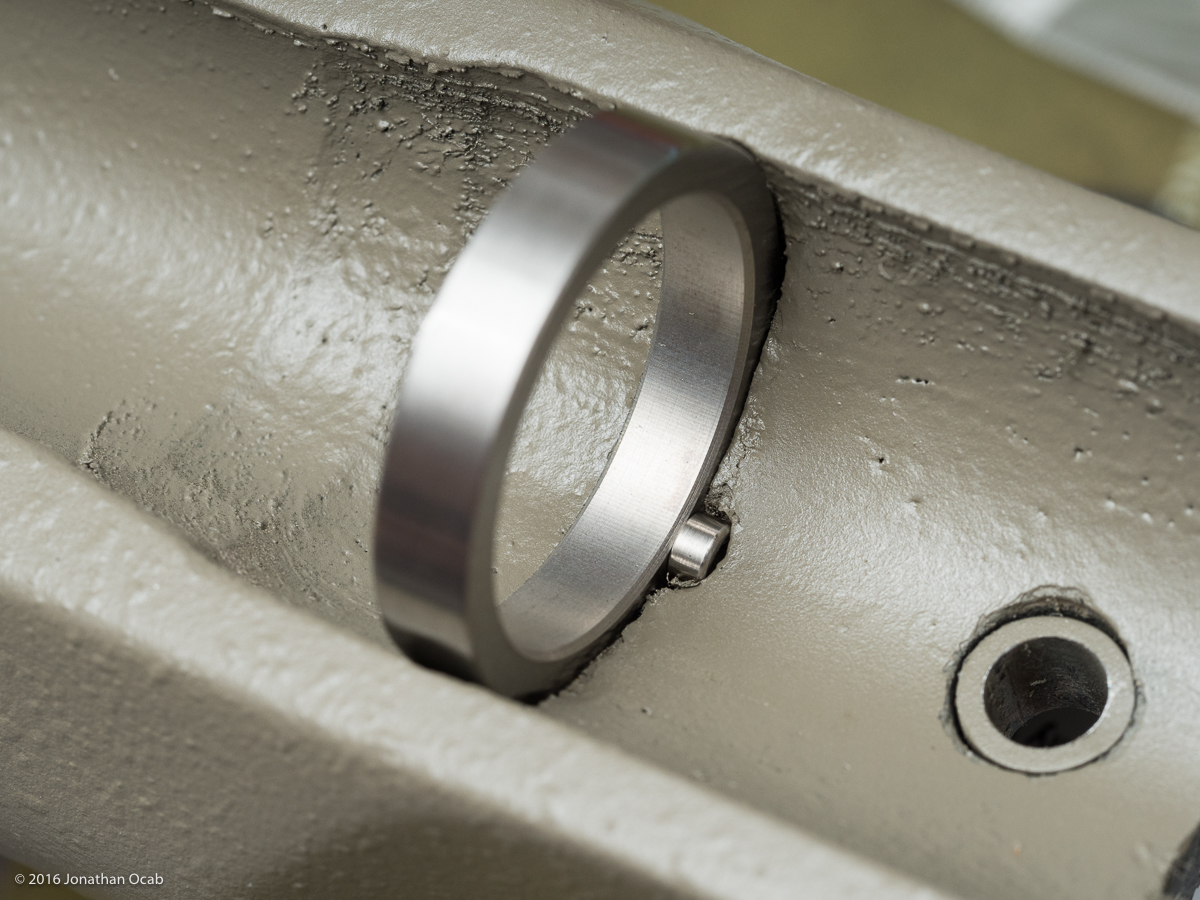
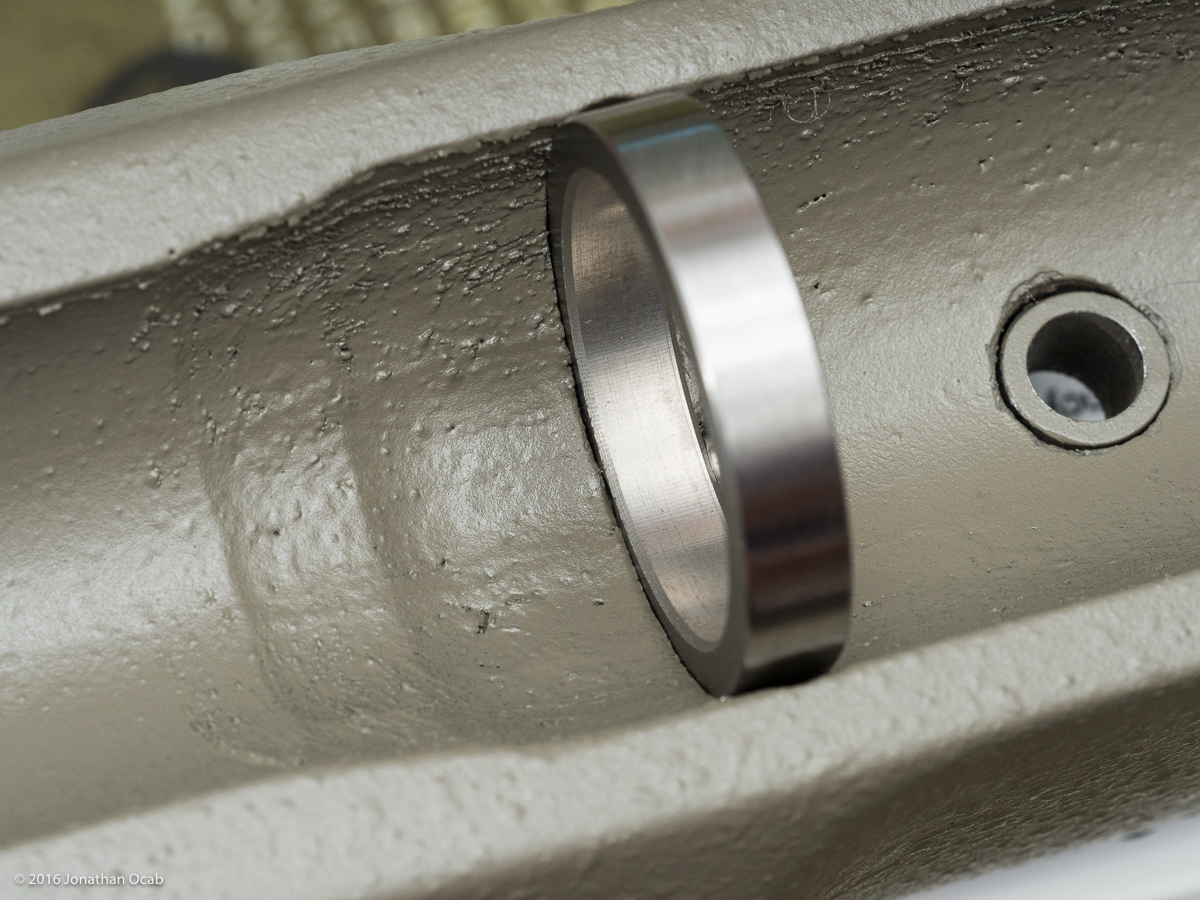
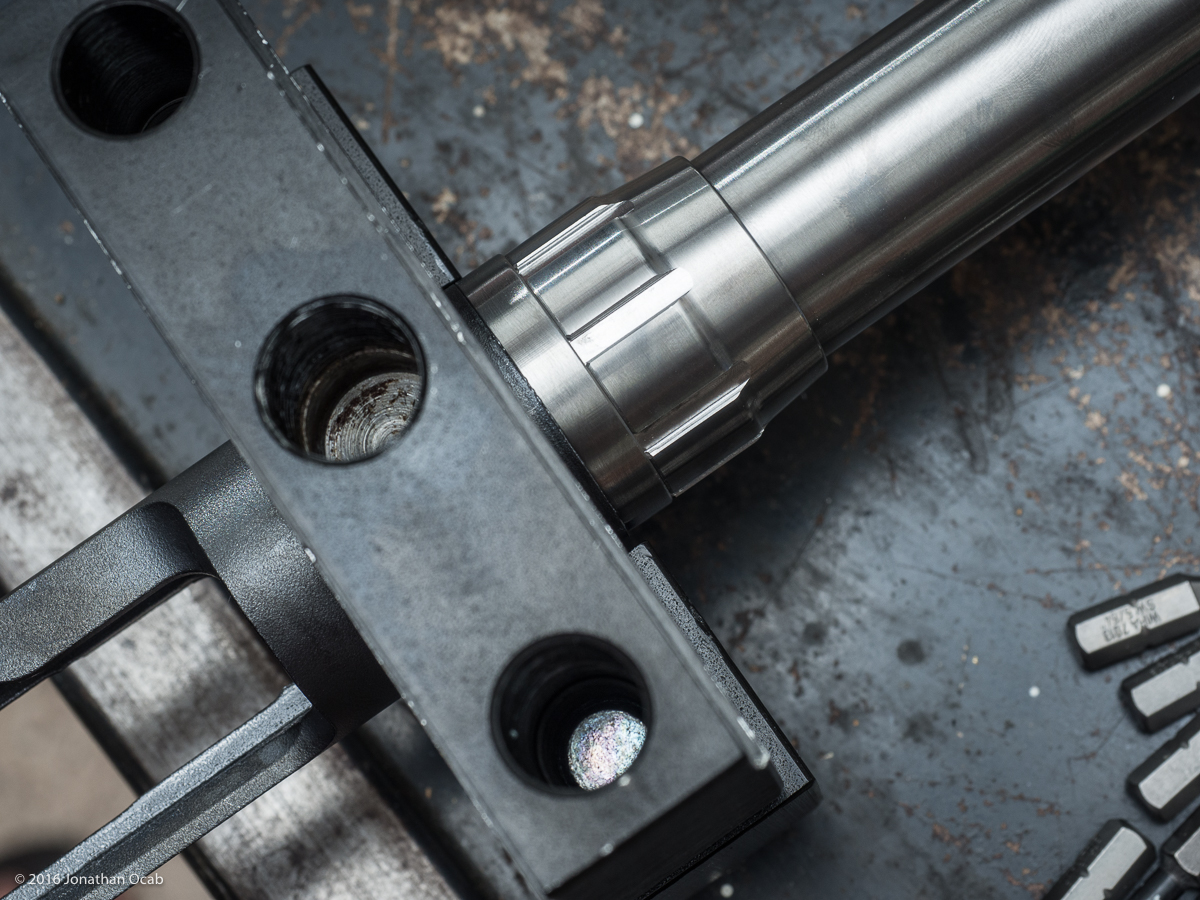
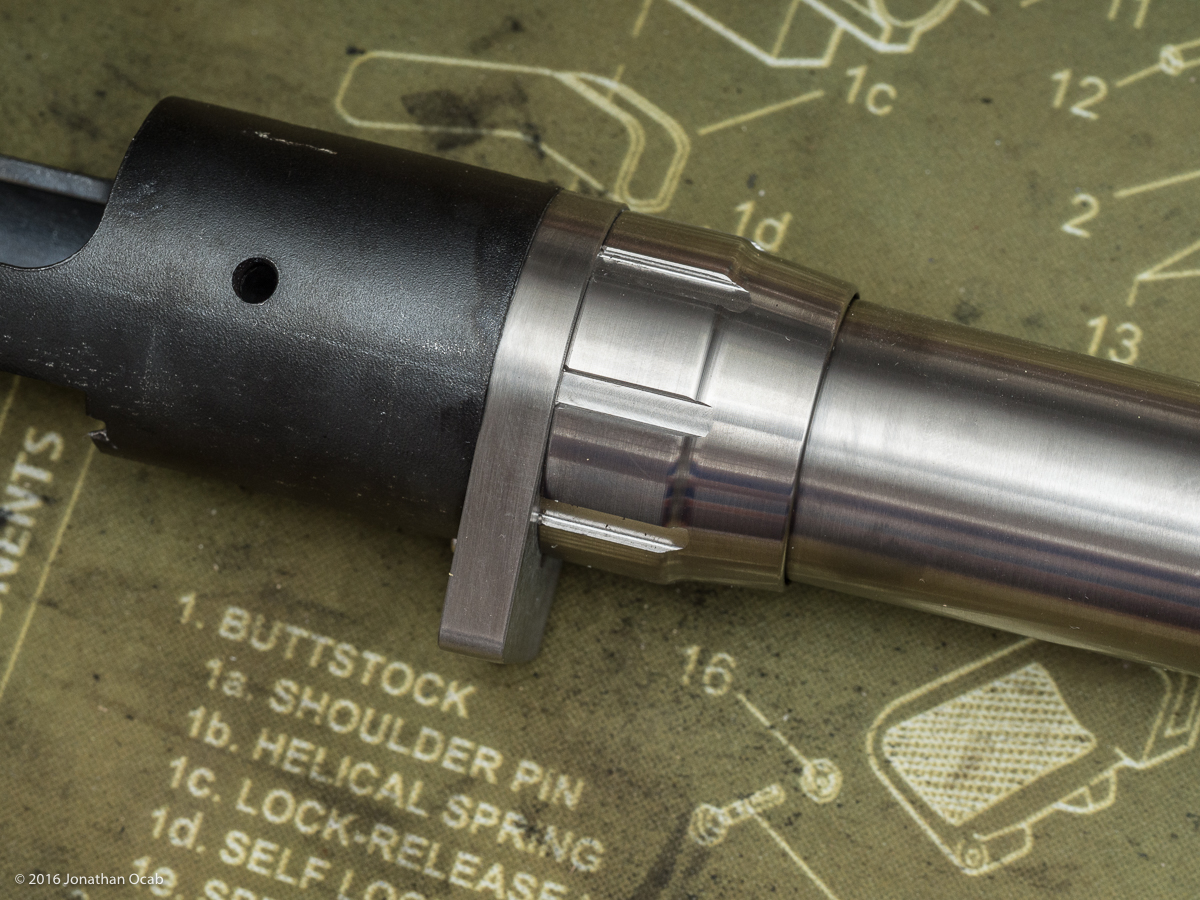
Side by side, the NSS recoil lug is noticeably thicker than the factory recoil lug.
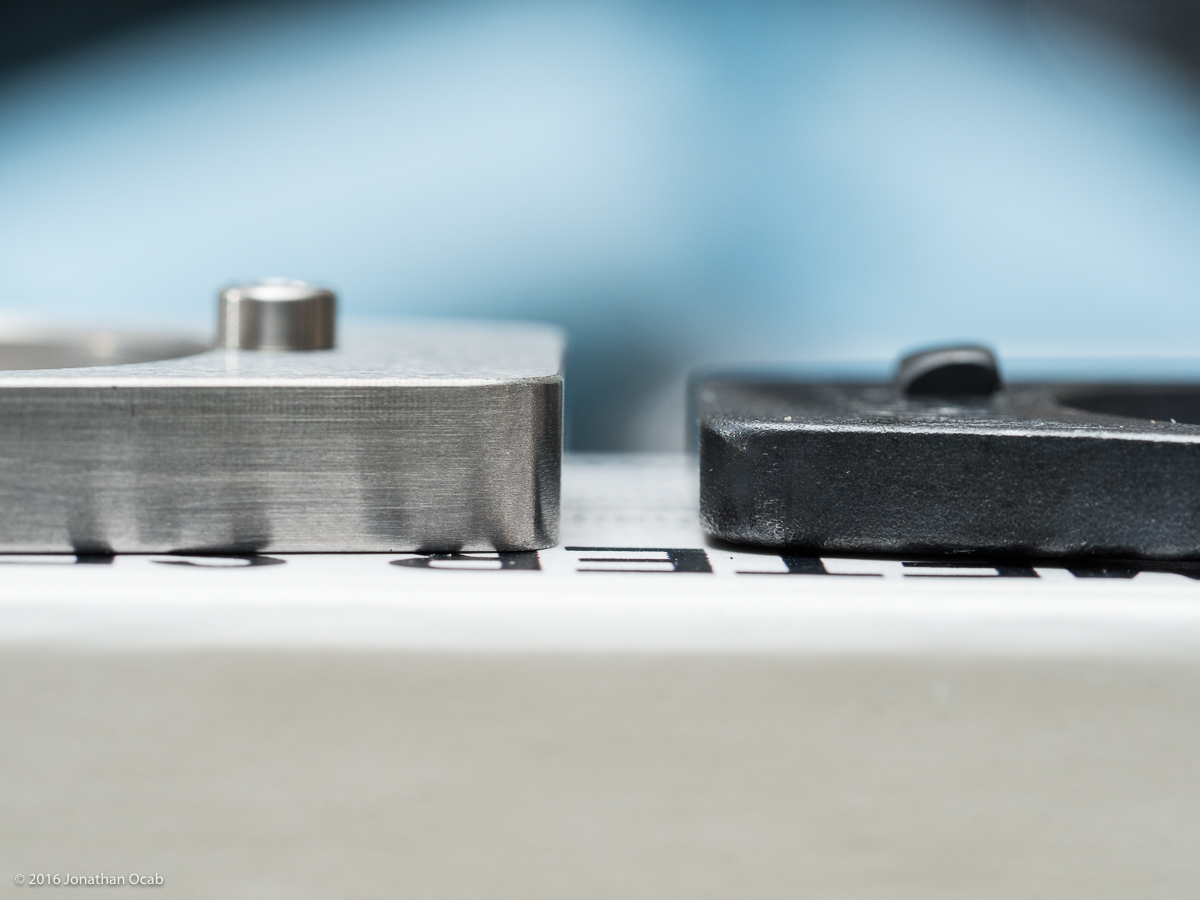
The NSS recoil lug measures approximately .244″ thick compared to the .190″ thickness of the factory recoil lug.

This is actually a concern because there is the possibility that I may have to modify the McMillan A-5 stock to accept the thicker recoil lug. But when I checked fit of the recoil lug in the stock, it hand pressed fit in to the lug recess with just a little extra force.
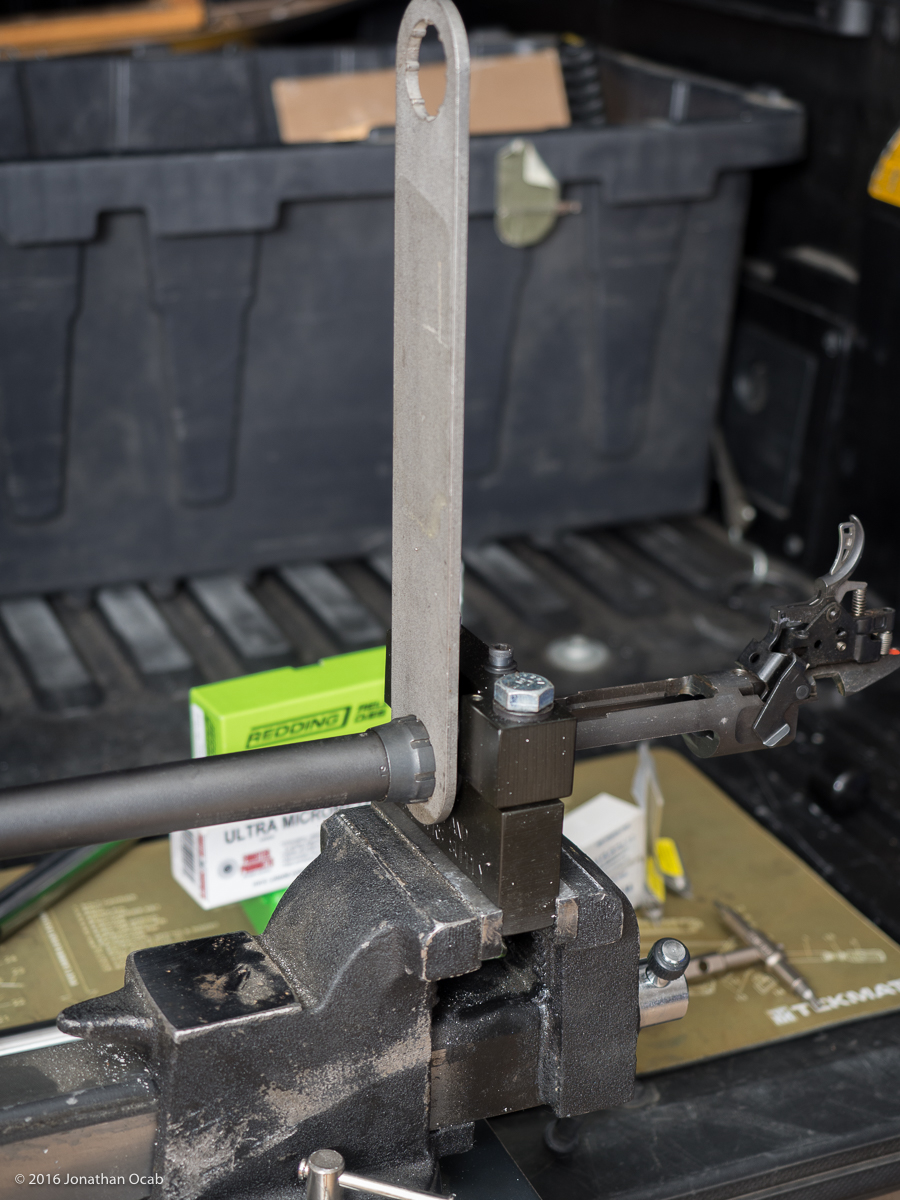
As far as the NSS barrel nut, it appears to be produced with better quality control, especially when it came to getting the barrel nut wrench engaged on the nut recesses. The factory nut seems to have very inconsistent, and unevenly cut recesses, and the wrench has to be placed in a specific orientation over the factory nut to engage the recesses.
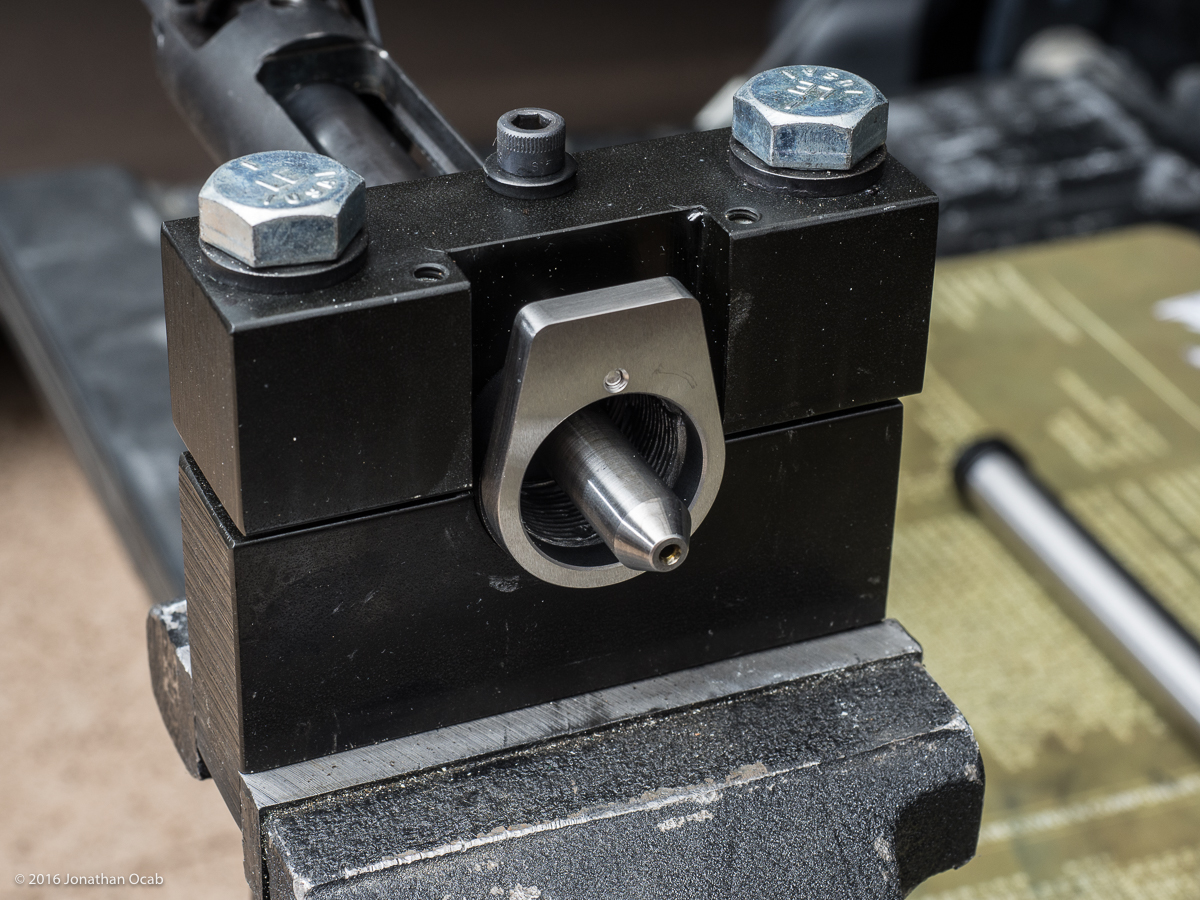
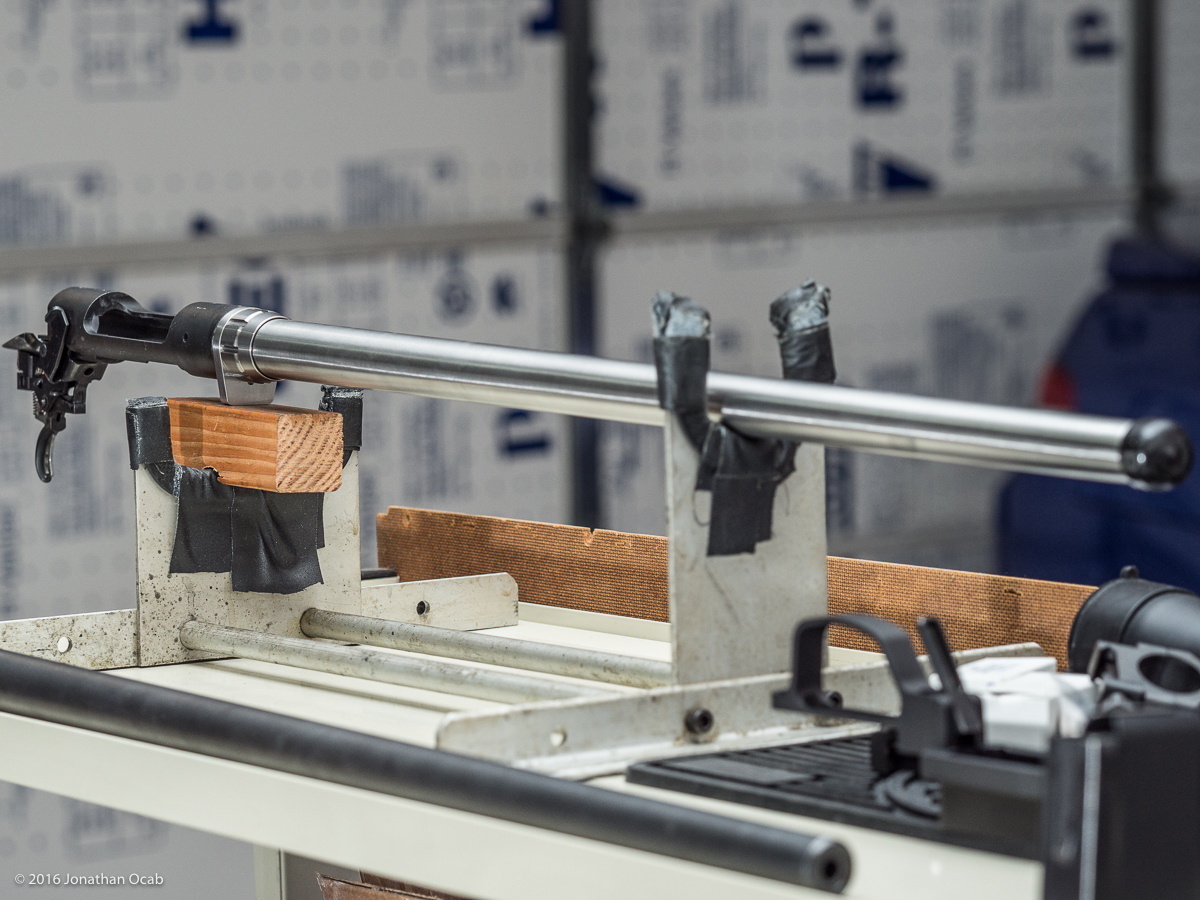
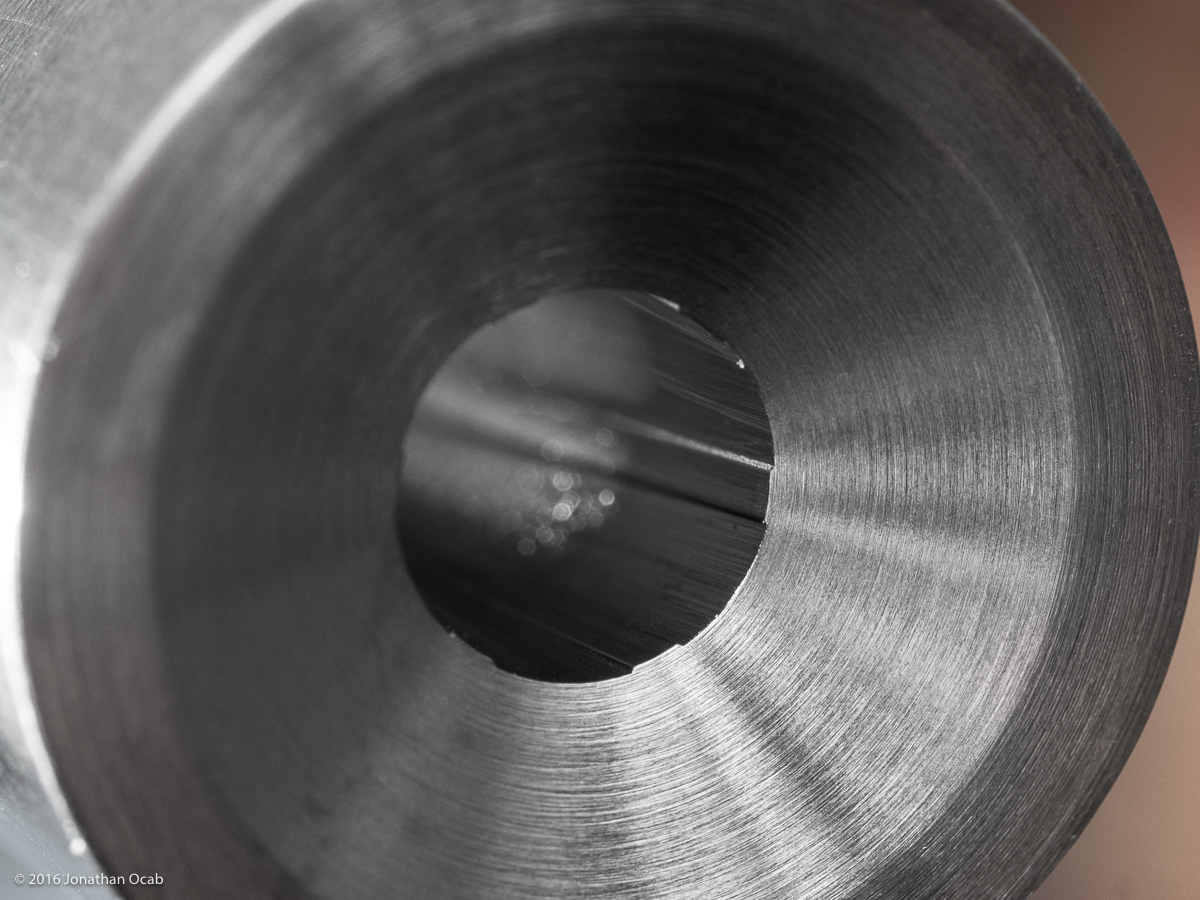
After the receiver was cleaned, I was ready to install the barrel. Installing a pre-threaded / pre-chambered Savage barrel is pretty simple if you have the tools, specifically a bench vise, an action wrench / vise blocks, and barrel nut wrench along with the respective Go and No-Go gauges for the cartridge the barrel is chambered for.
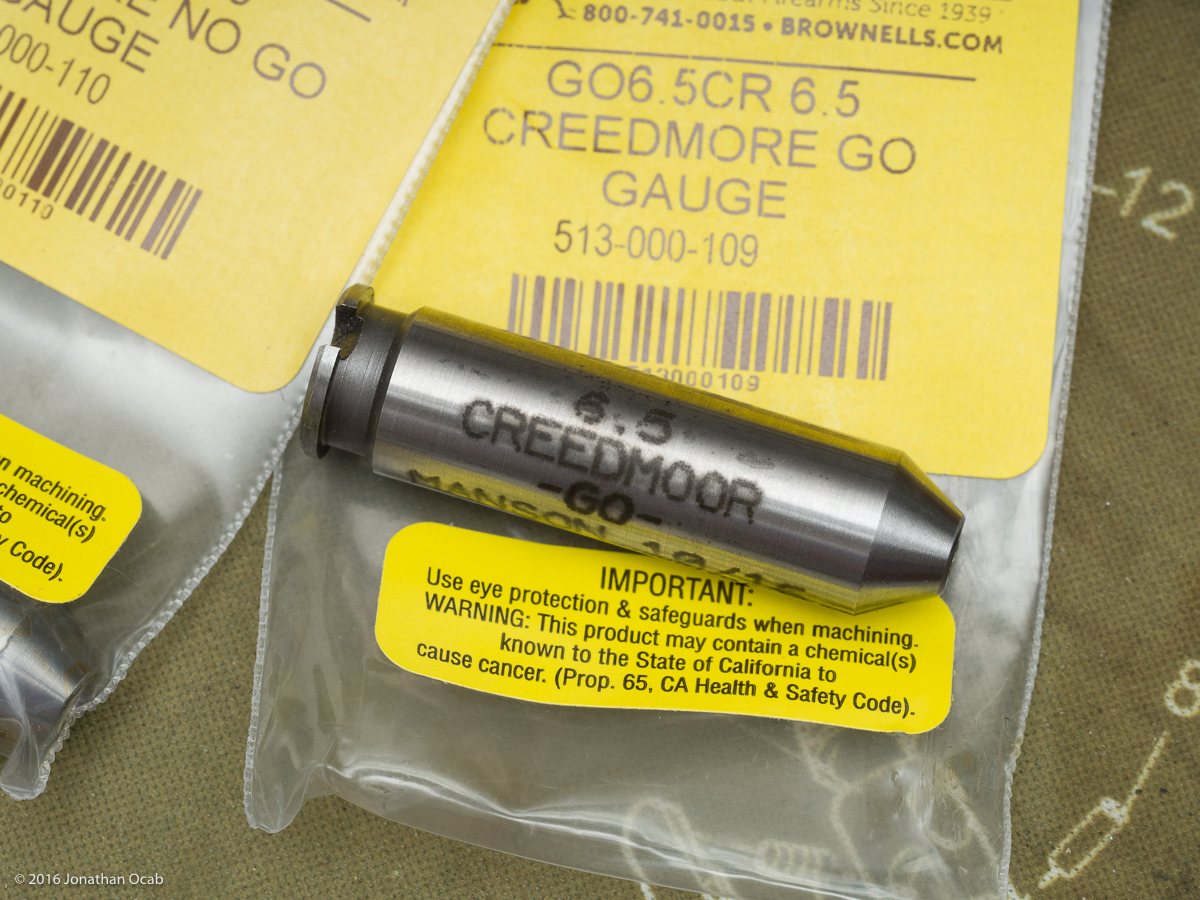
Before I started, I removed the ejector from the Savage bolt. The reason why I did this is because the ejector places tension on the headspace gauge, and makes it difficult to get a feel of the Go gauge as the bolt opens and closes on it. When you measure headspace with a Go gauge, you really want to make sure it fully chambers in the rifle, but also that the bolt closes on the Go gauge without much resistance. If there is any force from the ejector, any drag or rubbing of the headspace gauge in the chamber as the bolt is cammed over will be difficult to discern as either being too tight a headspace.
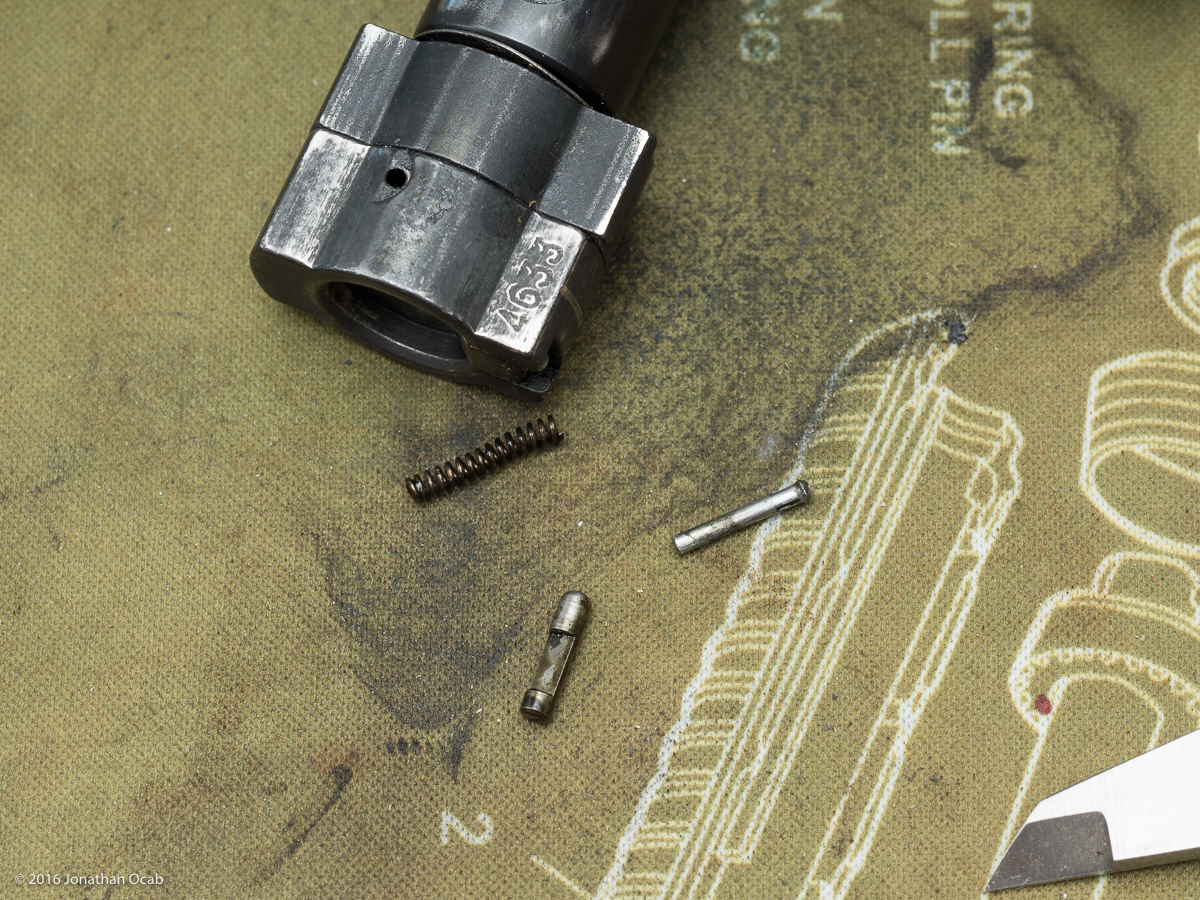
I left the extractor installed because it is easy to get the rim of the headspace gauge underneath the claw, and the claw helps to retain the headspace gauge onto the bolt face during the testing process.
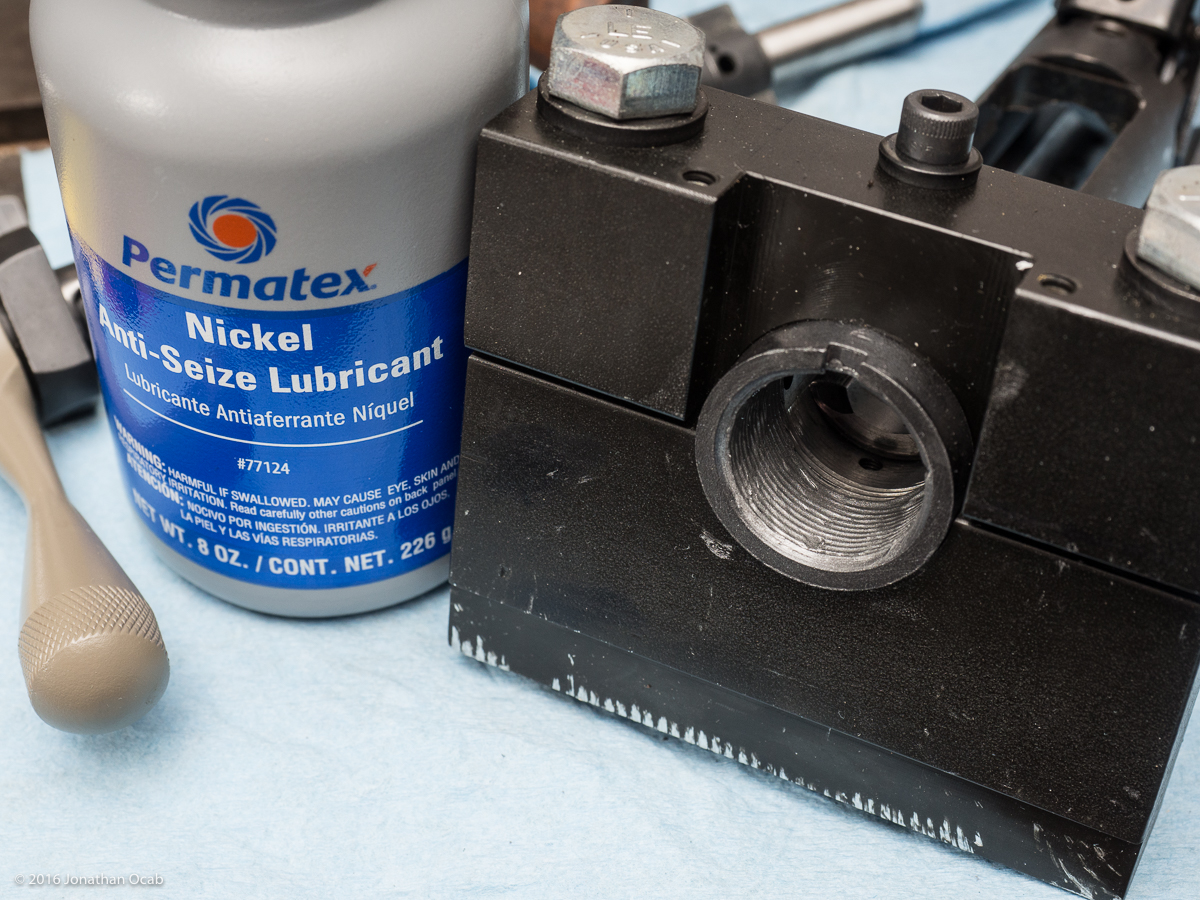
Once the ejector is removed from the bolt, I simply placed the action into the NSS action wrench. I then proceeded to coat the threads in the action with nickel anti-seize. Nickel anti-seize is used because it is ideal for stainless steel, since copper and aluminum based anti-seize are not recommended for stainless steel.
The bolt is then placed into the receiver, the Go gauge placed onto the bolt face (held by the extractor claw), the bolt closed onto the receiver, and the action gripped into a vise by the NSS action wrench / vise blocks.
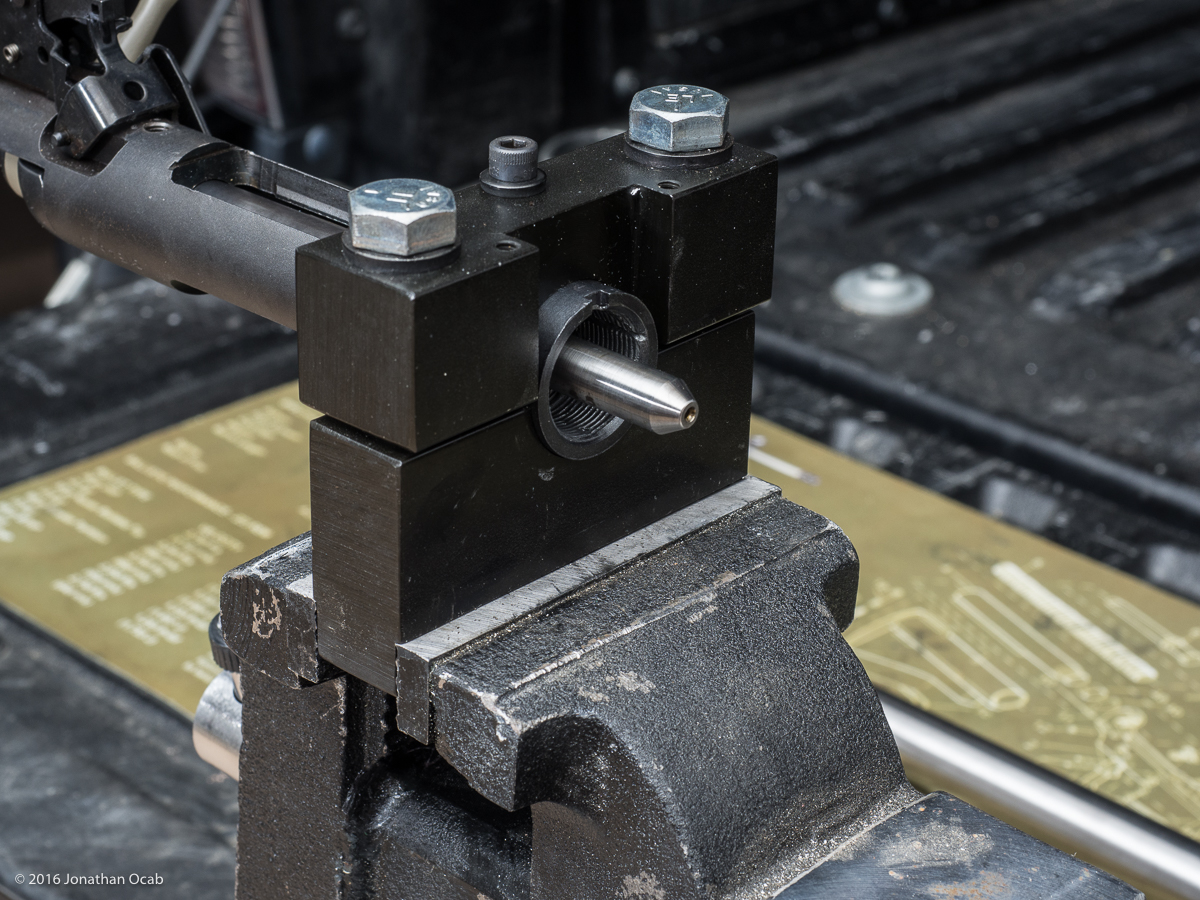
I then put another light coating of the nickel anti-seize on the threads of the barrel with the barrel nut threaded as far forward (towards the muzzle) as possible. The NSS recoil lug is placed on to the receiver and the barrel is threaded on until it stops because it makes contact with the headspace gauge.
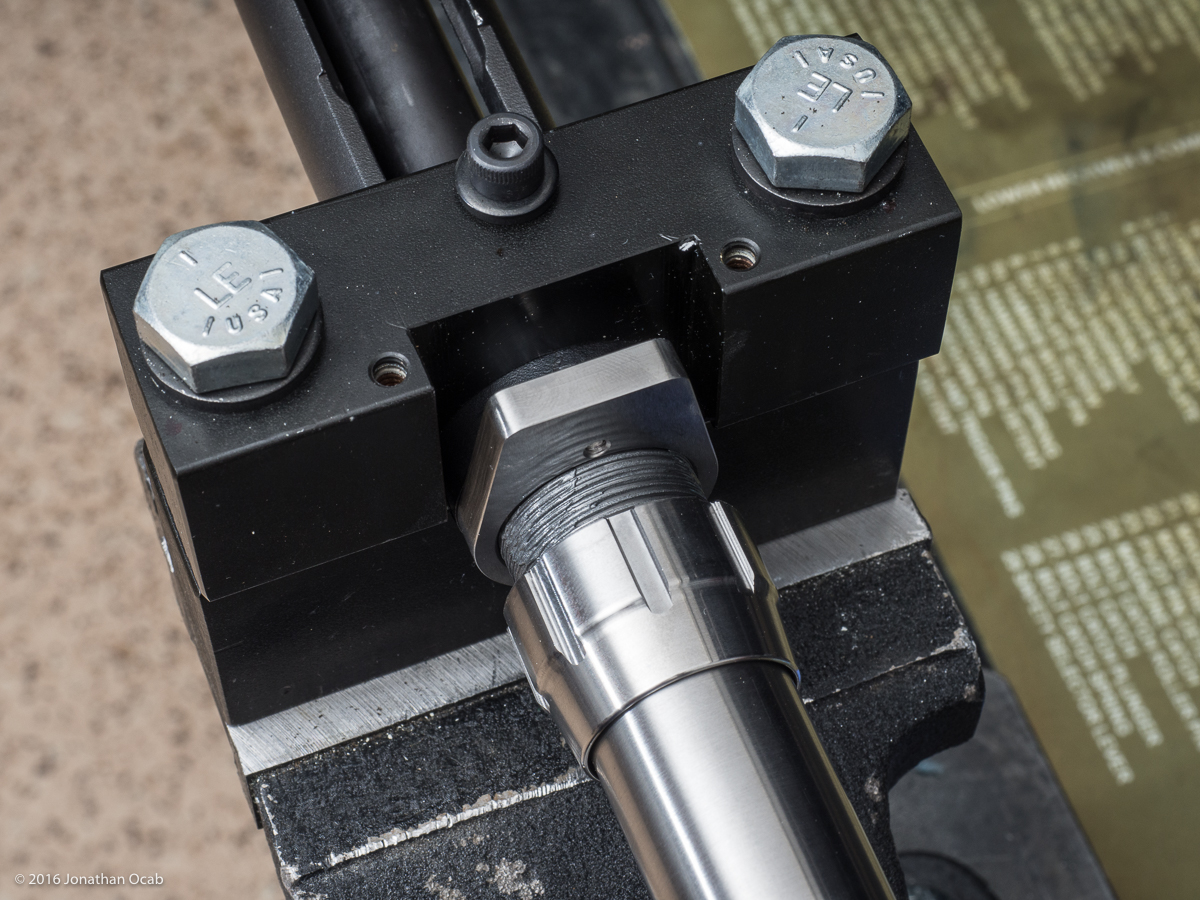
Threading the barrel onto the receiver with the bolt closed on a Go gauge means this barrel is roughly at a ‘Go’ headspace condition. Note that it is very easy to thread the barrel onto to the Go gauge too snugly, so just thread carefully until it makes contact. Once it makes contact, immediately thread the barrel nut back towards the action until you get it hand tight against the recoil lug. This is when you test the operation of the bolt on the Go gauge. It should open and close easily on the Go gauge with no resistance. Once this passes, the No-Go gauge is then used. The bolt should not close on a No-Go gauge. If it does not, everything is pretty much good to go.
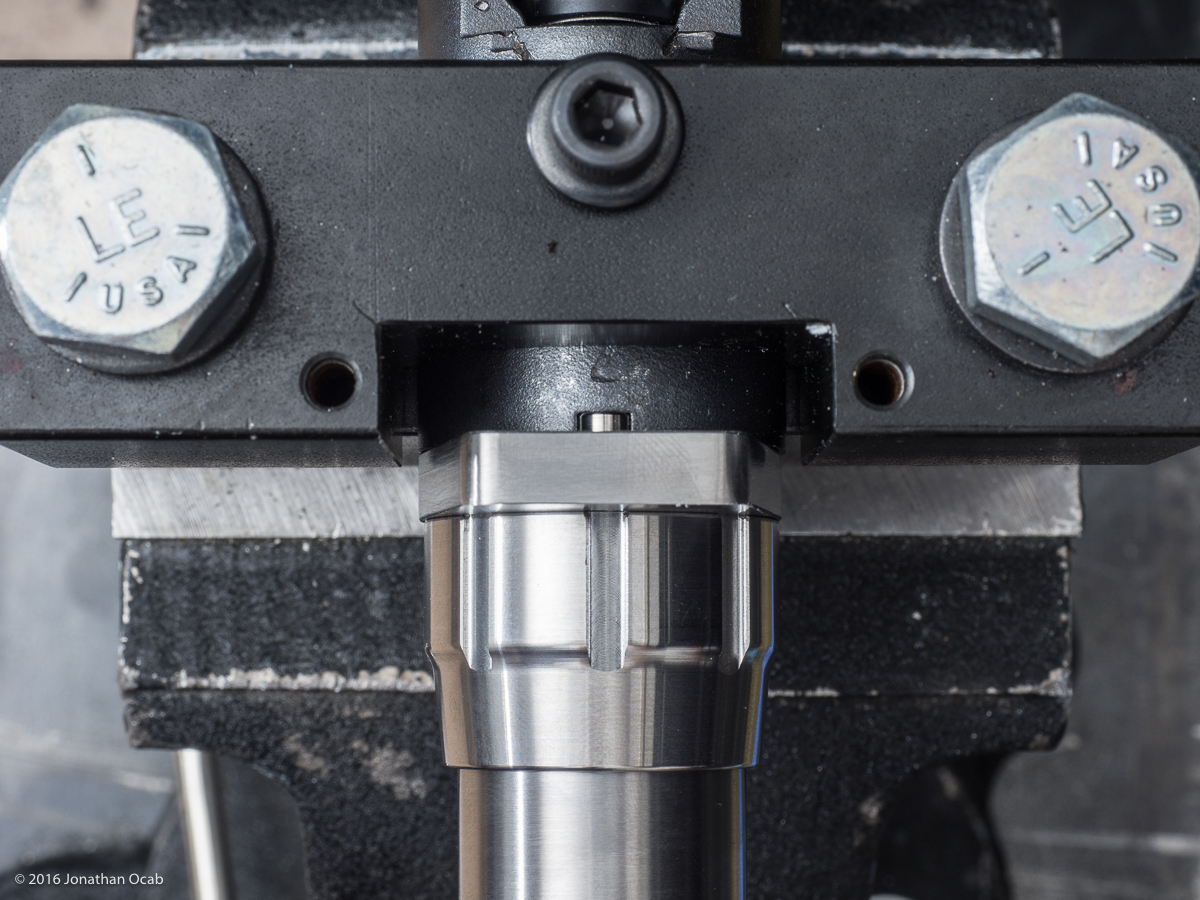
Once the barrel stops moving because the chamber hits the Go gauge, the barrel nut must then be tightened down. According to the NSS action wrench instructions, they claim 40-50 foot-pounds of torque on the barrel nut wrench. My Sharp Shooter Supply Savage barrel nut wrench actually doesn’t have a notch for use with a 1/4″ or 3/8″ drive torque wrench. But the general consensus is that muscle strength on the barrel nut wrench to snug up the barrel nut while the action is in the vise along with two whacks of the wrench with a rubber mallet should be more than sufficient.
Over torquing is actually detrimental to accuracy (and integrity of the action), so a fair amount of human muscle to snug up the barrel should be more than enough to exceed 25-30 foot-pounds and the rubber mallet whacks should get it within 40 foot-pounds (and not exceed 50). No, this isn’t scientific, but is an accepted method that is known to give solid results.
After the barrel nut tightening, the Go and No-Go gauges are run through the receiver one more time to double check headspace.
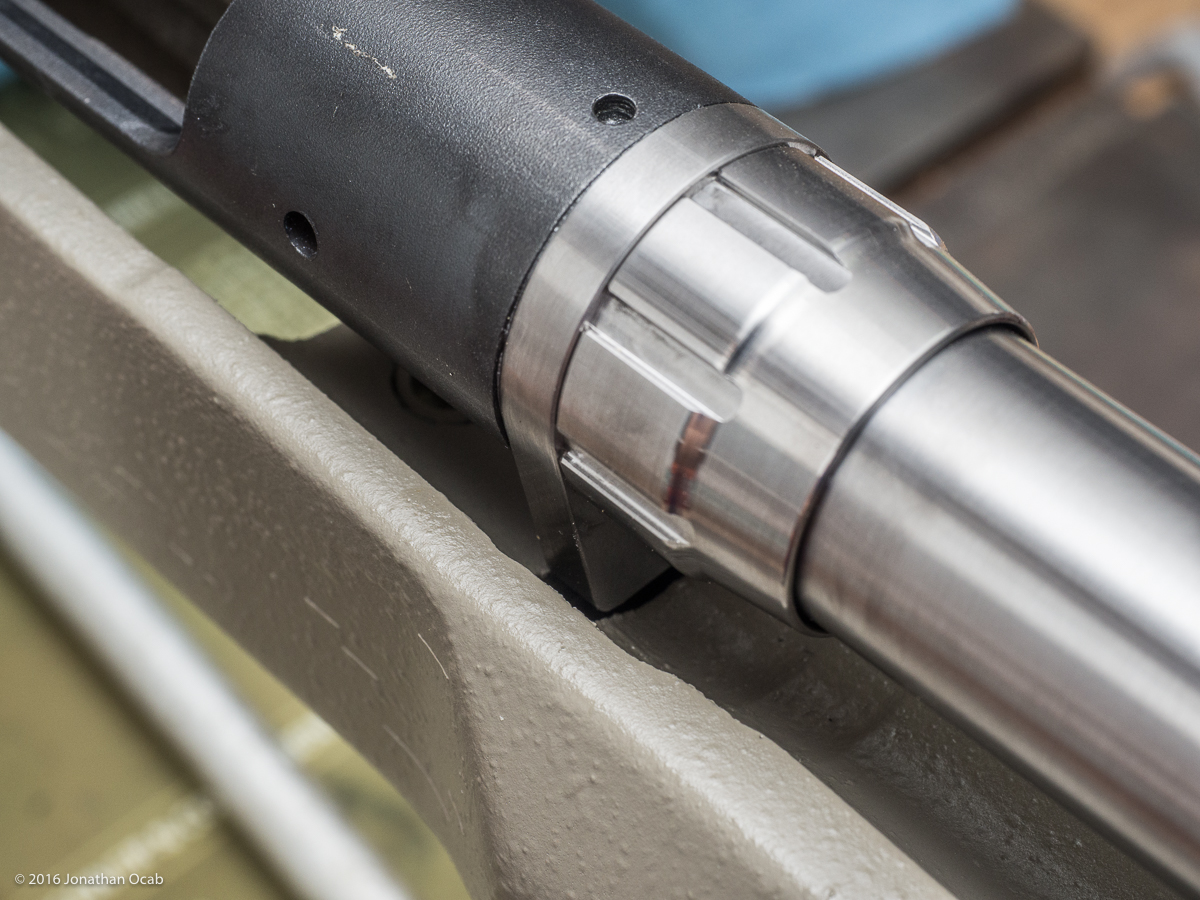
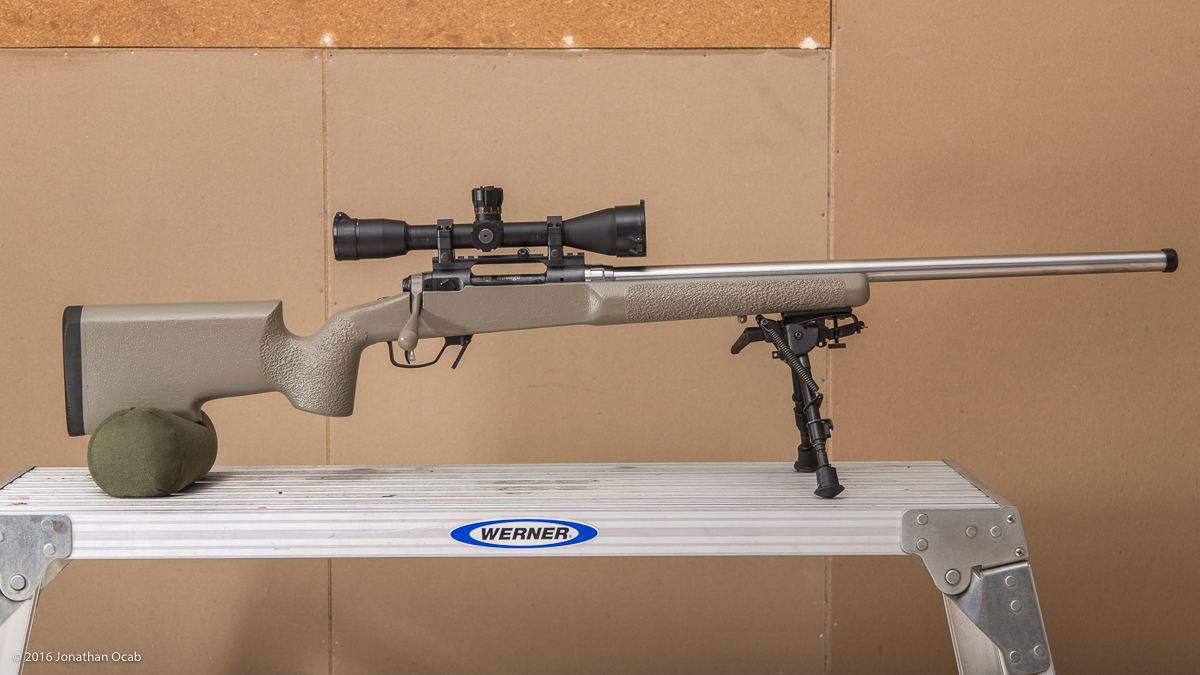
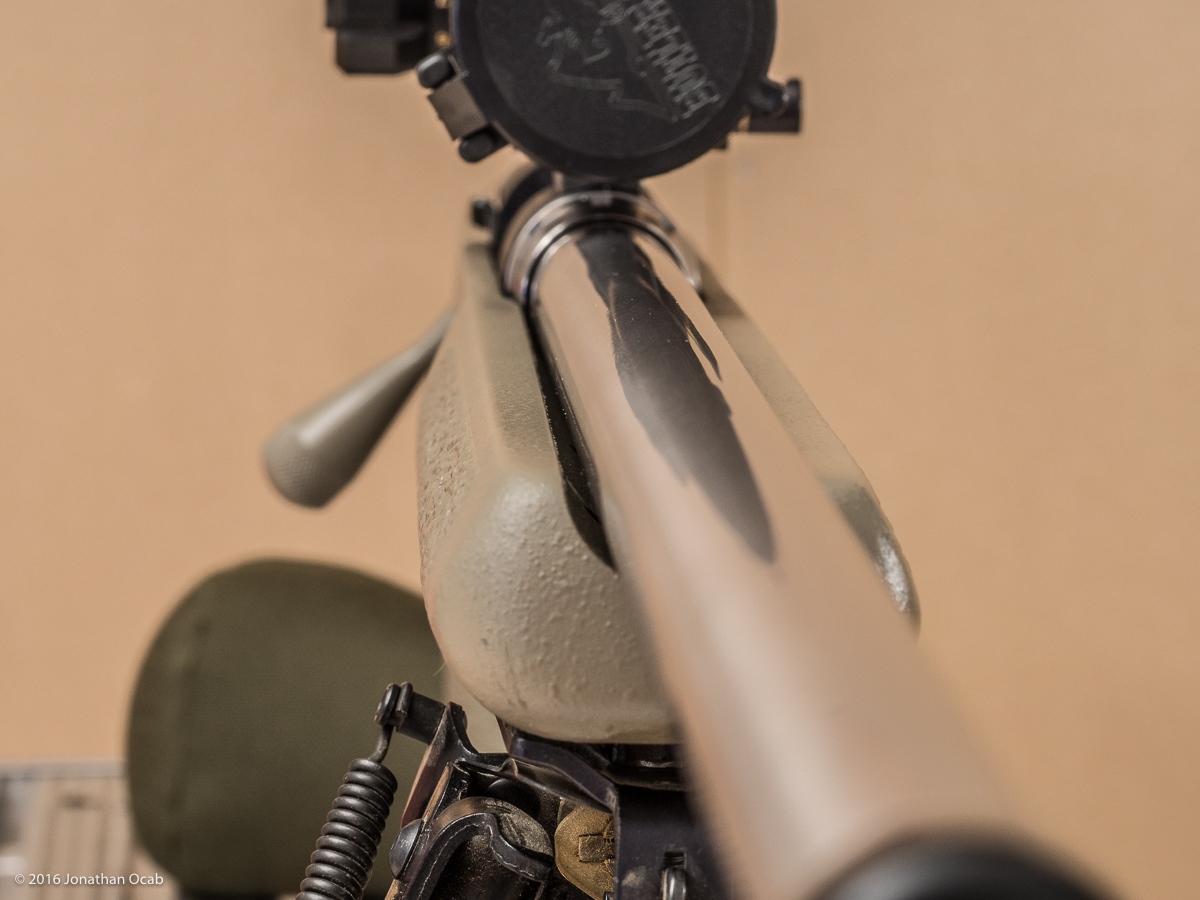
The barreled action dropped into for a nice snug fit and everything lined up correctly including the action screw holes with the stock screw holes.
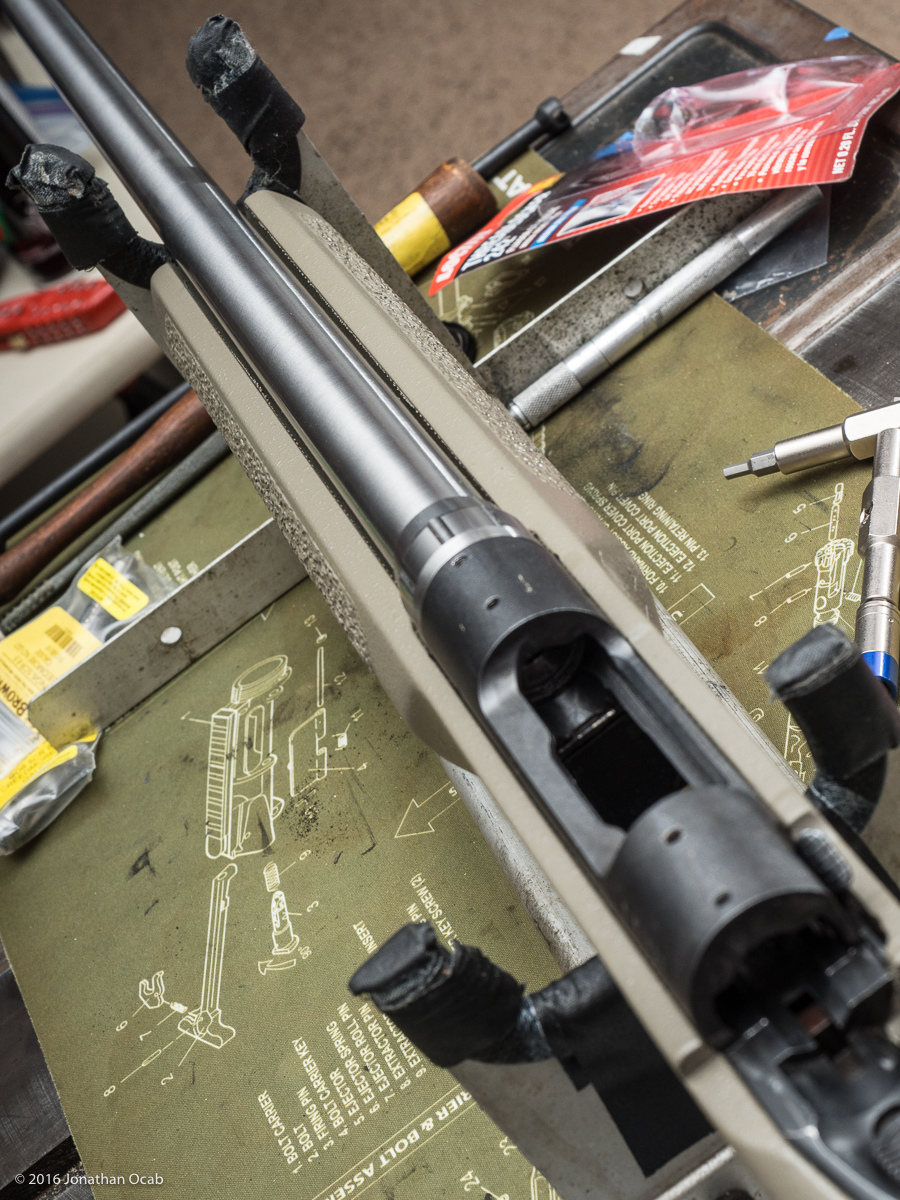
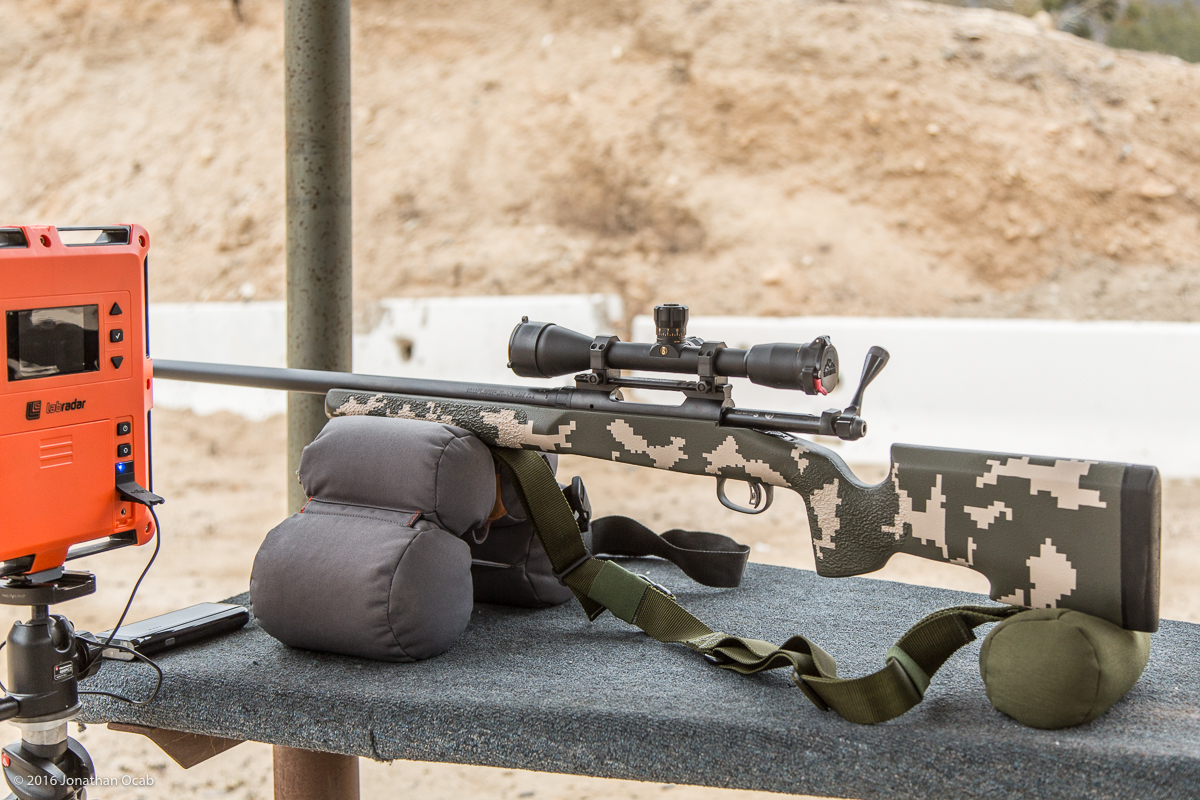
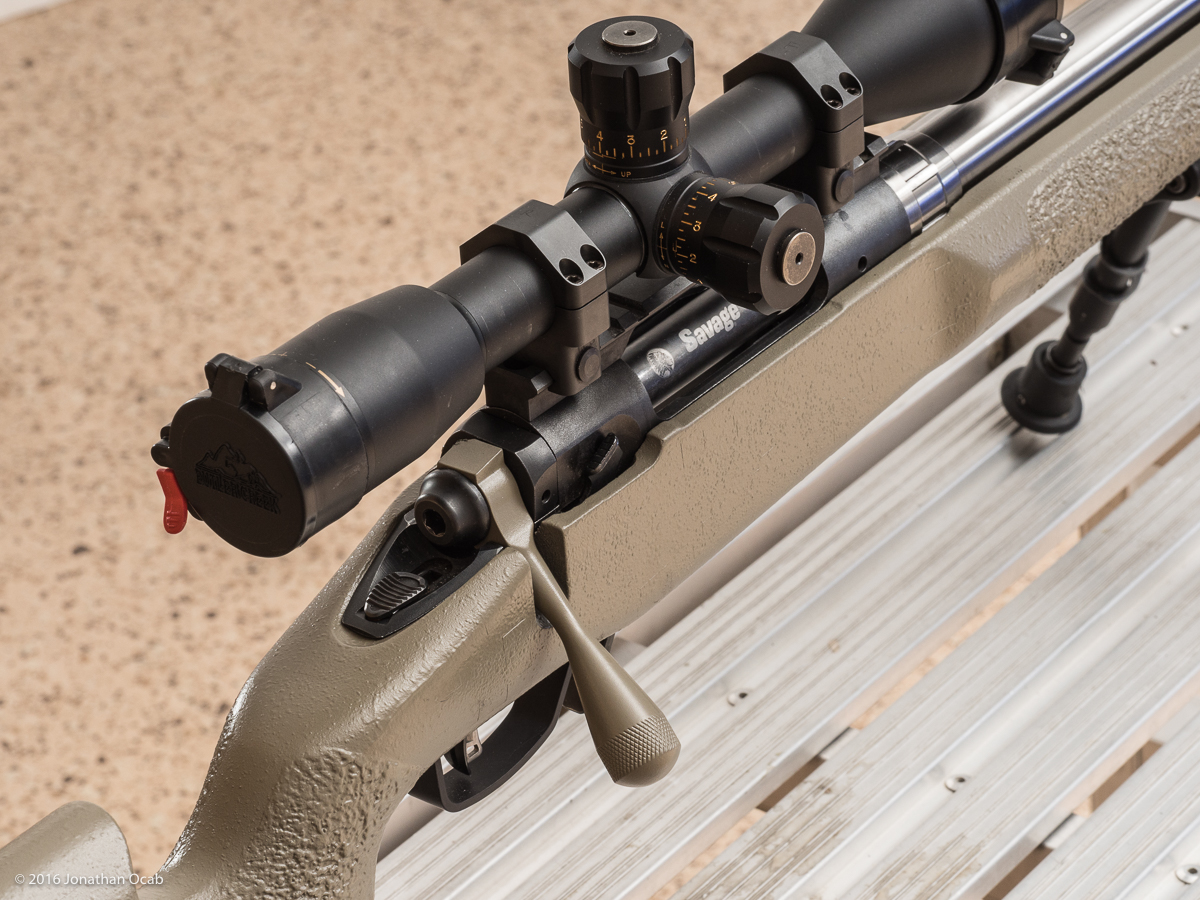
I reassembled the rifle with 45 in-lbs for the action screws and 15 in-lbs for the rear trigger guard screw, and threw the Ken Farrell 0MOA base, TPS 1″ low rings, and the Bushnell Elite 3200 10×40 Mildot back on the rifle. Note that I do plan on getting a new scope for this rifle. I am unsure of what it will be getting, but have been pondering a wide range of scopes including the Nightforce Optics ATACR F1, Vortex Optics Razor HD Gen II, and Vortex Razor AMG.
The next step in the project will be going to the range to test fire it. I plan on shooting the aforementioned factory ammo through the rifle initially: Hornady 140gr ELD Match and Prime 130gr (which uses the Norma 130gr bullet from the Norma Golden Target ammo line). I will be running everything against the LabRadar to get baseline chronograph data with factory loads in order to get an idea of where I can go with my handloads.
I will be leaving the barrel, barrel nut, and recoil lug uncoated until after I test fire and get some rounds through the gun. At which point I will be removing the barreled action from the stock, and hitting the stainless parts with the Aluma-Hyde II in Magpul FDE. I will not be painting the receiver or the bolt body (still undecided on painting the CDI Precision DBM bottom metal). It is going to be a weird two-tone with the blueing of the receiver and the black of bottom metal along with the Magpul FDE color of the stock and barrel, but I’m not going to mind it at all.
Expect an update to this project in the next couple of weeks with live fire results.
paul
sweet highly detailed review sir.
more vlogs please!
Barr Soltis
Johnathan, I really enjoyed your article because this summer I’m going to convert my 10FP .308 to a 6.5×47 Lapua and you answered most of my questions. Interestingly, I had already decided to use a Criterion 26 inch varmint barrel with the 11 degree target crown so your project and the pics were especially helpful as were the tools that you purchased. Just wondering, how did the rifle finally shoot?
ocabj
Read parts 3 and 4 which have load data and groups: https://www.ocabj.net/precision-rifle-project-series-savage-10fp-part-3/ https://www.ocabj.net/precision-rifle-project-series-savage-10fp-part-4/