
In the first “Cleaning Firearms” article I posted, I discussed the What and Why of firearms cleaning. In this blog post, I want to cover the How: How do I personally cleaning a firearm?
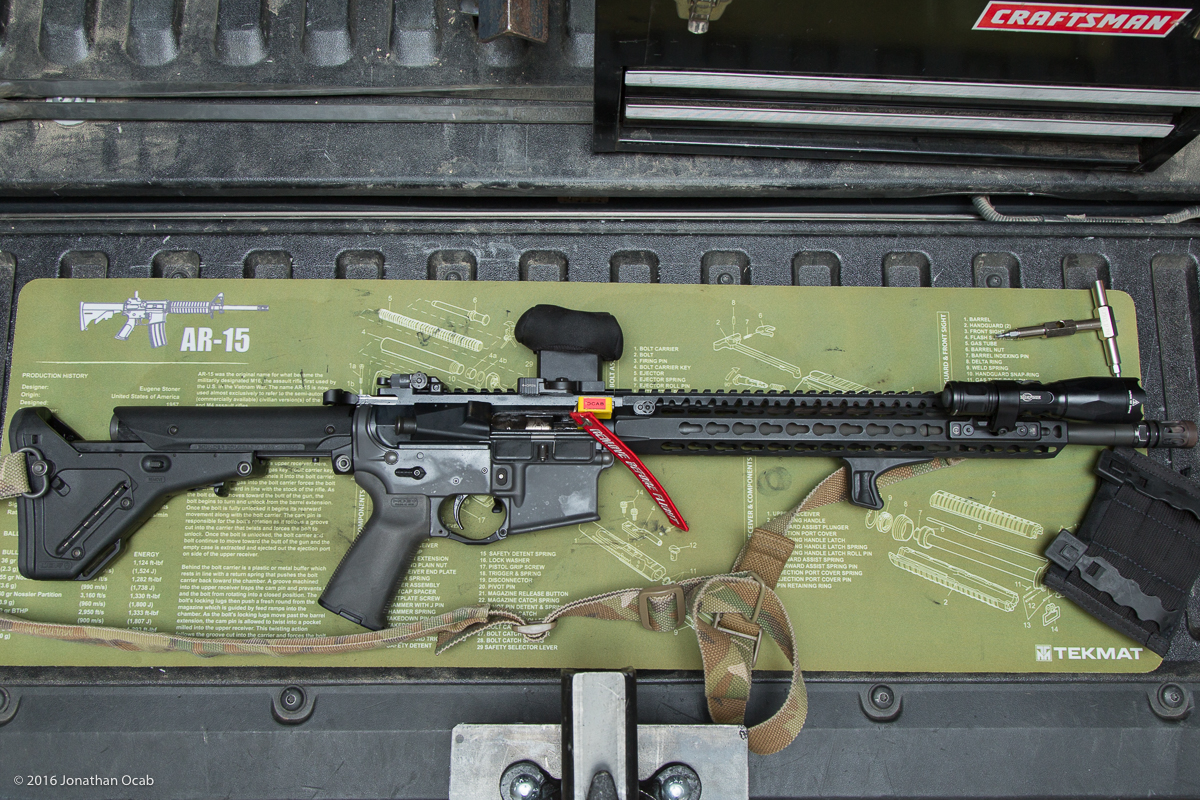
Specifically for this article, I am going to address how I clean the AR-15. The AR-15 platform is arguably “America’s Gun” at this point in time. Aside from a pistol, lots of gun owners have an AR-15 and many soon to be gun owners pick an AR-15 as their first gun (if not first rifle). It is a very versatile platform, with various applications from recreational shooting, competition shooting, varmint hunting, and even game hunting (larger caliber/cartridge versions).
Not to mention, it is a maligned firearm in the media, and is always targeted by gun control advocates, which further increases it’s popularity towards the gun buying public.
Due to it’s wide ownership, it would make sense to discuss how I clean the AR-15 since I often read questions in forums regarding AR-15 cleaning. Also, while cleaning the AR-15 has some unique aspects that are specific to this platform, bore cleaning is pretty much universal to all other rifles.
My techniques will differ from the cleaning techniques and regiments used by others. I don’t want to delve into if my technique is better than others. This article is specifically to show how I clean my AR-15. It is not the only way to do it.
The techniques and procedures outlined here are what I have been using for the past 10+ years, which was developed when I was heavily competing in NRA/CMP High Power (Service) Rifle, when all I shot (literally) was the AR-15 for a solid four years straight.
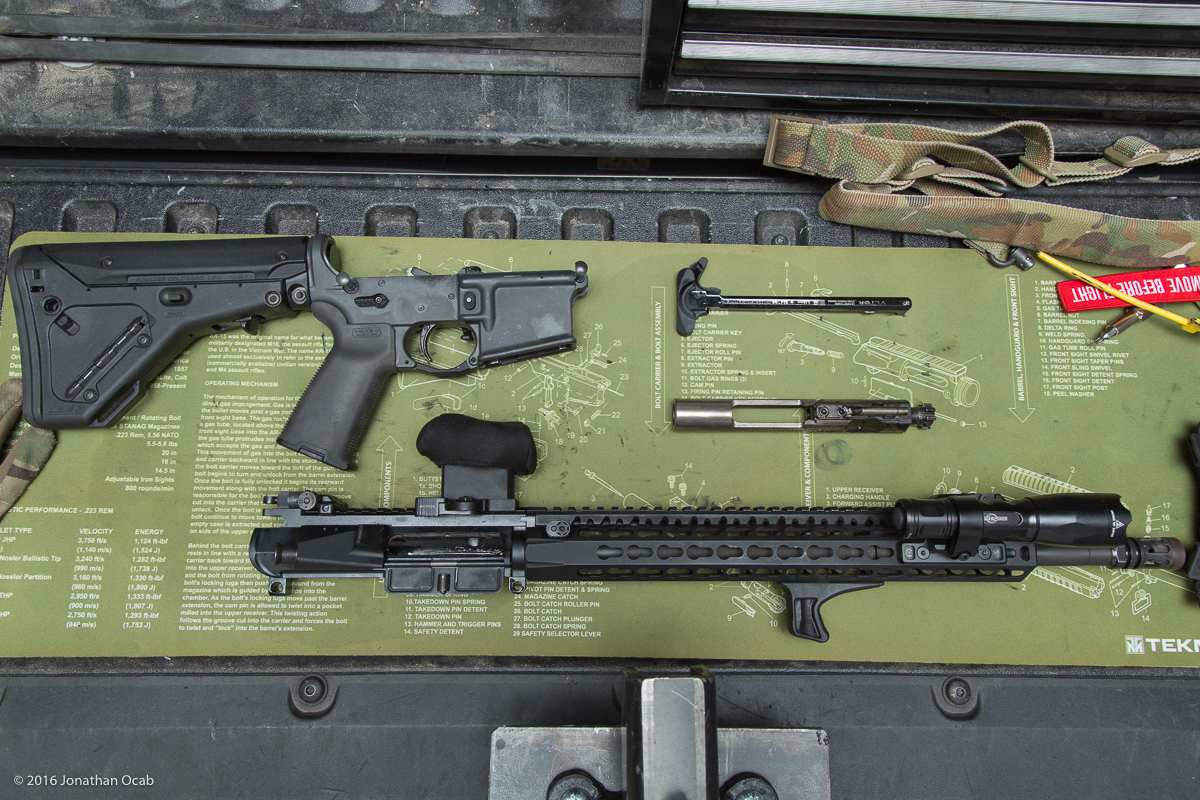
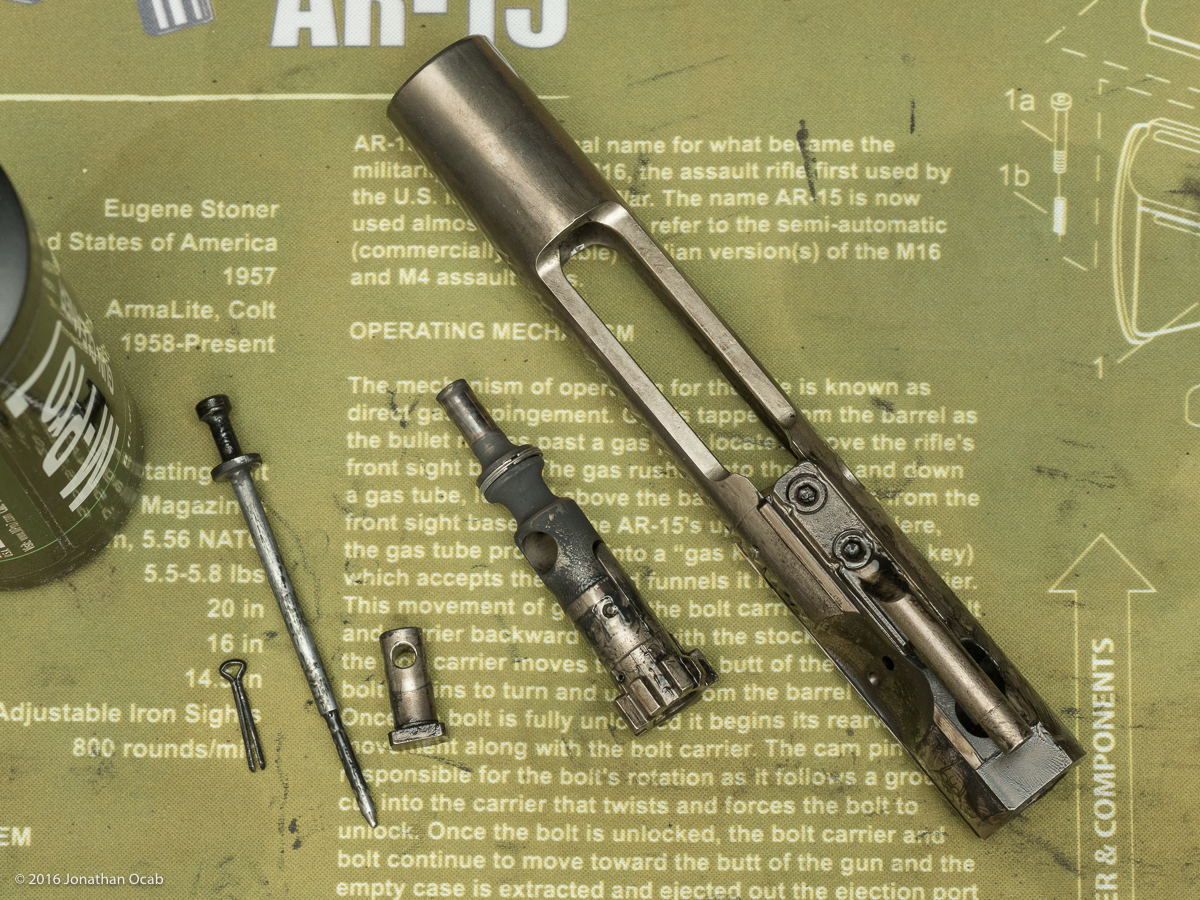
When I clean the AR-15, I will break it down into three basic component groups:
- Lower Receiver
- Upper Receiver
- Bolt Carrier Group (BCG) and Charging Handle (CH)
Once I break it down into these three specific groups, I go through five (5) specific stages:
- Upper receiver cleaning and bore cleaning prep.
- Bolt carrier group cleaning.
- Bore cleaning and flash hider / muzzle brake cleaning.
- BCG and upper receiver lubrication
- Lower receiver cleaning and lubrication.
Stage 1
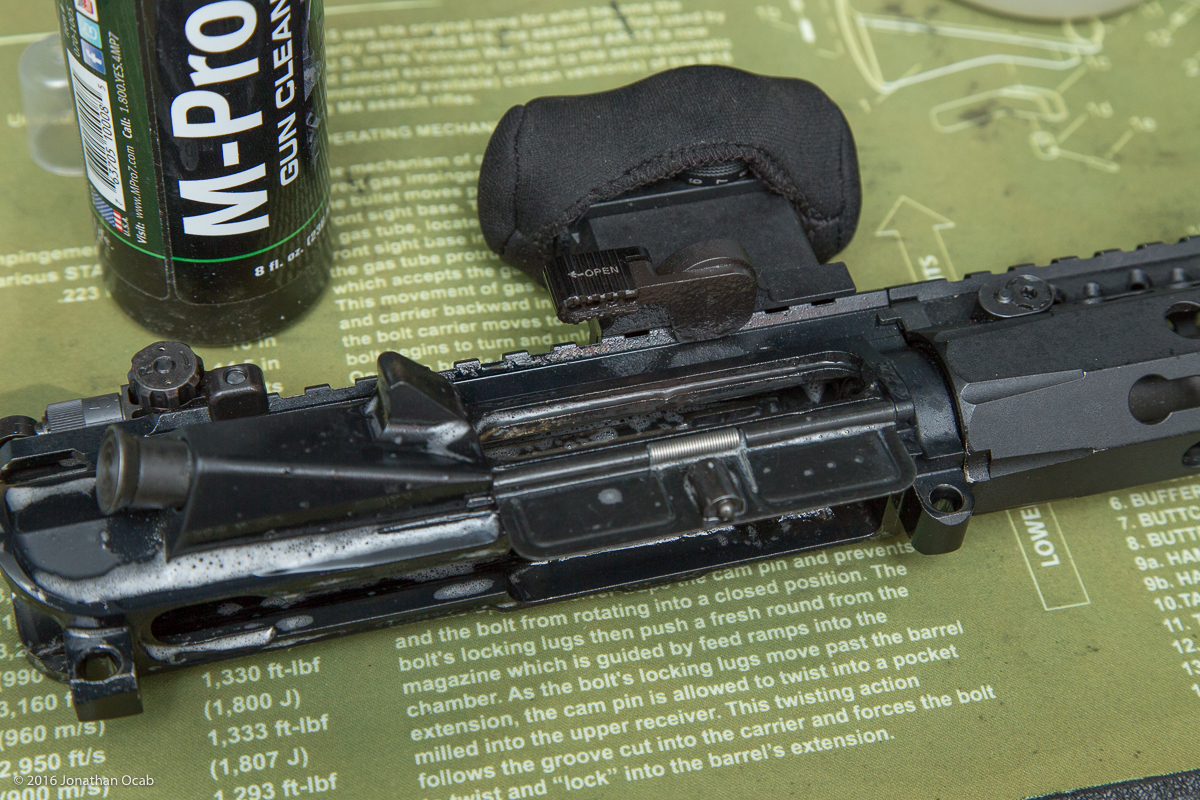
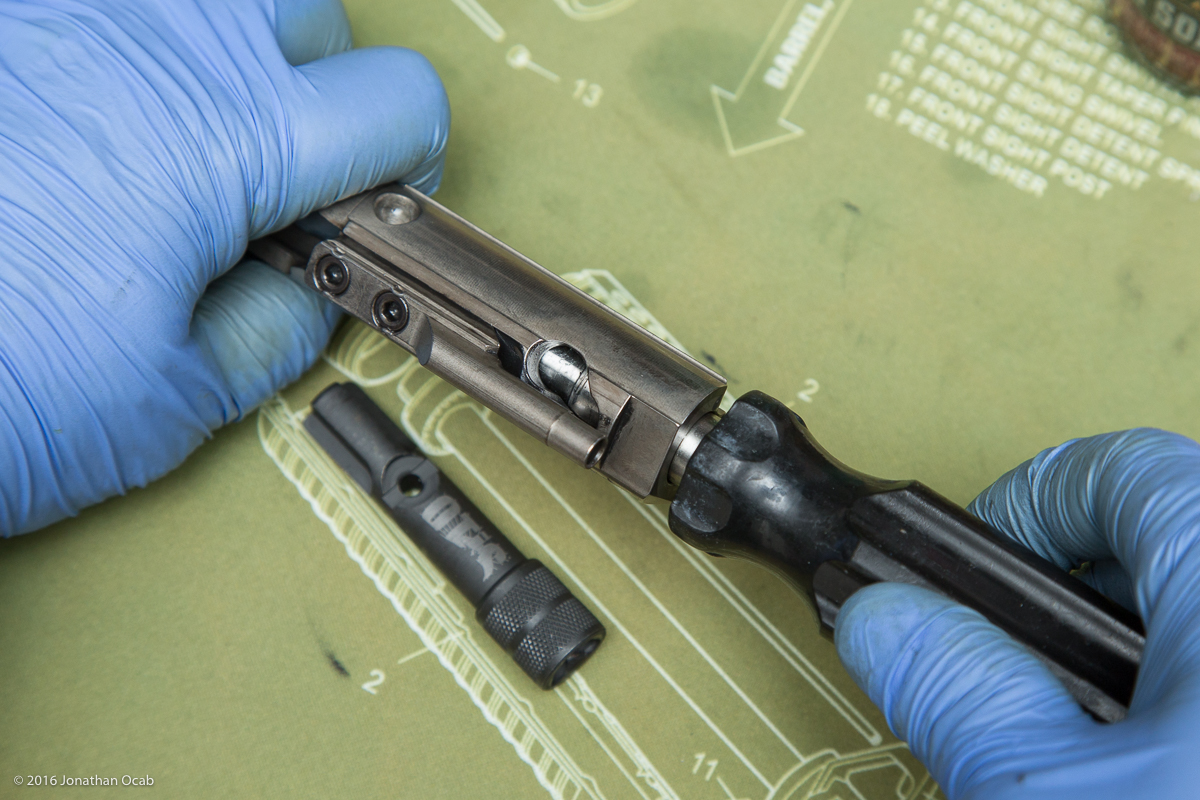
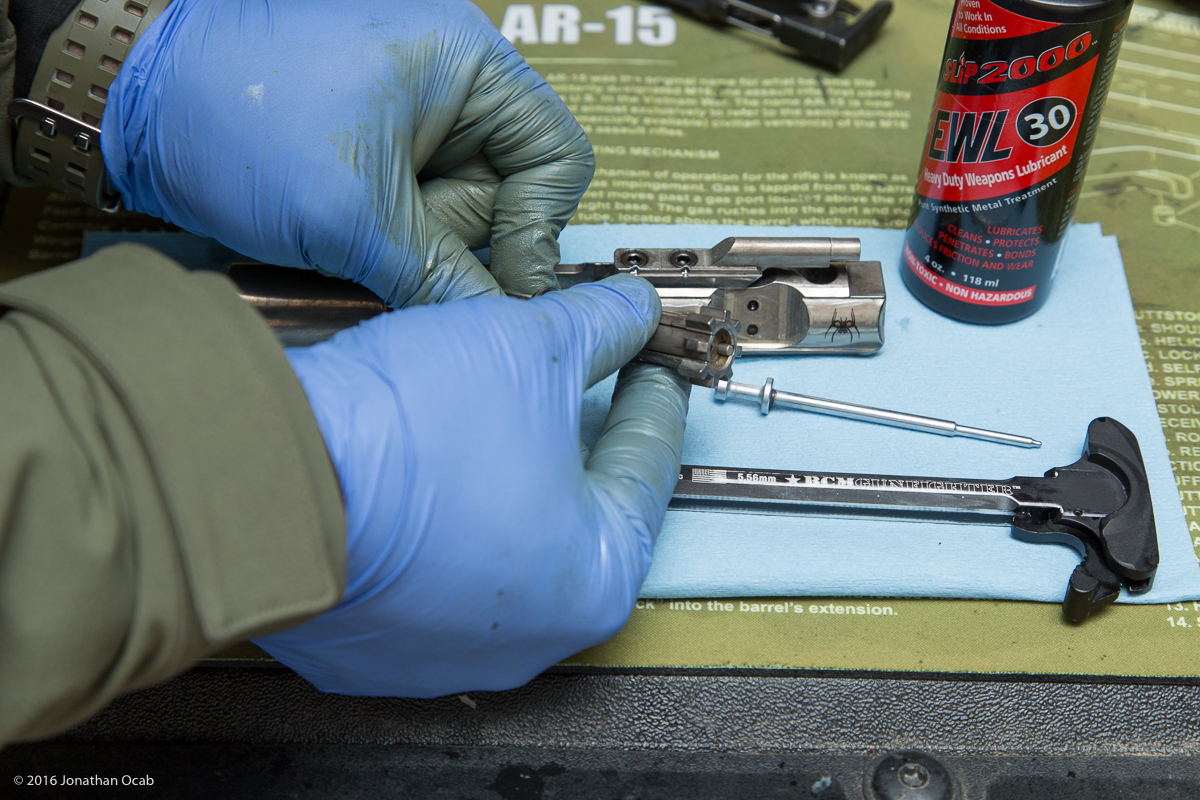
The first stage is to do some cleaning of the upper receiver and prep the bore for cleaning.
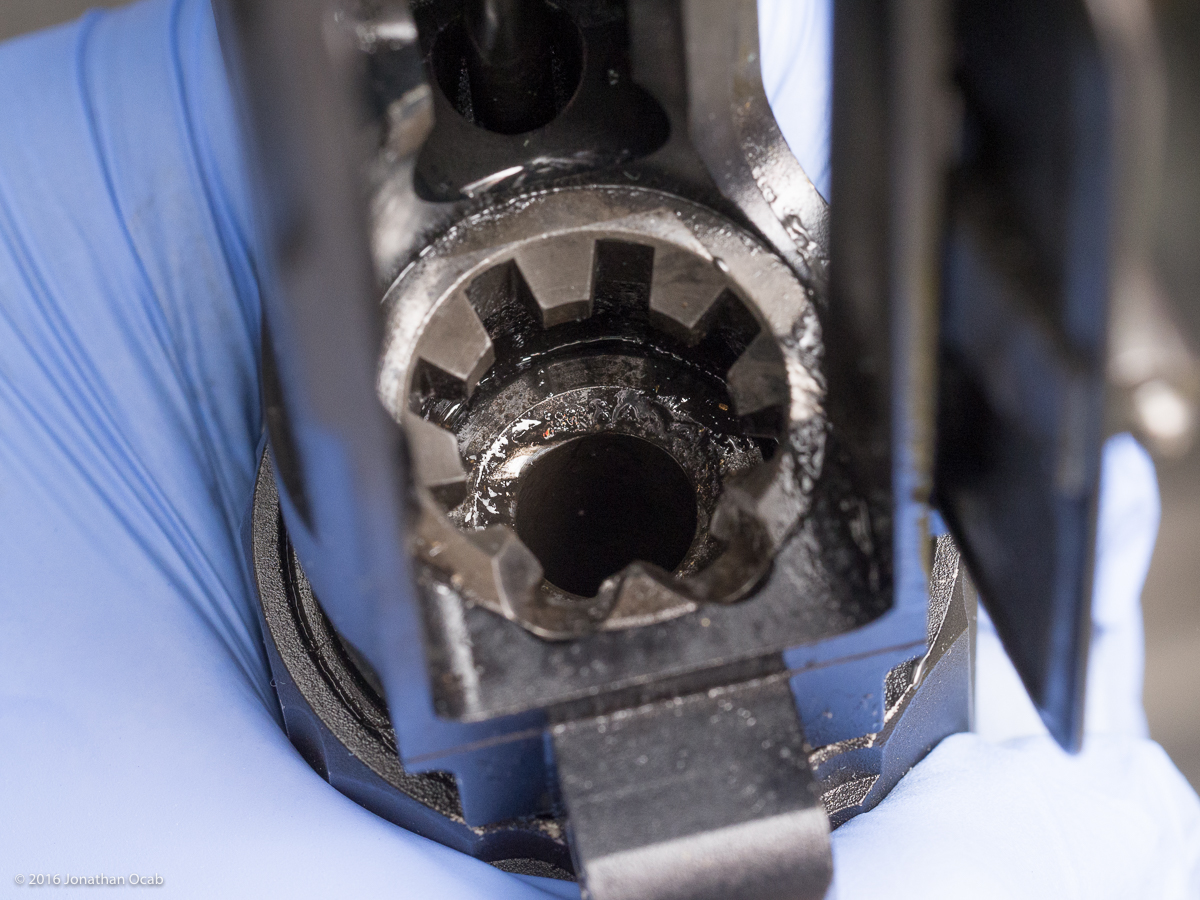
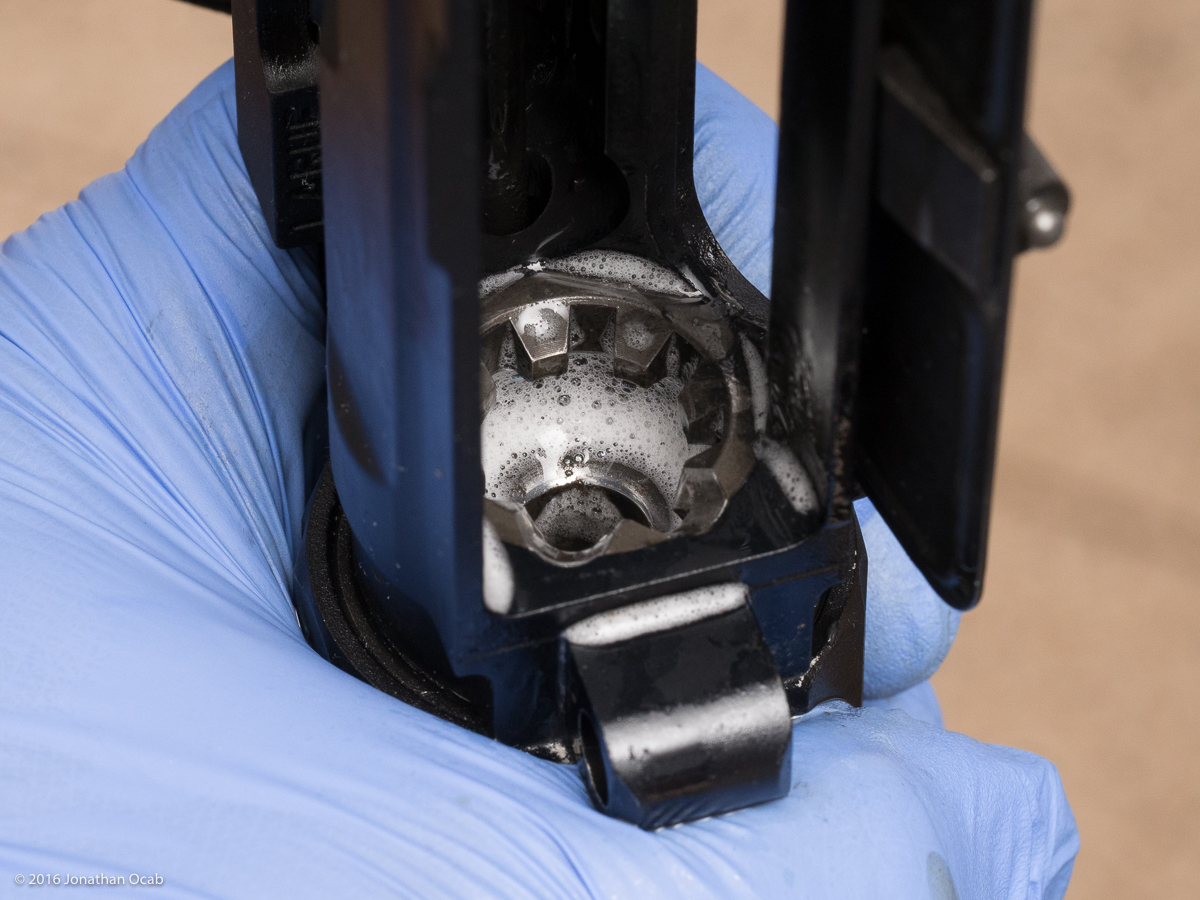
I will first wipe down the exterior surfaces of the upper receiver, and then the interior of the upper receiver (channels for the bolt carrier group and charging handle) with a disposable shop towel. I then spray down the upper receiver with M-Pro7 gun cleaning solution. I will then agitate the surfaces with a nylon GI-style cleaning brush and wipe down the upper receiver with a shop towel.
Wrapping the brush with a shop towel and then using that to wipe the inside of the upper receiver is a good way to go to the small areas you can’t get with your hands. Cotton swabs will also work.
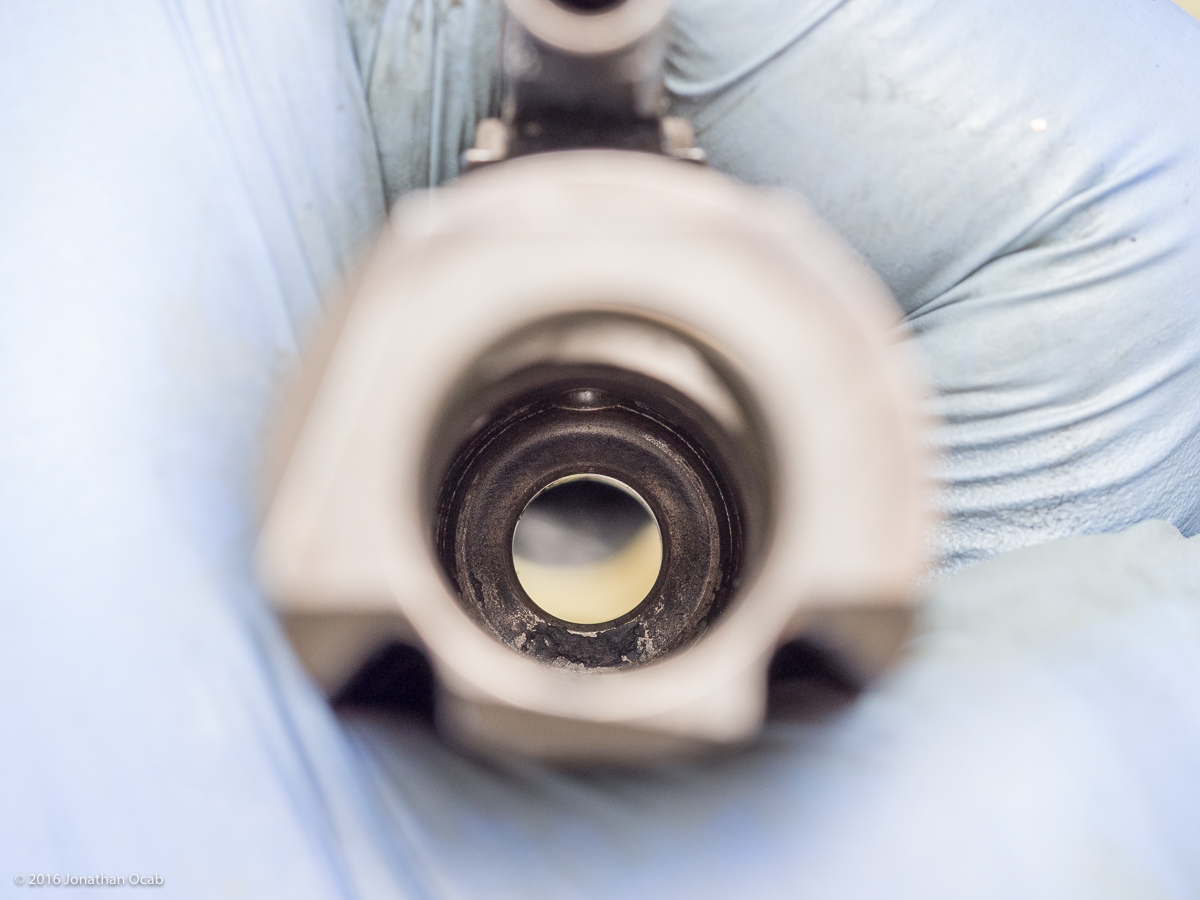
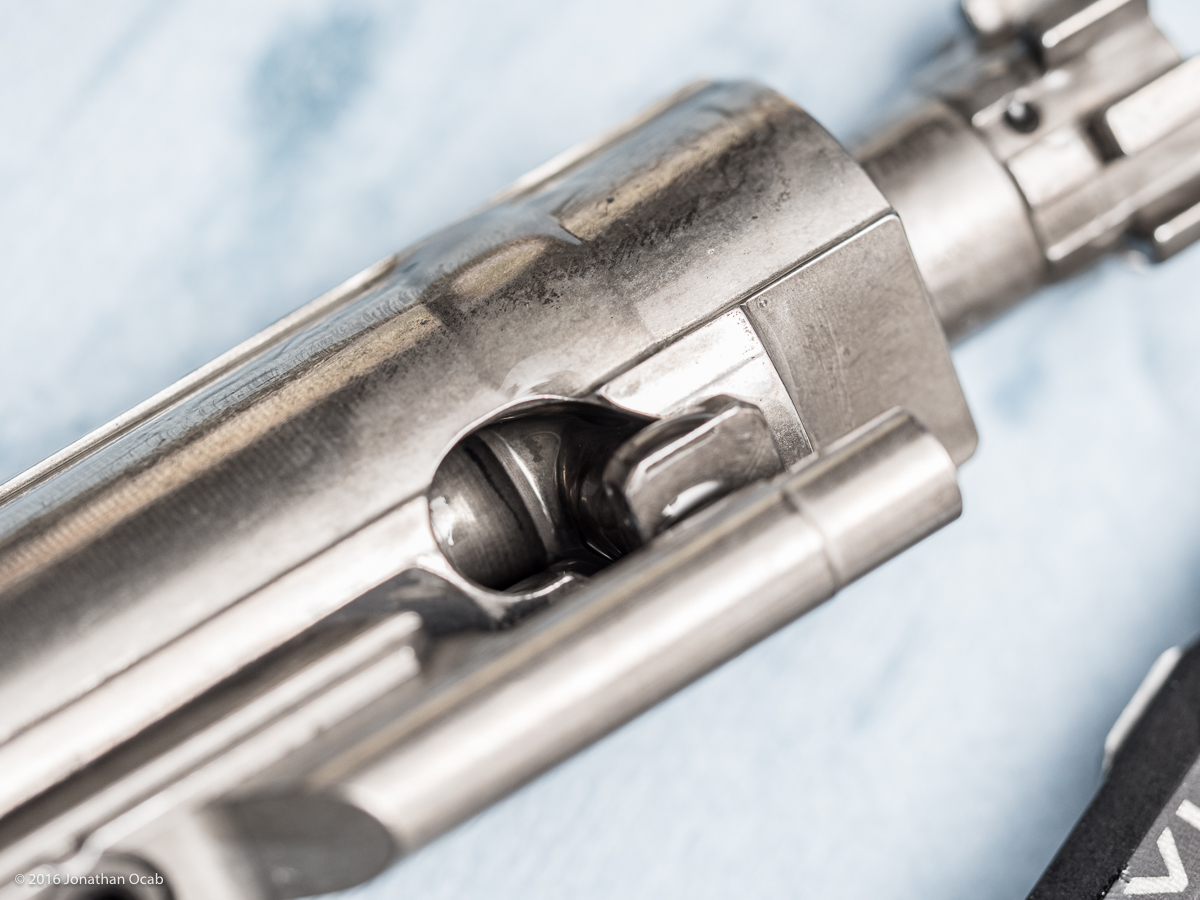
I will then spray a generous amount of M-Pro7 into the chamber with the muzzle angled down to saturate the bolt lug recess, chamber, and bore. I pretty much spray MPro-7 into the chamber end until M-Pro7 starts leaking out the muzzle end.
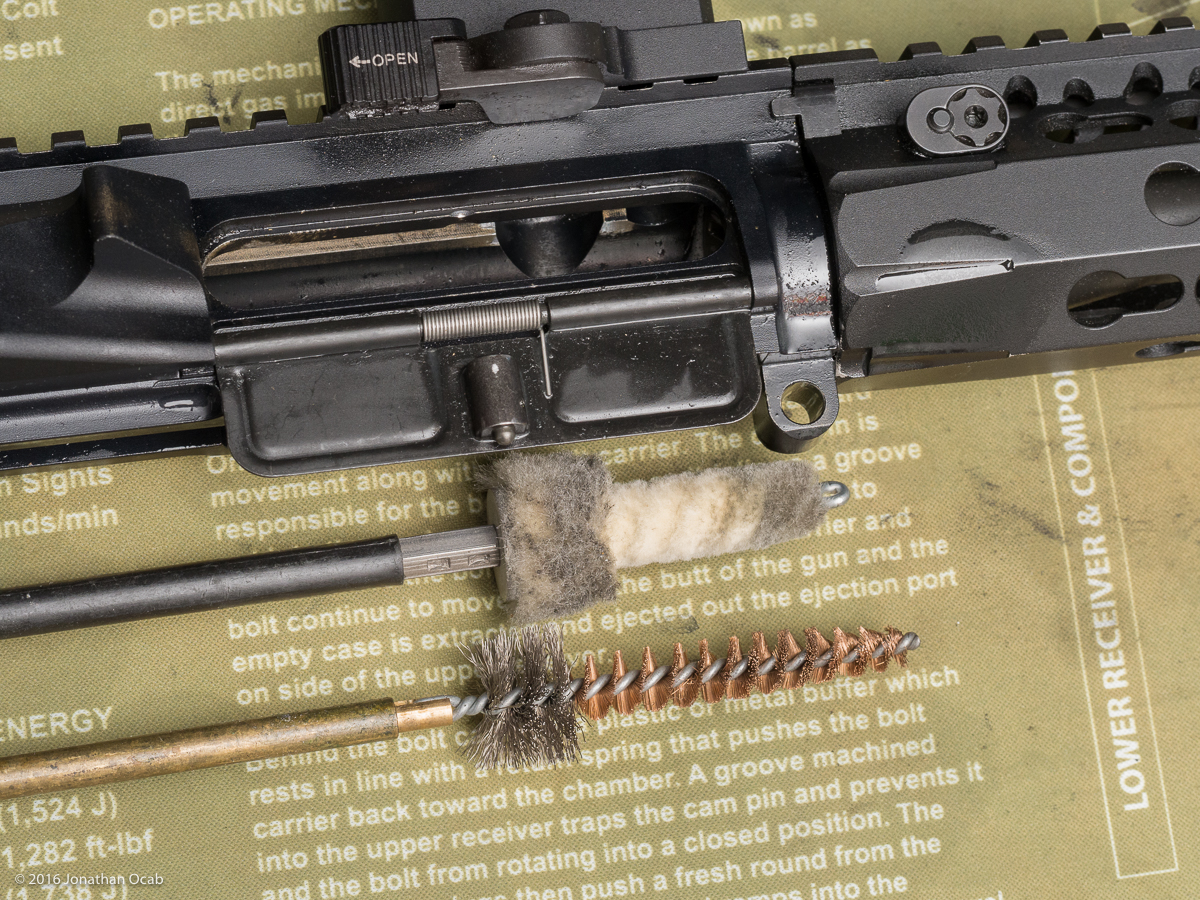
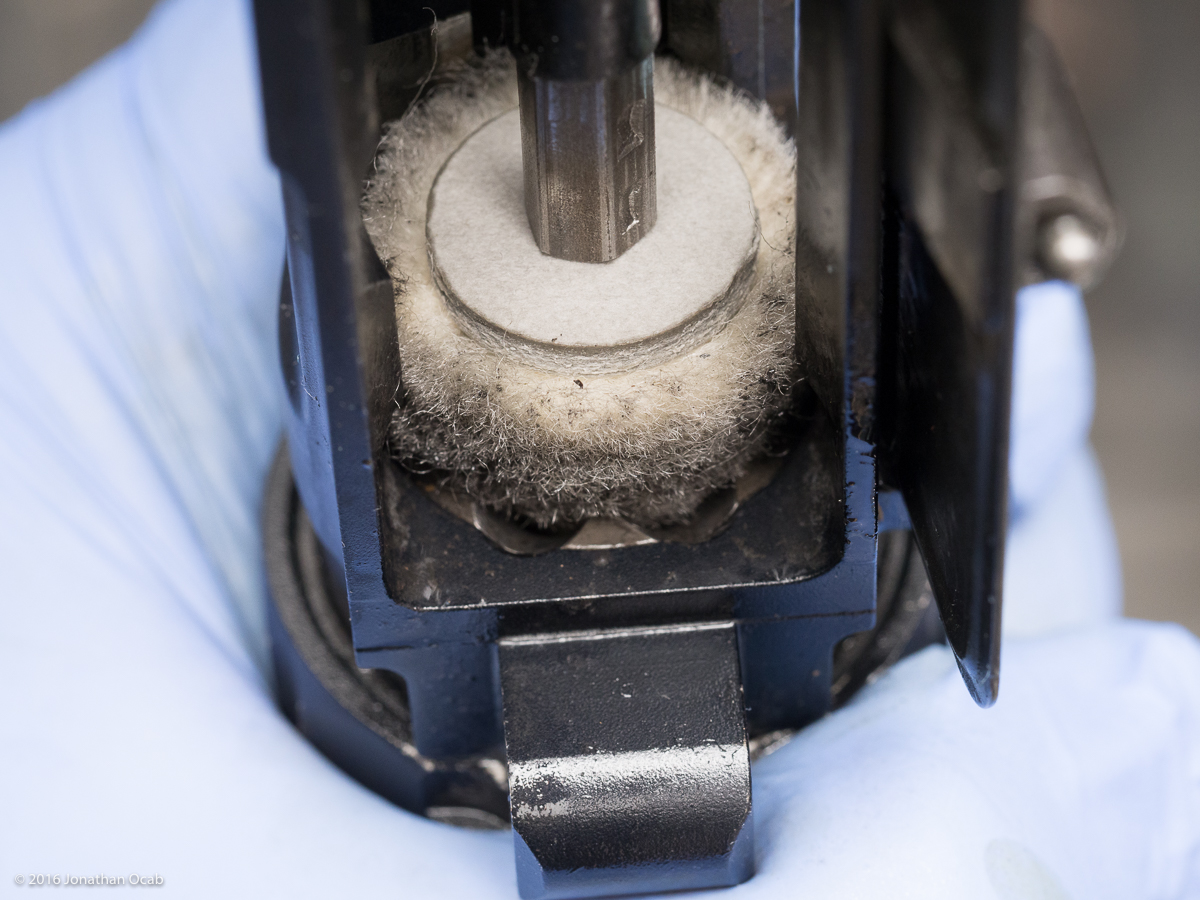
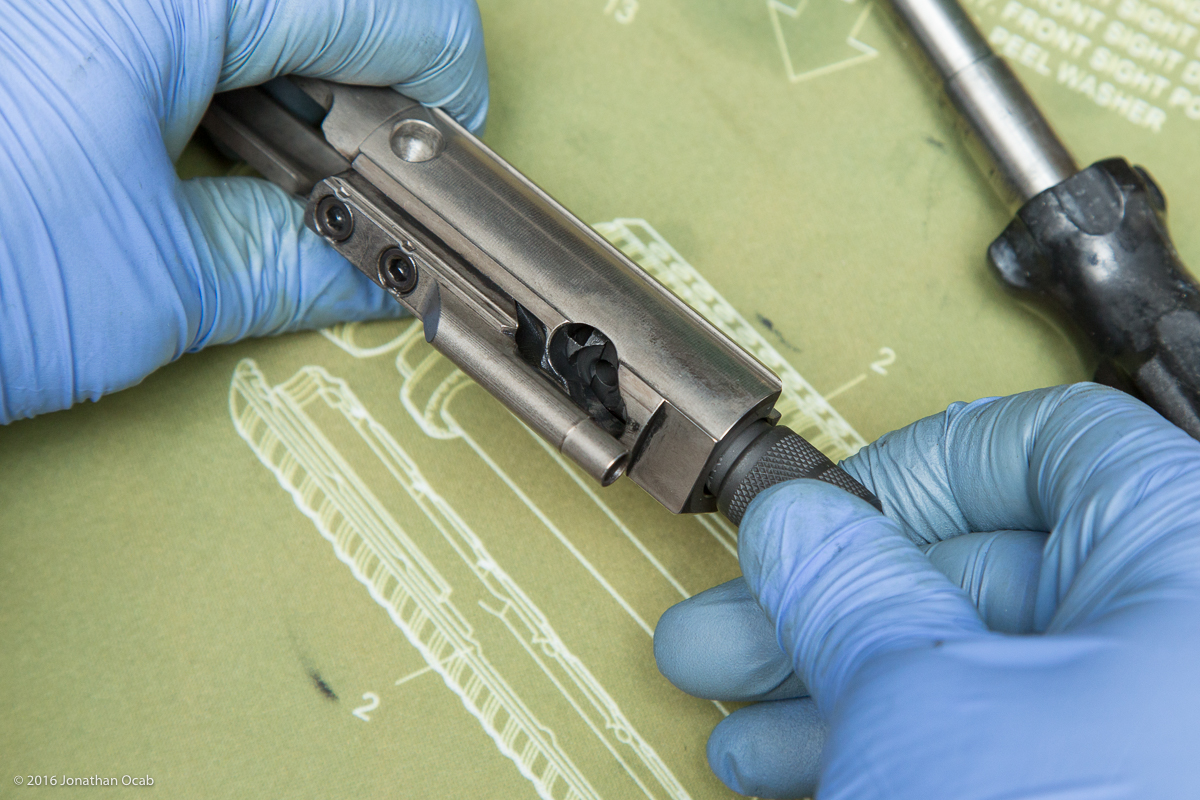
Then I will proceed to clean the chamber using an AR-15 chamber cleaning brush on a Dewey brass chamber cleaning rod. After using the AR-15 chamber cleaning brush, I will then use a cotton or wool AR-15 chamber mop. Note that chamber mops aren’t all that great for cleaning. I only use it to wipe out any excess solution and loosened carbon crud.

Stage 1 is complete and I will put the upper receiver in a cleaning cradle or vise and let the M-Pro7 that was sprayed into the bore to soak into the fouling in the bore.
In summary, the core steps of Stage 1 are:
- Clean upper receiver exterior and interior with towel(s) and M-Pro7.
- Spray generous amount of M-Pro7 into chamber end, saturating the bolt lug recess area, chamber, and bore.
- Clean bolt lug recess and chamber with chamber brush and chamber mop.
- Set aside to let M-Pro7 in barrel soak the bore.
Stage 2
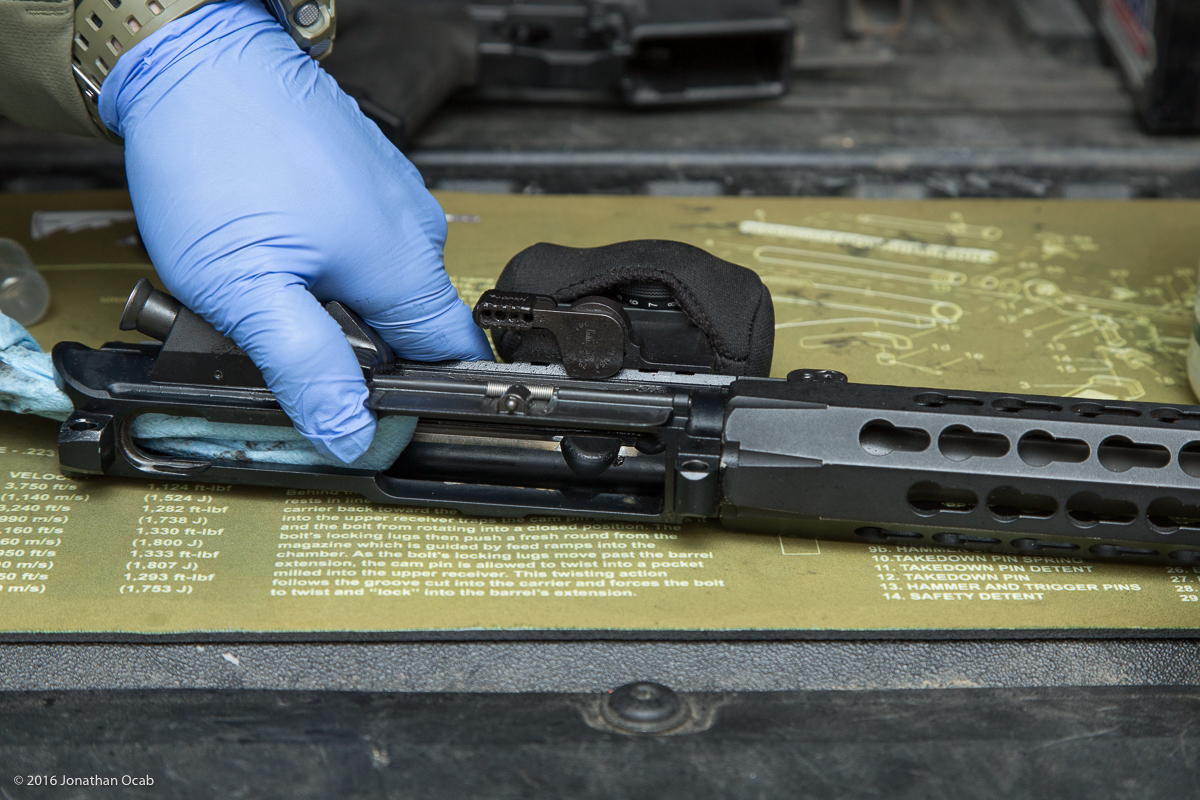
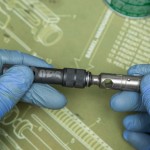
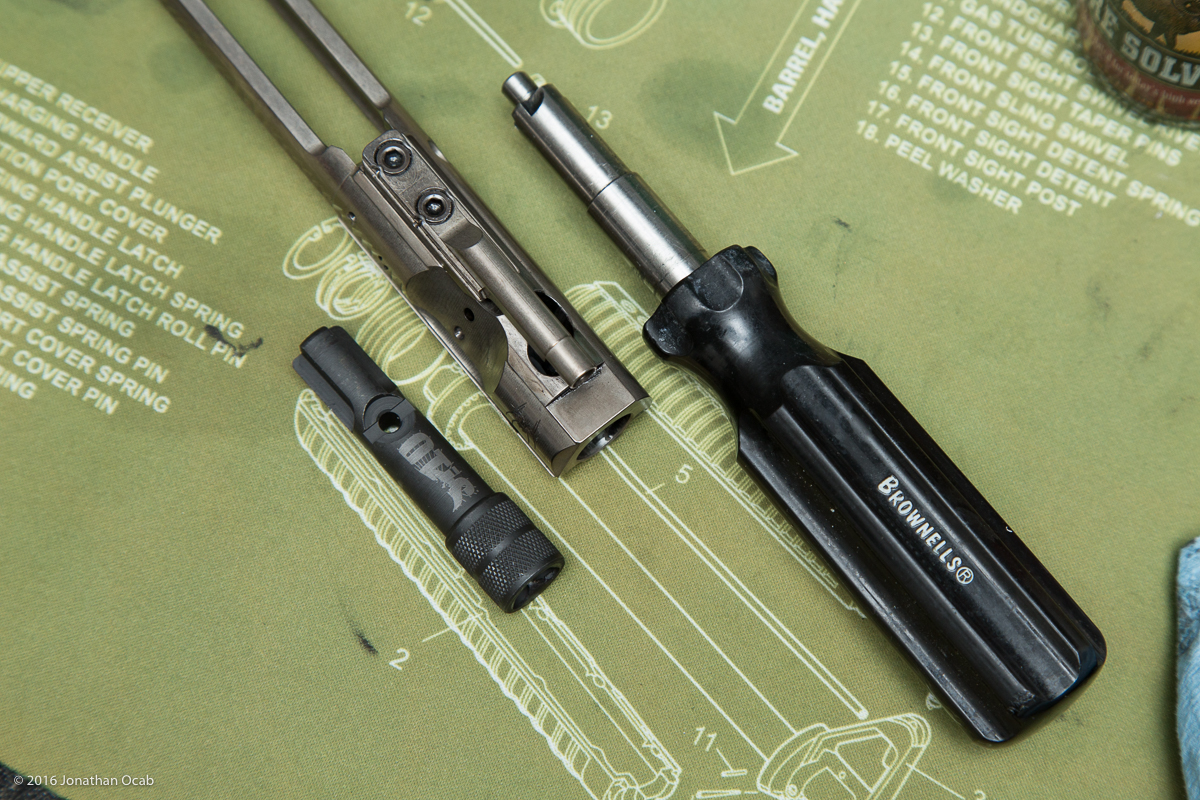
Since I want the M-Pro7 to take some time and soak into the dried bore fouling, I will take the opportunity to clean the bolt carrier group and charging handle. Obviously, I will field strip the BCG down to its core parts:
- bolt carrier
- bolt
- firing pin
- cam pin
- cotter pin
From there, I will spray down these parts with a generous amount of M-Pro7 gun cleaning solution. Using a nylon brush to agitate the carbon fouling on the BCG parts and CH is helpful to loosen and remove the fouling.
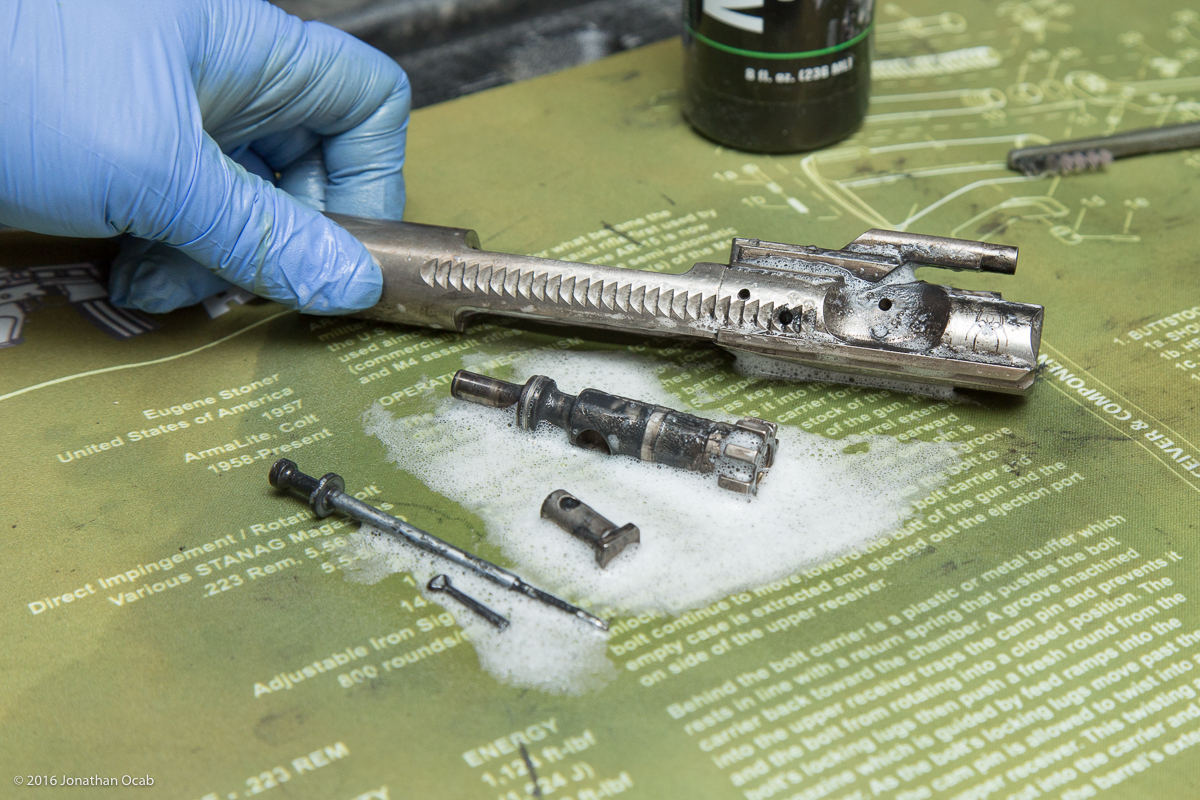
These parts are then wiped down with a rag or shop towel.
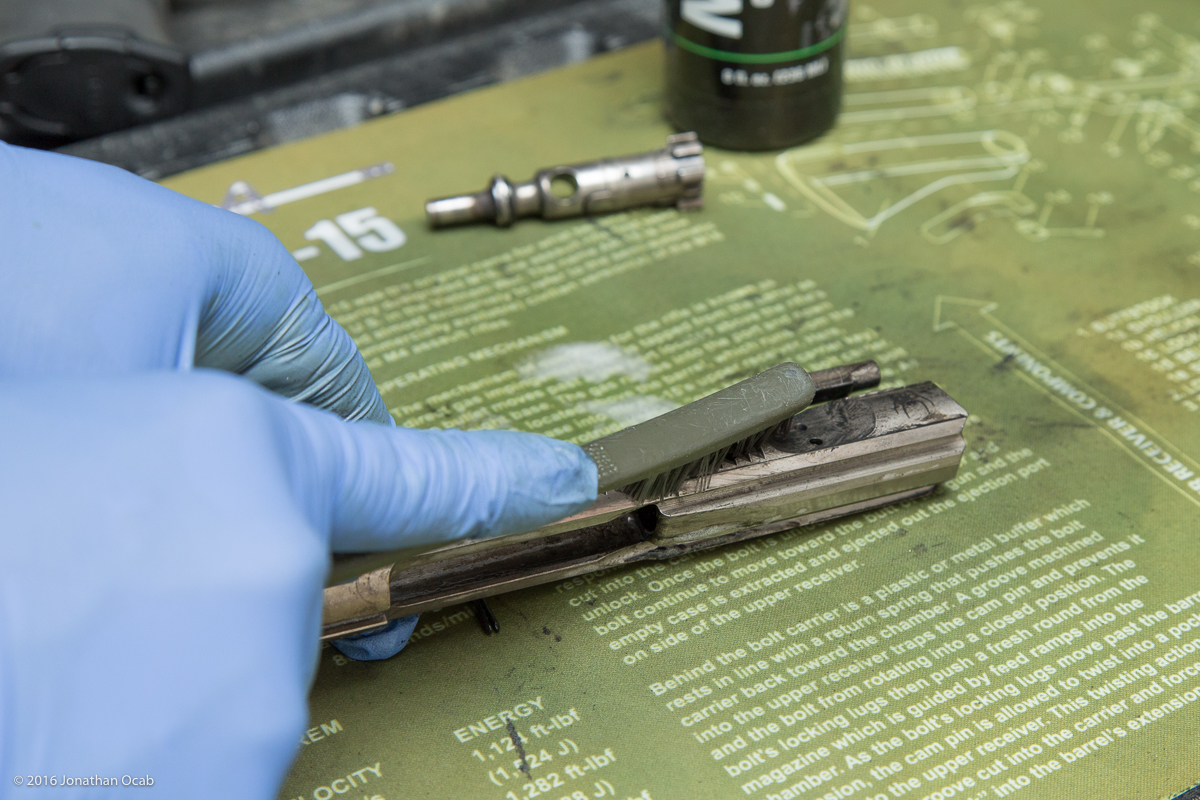
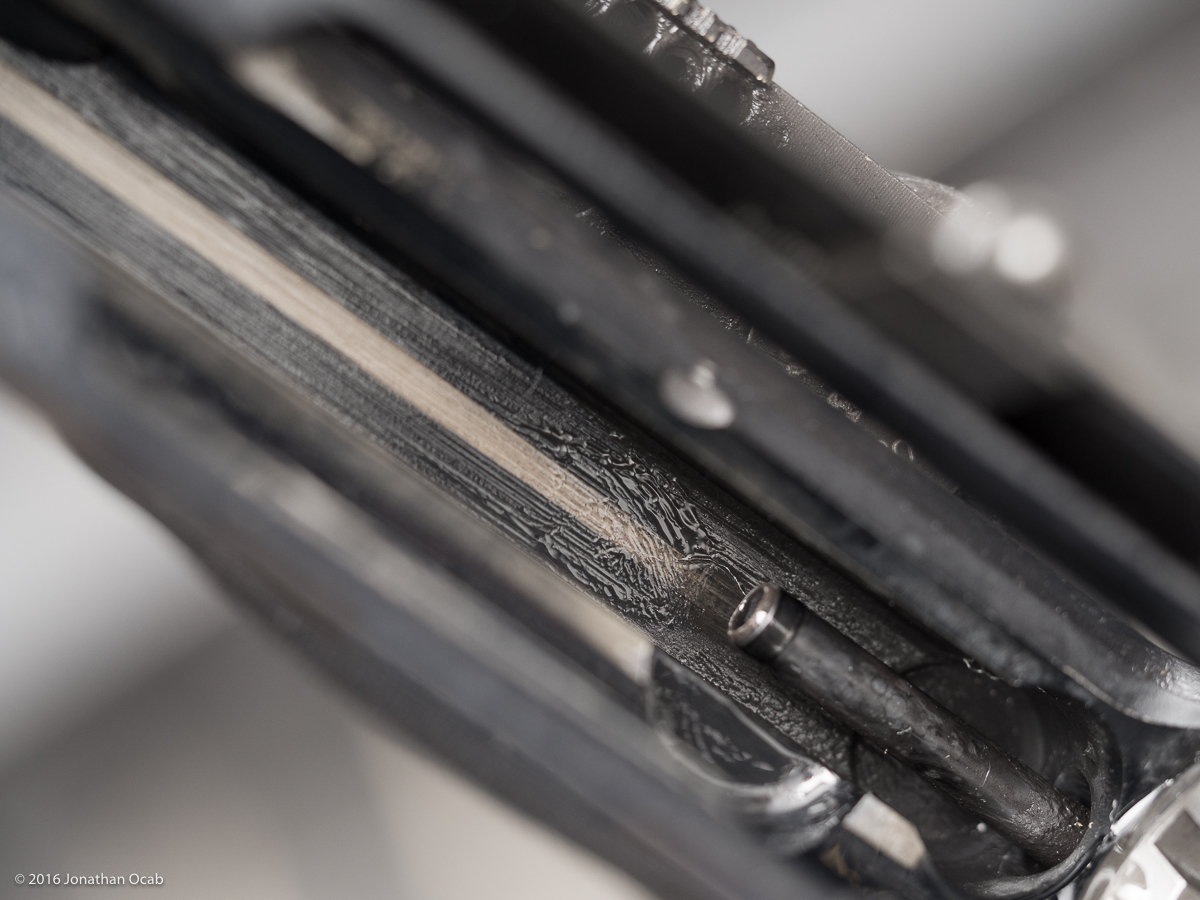
There are two “trouble spots” that are often the most difficult to clean with regards to the BCG: the bolt carrier channel ‘base’ and the bolt tail. These two points collect the most difficult to remove fouling since the carbon fouling is baked onto those areas by the hot gases of the fired cartridge during operation.
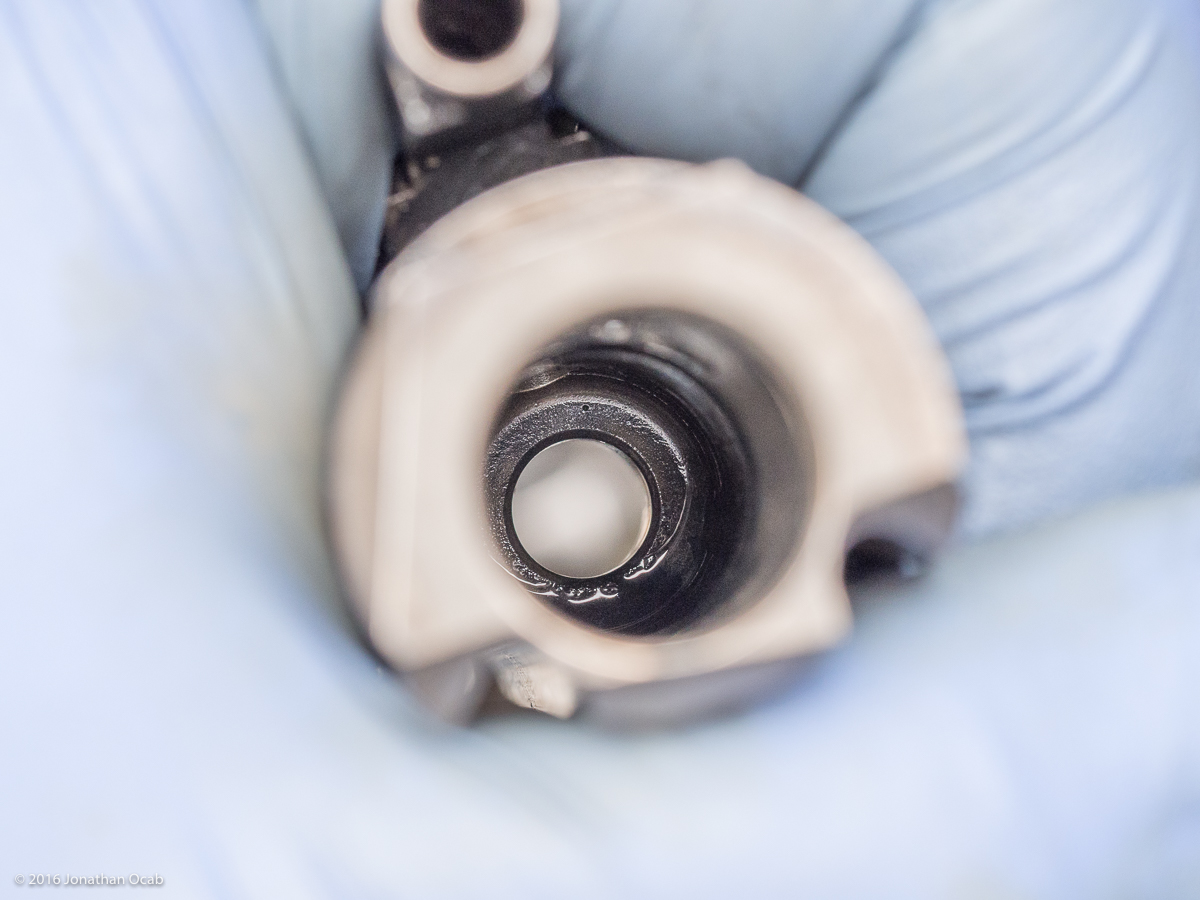
As far as cleaning the bolt tail, you can just use a razor blade or the neck of a brass cartridge case to scrape the carbon off the bolt tail. Of course, you could use a bolt scraping tool such as the Otis B.O.N.E tool or the scraping tool on the Leatherman MUT.
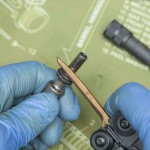
Cleaning the back wall of the channel in the bolt carrier is a bit more problematic. Soaking this area in some sort of cleaning solution will help significantly if you desire to clean it off completely. From there, you can use cotton swabs or a scraping tool such as the Otis B.O.N.E. tool or a standalone tool like the Brownells bolt scraping tool.
I will use a scraping tool, followed up by a paper towel wrapped around the small end of a GI-style nylon brush. Generally, this isn’t completely clean, and you’ll often still see carbon fouling inside the bolt carrier channel (especially with a macro lens), but it’s not going to affect function.
After cleaning the bolt carrier, bolt, firing pin, cam pin, cotter pin, and the charging handle, I’ll spray these parts down with brake cleaner in order to remove any leftover solvent and spray off any left over carbon fouling if possible.
Stage 2 is completed and I’ll set aside all of the BCG parts and the CH and begin on the next stage of cleaning the bore.
The core steps of stage 2 are:
- Field strip bolt carrier group.
- Wipe down all bolt carrier group parts with shop towel(s).
- Spray down all bolt carrier group parts with MPro-7.
- Use nylon brush to agitate and loosen fouling on parts.
- Use scraping tools in troublesome fouling areas.
- Wipe down bolt carrier group parts.
- Spray down all bolt carrier group parts with brake cleaner to remove lingering solvent and fouling.
Stage 3
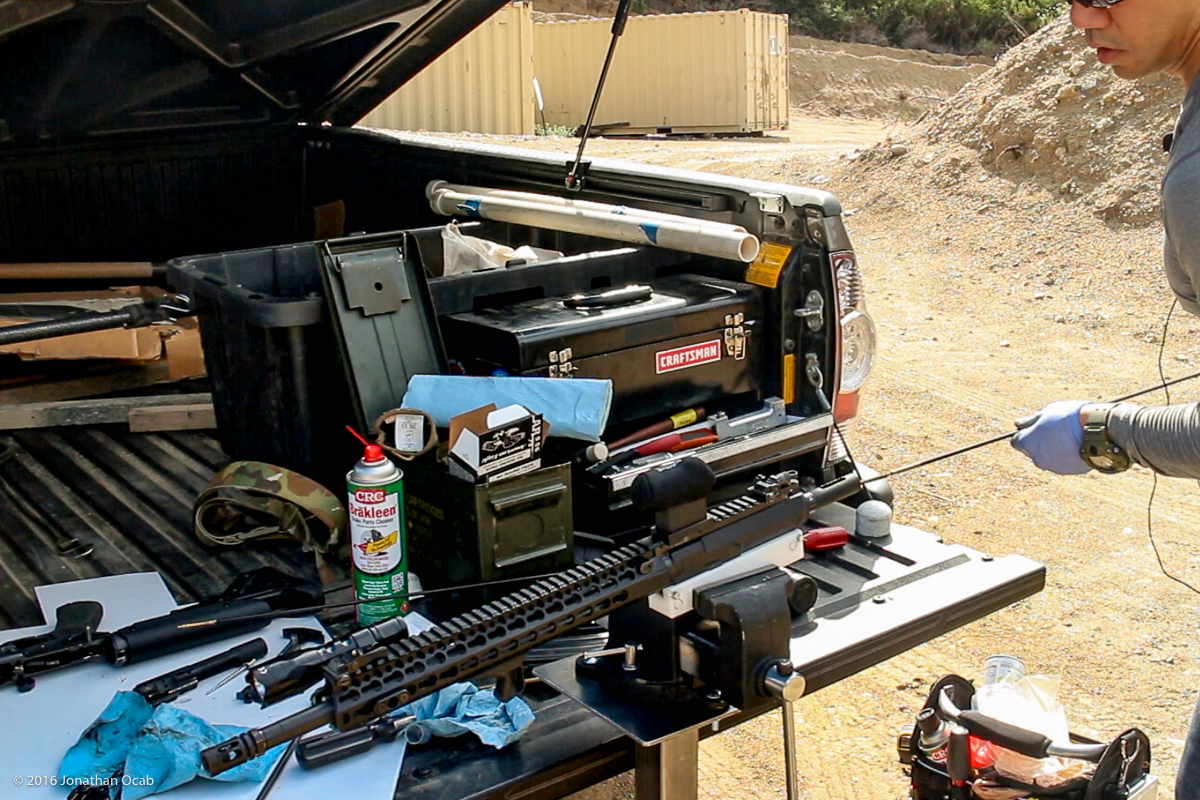
Bore cleaning is the next phase I undertake when cleaning the AR-15. By now, the M-Pro7 that was sprayed into the bore in Stage 1 has worked it’s way into the dried fouling within the bore.
Note that I will use a few tools when cleaning the bore.
- 20 caliber Pro-Shot stainless steel rod and 20 caliber Pro-shot pierce-style jag
- 22 caliber Dewey coated rod and 22 caliber bronze bristle, brass core brush
- Lucas Bore Guide with the appropriate 20 caliber and 22 caliber sleeves
- Sinclair International cleaning cradle or bench vise with upper receiver vise block (to hold upper)
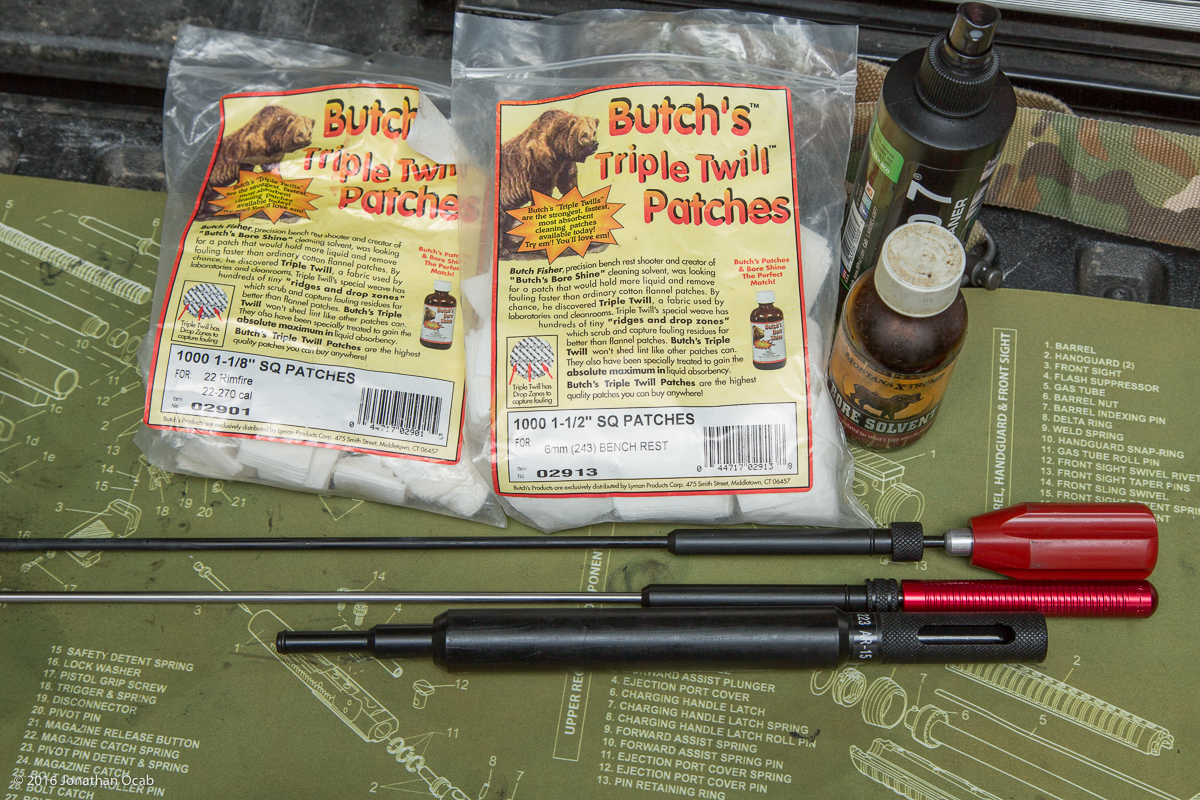
Without getting too deep into the weeds on cleaning tools in this post, the reason why I use a 20cal rod and jag for patches is because I like to use 1-1/2″ Butch’s Bore Shine triple-twill patches in a 22cal bore. The 1-1/2″ square patches are actually meant for larger 6mm/.243″ bore diameters, while 22cal typically uses a 1″ patch. I don’t like 1″ patches because they don’t have much material to carry in solvent and to take out fouling on each pass. Plus, I found that even 1″ patches on a 22cal jag can be too tight, depending on the design of the jag used.
That being said, I use a 1-1/2″ BBS triple-twill patch on a 20cal rod and jag in a .223/5.56 AR because it has a lot of patch material to deliver solvent and to wipe out fouling, and the combination of jag diameter and patch size is not too loose nor too tight in a .223/5.56 barrel.
I begin by spraying down the a bore brush with some M-Pro7 and then running the brush from the chamber end out the muzzle and back.
I will run down and back up the bore several times. The goal is just to further agitate and loosen the fouling in the bore, particularly in the lands. Note that I wipe down the shaft of the cleaning rod with a paper towel after each complete pass of the rod. This is to remove any fouling or grit from cleaning rod’s shaft so it doesn’t reenter the bore.
I count both the forward stroke (insert brush through chamber end and out muzzle end) and the reverse stroke (pulling brush back from muzzle end and out chamber end) as one full complete pass.
There is a lot of controversy over running chamber brush out the muzzle and back into the muzzle on a reverse stroke, the argument being that you’re going to ruin the lands at the crown. Some purists will actually remove the brush from the rod after the brush exits the muzzle end, remove the rod from the barrel, and reattach the brush for the next pass. My counter to this is that you’re using a bronze/brass brush, it won’t cause any damage to the steel of the barrel.
After several passes of the bore brush in the barrel, I will then spray down the brush with brake cleaner. This will help remove any solvent from the brush and extend the life of the brush so it doesn’t have to be replaced as often. Note that isopropyl alcohol is also sufficient.
Now that the barrel has been brushed, I will then run several patches down the bore. I will spray down a patch with M-Pro7 and run it down the bore and out the muzzle, collecting the dirty patch in a garbage can underneath the muzzle or into a patch collector attached to the muzzle.
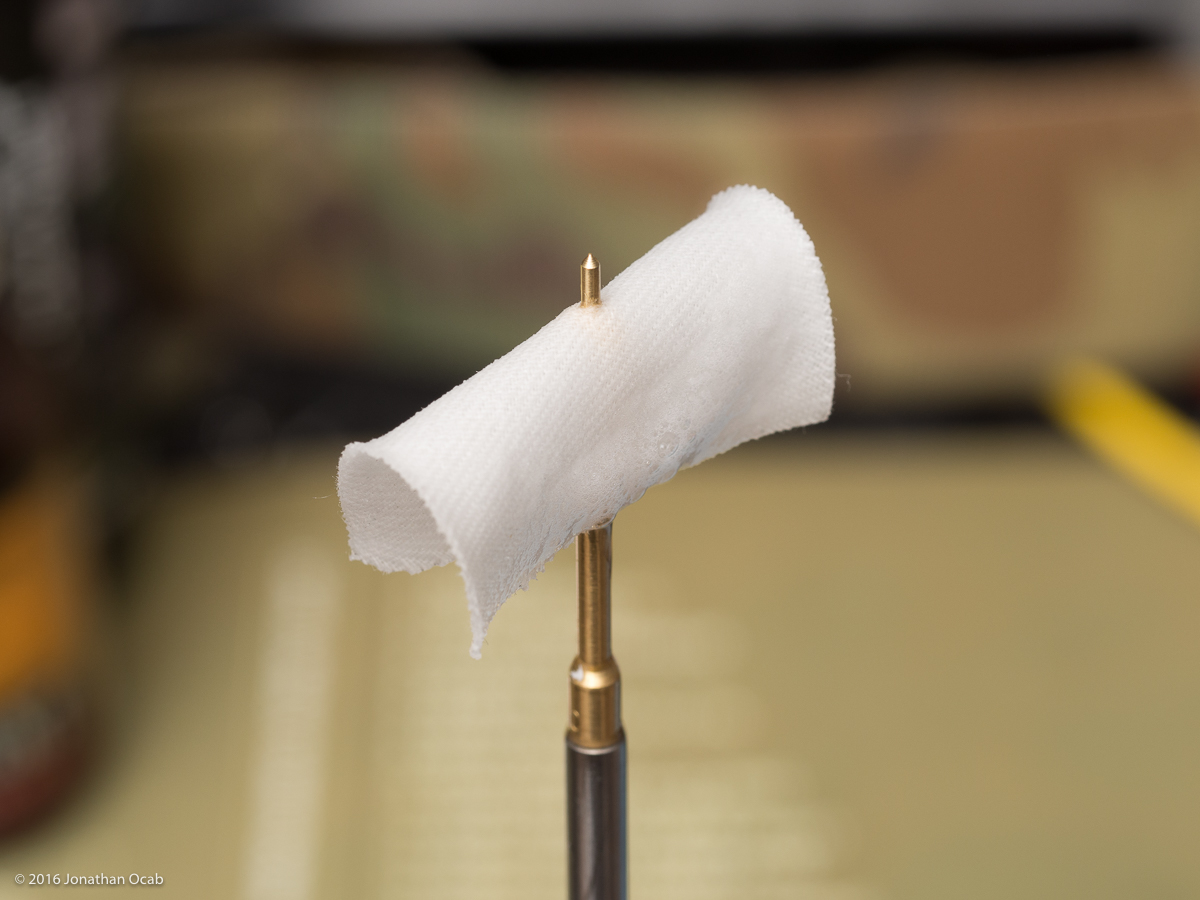
I will alternate a M-Pro7 saturated patch and a dry patch through the bore several times. After six or so pairs of wet and dry patches, the patches typically start to come out pretty clean. It all depends on how many rounds were fired in the gun since it’s last cleaning.

There is one optional step, and that is to use a copper solvent. I will generally use a copper solvent in any bore that is not chrome lined *after* I run several pairs of M-Pro7 wet and dry patches, and the patches start coming out fairly clean. Once this happens, I’ll run patches wet with Montana X-Treme Bore Solvent. I’ll do a few wet and dry pairs, but letting a few minutes elapse between a wet and dry patch in order to let the Montana X-Treme to act on the copper. I don’t really run copper solvents in a chrome lined bore because chrome lined barrels don’t build up copper fouling as frequent as stainless steel or chrome moly (unlined), and M-Pro7 in combination with brushing and patches seems to take care of a chrome lined barrel without much need of copper solvent. If anything, I will use a copper solvent in a chrome lined barrel every few thousand rounds.
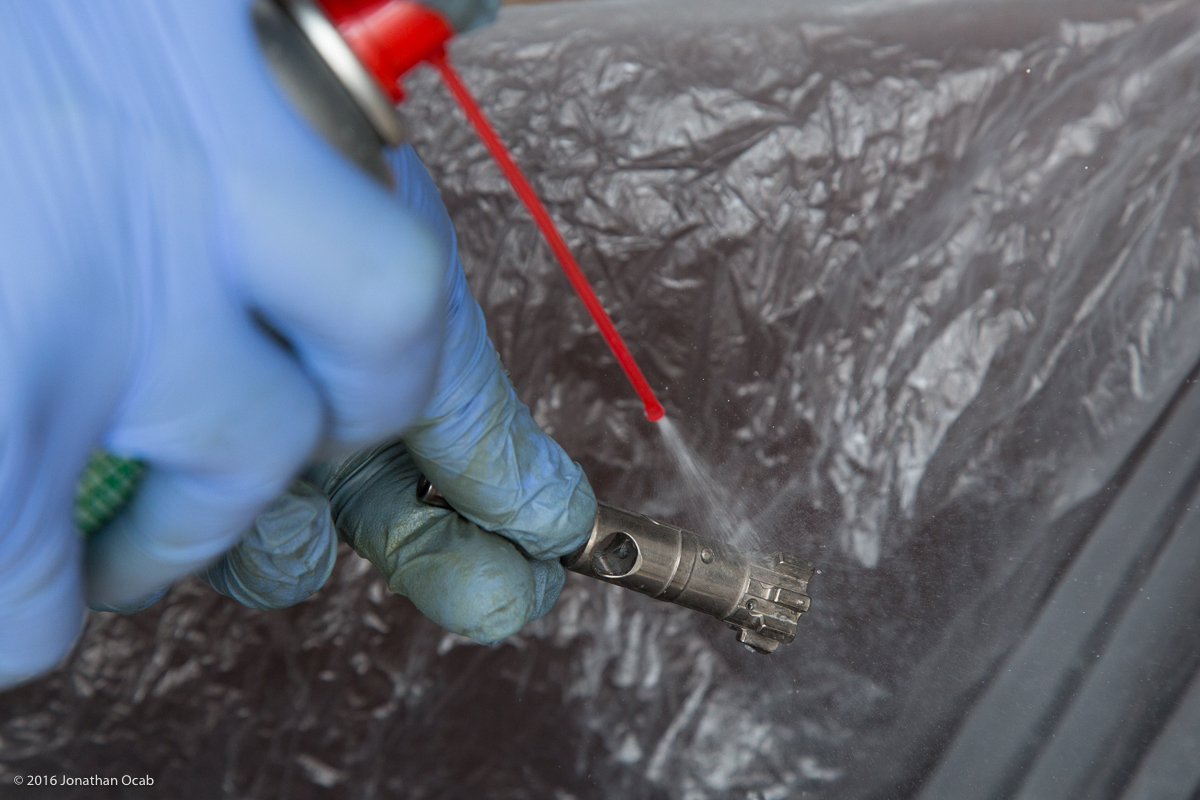
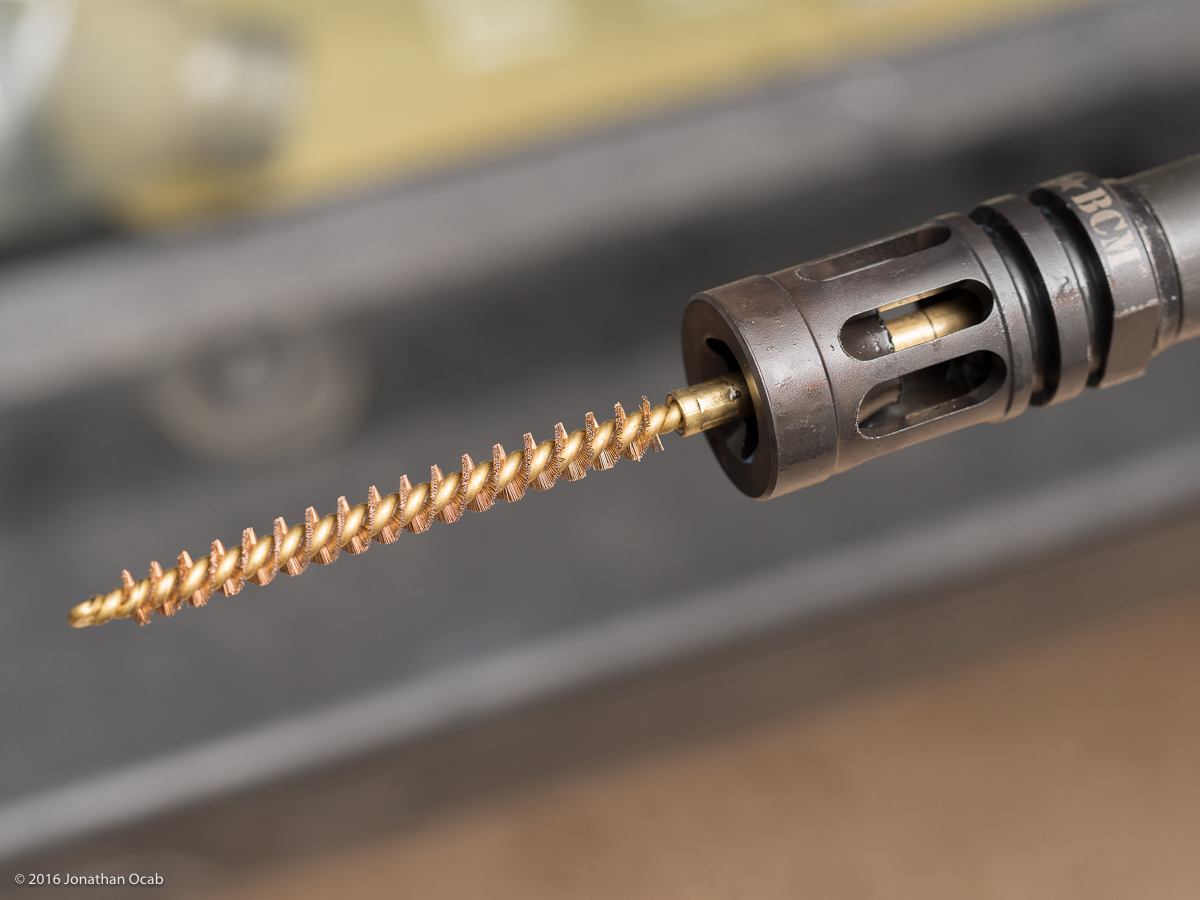
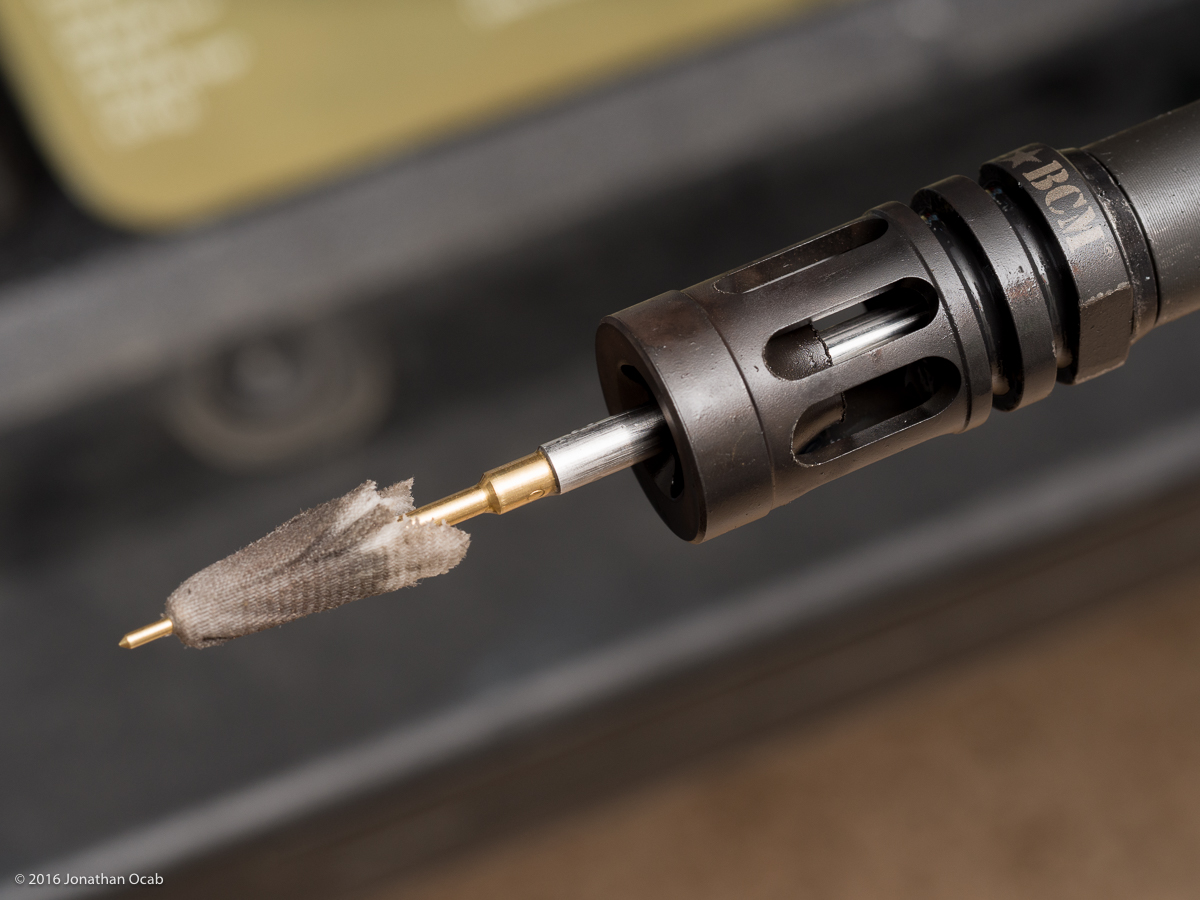
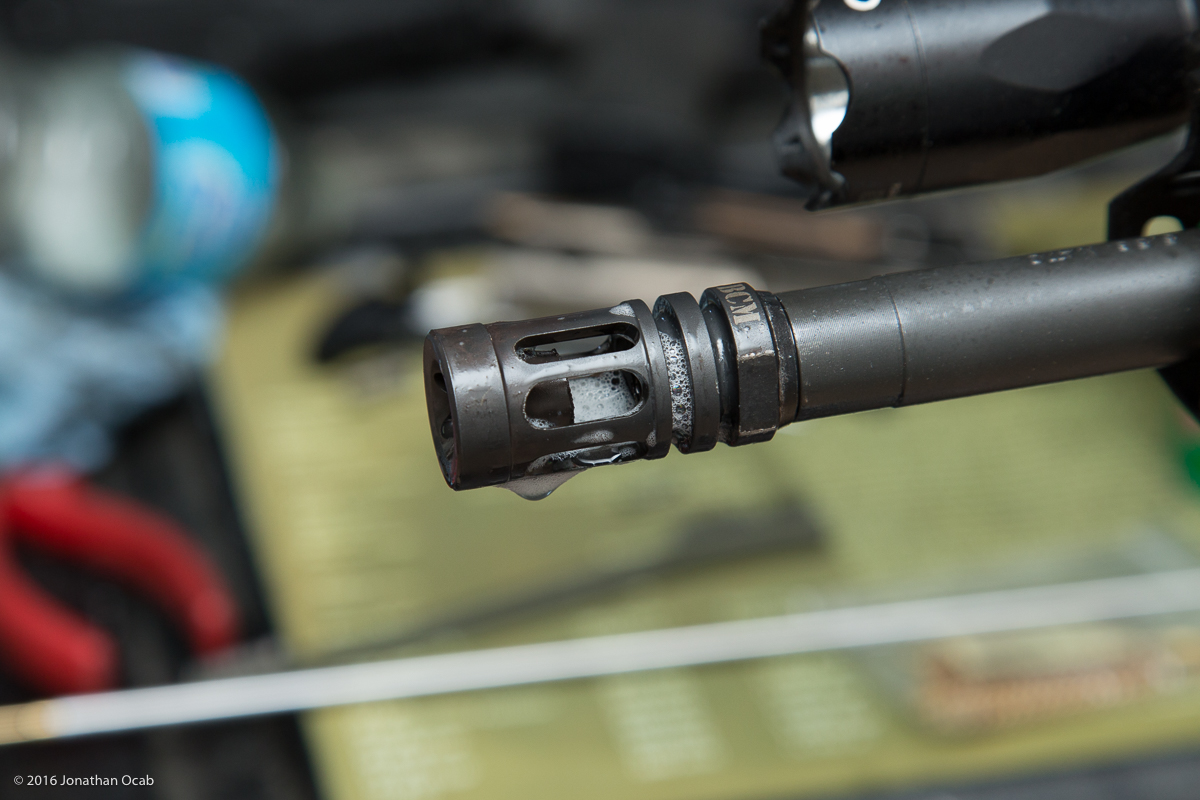
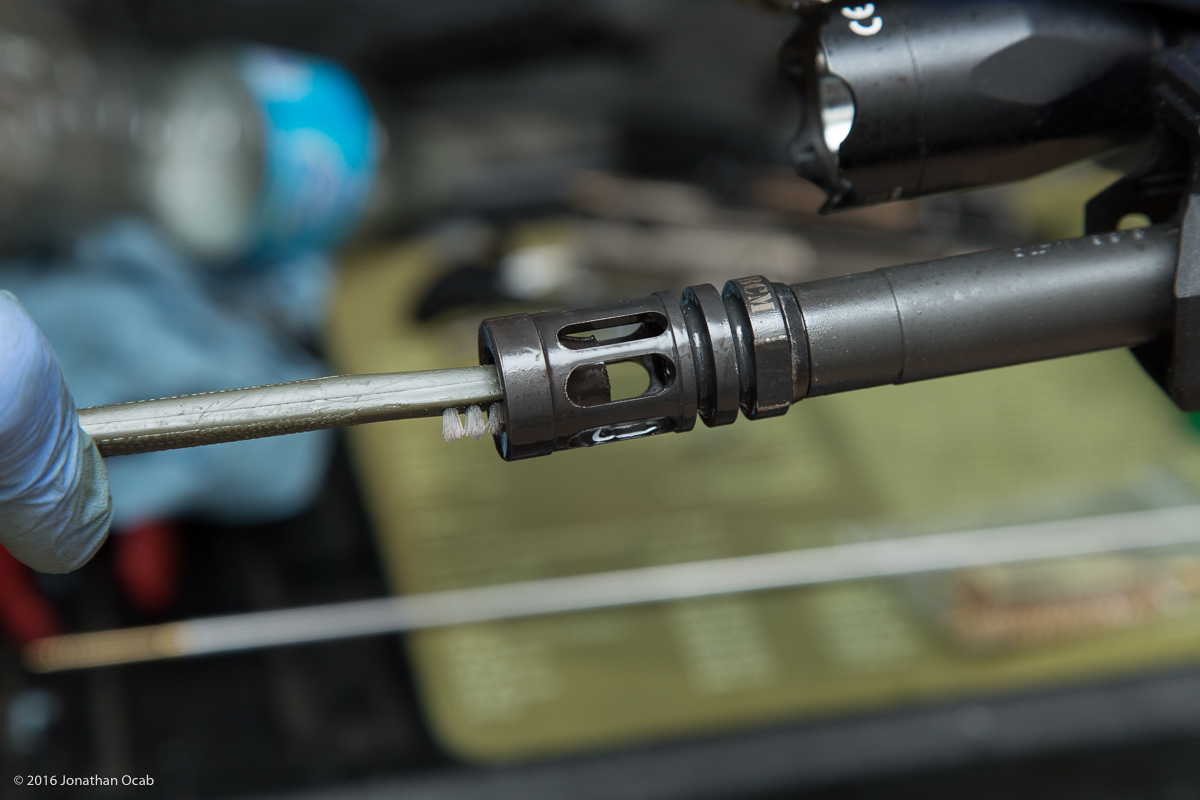
When the patches start coming out streak free, I’ll spray down the muzzle attachment (flash suppressor or muzzle brake) with M-Pro7 and do some basic brushing of the reachable surfaces. I don’t expect to clean a flash hider or muzzle brake very completely, but this is mainly to get some of the crud off of it wherever I can.
I’ll pass a few more wet and dry patch out the bore after the muzzle attachment is brushed and wiped down, at which point I will remove the bore guide and spray out the bolt lug recess, chamber, and bore with brake cleaner. I will also spray down the muzzle attachment with brake cleaner. This is to pretty much remove any solvent left in these areas.
After a few minutes of dry time, I’ll re-insert the bore guide, and run a couple dry patches through. Then I will run a patch wet with Slip2000 EWL down the bore.
This isn’t to lubricate the bore, but to get a light film of oil preservative in the bore since it will be bone dry after using the brake cleaner. I’ll run the same oily patch down the bore twice, taking the patch off the jag after the first pass, flipping it over, and run it through once more. Then I will run a single dry patch to mop up any excess pools of oil. I don’t want the bore dripping with oil. Again, I simply want a light film as a rust preventative.
To summarize the steps for stage 3:
- Use run bore brush wet with M-Pro7 on rod through the barrel for several full strokes (once forward and backward).
- Run a patch wet with M-Pro7 on a jag with rod through the barrel, followed by a dry patch. Repeat several times until patches begin coming out nearly streak free.
- Spray down muzzle attachment (flash hider or muzzle brake) with M-Pro7 and clean with nylon brush and towel(s) as best as possible.
- Spray brake cleaner into bolt lug recess area, chamber, and into bore.
- Run a few dry patches though the bore.
- Run a patch wet with Slip2000 EWL through bore.
- Run a dry patch through bore.
Stage 4
The bolt carrier group parts and charging handle should be pretty much dry after the time spent cleaning the barrel. I will lubricate parts with Slip2000 EWL30.
I’ll pretty much drip EWL30 over the parts and then rub it all over the BCG parts and charging handle with gloved hands. After reassembling the bolt, I like to add a couple more drops of oil on the cam pin area and into the venting holes of the bolt carrier.

I will also apply EWL30 to the interior of the upper receiver with either a shop towel or directly with gloved hands.
Then the charging handle and bolt carrier group are inserted into the upper receiver.
So essentially, Stage 4 is:
- Apply Slip2000 EWL30 lubricant on all bolt carrier group parts (sans firing pin), and reassemble BCG.
- Apply lubricant on charging handle contact surfaces and inside upper receiver areas.
- Reinstall CH and BCG.
Stage 5
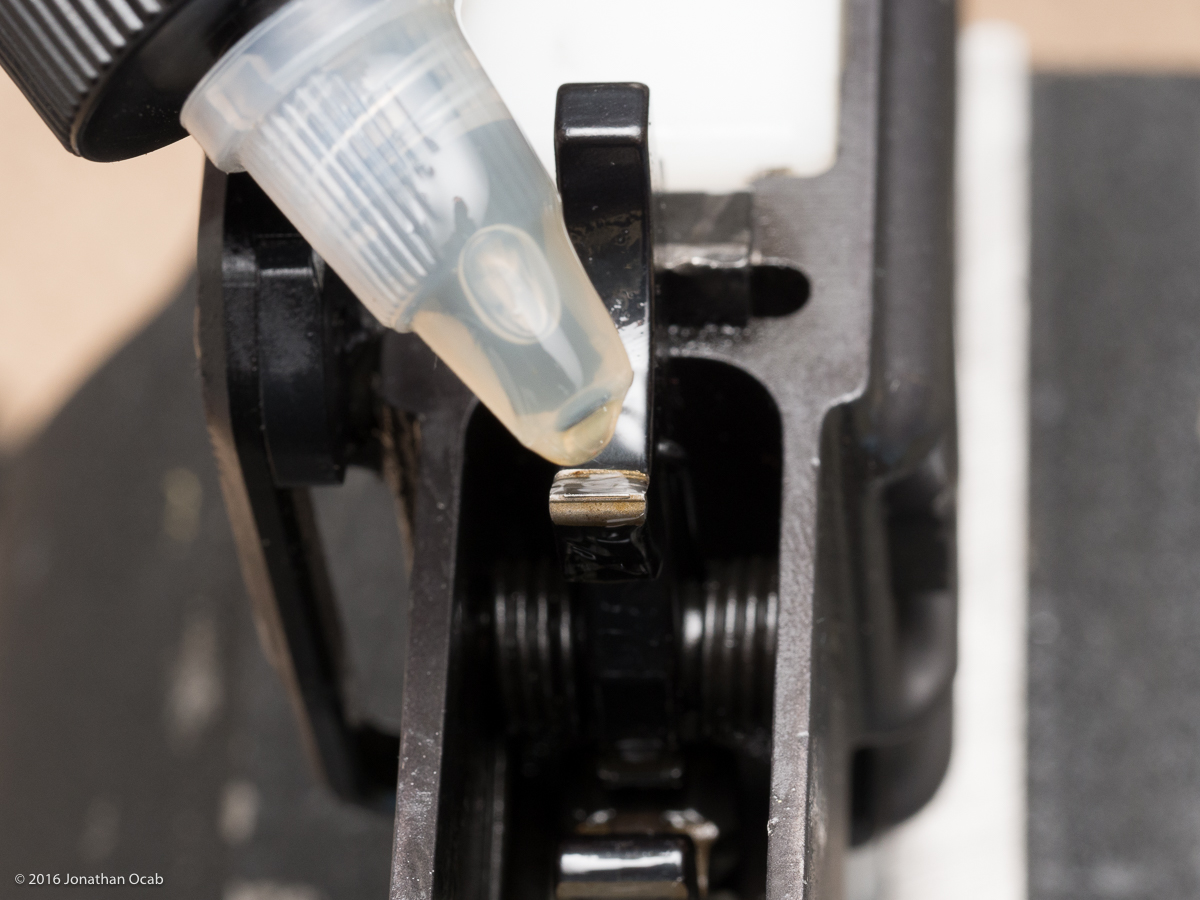
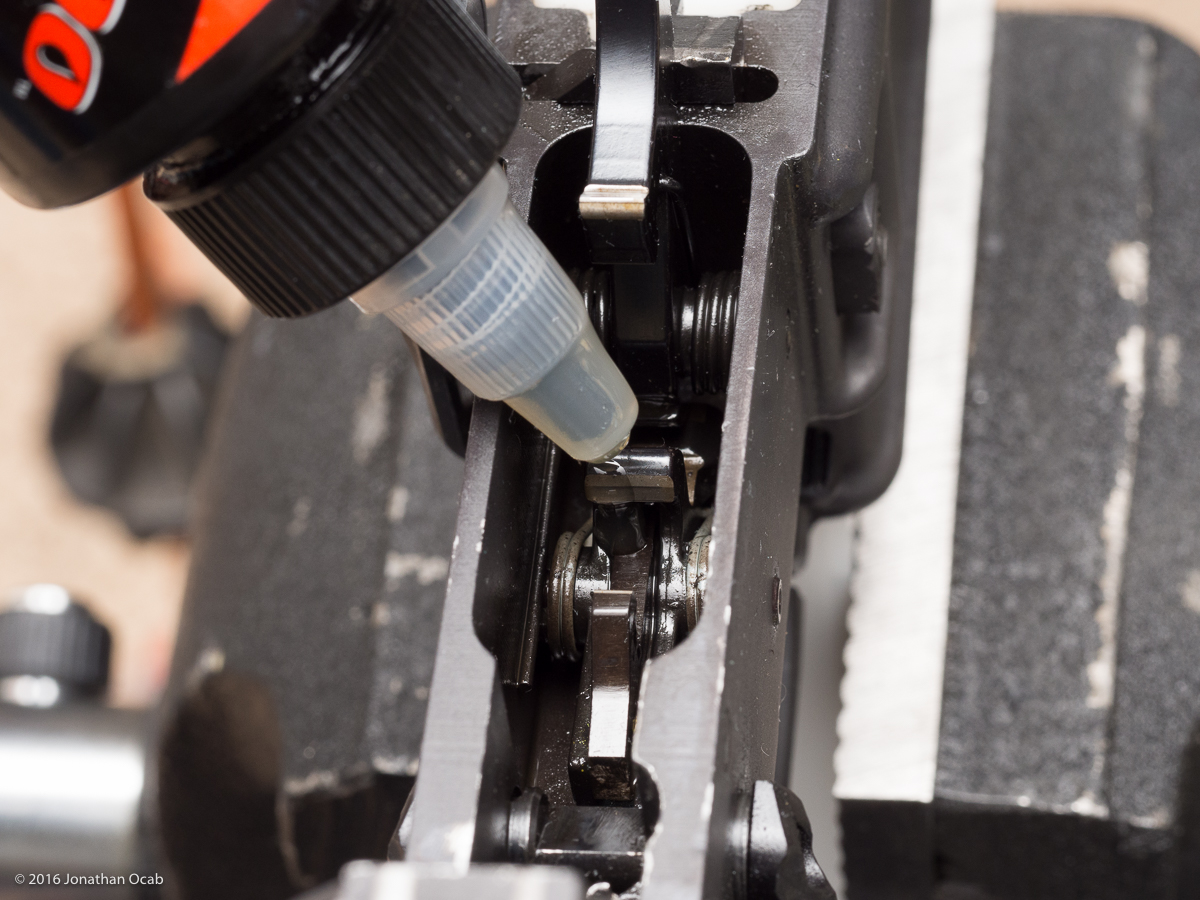
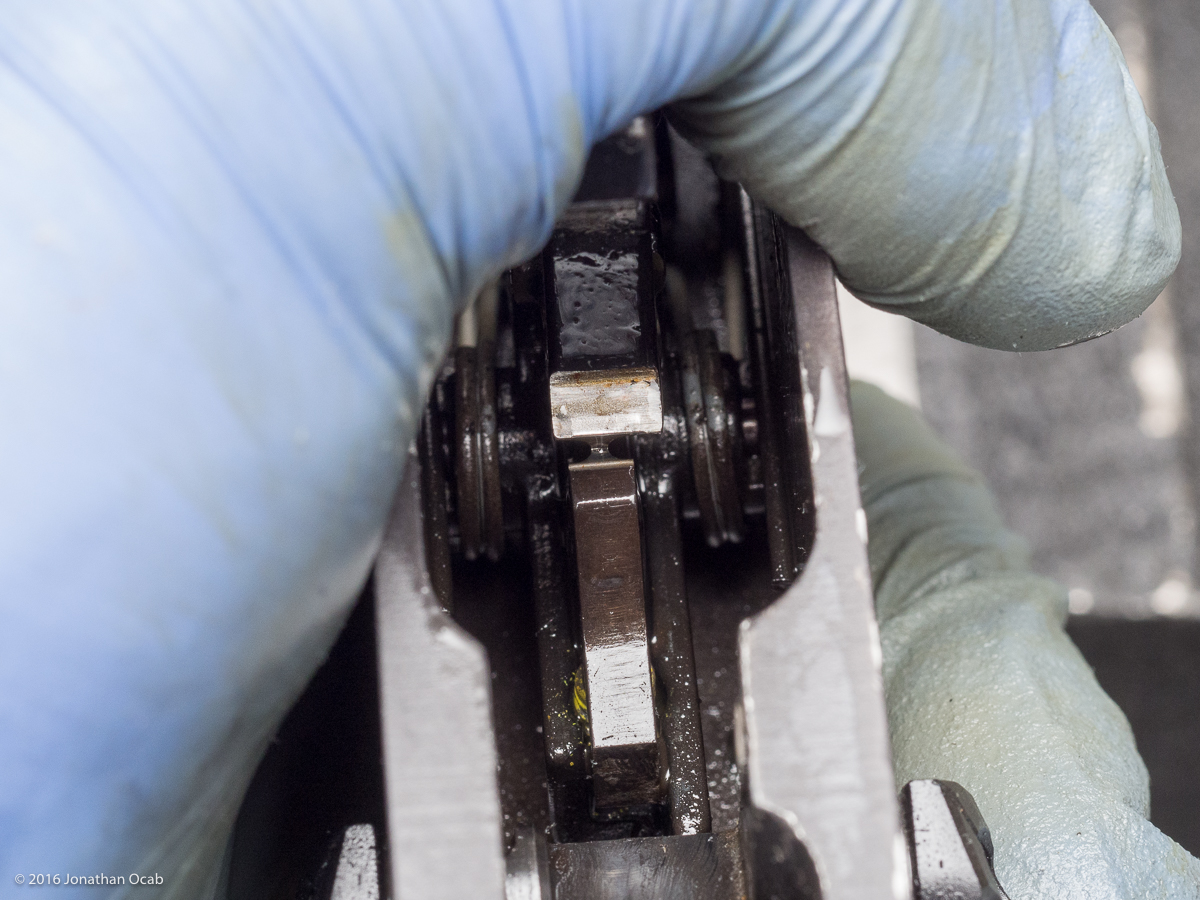
The final stage is some basic cleaning of the lower receiver. There really isn’t much to do to the lower receiver. I’ll generally just wipe out the trigger area for any fouling that mixed up with the lubricant. I’ll then reapply some lubricant (EWL30) to some of the key points on the hammer and disconnector, as well as the hammer and trigger pins. Note that the rifle in this demonstration has a Geissele SSA-E trigger, which has lubrication points defined in the owner’s sheet.
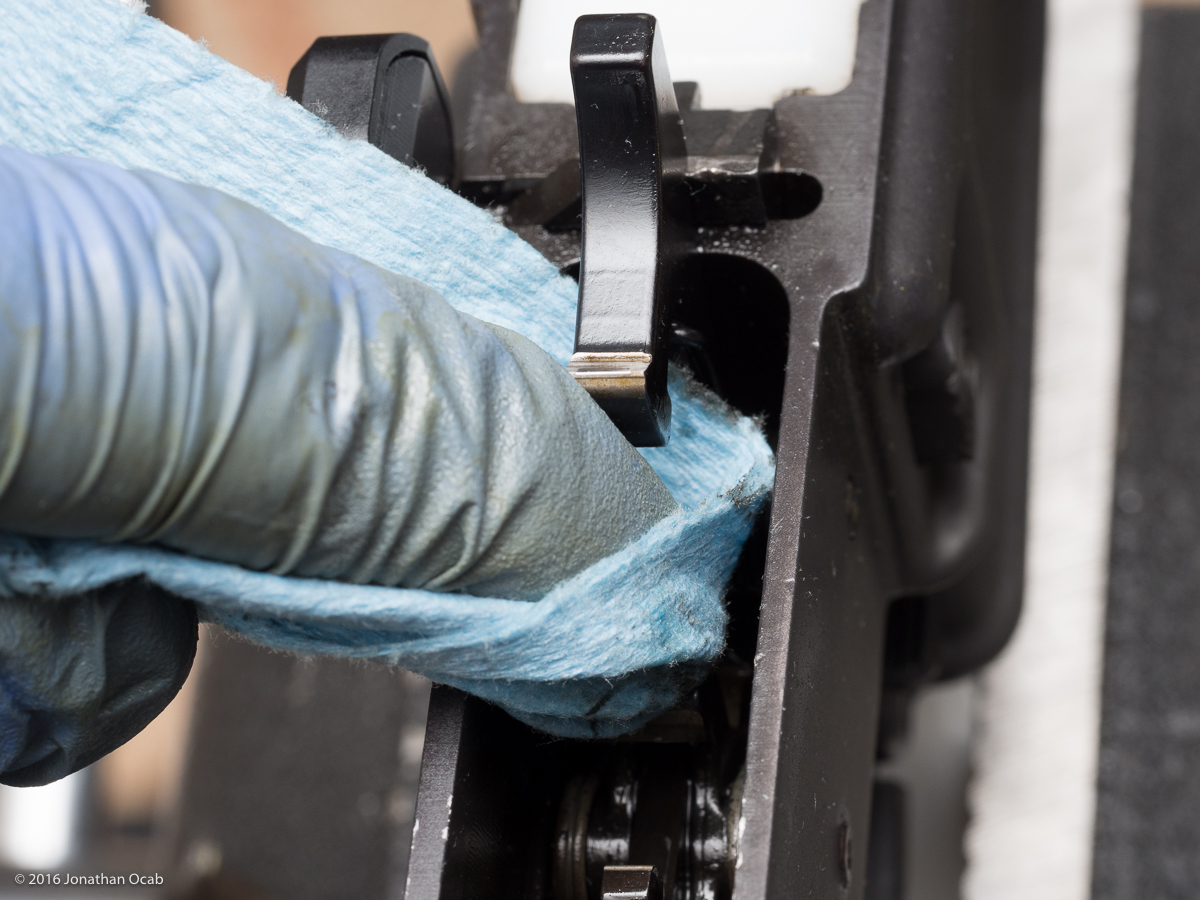
After this, the upper and lower receivers are put together, and I’ll do a quick once over with a lightly oiled (EWL) rag or shop towel over the exterior surfaces of the rifle.
This pretty much marks the completion of my cleaning process of an AR-15. This may seem like a lot of steps, but I can pretty much do this well inside 30 minutes.
While this article is written as “The How” of cleaning, it is *my* how. It’s not the only way to clean an AR-15, but hopefully it provides some insight for novices and experts alike, and you can utilize some of the methods outlined here.
It is also important to note that your choice of gun cleaning solvent, bore cleaning solvent, and/or lubricant may differ from what I use. I mentioned each product by name specifically in each step (e.g. EWL30 for BCG lubrication) because that is what I specifically use.
I mentioned a lot of the cleaning tools and supplies that I use to clean the AR-15, but I will list and discuss all of these items, and my reasons for using them (such as why I use Slip2000 EWL and EWL30) in Part 3 of my “Cleaning Firearms” series, to be posted in the very near future.
Addendum: I was contacted out of band regarding my omission of cleaning the gas tube. The reason why I didn’t even mention the gas tube is because I don’t clean it. At most, I’ll insert the plastic tube of the brake cleaner into the opening of the gas tube and spray, but this is ‘risky’ in that you might accidentally shoot the tube into the gas tube if it detaches from the spray nozzle. You risk creating an obstruction in your gas tube if you attempt to clean it (e.g. pipe cleaners). So basically, avoid cleaning the gas tube.
Comment on this post