
NOTE: A few people reached out to me thanking me for my review and mentioned that the LoD Offroad Destroyer rear bumper with tire carrier for the JK was actually revised to include a safety mechanism to prevent the carrier from swinging into the corner of the Jeep.
In my article outlining the first 60 days of Jeep Wrangler JK ownership, I discussed several possible upgrades I would make on the Wrangler. One of the upgrades mentioned is a rear bumper, and another mentioned is an aftermarket tailgate hinge and tire carrier upgrade. I was wanting the ability to mount accessories to the tailgate area, such as a Hi-Lift jack and a jerry can or Rotopax for emergency fuel.
While researching my options for accessory mounting, I inevitably looked into a rear bumper with integrated tire carrier system. What I found appealing with this type of system is that the weight of the spare tire would be taken off the tailgate, and placed on the rear bumper. This would alleviate stress on the OEM tailgate tire carrier and the tailgate hinges. Assuming the rear bumper and tire carrier had mounts for them, accessories could be mounted to that tire carrier and would not place extraneous weight on the tailgate or tailgate hinges.
As I scoured the Internet, I discovered LoD Offroad and their Destroyer rear bumper with tire carrier system.
The LoD Offroad Destroyer rear bumper with tire carrier looked very impressive due to its features, specifically the fact that the tire carrier could swing along with the tailgate or independent of the tailgate, and the various accessory mounts LoD makes for the Destroyer tire carrier. LoD makes Hi-Lift jack (horizontal and vertical) mounts, a Rotopax mount, a jerry can mount, and a universal mount, as well as a rack for general storage. The flexibility and modular aspect of the system drew me in.
I looked into other rear bumper with tire carrier systems, including the LoD Offroad Signature, Poison Spyder RockBrawler, Rock Hard 4×4, and MetalClock among others. Unfortunately, the only one I saw in person was the Poison Spyder RockBrawler, but it was simply on a vehicle in a booth at an off-road show, and the booth was not even for Poison Spyder. Rather, it was simply eye candy for the booth’s vendor, so I was not able to get much hands-on time with it or questions answered about it.
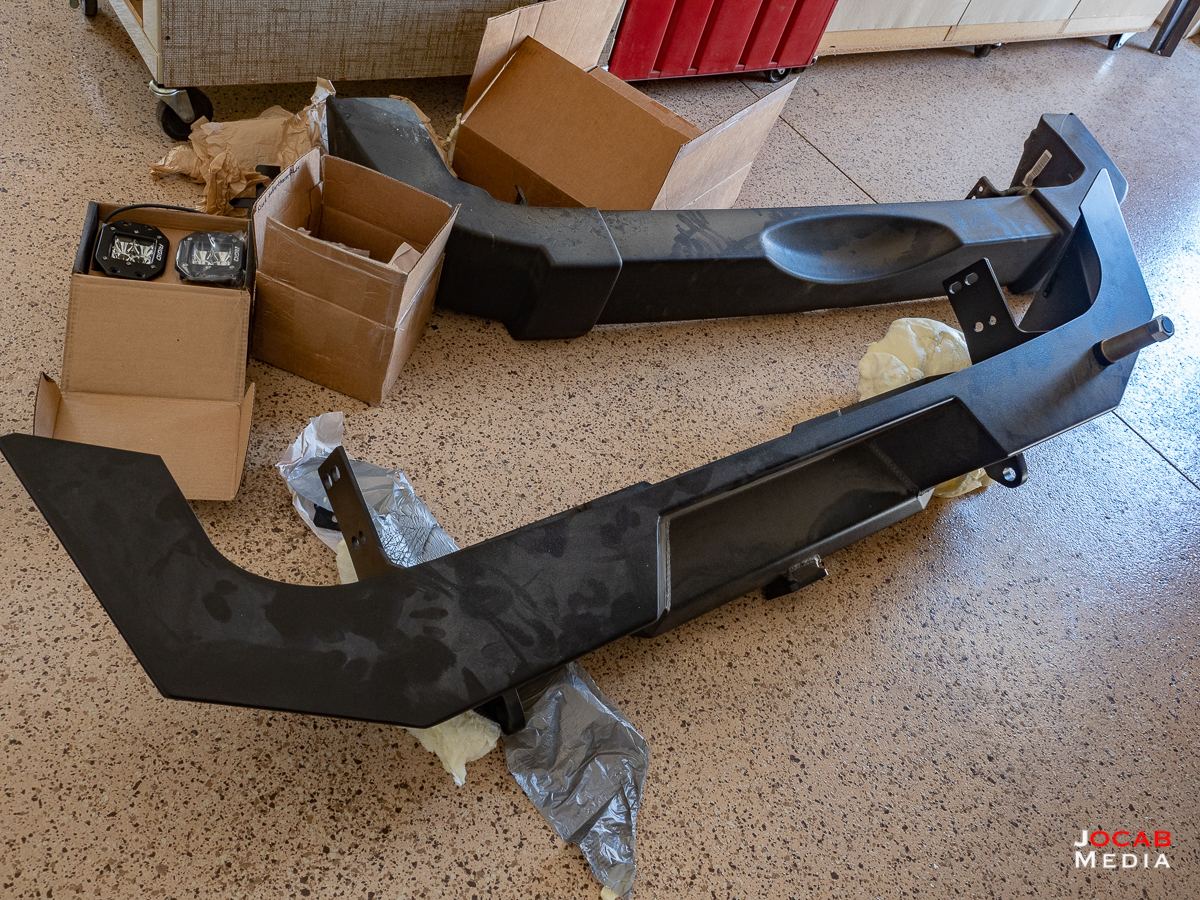
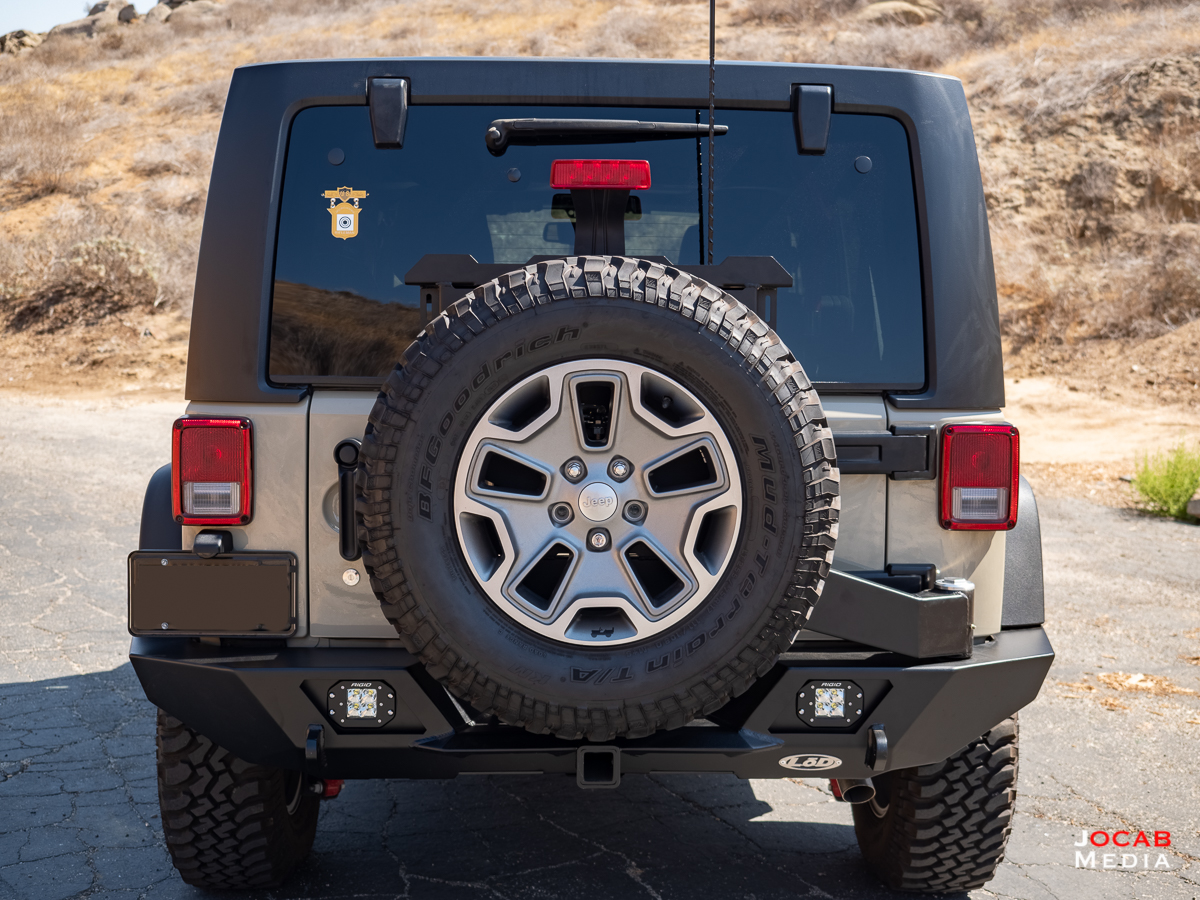
With all my online research, the LoD Offroad Destroyer remained at the top of my list, so I ended up ordering an LoD Offroad Destroyer Full-Width Rear Bumper with Tire Carrier from Northridge 4×4. I opted for a full-width rear bumper since I am not building a rock crawler and wanted the protection of a full width bumper.
I also purchased the LoD Offroad bezels for Rigid Industries D-Series flush mount lights, the LoD Offroad third brake light mount, and LoD Offroad CB antenna mount, along with a pair of Rigid Industries D-Series flush mount flood LED lights (#212113).
Of course, the install involved removing the OEM rear bumper.
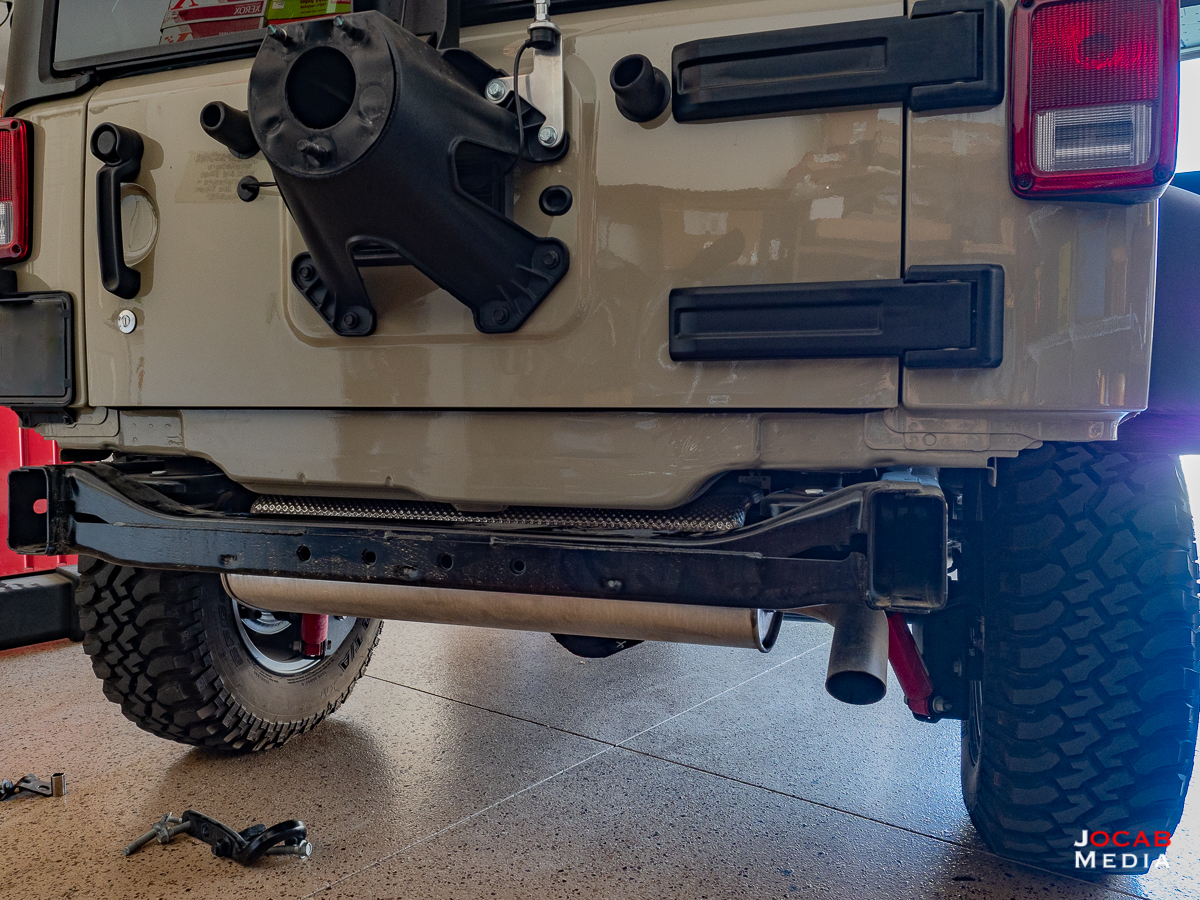
I was amazed how light the Jeep Wrangler OEM plastic bumper is and how simplistic it is. It is basically just plastic with brackets to connect it to the frame.
The stock factory rear bumper only weighs 15.6 lbs. The factory tow hook is about an additional 2lbs.
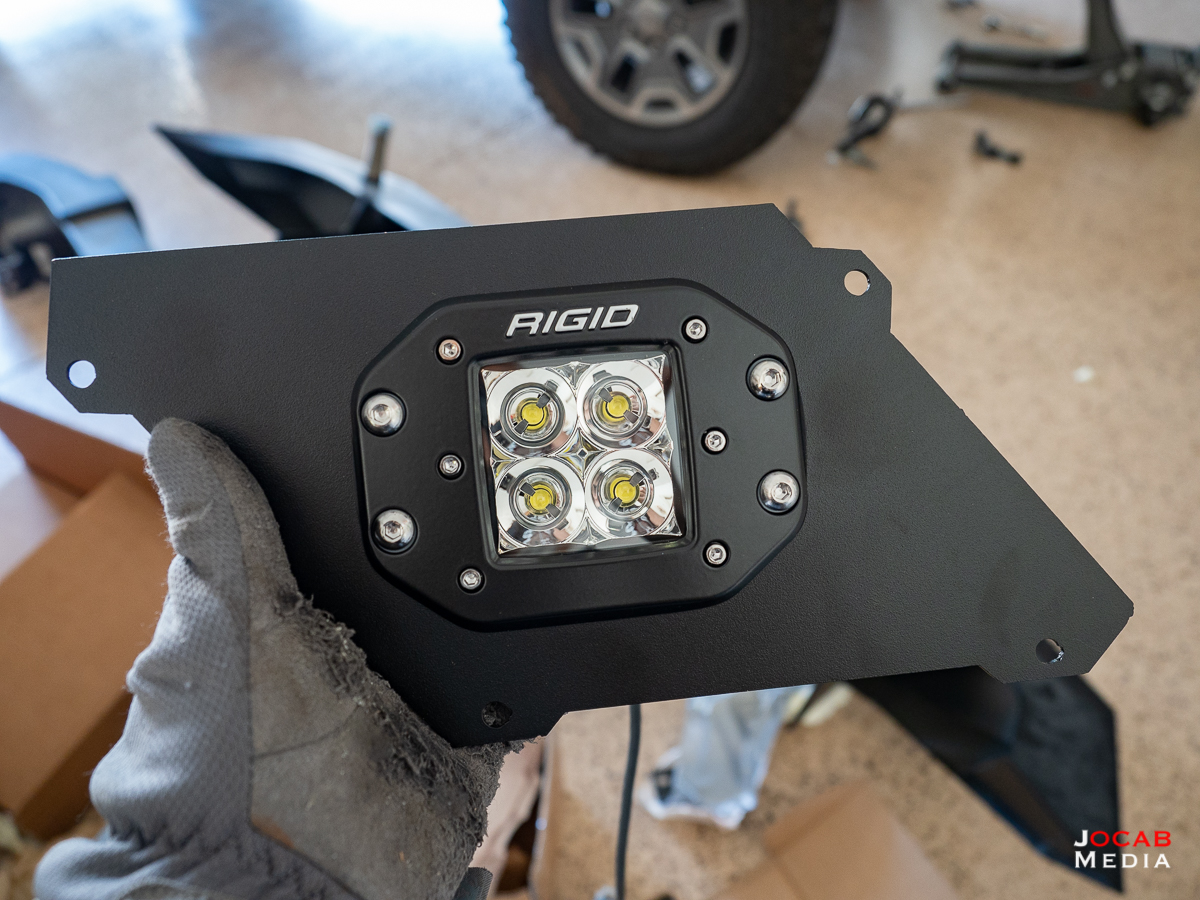
One feature of the LoD Offroad Destroyer rear bumper is the interchangeable light bezels. Basically, the Destroyer allows the owner to use a variety of different lights by swapping out the bezels on the rear facing side. By default, it will include blank bezels for no lights, or you can opt for round cutout bezels for use with the LoD Offroad round halogen light kit, or for square cutout bezels to use with Rigid Industries Dually (aka D-Series), Dually XL (aka D-XL), or Dually flush mount (aka D-Series flush mount).
As mentioned earlier, I acquired a pair of Rigid Industries D-Series flush mount flood LED lights, so I acquired the corresponding bezels.
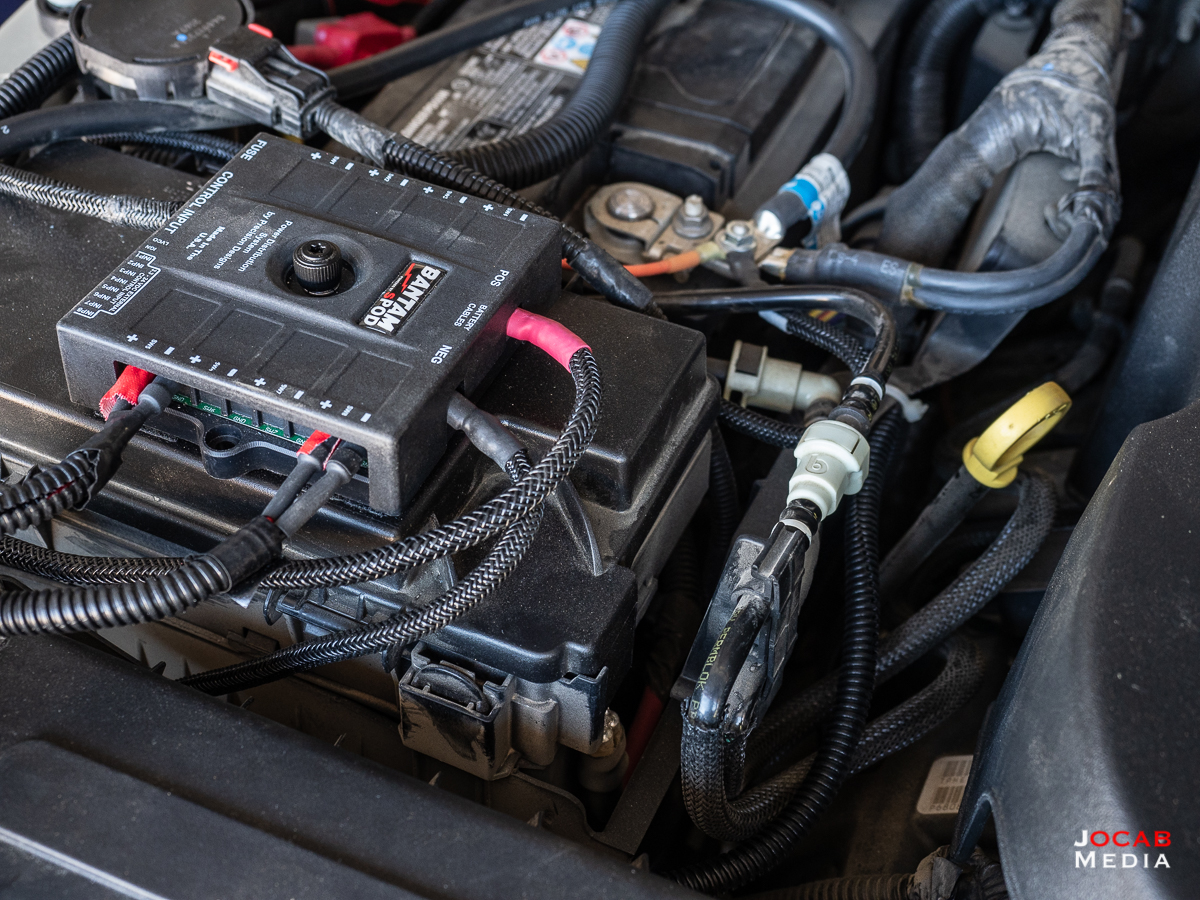
When I was looking into the LoD Offroad Destroyer rear bumper and was factoring in the light options, I was considering adding the lights after it was installed. But then I realized that the bumper would have to be removed from the frame in order to get the lights installed. Since it would be best to get the lights into the bumper at the same time I was installing the bumper, I bought the sPOD Bantam before the rear bumper in order to have an electronic switch/relay system ready to go.
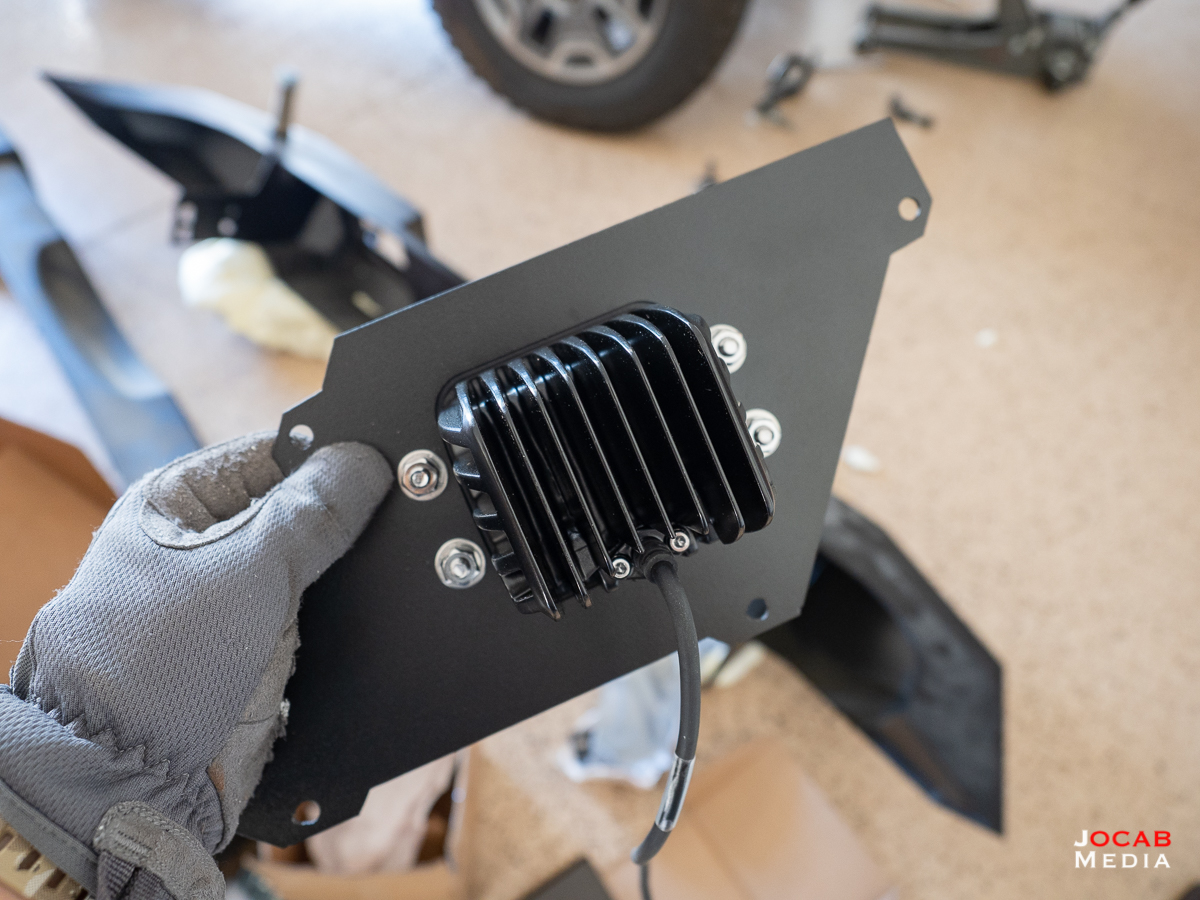
The D-Series lights mount to the bezels with the Rigid Industries supplied hardware, then the bezel assembly is attached to the rear bumper with the LoD hardware.
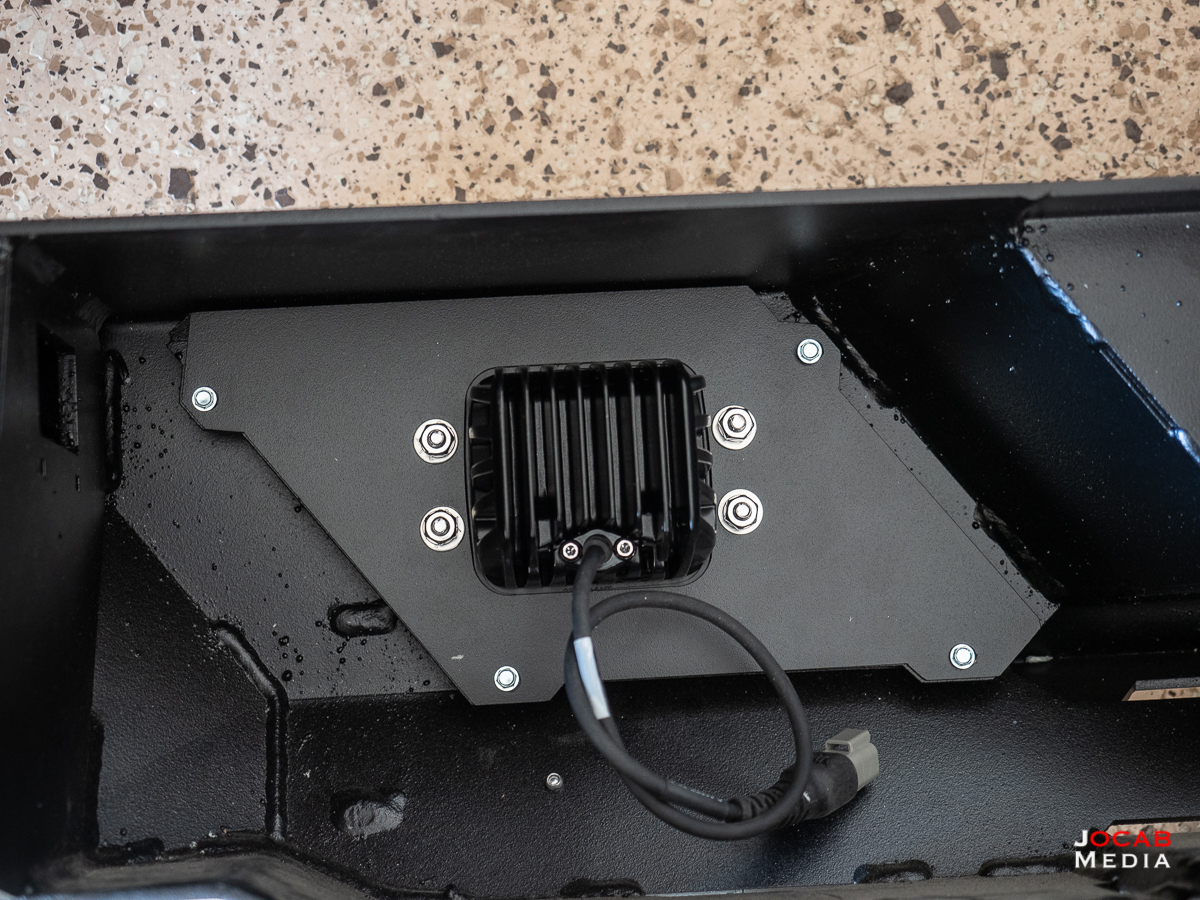
The Rigid Industries D-Series lights come with Deustch connectors attached to each unit, which then interface to the Deutsch connectors on the included switch and wiring harness. I cut the harness before the switch since I only needed the wiring with the male Deustch connectors to splice to the sPOD.
After the rear bumper was attached, I got to running the wiring for the D-Series lights. The rear bumper itself is actually fairly straightforward, with six additional holes to be drilled in the frame.
Note: The instructions that were included with rear bumper did not match the instructions that are on the LoD Offroad website, or their installation video on YouTube (see above). The bundled instructions indicate two vertical holes to be drilled out in the rear frame rail for two corresponding bolts. But the latest / current revision instructions (and video) exclude these two bolts. I opted not to install those bolts. As far the six additional holes, two for sure need to be drilled (one on each side frame rail), but the four on the rear frame rail already exist. In my case, one needed to be opened up a little because it was not 1/2″ in diameter to accommodate the bolt.
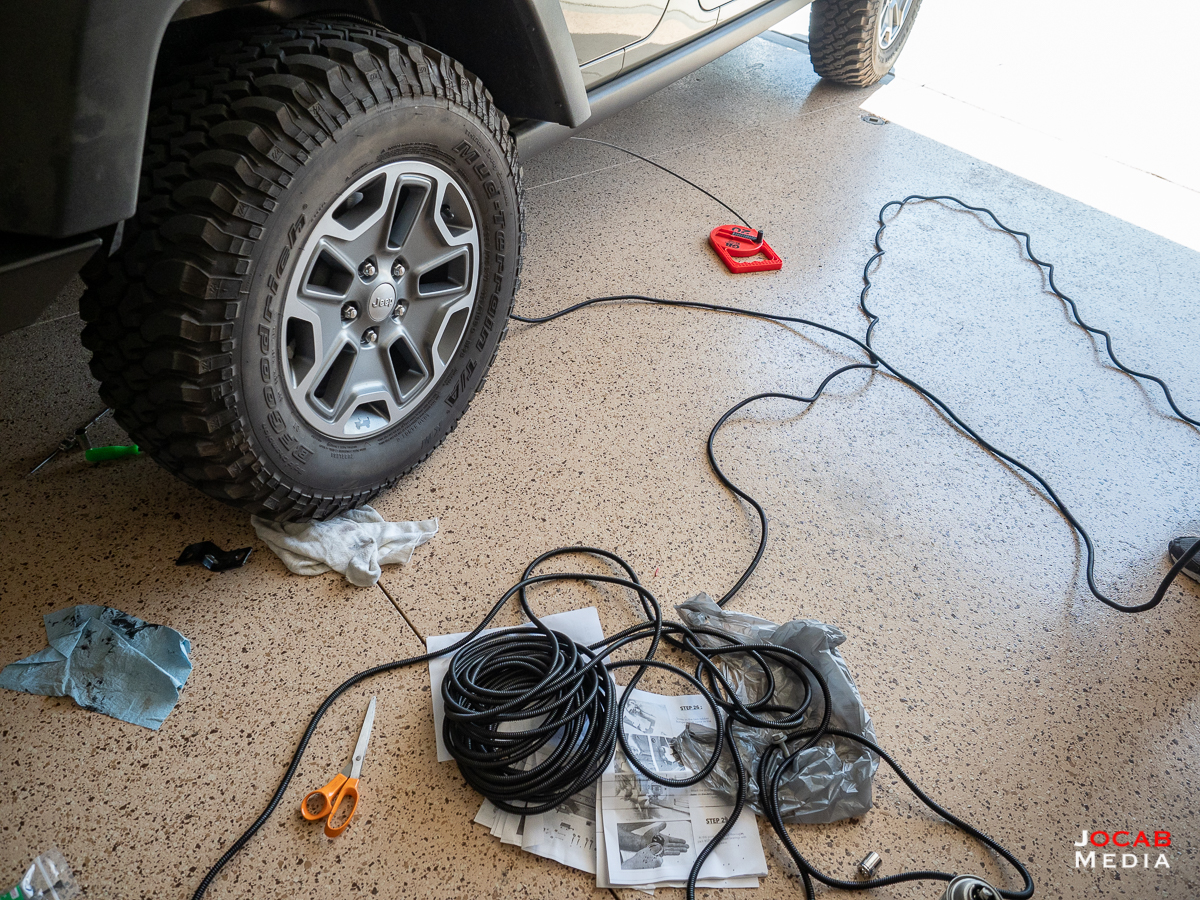
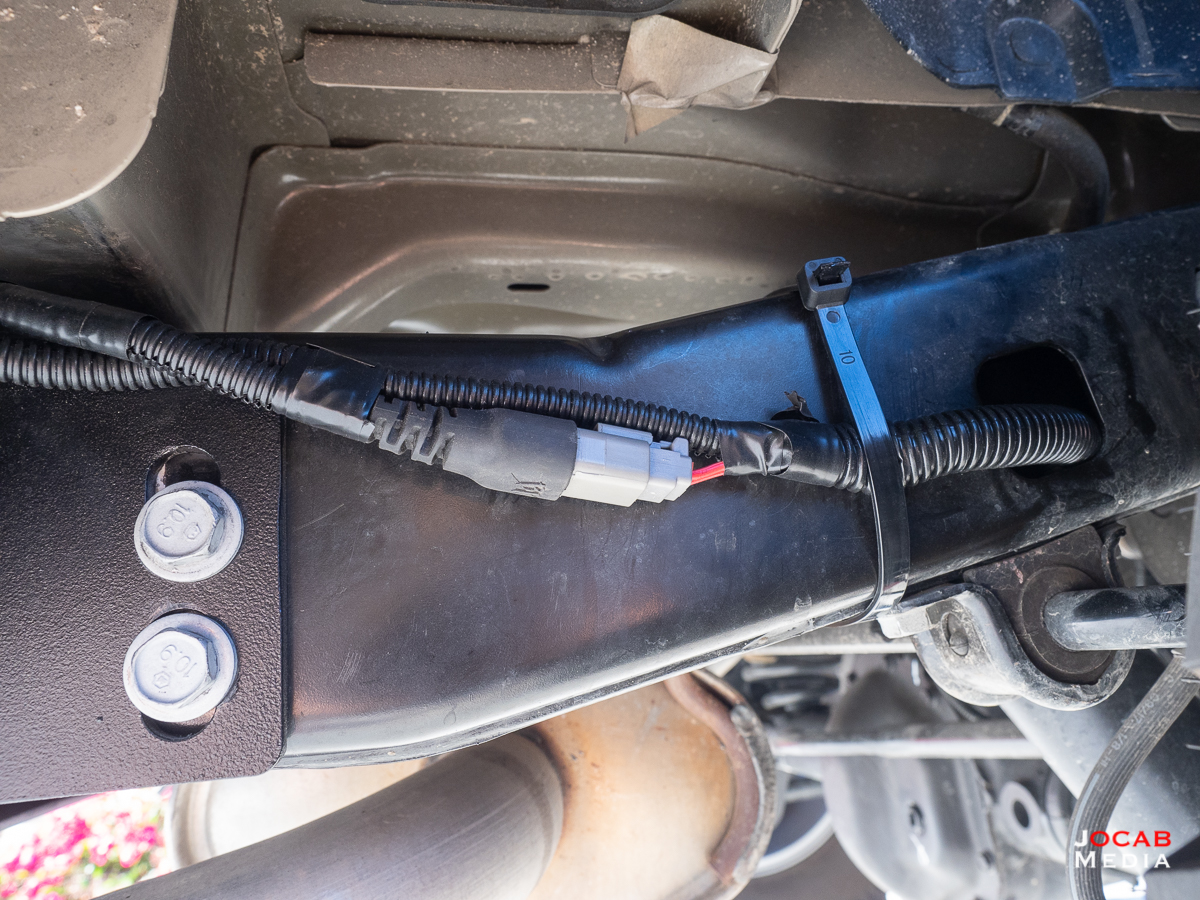
I essentially ran the wiring from the lights along the top side of the rear frame rail and then towards the passenger side frame rail.
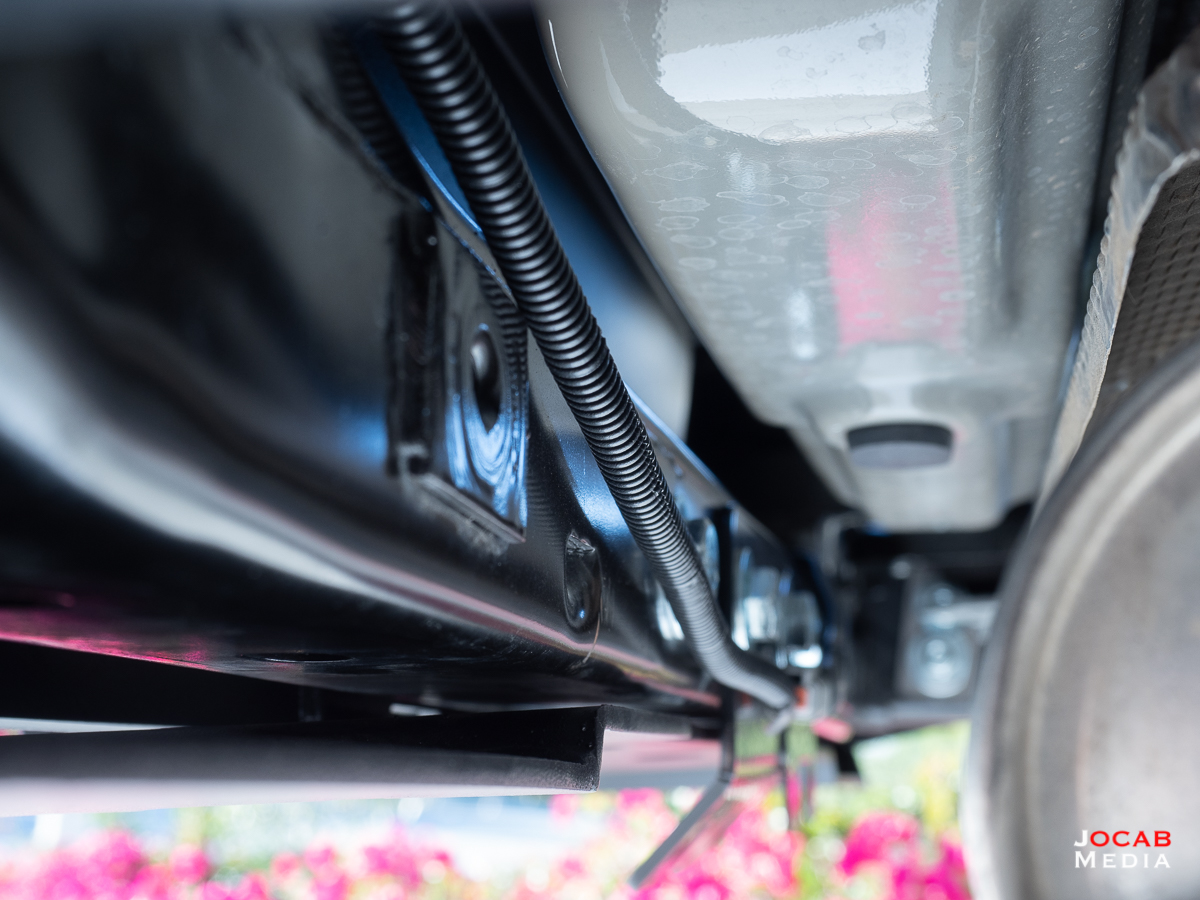

The above photo shows the wiring (in split loom) hanging down below the top side of the rear frame. I wanted to show the cabling and how close the rear frame rail is to the muffler. High temperature split loom is critical, but also trying to keep the wiring as far a way from the exhaust system is very important.
After run along the rear frame rail towards the passenger side, the wiring was inserted into the frame rail behind the rear passenger tire and run inside the frame rail all the way to the front passenger wheel where there is a hole in the frame rail.
I zip tied at the corner of the rear and passenger side frame rails, and then zip tied the wiring to the passenger side frame rail right before the wiring (split loom) entered the frame rail. This cut out all the slack in the split loom wiring so it does not hang down the rear frame rail.
Note: It helps to have a wire fishing tape tool to get the wiring run down the interior of the frame rail.
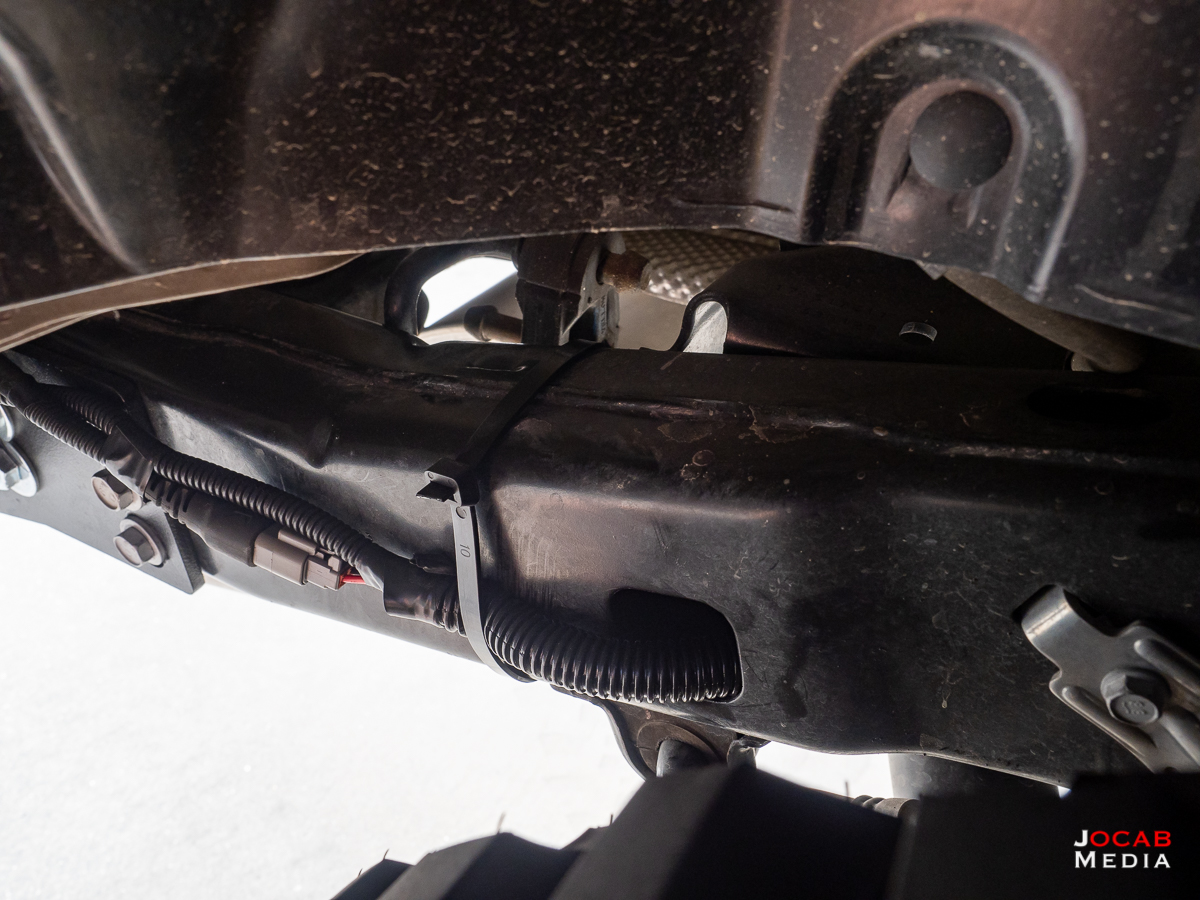
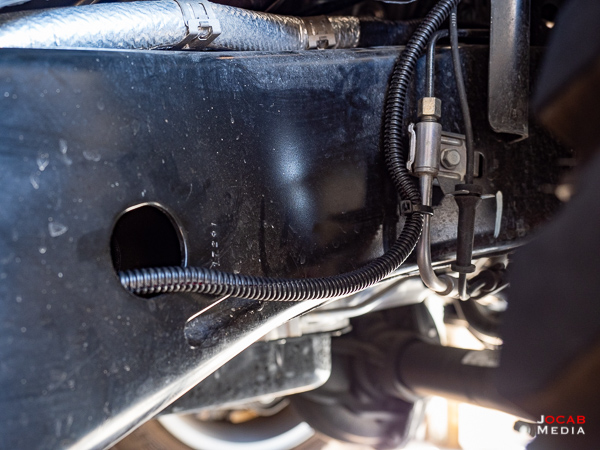
Once the wiring was pulled down the passenger side frame rail, it exited a hole in the frame rail just behind the passenger front wheel.
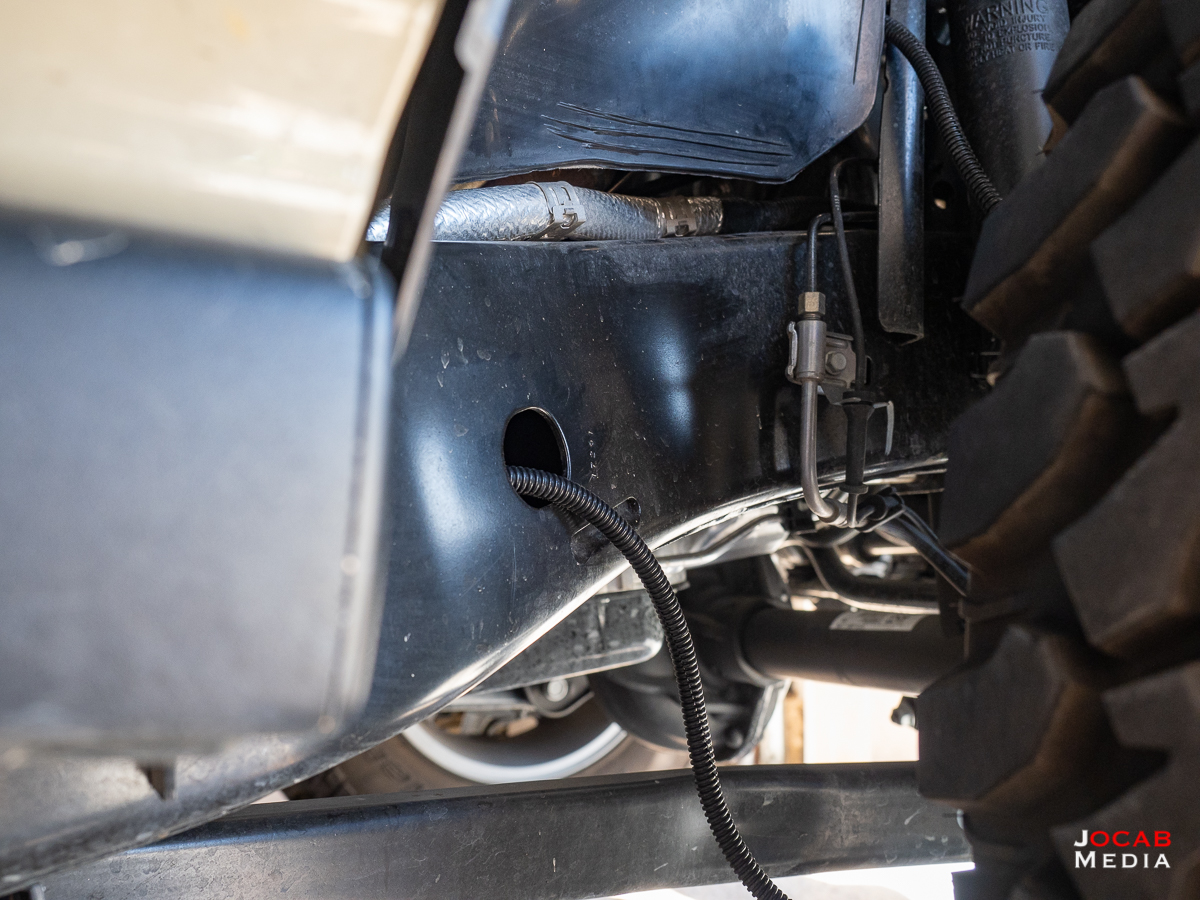
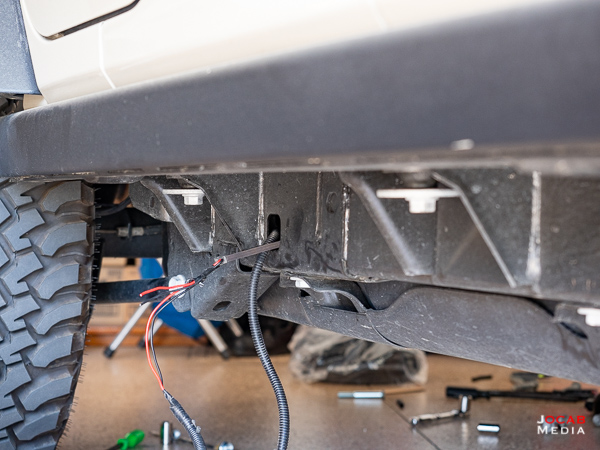
Directly above the frame rail hole and behind the shield between the wheel well and the engine bay in the photo above well shield is the exhaust manifold. I did not want the wiring run along side the hot exhaust manifold, so I zip tied the loom to the steel brake line and run the split loom up the passenger front shock absorber into the engine bay.
After this, it was trivial to get the ends set with split terminal rings and then onto the sPOD.

With this done, it was back to addressing the Destroyer tire carrier. Obviously, this entailed removing the stock OEM tire carrier (and brake light).
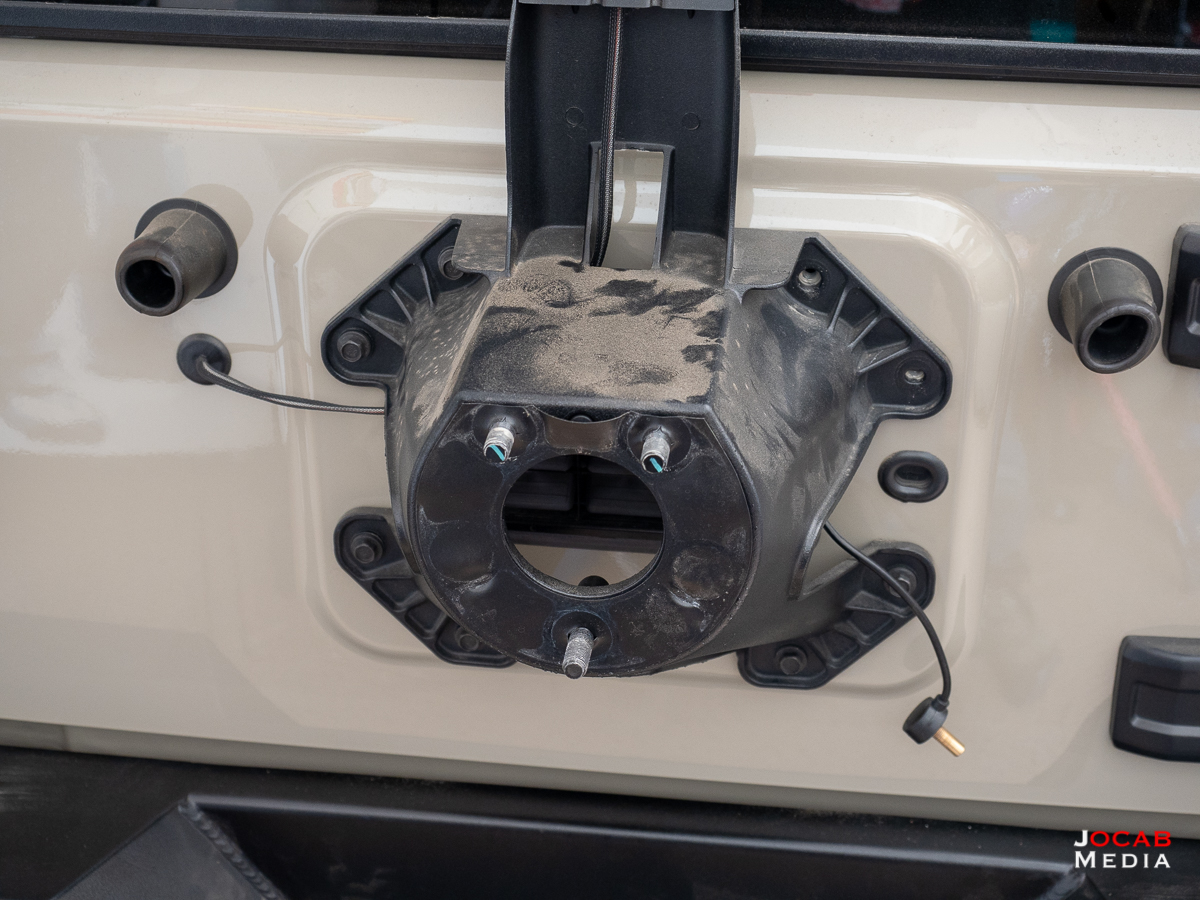
The stock tire carrier is removed and replaced with the tailgate plate for the LoD Offroad tire carrier.
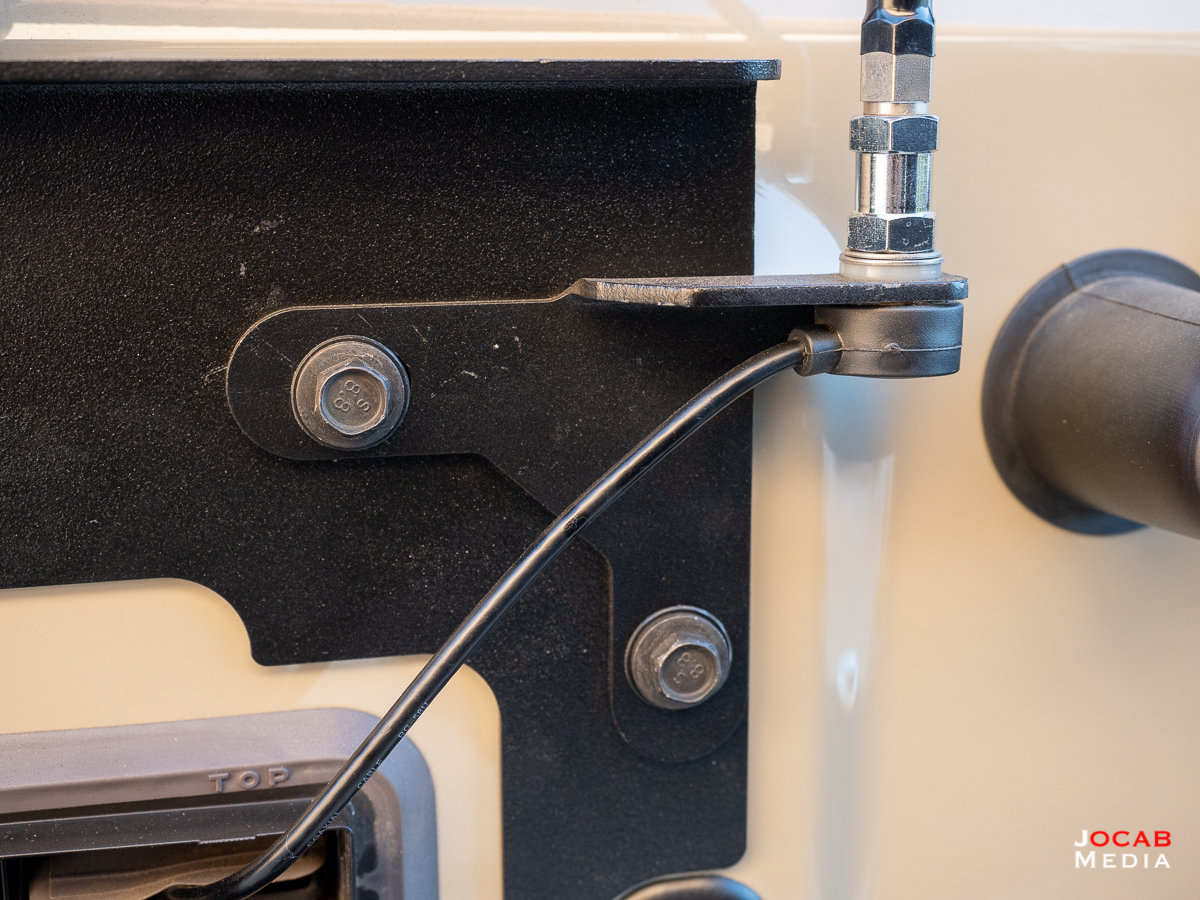
At this point, I also installed the LoD CB Antenna mount as well as the third brake light.

The tailgate place is what the tire carrier will mate to.
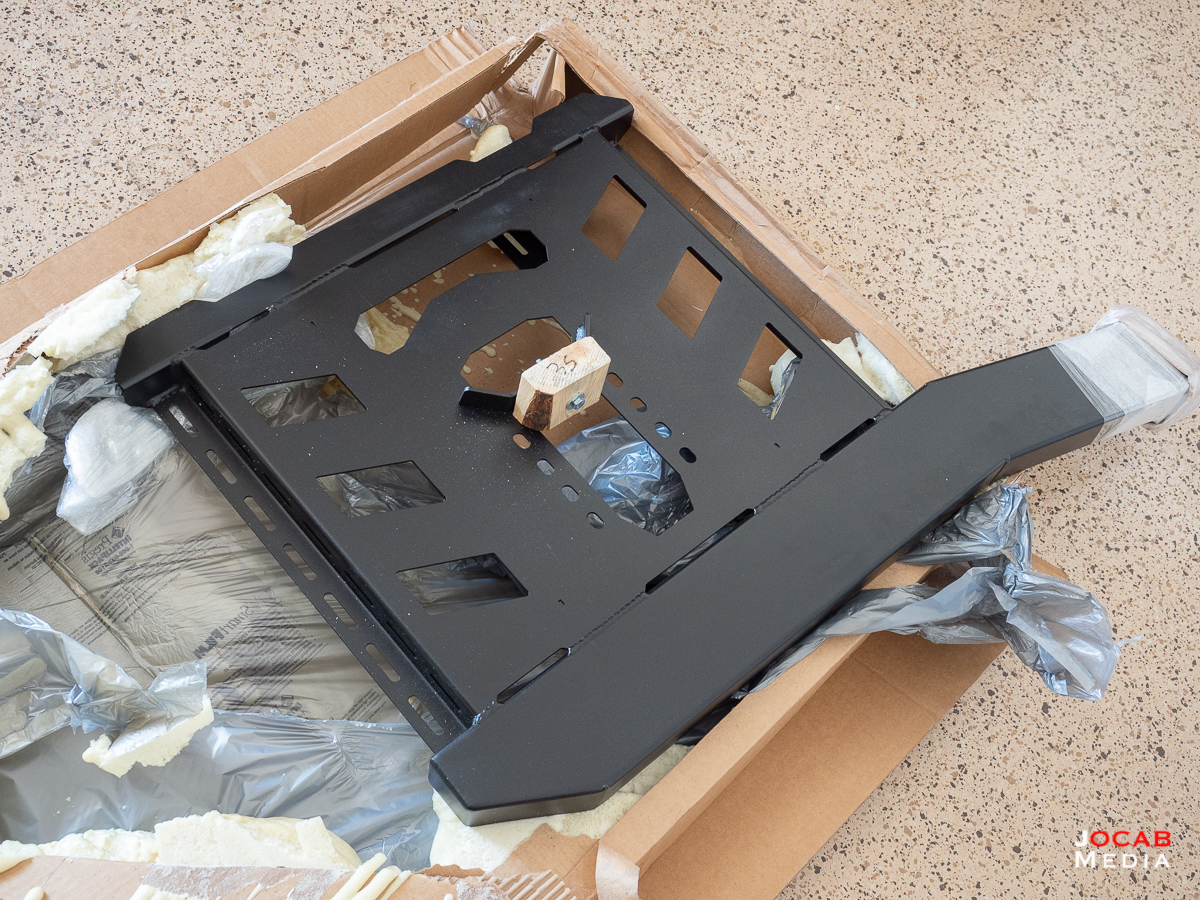
I did not really take photos of the packaging, but one thing LoD Offroad definitely did well was the packaging of the parts. They basically sprayed foam insulation into the boxes which hardened and made for very rigid support for the bumper and tire carrier. Most manufacturers will not guarantee powder coated parts due to possible damage during shipment, so some folks prefer to get buy steel accessories and powder coat locally. But when I opened up the boxes, I found the powder coating to be undamaged in all areas thanks to the packaging methods.
Setting the tire carrier onto the spindle was fairly straight forward.
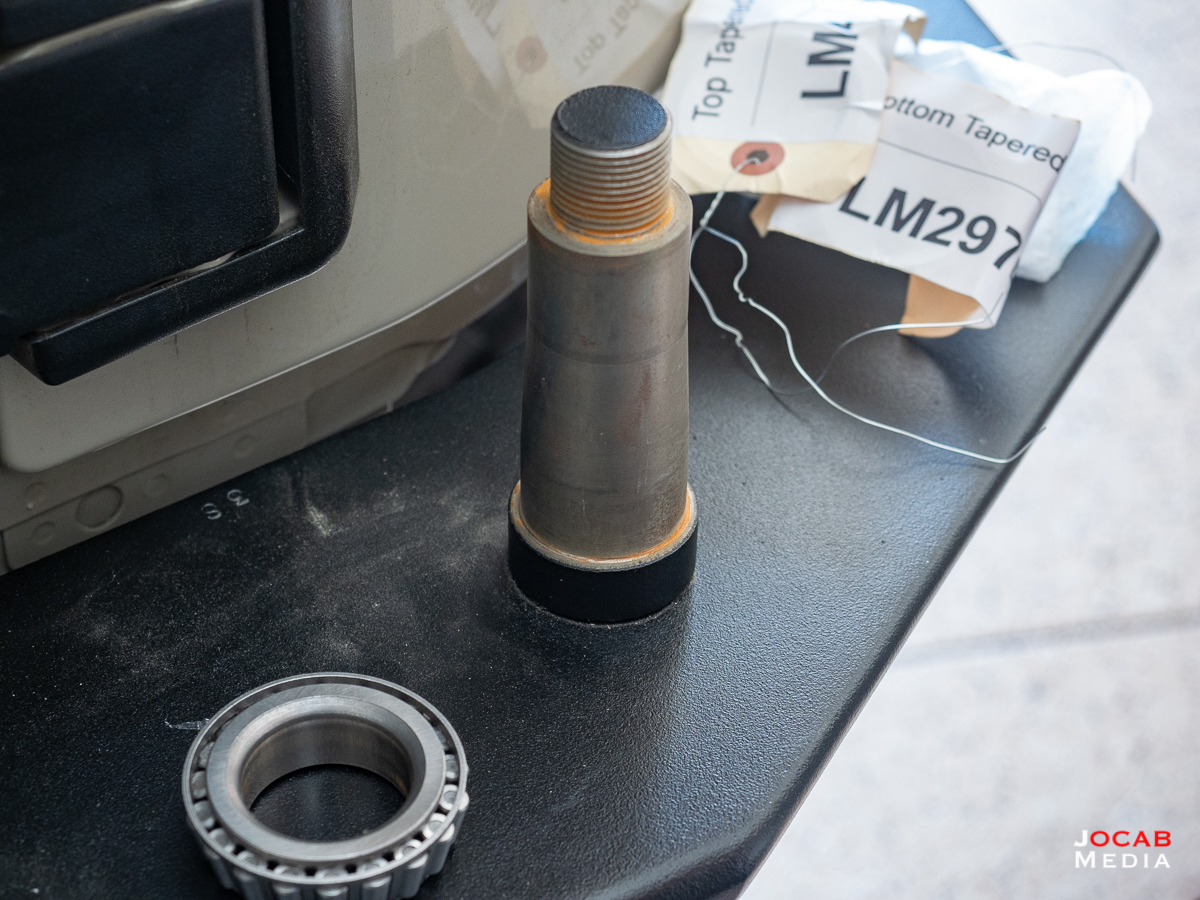
You basically need to pack the bearings with grease, insert and seal the bottom bearings into the tire carrier, then place the carrier onto the spindle.
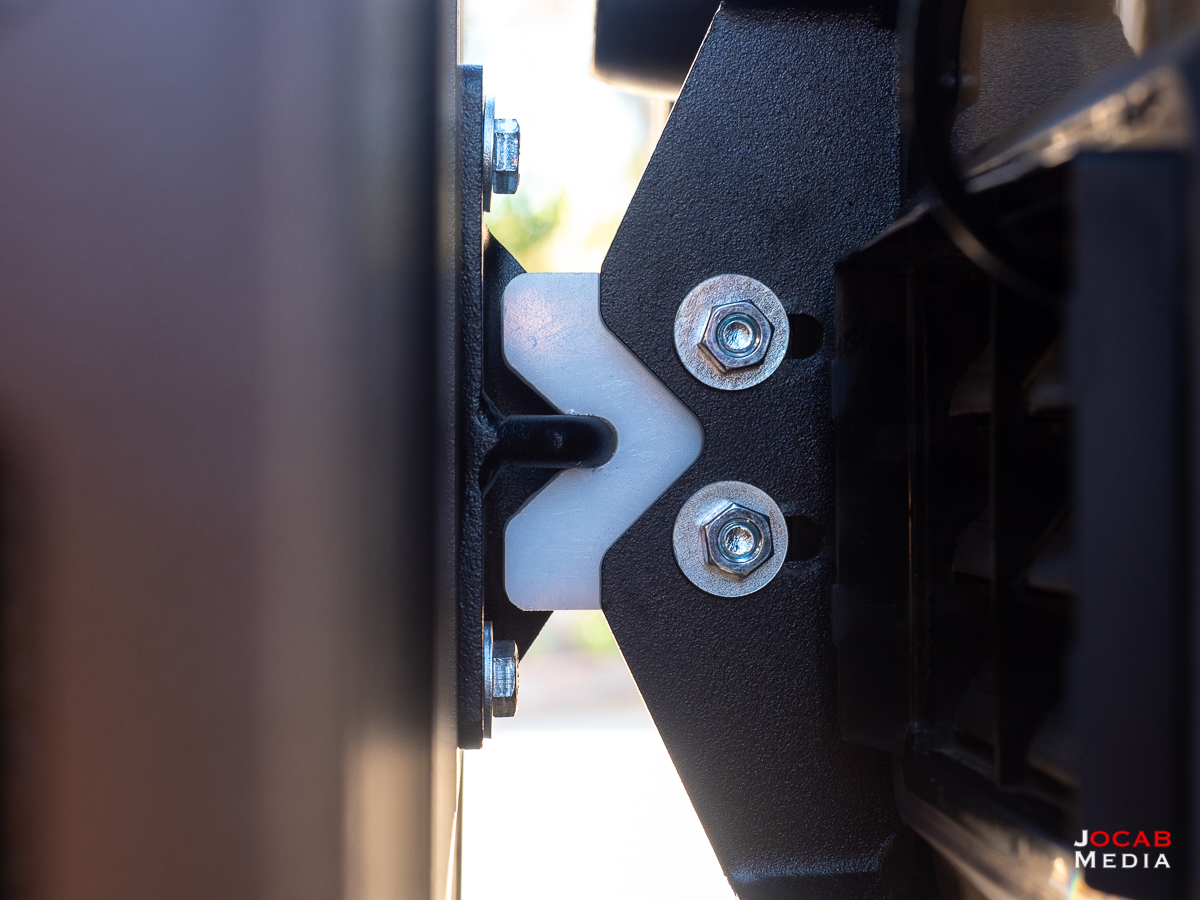
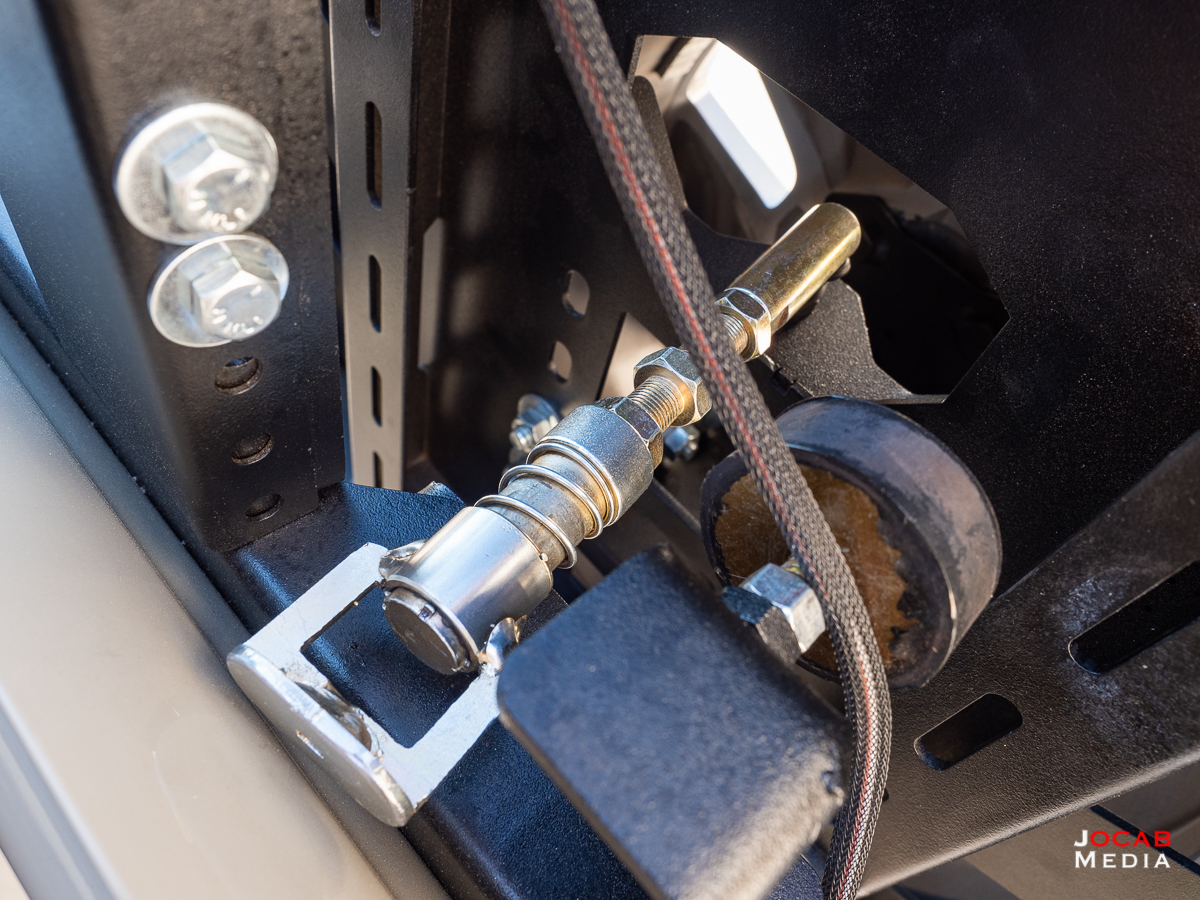
Actually setting the tire carrier to the plate will take a bit of time. It is critical to read the instructions carefully to setup and adjust the quick latch mechanism, the striker plate, and the rubber bumpers.
When all of this is adjusted, the install is complete.
During the install and post-install, there were several annoying aspects I found with the LoD Offroad Destroyer rear bumper with tire carrier system.
First off, there were several sharp, jagged, and unpolished edges on various parts. The funny thing is all of these were powder coated, which implies the imperfections were not cleaned prior to powder coating, and thus, did not occur during shipment. But one burr I found was on the edge of the backside of the bumper right under the drivers side light bezel. This meant the wiring harness would run right along side it. Even with split loom, I filed this off and hit it with a little touch up paint (to prevent rust), since I did not want that sharp edge cutting into the wiring loom.
I also found a few jagged gouges in the bottom edge of the tire carrier.
These look like dents during shipment, but it appears to have happened before powder coating. For now, I opted to leave these as is, but I might file down some of the sharp points later on and then use some touch up paint to clean up any steel I expose.
The quick latch system is very interesting, but this part also had sharp edges.
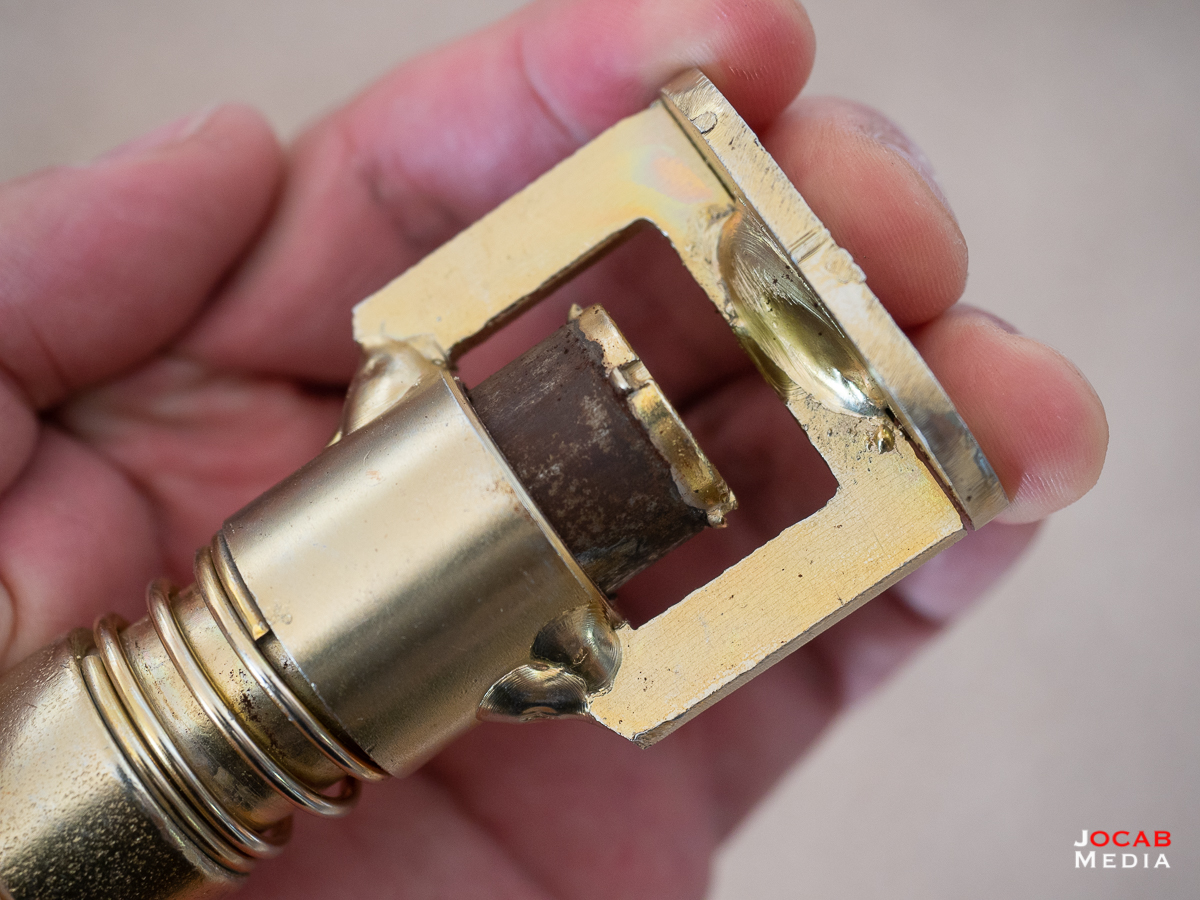
The plunger side which faces the tailgate needed to have the edges filed / ground down due to rough machining marks. I actually nicked the tailgate where the quick latch mates to the tailgate plate because the quick latch slipped out of my hand when I was trying to actuate the plunger. It sprung back and hit the tailgate, and the sharp edges of the quick latch resulted in the clear coat scratch.
Not to mention there was crud on the surface of the quick latch mechanism that I can only assume is rust. I ended up spraying it down and cleaning it up with Break-Free CLP. While I do not recommend Break-Free as an all-in-one firearms cleaner, lubricant, and preservative, this brand of CLP does work very well as a preservative (anti-rust inhibitor).
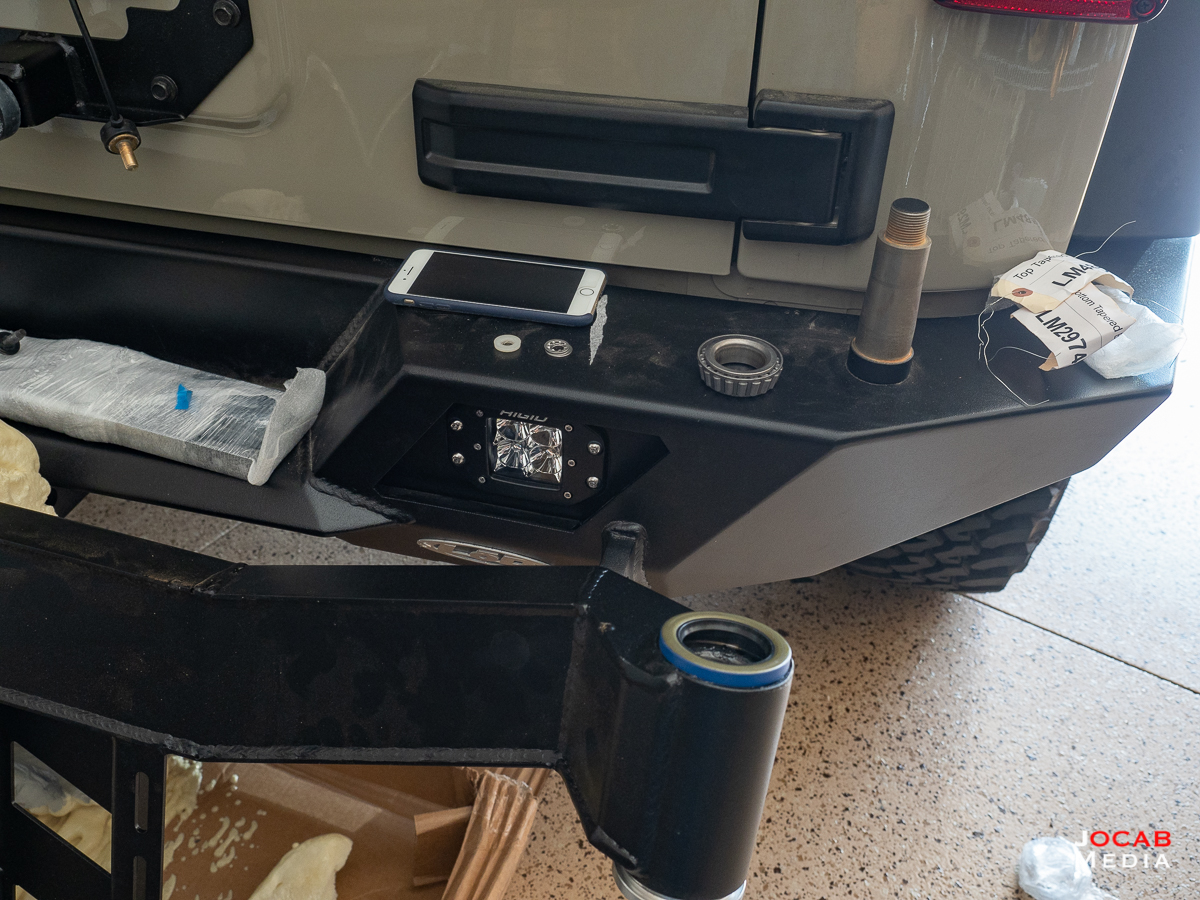
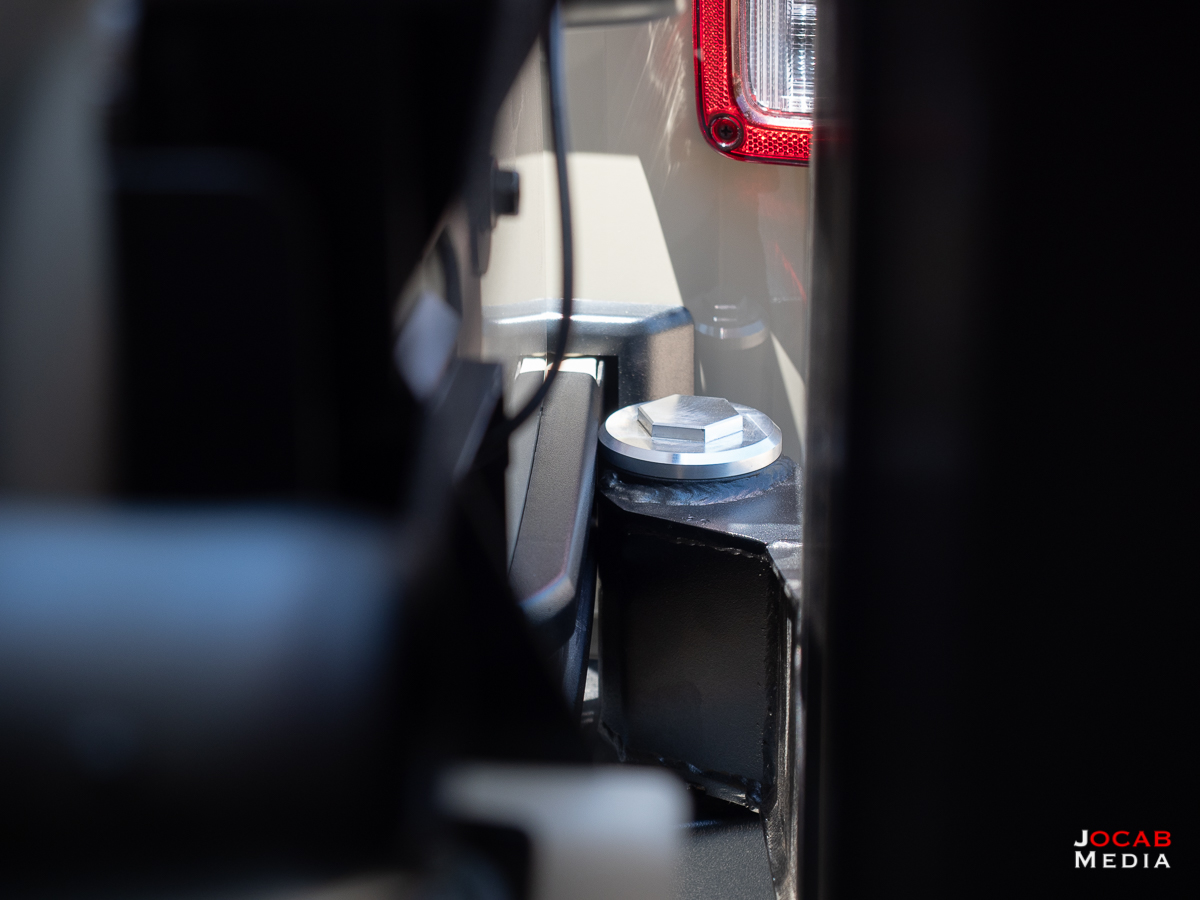
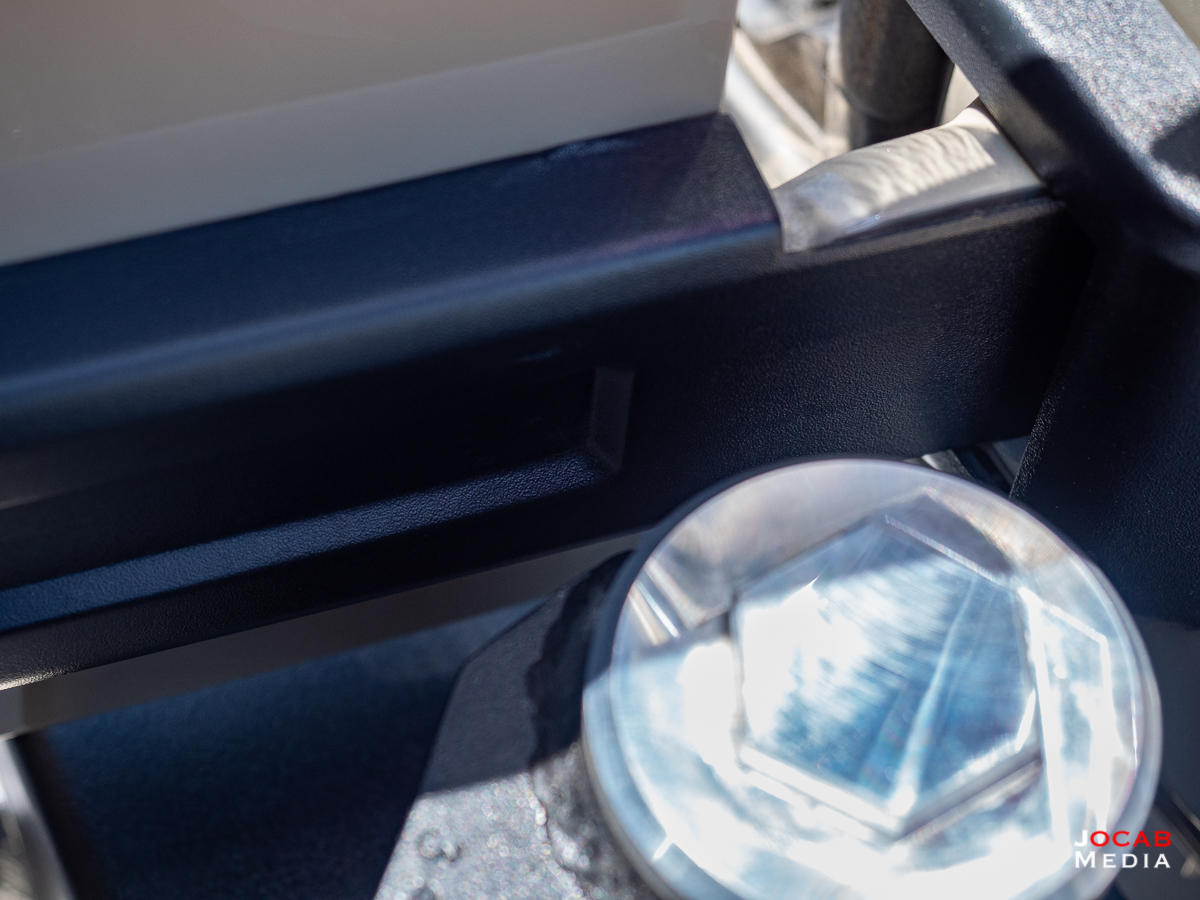
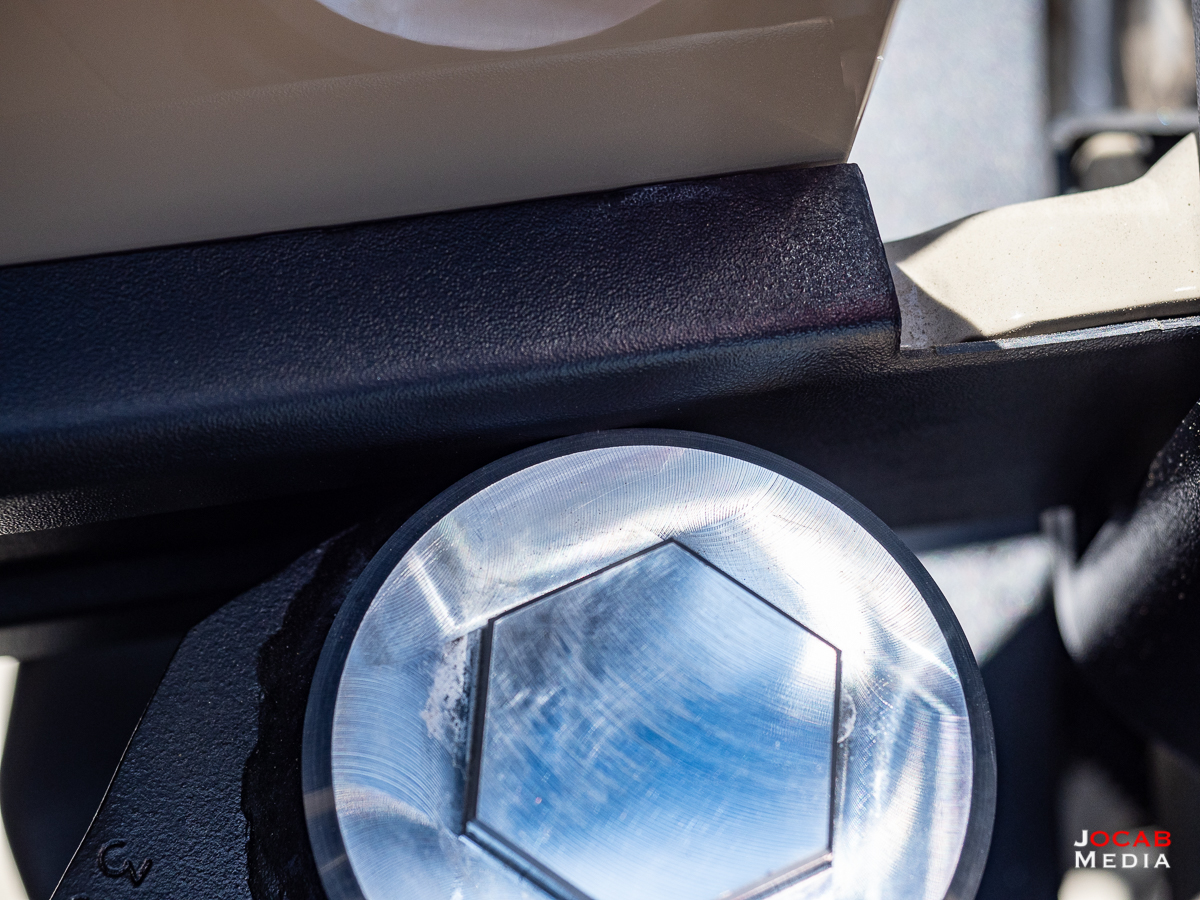
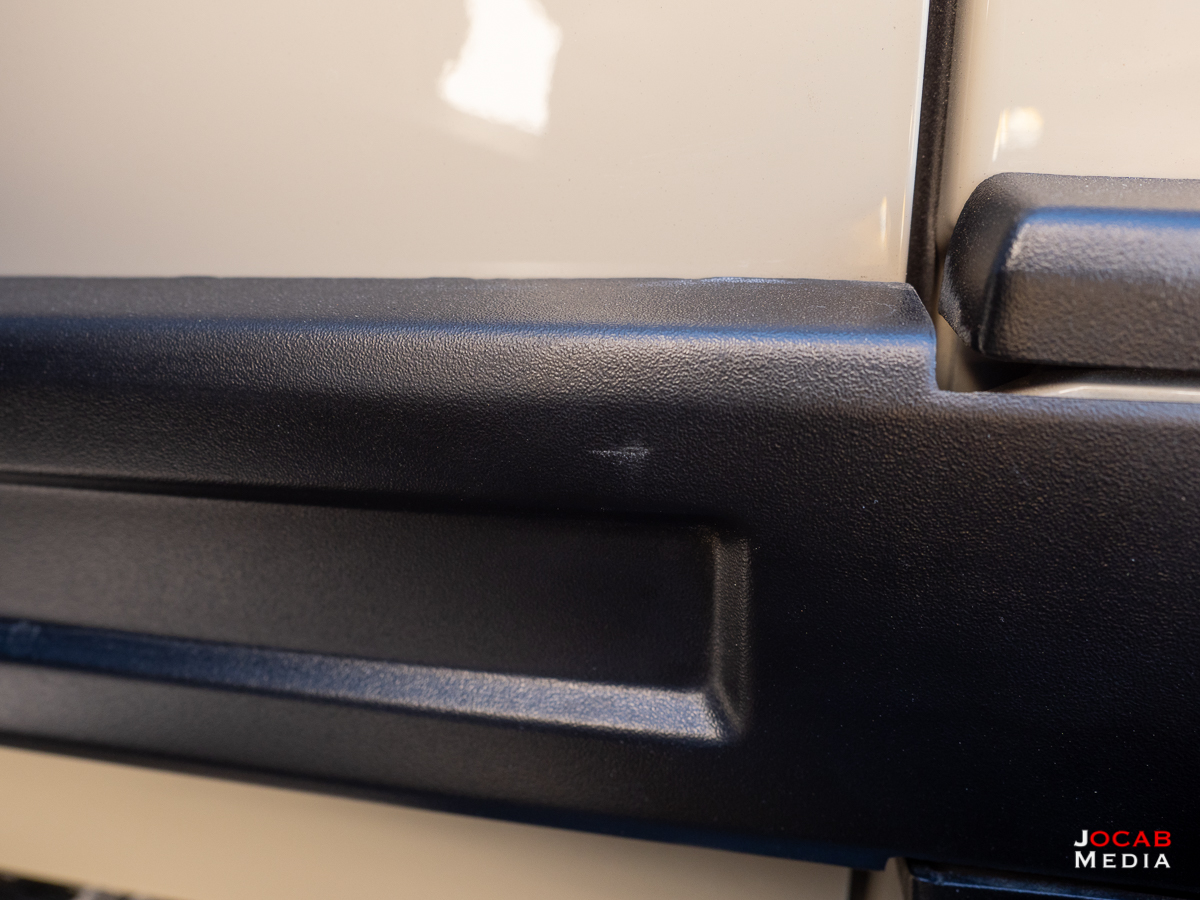
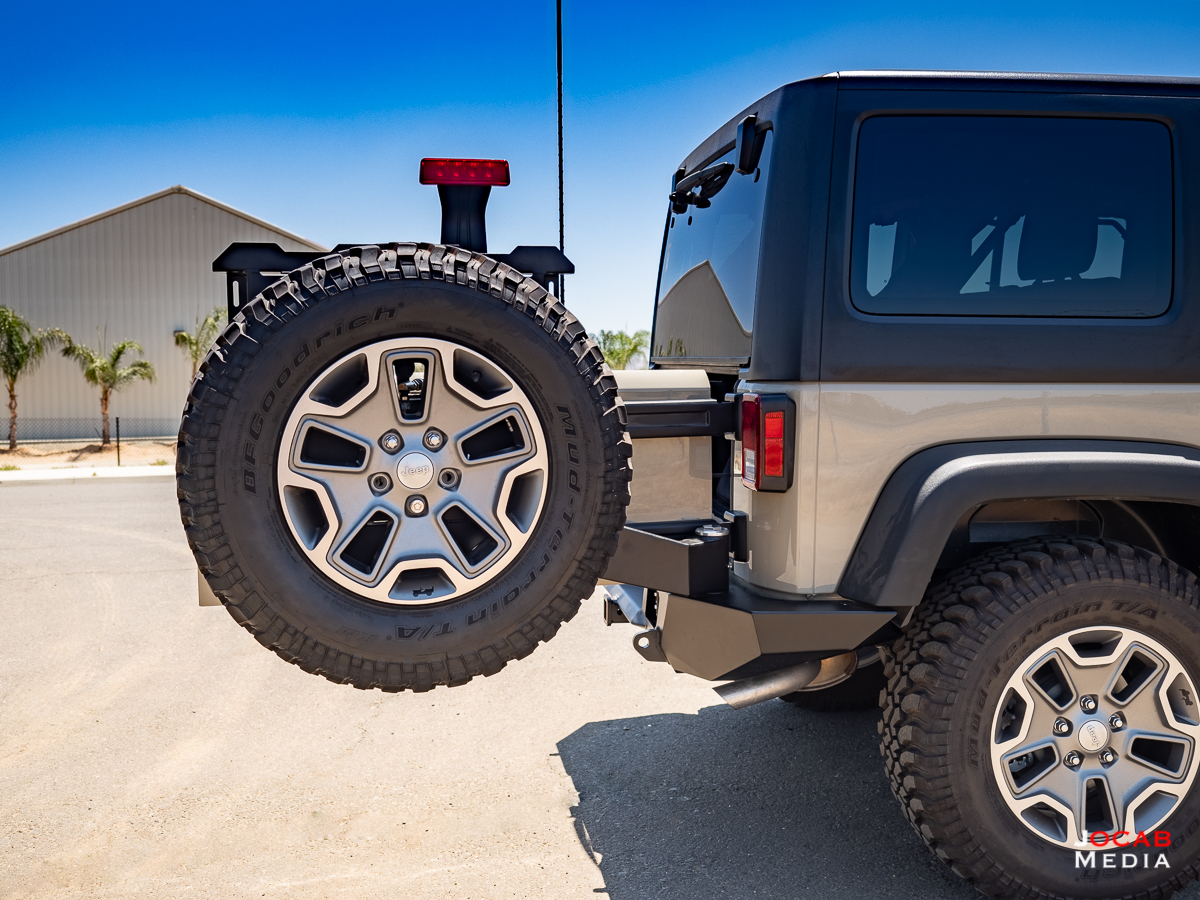
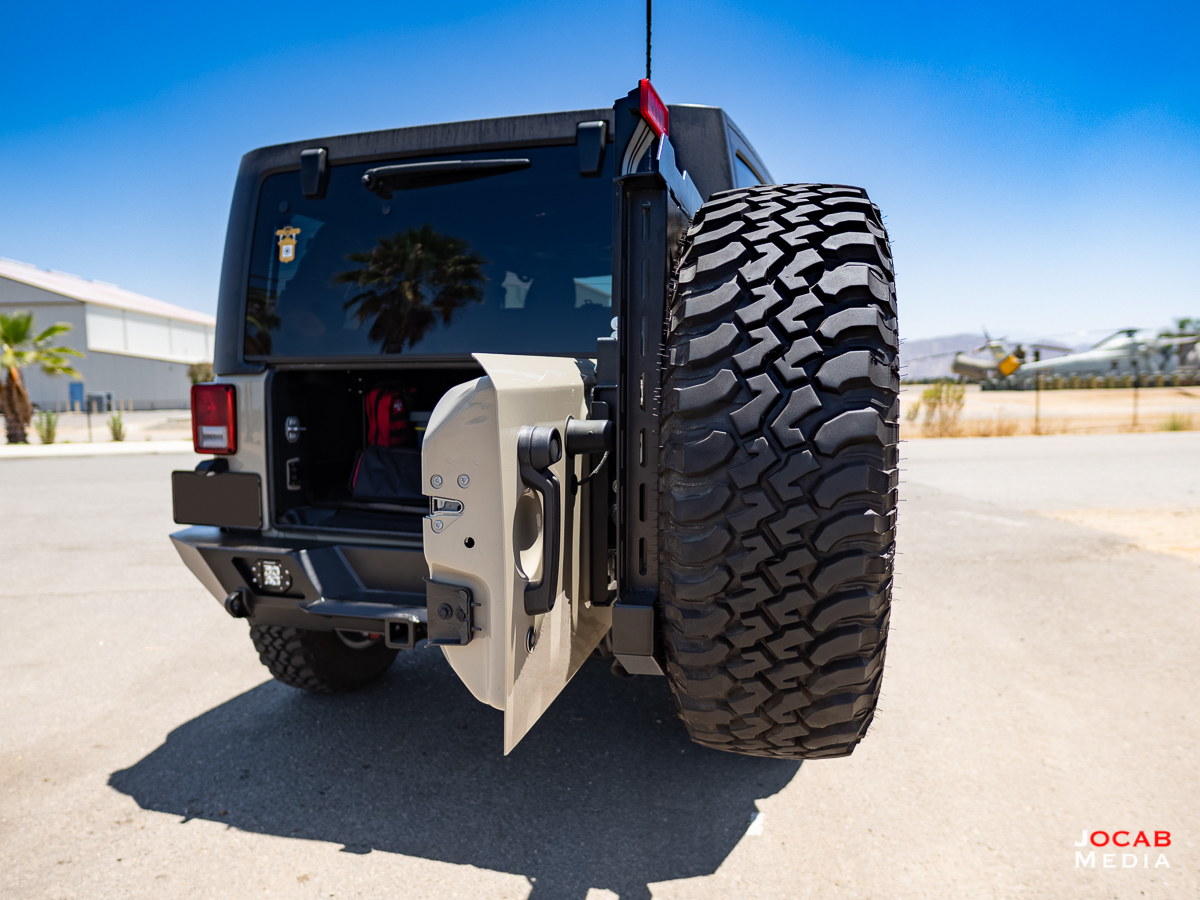
Another annoying aspect is that if not linked to the tailgate, the tire carrier will freely swing. If the spare tire is not on the carrier, the carrier arm will actually strike the passenger rear corner. This actually happened without me realizing it during the install, as I did not notice it until later when I was taking photos. I put in a very thin, but long indent into the corner, which matches the tire carrier arm.
Note: I did not even notice it until days after the install. The dent is so slight that you will not notice it unless it is in the sunlight and you’re looking for the break in the surface. But it is there.
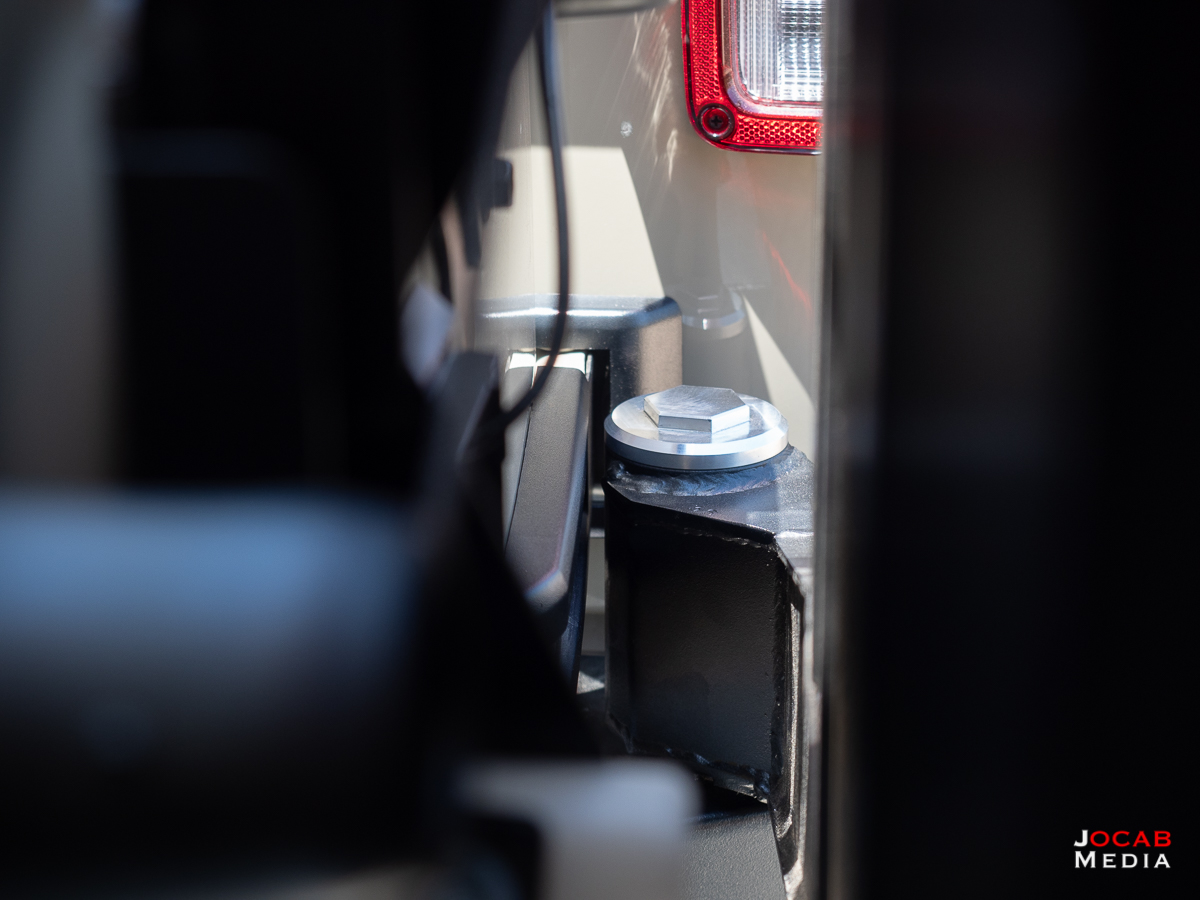
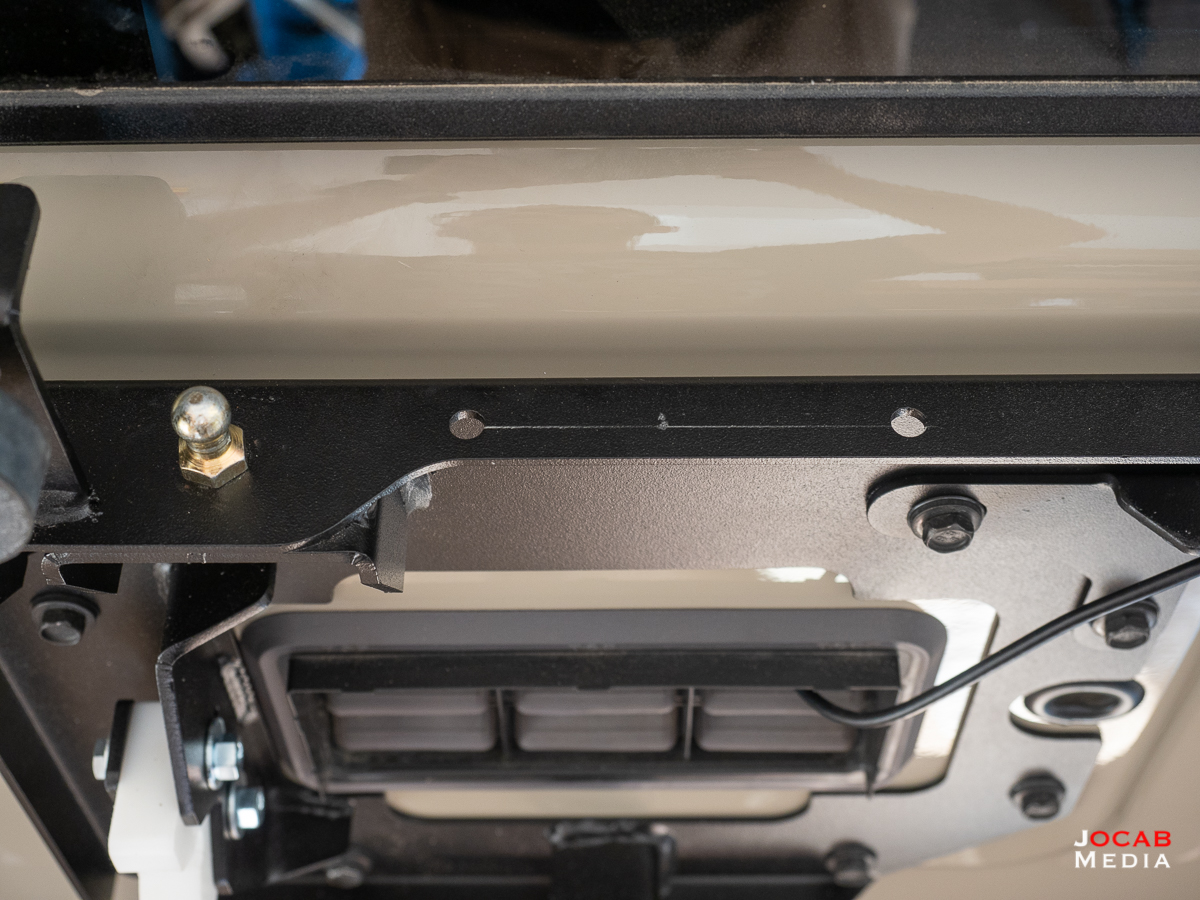
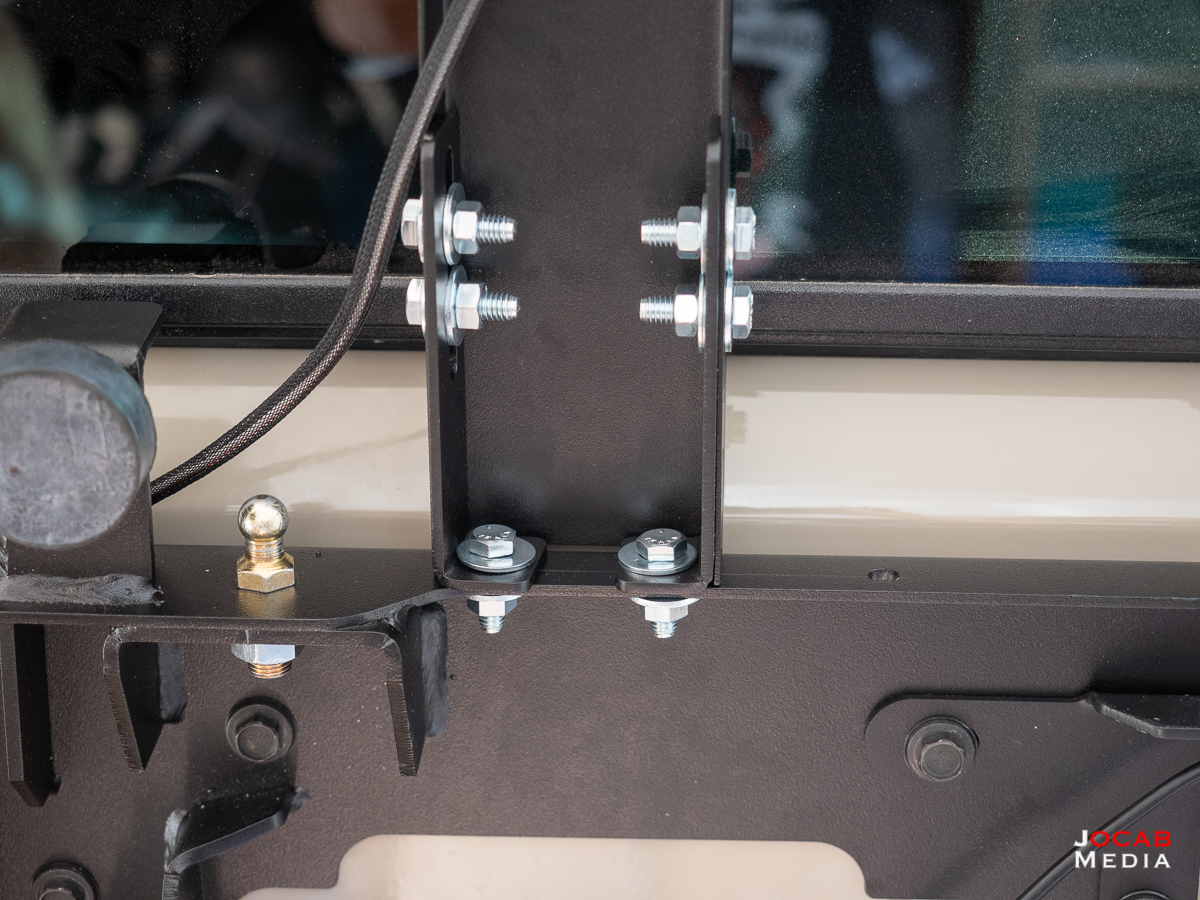
I really wish LoD Offroad put a safety mechanism to prevent this from happening. What they could have done was put a threaded hole into the top side of the bumper on the passenger side which could accept a threaded brass stud and maybe rubber coated or sleeved (or even just a rubber puck), which could act as a stopper for the tailgate arm. It might not be aesthetically pleasing, but I would have sacrificed that appearance for an undamaged rear corner. I am thinking about drilling and tapping my own hole into the bumper, but it is sort of late now.
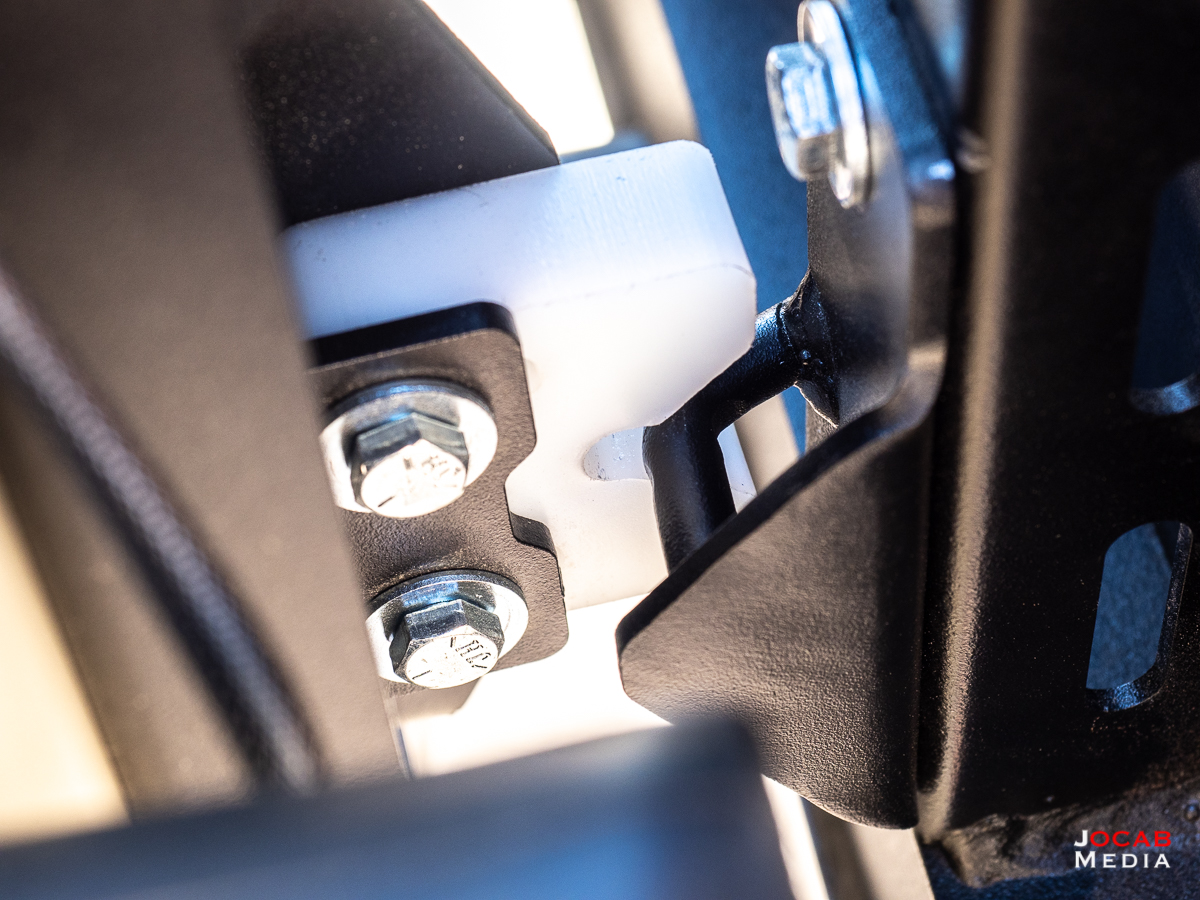
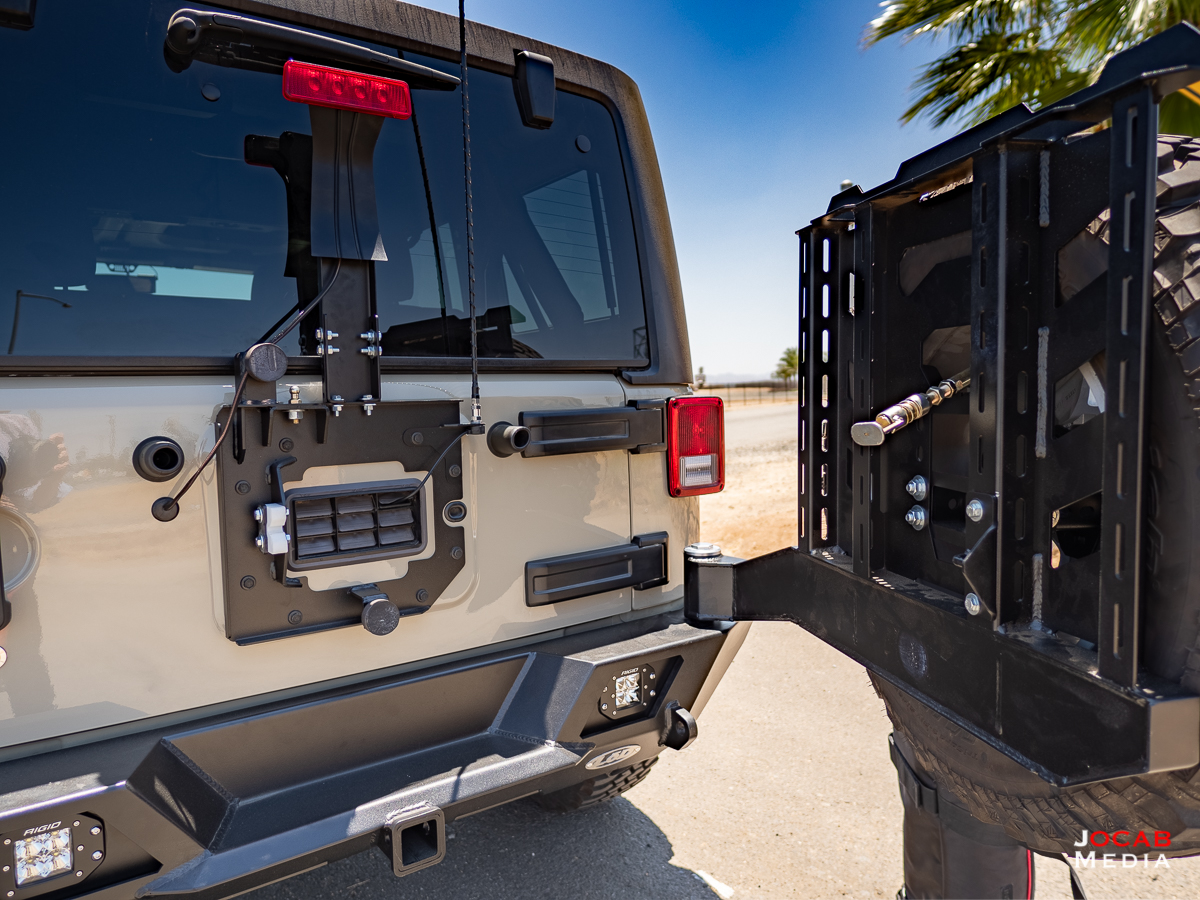
Another annoyance related to this occurs when the tire carrier is latched to the tailgate plate. If you swing the tailgate open, it will stop at the naturally detent / stop point in the OEM tailgate hinge. But the if the tailgate is opened just a little further (or if the Jeep is facing forward on a declining angle), the tire carrier arm will make contact with the lower tailgate hinge cover.
I already marked up the tailgate hinge cover while testing the clearance.
Granted, the tailgate hinge cover is plastic, replaceable, and relatively inexpensive, but this is still annoying nonetheless. A mitigation for this would have been to put a rubber stopper on the backside of the tire carrier arm, so it will act as a bumper to the tailgate hinge cover. I will probably do this on my own. I might just use adhesive to put a rubber stopper/bumper (or even just a thin layer of rubber) on the back of the tailgate arm.
I wish LoD Offroad had put some warnings about these characteristics / behaviors of the tire carrier in the manual to prevent these accidents, so that people are aware and will take extra care during the tire carrier assembly and adjustment.
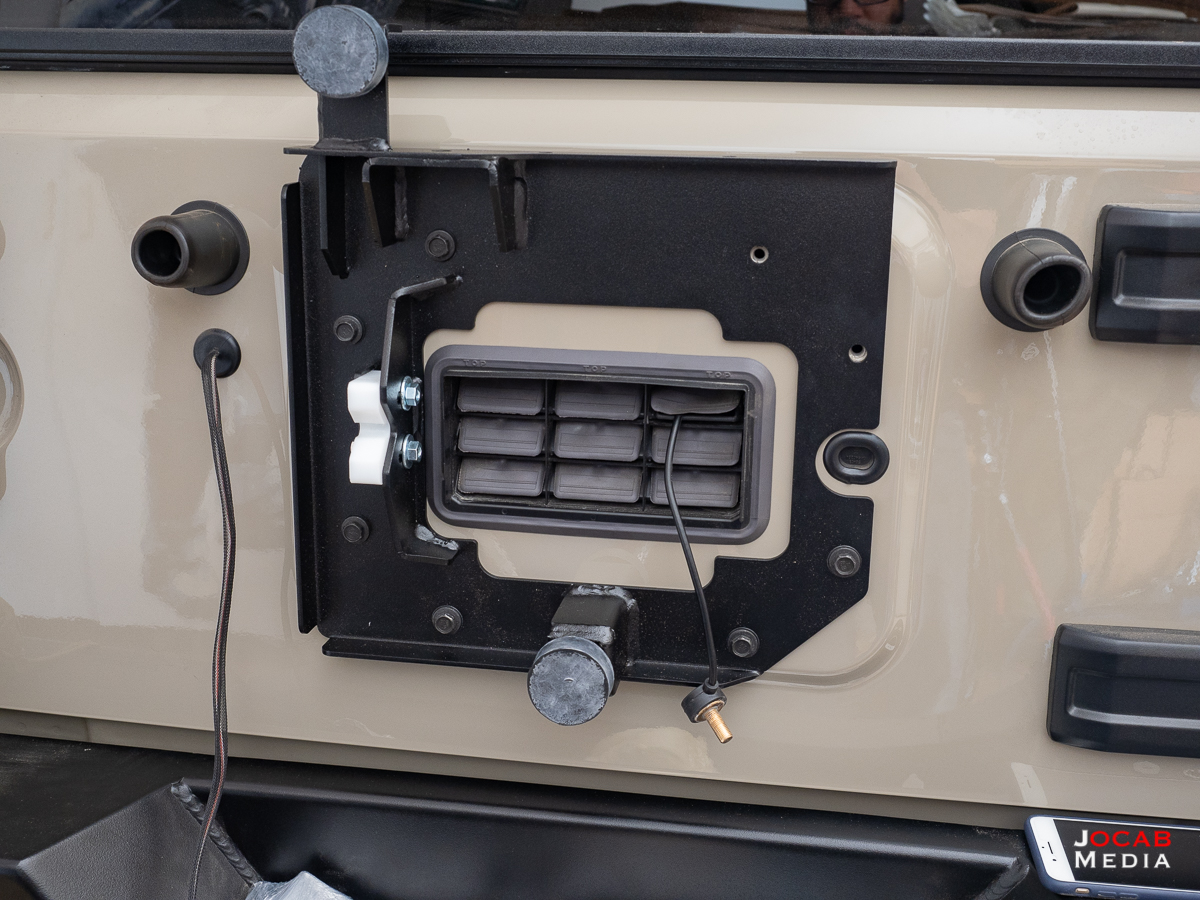
Another annoyance which I knew before hand is the fact that the LoD Offroad third brake light mount sits off-center. I noticed this in photos on the LoD website and emailed them about it, and they confirmed this is the case because of the quick latch attachment point.
When I looked at it, I basically decided to place the L-brackets that connect the third brake light mount to the tailgate plate so that they were on the inside of the mount instead of outside. This then allowed for a new hole to be drilled instead of using the far right hole pre-drilled for the third brake light mount.
In the above photo, you can see the mark made to indicate where to drill the new hole to accommodate the third brake light mount with the L-brackets ‘inversed’ in orientation.
I have no idea why LoD did not think to drill the tailgate plate for the third brake light mount in this manner. It is not like this unstable. The mount is steel and even without the wider stance of the third brake light mount on the tailgate plate, it is is rock solid.
After all the aforementioned issues, what do I think of the LoD Offroad Destroyer rear bumper and tire carrier system?
I think the system is an interesting design and I am looking forward to leveraging the full potential tire carrier via the accessory mounts, but it feels like the Destroyer rear bumper and tire carrier system could have used actual user beta testing before the design was finalized. The issues I came across such as the tailgate freely swinging to contact the body if disconnected from the tailgate and the third brake light mount being offset could have certainly been mitigated and/or eliminated if the designs were tested and vetted by actual users.
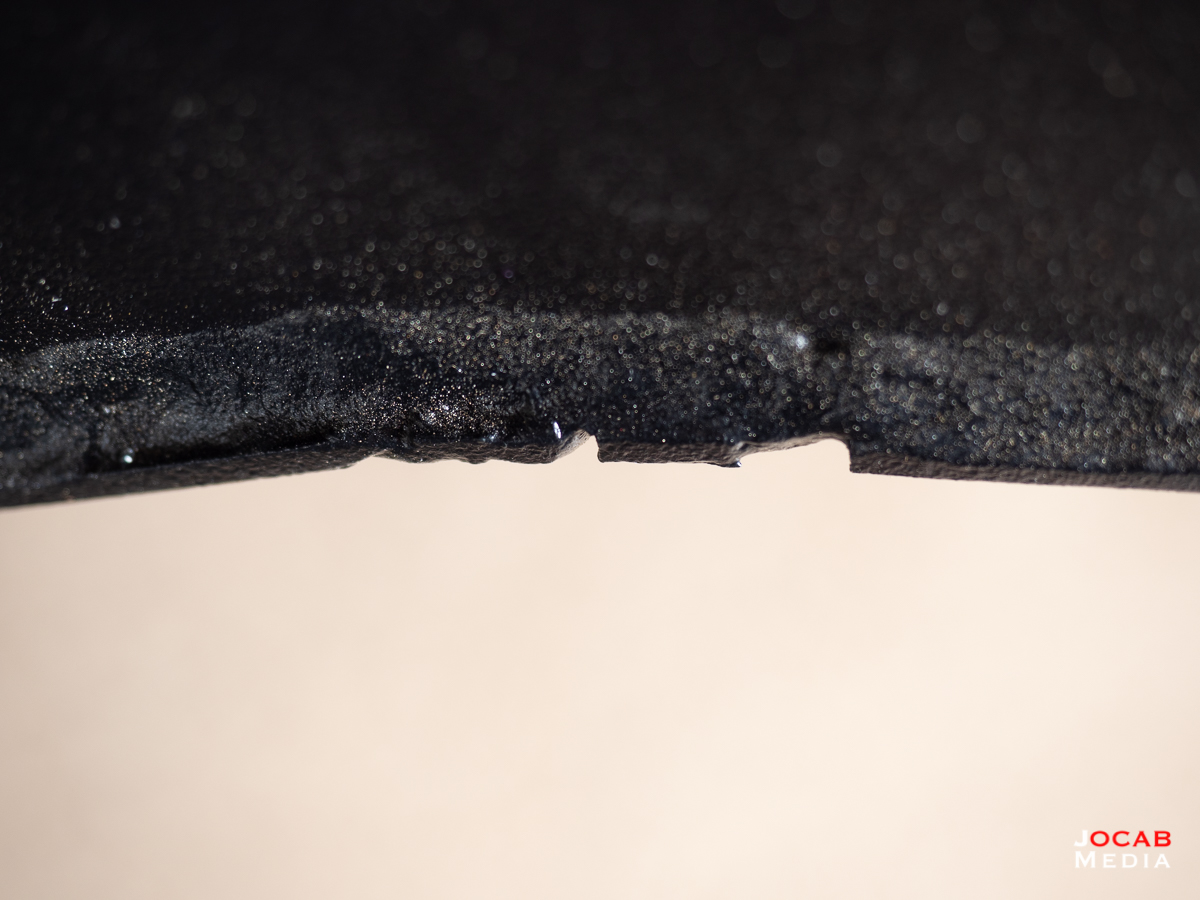
There are some smart design features such as the interchangeable light bezels being recessed. The bezels are actually recessed in the bumper and there is a cut at the lower portion of the recess.
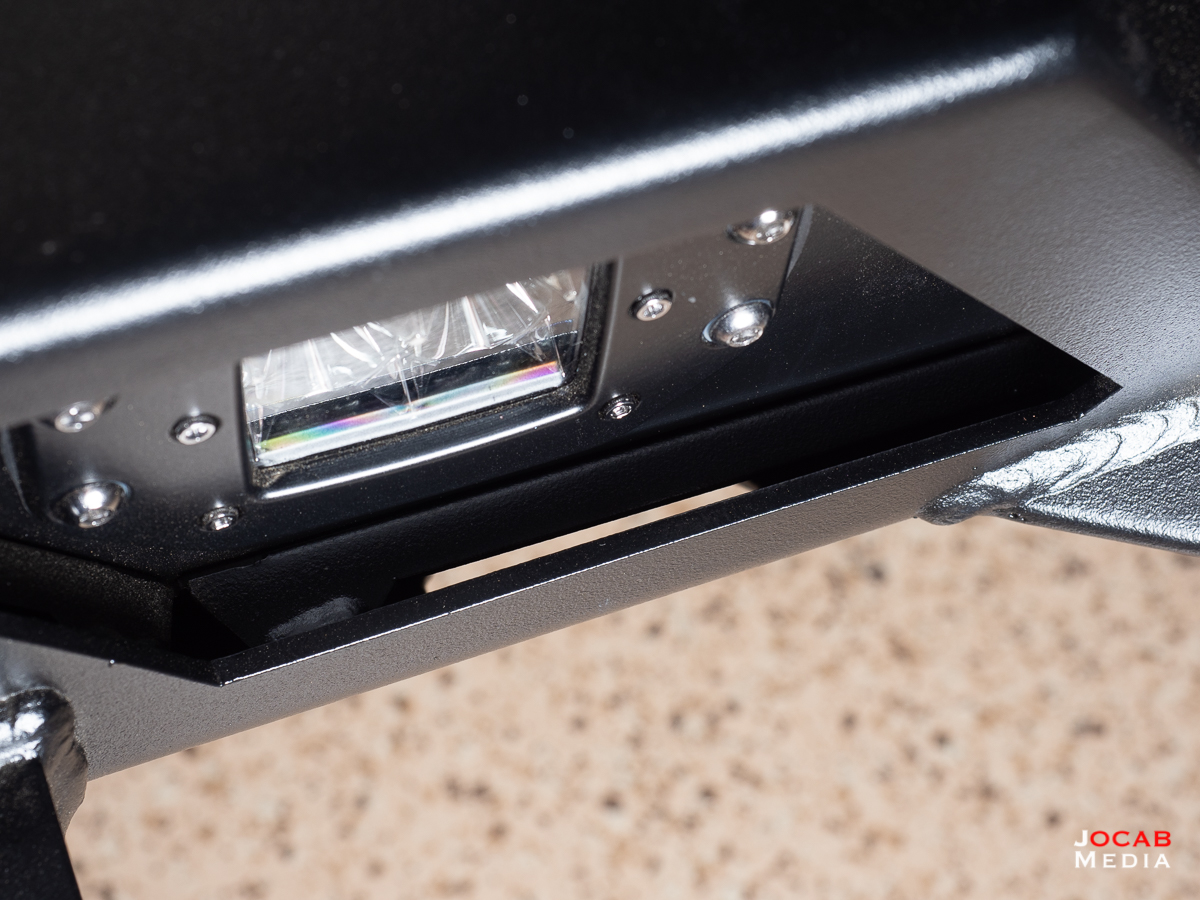
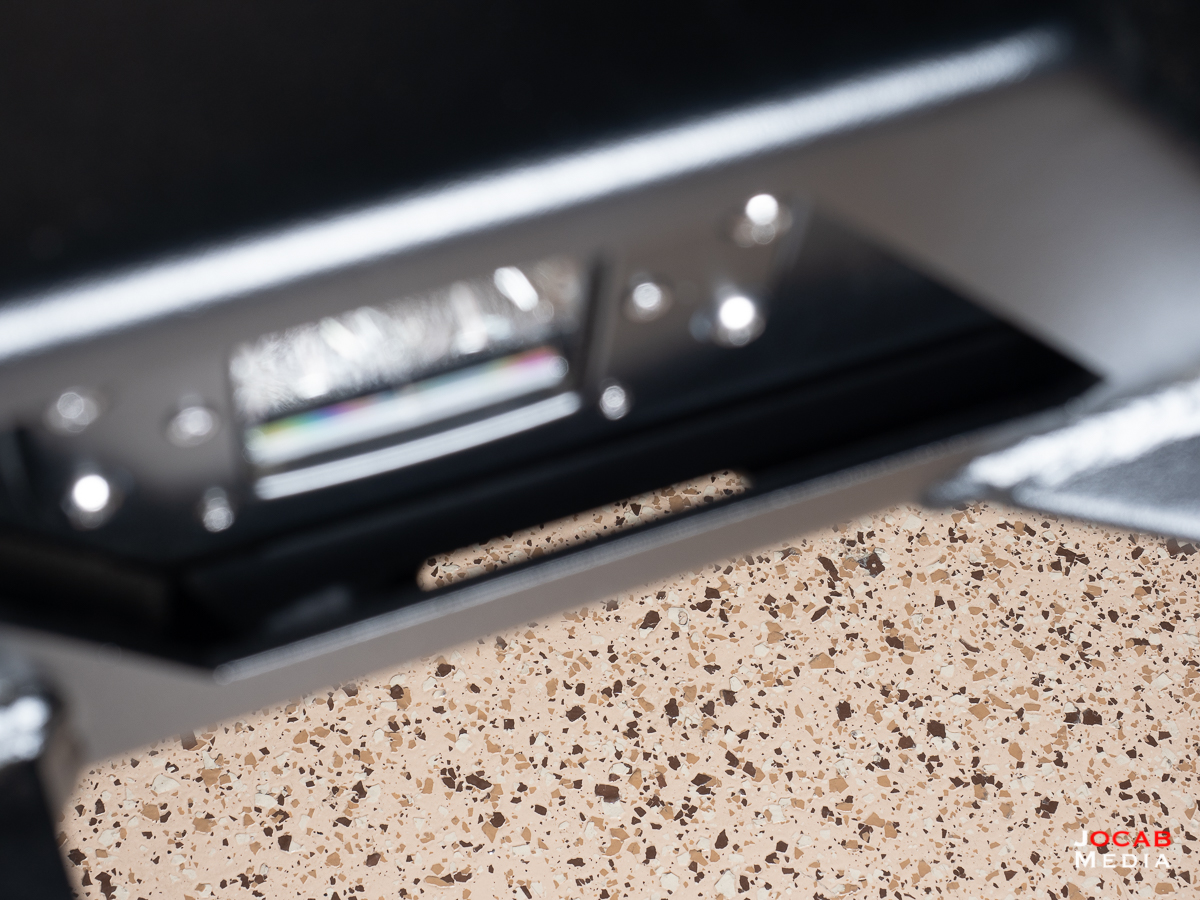
This cut ensures that moisture and water can flow out and not settle, thus mitigating rust.

The anti-rattle features might seem low-tech, but the rubber bumpers and the striker plate actually work effectively to create a system that will not rattle.
The tire carrier linked with the tailgate operates smoothly and does not seem to have any real issues after every the quick release latch and the striker plate were adjusted according to the instructions.
The actual tire carrier operates smoothly with the tailgate. The ball bearings in the spindle make the carrier move buttery slick.
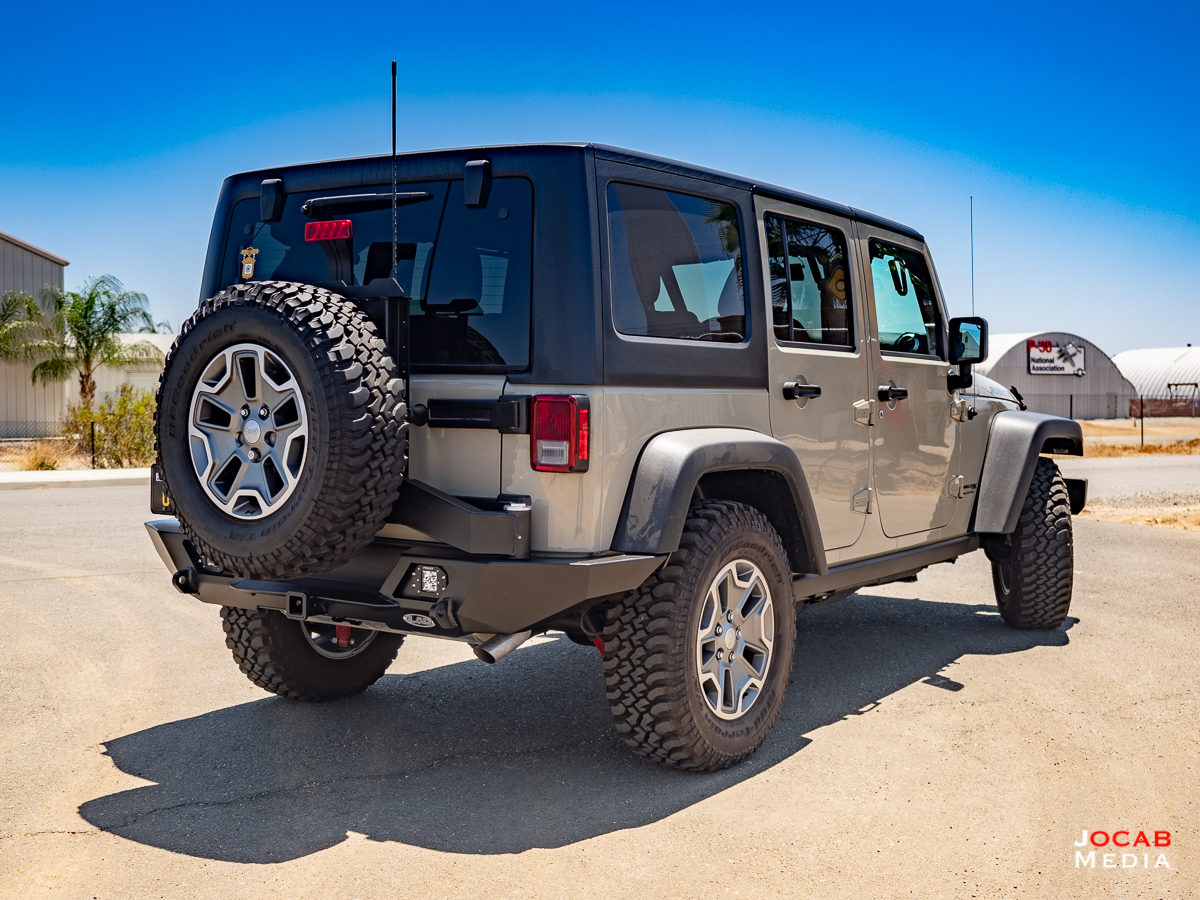
One interesting observation I made after the install and driving around for a few days is that the rake on my Wrangler JK Unlimited is virtually eliminated. In stock form, my Wrangler had a slight forward rake (front end lower than rear end), as do nearly all stock Wrangler JKs. But the rake was increased due to the addition of the Warn Industries Zeon 10-S winch and Rock Hard 4×4 winch plate, which added an extra 90 lbs or so.
The LoD Offroad Destroyer full-width rear bumper with tire carrier runs 146 lbs according to the LoD product page. If you discount the paltry weight of the factory OEM rear bumper (and tow hook), there is about 130 lbs added to the rear, which helps offset that additional front end weight, and thus mitigating the rake.
Would I recommend the LoD Offroad Destroyer rear bumper with tire carrier system?
To be honest, it is hard to recommend to others because it really is going to be contingent on the needs and desires of the prospective buyer, and if this specific bumper and tire carrier system can address those needs.
Given a fixed set of accessories to mount on the tire carrier, a simpler solution would be to swap out the stock OEM tailgate hinges with heavier duty aftermarket hinges. Then one could mount a Hi-Lift jack and Rotopax units using tailgate hinge specific mounts.
But if there is the desire to be able to operate the tailgate and tire carrier simultaneously as well as independently without any tools, then the LoD Offroad Destroyer bumper is the only real solution available (that I know of).
Knowing what I know now, would I buy the LoD Offroad Destroyer rear bumper with tire carrier system, again?
I thought about this for several moments and I would have to say with some hesitation, yes, I would. The reason for the hesitation is that if I had to do this all over again, I would probably make more effort to get up close and have a hands on inspection of all the rear bumper with tire carrier systems that I am considering. Unfortunately, given the nature of some of these aftermarket off-road part manufacturers, it is difficult to find certain manufacturers products in a retailer in your region.
I am in Southern California and Poison Spyder is overly represented in local retailers and by Jeep owners because Poison Spyder is located here. Whereas LoD Offroad is in Indiana and they do not have any official dealers in Southern California. Thus, shopping for such parts can make for difficult purchasing decisions.
So in summary, I would simply have to say that right now I am content with the LoD Offroad Destroyer full-width rear bumper with tire carrier system.
After installing the system and discovering a lot of the characteristics that I have been critical of, my excitement regarding this new accessory has certainly waned. That is to say I am not unhappy with it, but am slightly disappointed because I had very high expectations going in.
I may have listed off several negative comments of the LoD Offroad Destroyer rear bumper, but we will see if the characteristics I have been critical of in this write-up persist over time l as I expand on the system with the various accessory mounts and start leveraging the system fully. I do in fact have the horizontal Hi-Lift jack mount ordered and on the way.
Of course, time will also determine how the bumper and tire carrier system holds up after more use.
I hope this install overview and review article will help other Jeep Wrangler JK owners make a well-informed decision when purchasing an aftermarket rear bumper and tire carrier system for their vehicles. Do your research and reach out to the manufacturer if you have questions, and do not rush into a purchase because the more time you take to research and weigh out all the options, the better you will be in your the decision making and purchasing process. Do not let any of the negative comments I may have made towards the LoD Offroad Destroyer full-width bumper with tire carrier dissuade you from even considering this product. Definitely take a look into because your views towards it may not match mine.
LoD Offroad Destroyer Shorty Front Bumper Install and Review – ocabj.net
[…] 2018 I installed the LoD Offroad Destroyer rear bumper with tire carrier on my 2018 Jeep Wrangler JK Unlimited. After some slight quirks discovered during and after […]
2018 Jeep Wrangler JK Unlimited Rubicon: The First 365 Days – ocabj.net
[…] of add-ons and accessories, but the one notable true upgrade (as in replaced a part) is the LOD Offroad Destroyer Rear Bumper with Tire Carrier. As it stands now, after the initial install of the LOD Offroad Destroyer rear bumper, I added the […]