
Additional offroad lighting is a common add-on to Jeep Wrangler vehicles and became more viable for me after I installed the Precision Designs sPOD Bantam. Now having a robust centralized switching and relay system, I wanted to start adding more devices to it. After adding some under hood lighting via KC HiLiTES Cyclone LEDs and some rear lighting on the LOD Offroad rear bumper via Rigid Industries D-Series flush mount flood LEDs, I decided add some front lighting.
I was actually considering windshield mounted LEDs, but have become less enthusiastic about them due to possible issues with hood glare. I am less inclined at the moment to run a 50″ light bar above the windshield due to wind noise. So a bumper or grille mounted light bar seemed to be the most reasonable option.
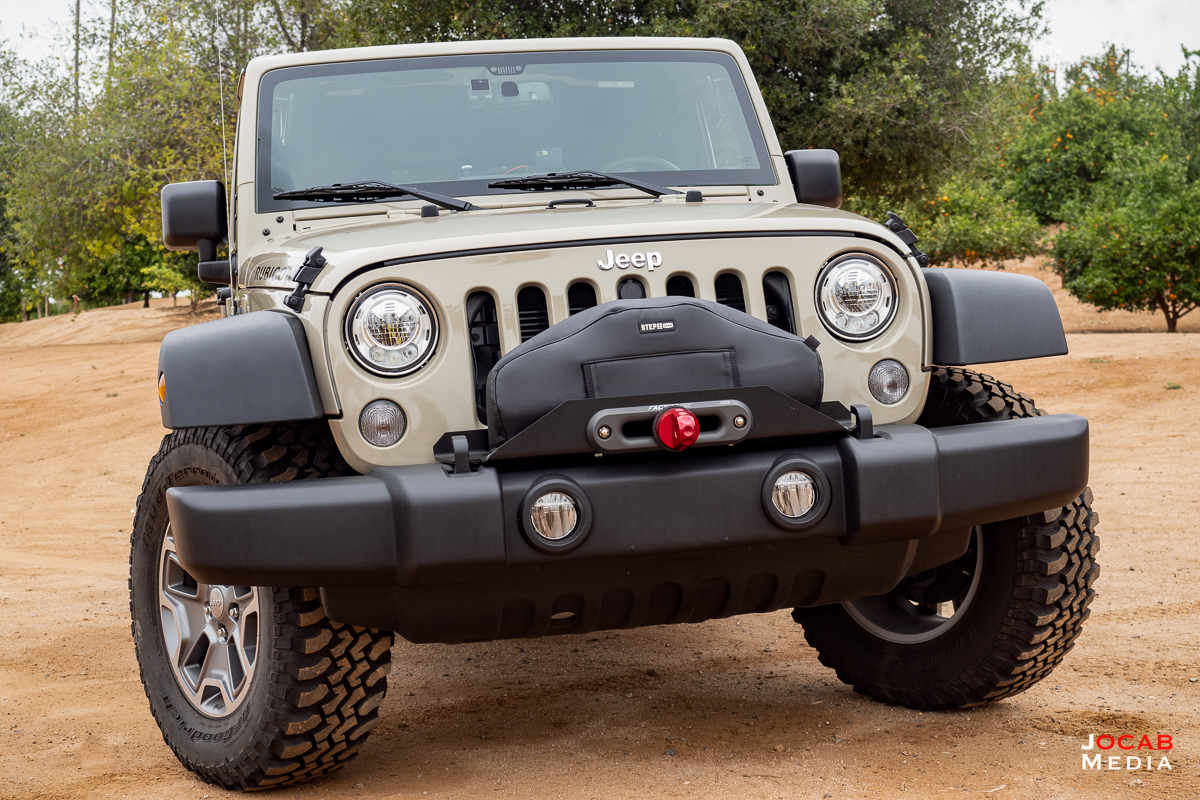
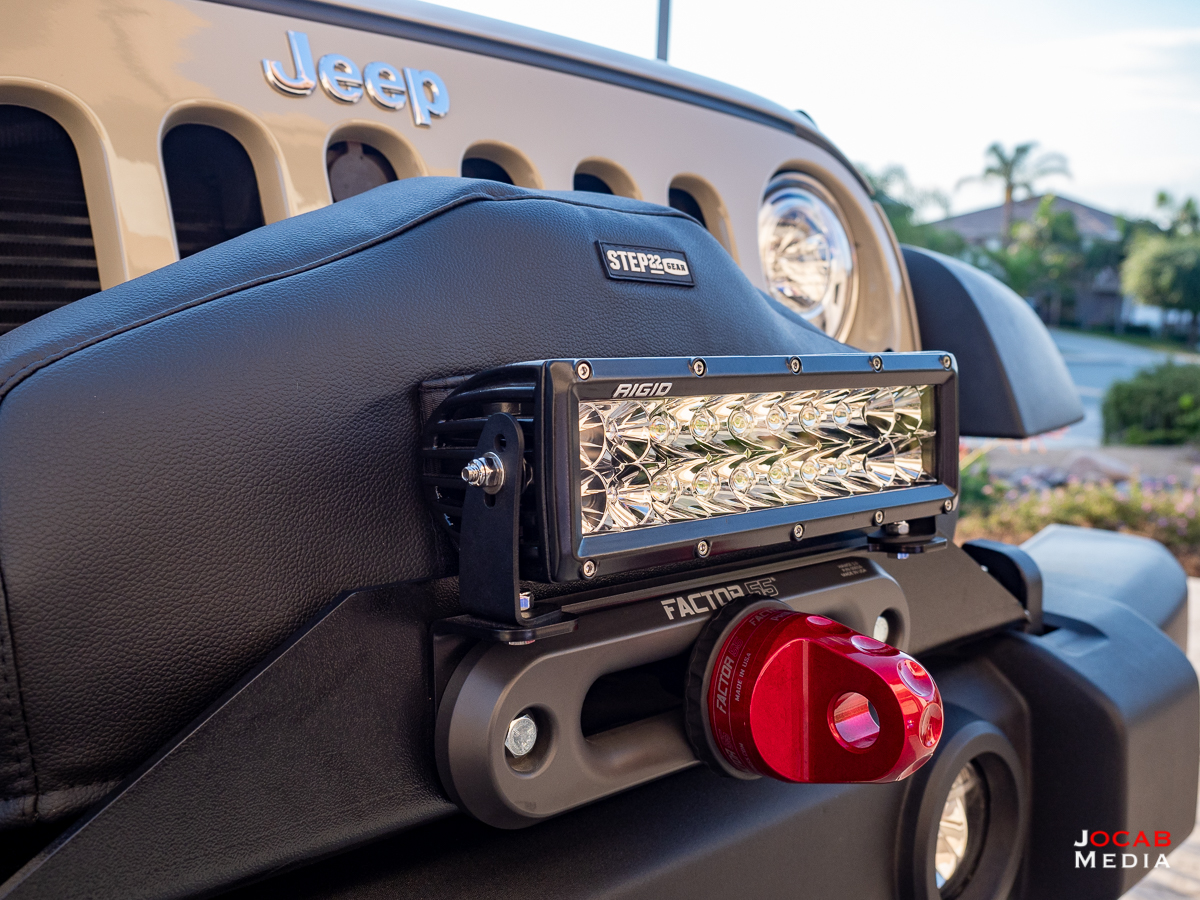
My 2018 Jeep Wrangler JK Unlimited Rubicon still sports a stock OEM bumper, but with a Rock Hard 4×4 winch plate. Rock Hard 4×4 makes a bull bar to fit their winch plate and includes light mount tabs, but I did not feel like getting the bull bar for this application.
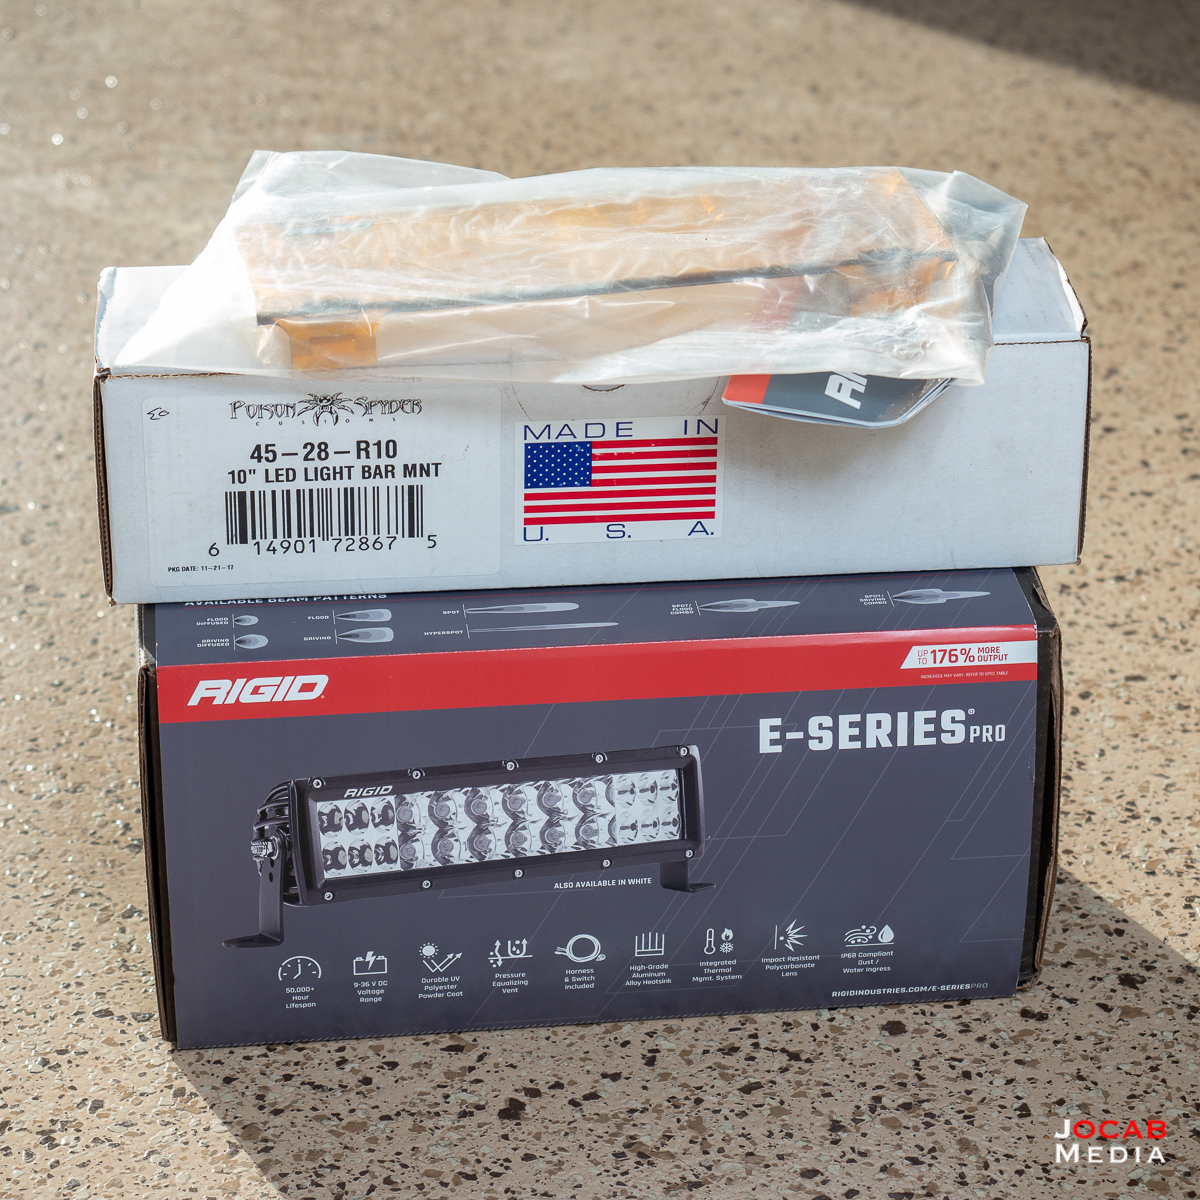
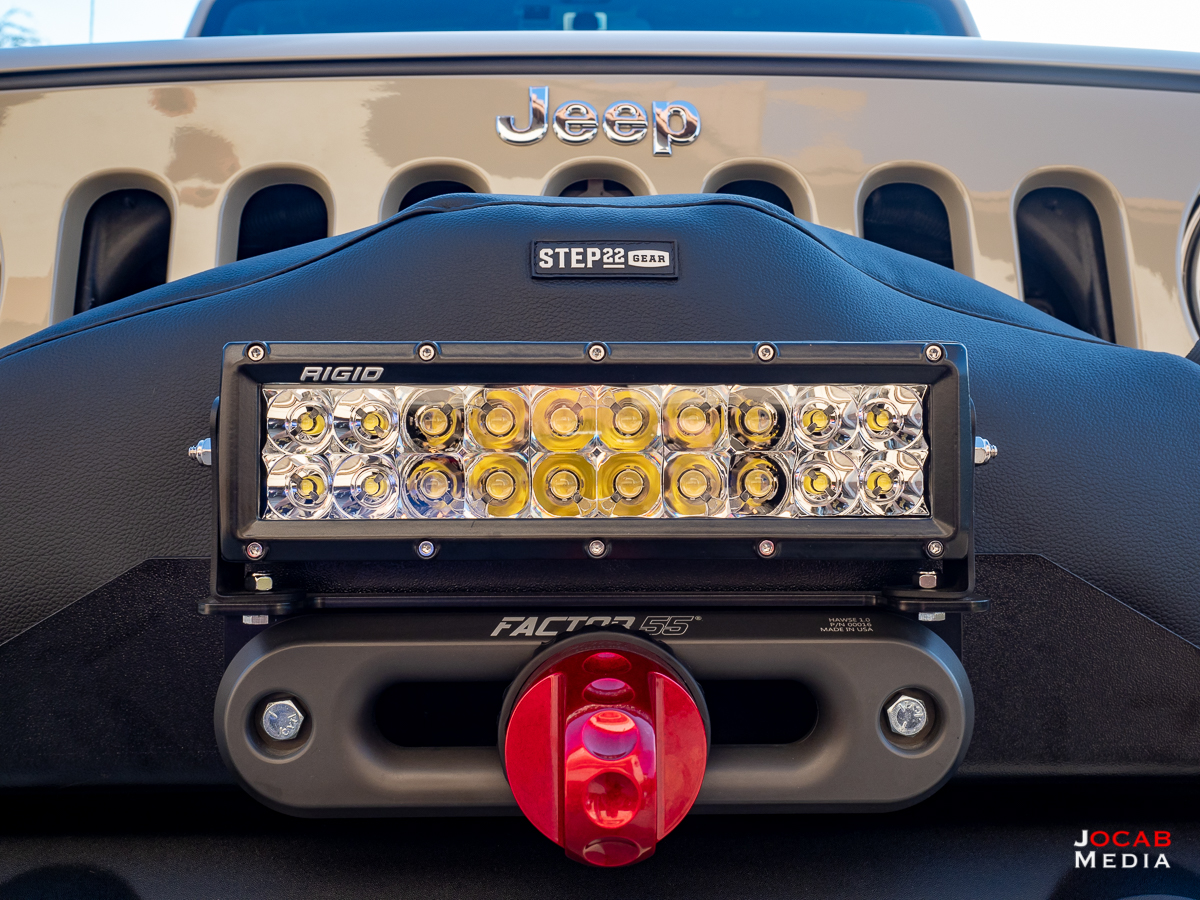
So I looked into Hawse fairlead light mounts and found the Poison Spyder fairlead light mount accessories. The Poison Spyder Hawse Fairlead light mounts would support either a pair of individual lights or a 10″ light bar. After much thought, I decided to go with a Rigid Industries E-Series PRO 10″ Spot/Flood combo light bar (SKU 110313) and pair it up with the Poison Spyder Hawse Fairlead Rigid 10″ LED Light Bar Mount.
The Poison Spyder mount sandwiches between the Hawse fairlead and the bumper winch opening (or in this case, the winch plate).
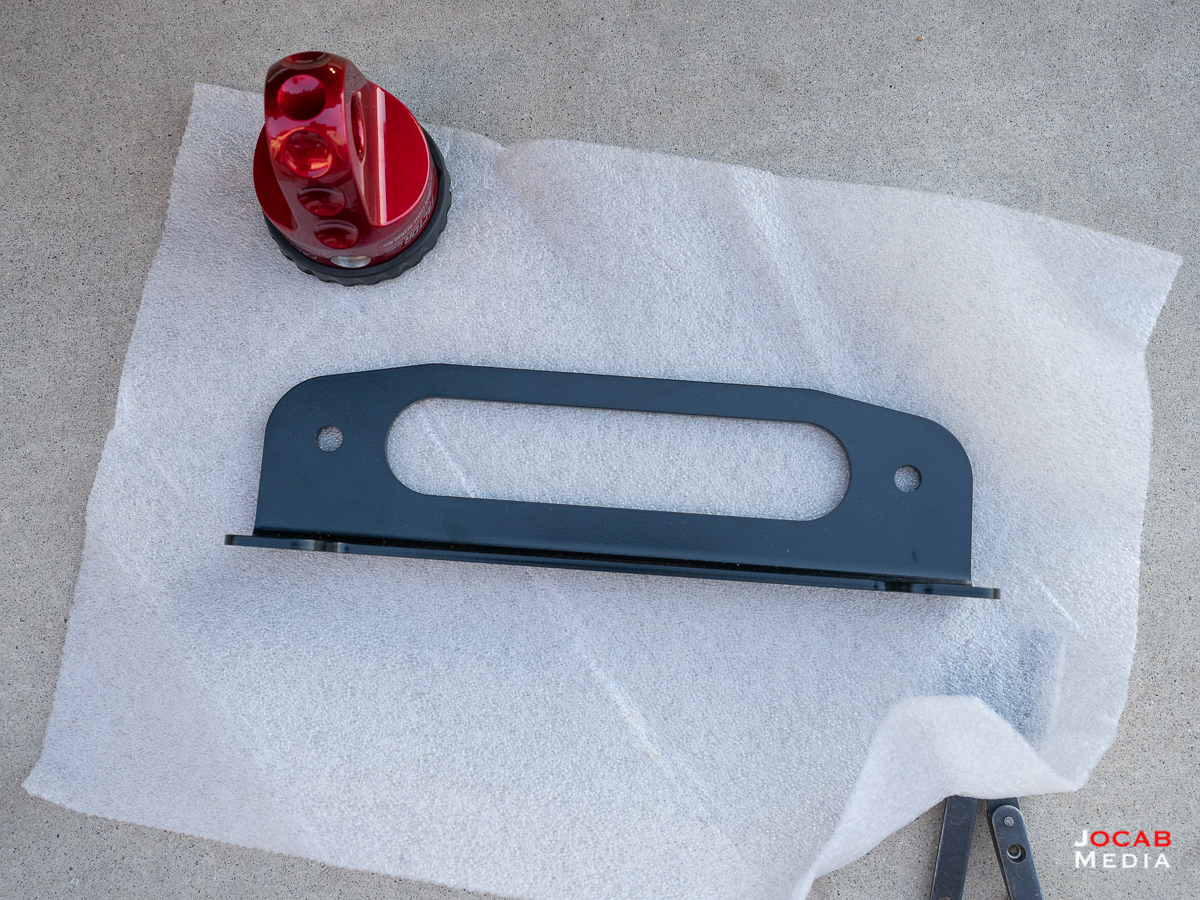
The existing hardware for the Factor 55 1.0 Hawse Fairlead was re-purposed from the Warn Industries Zeon 10-S winch hardware and are 7/16-14 1″ long hex bolts with chromed acorn nuts. Unfortunately, the 1″ bolt is not long enough to include the Poison Spyder light mount, so I picked up a pair of 1-1/4″ long 7/16-14 Grade 5 hex bolts from the local hardware store to accommodate the extra thickness of the light bar mount.
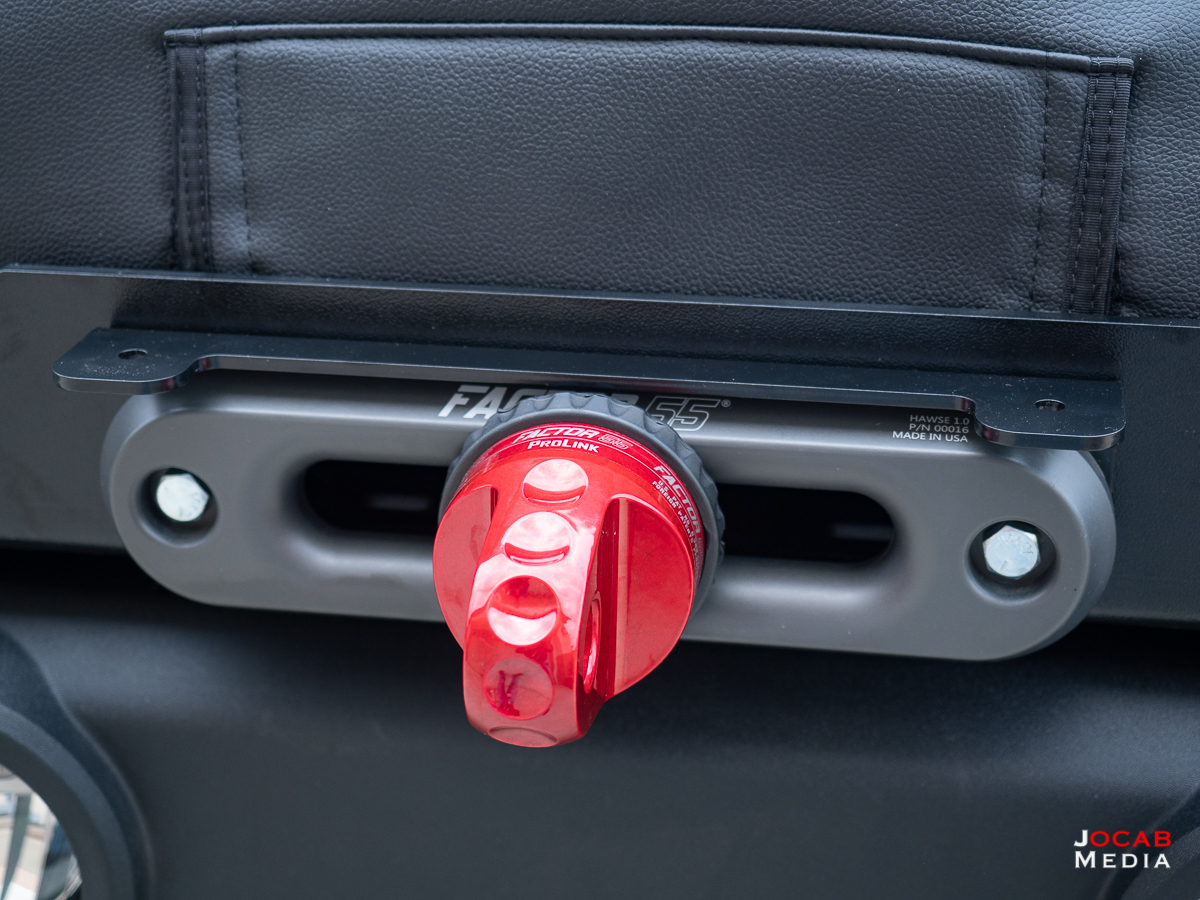
Note that the acorn nut used to sit on the outward facing side. But with the 1-1/4″ long hex bolts, I could not insert them in from the backside due to the winch not allowing enough clearance, so I had to insert the hex bolts from the front facing side. While there is nothing wrong with Grade 5 bolts, chromed stainless bolts might actually be slightly more aesthetically pleasing if the bolt head is going to be visible.
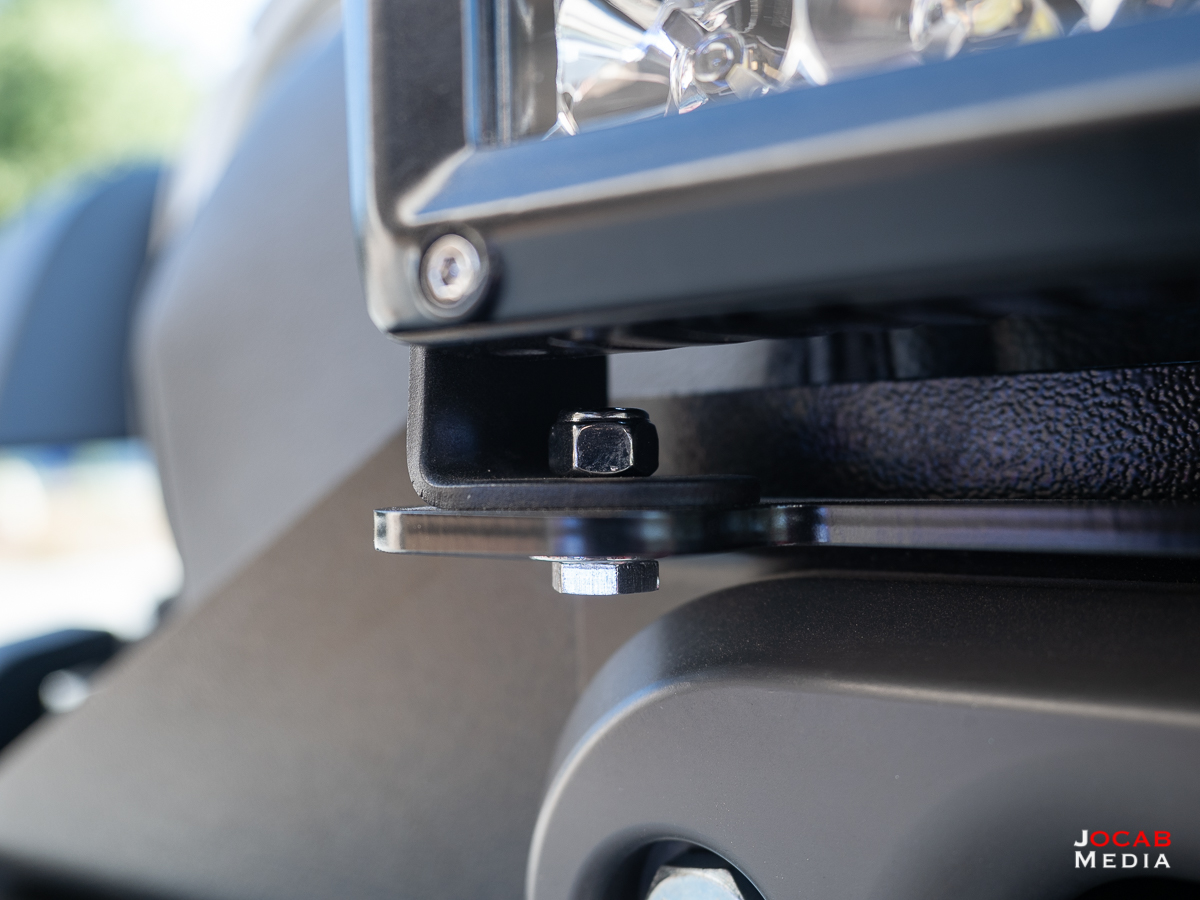
After that, I got around to mounting the Rigid Industries light bar. It actually does not come with hardware to attach the light bar brackets to the mount points. For this, I used 5/8″ long 1/4″-20 chrome hex bolts with 1/4″-20 chrome nylon lock nuts (and 1/4″ washers). 1/2″ will definitely be too short and 1″ is a bit long. You should be able to get away with 3/4″, but 5/8″ seemed perfect.
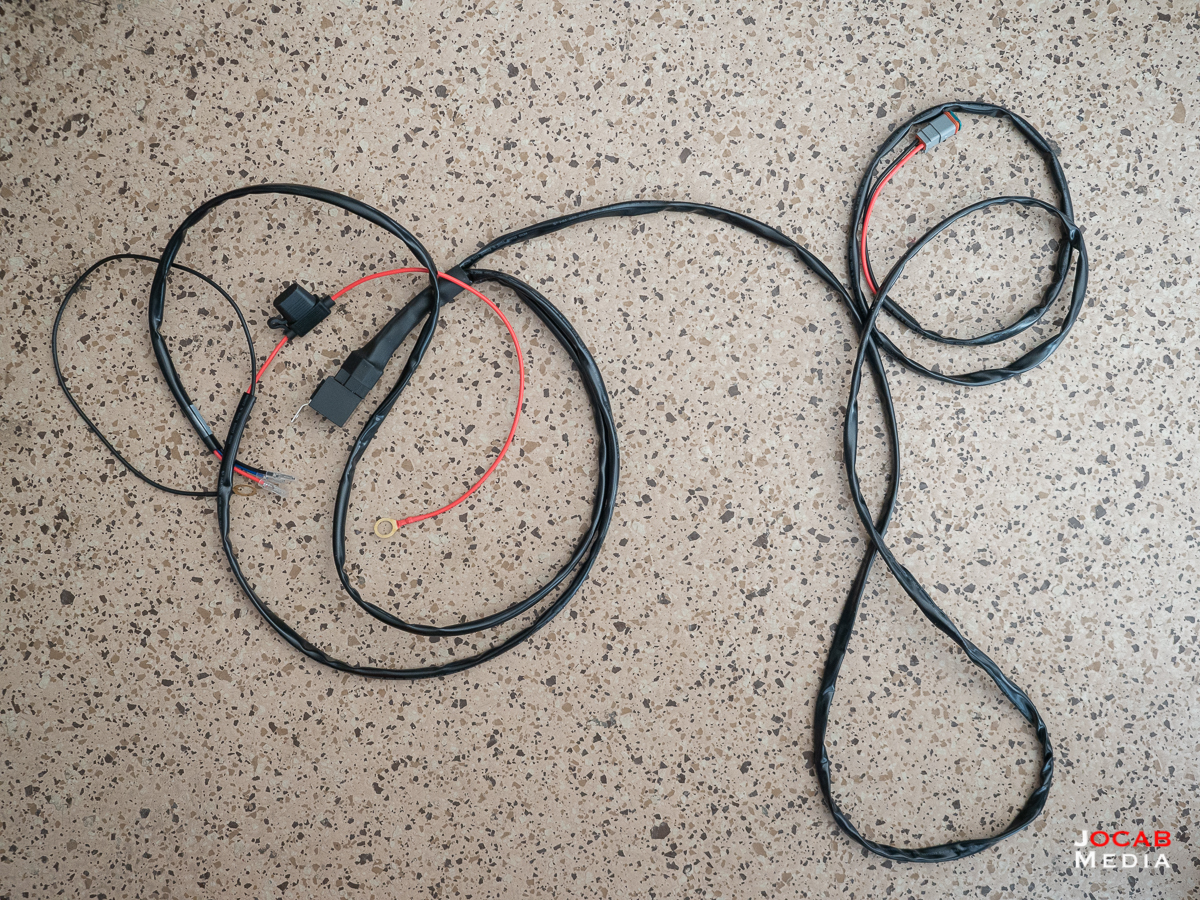
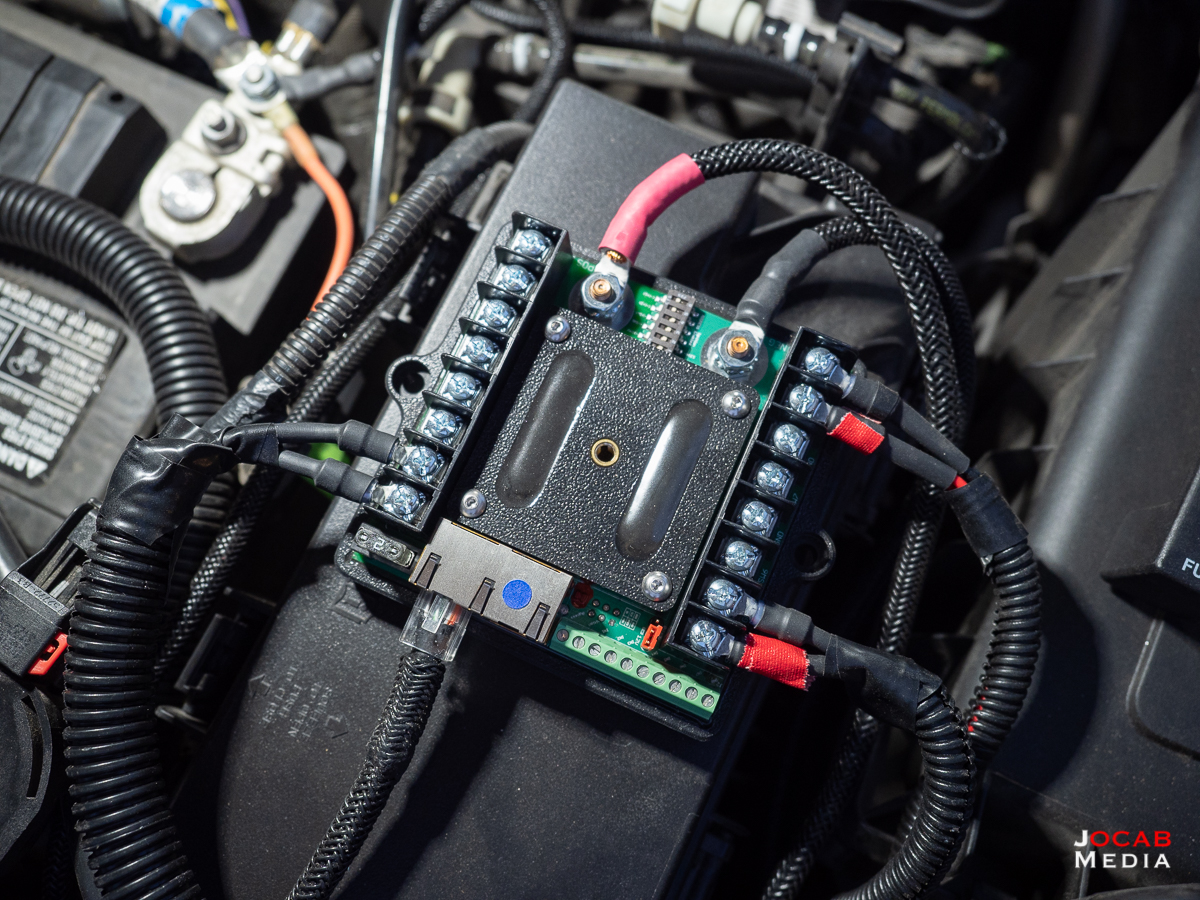
Of course, since I have the sPOD Bantam, I did not need the switch and relay included with the E-Series PRO light bar. But I did need the Deustch connector, so I cut the harness included with the Rigid Industries light bar right at the fuse so I could reuse the existing wiring with the connector for the light bar.
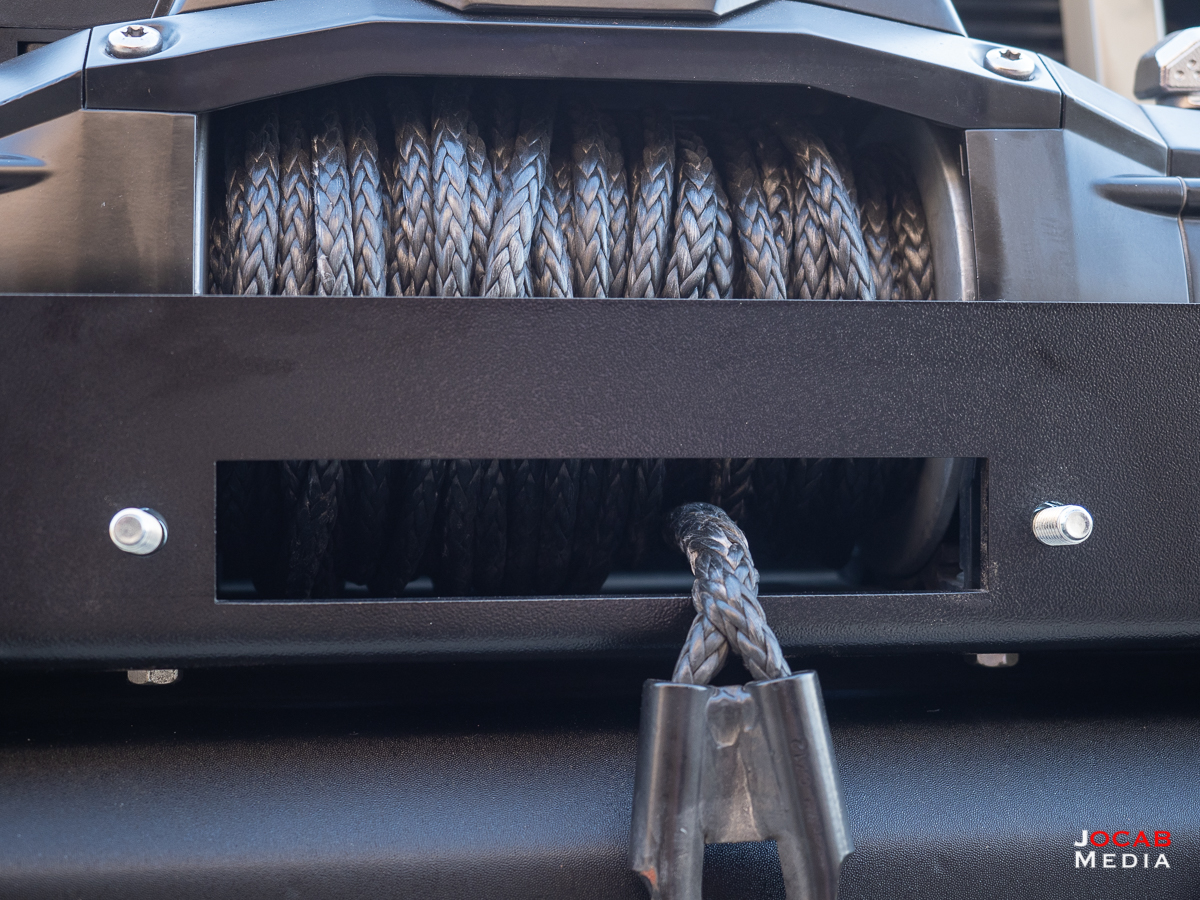
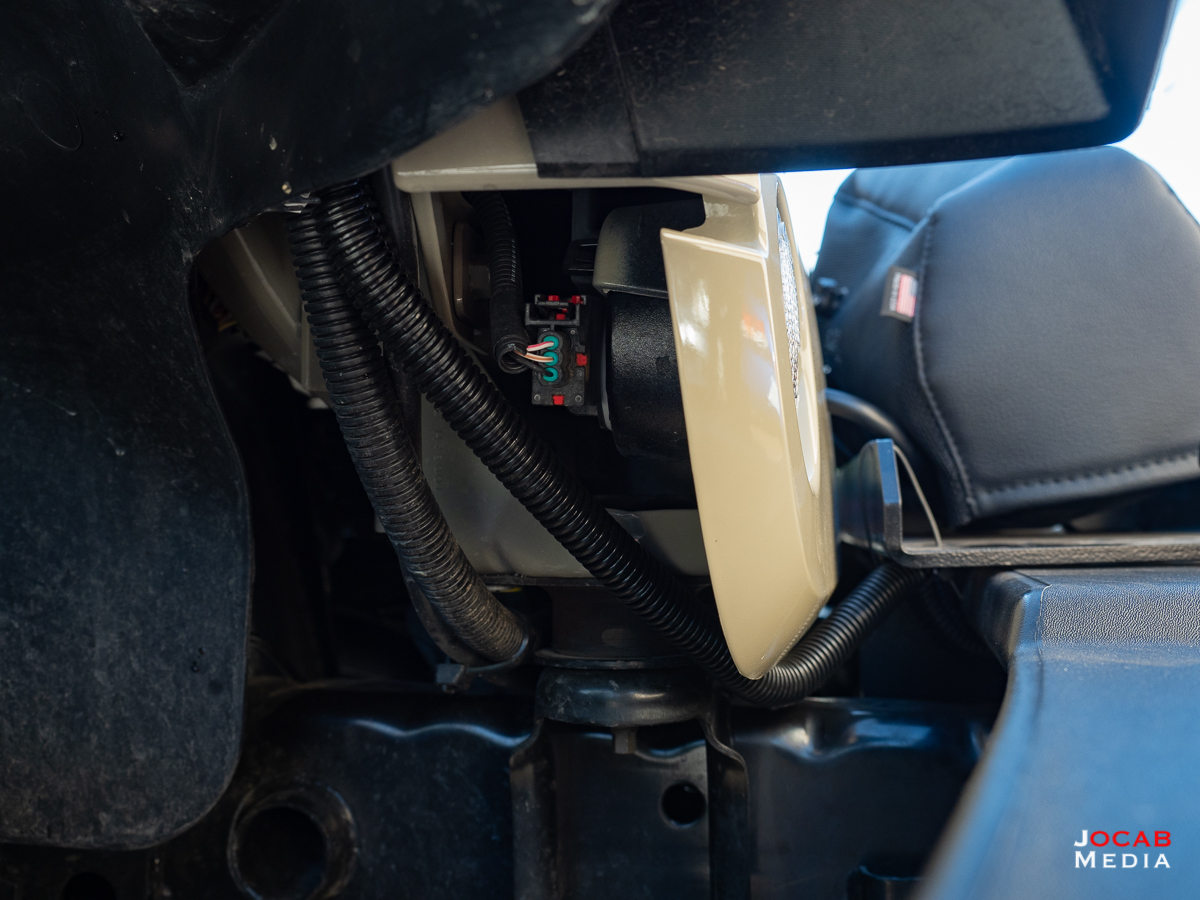
I ended up running the wiring around the winch plate from the driver’s side (the plug on the light bar is on the driver’s side), underneath the bumper along the front frame rail towards the passenger side, and up into the engine compartment. I ended up running it right along side the air box intake, which is where the winch cable runs along.
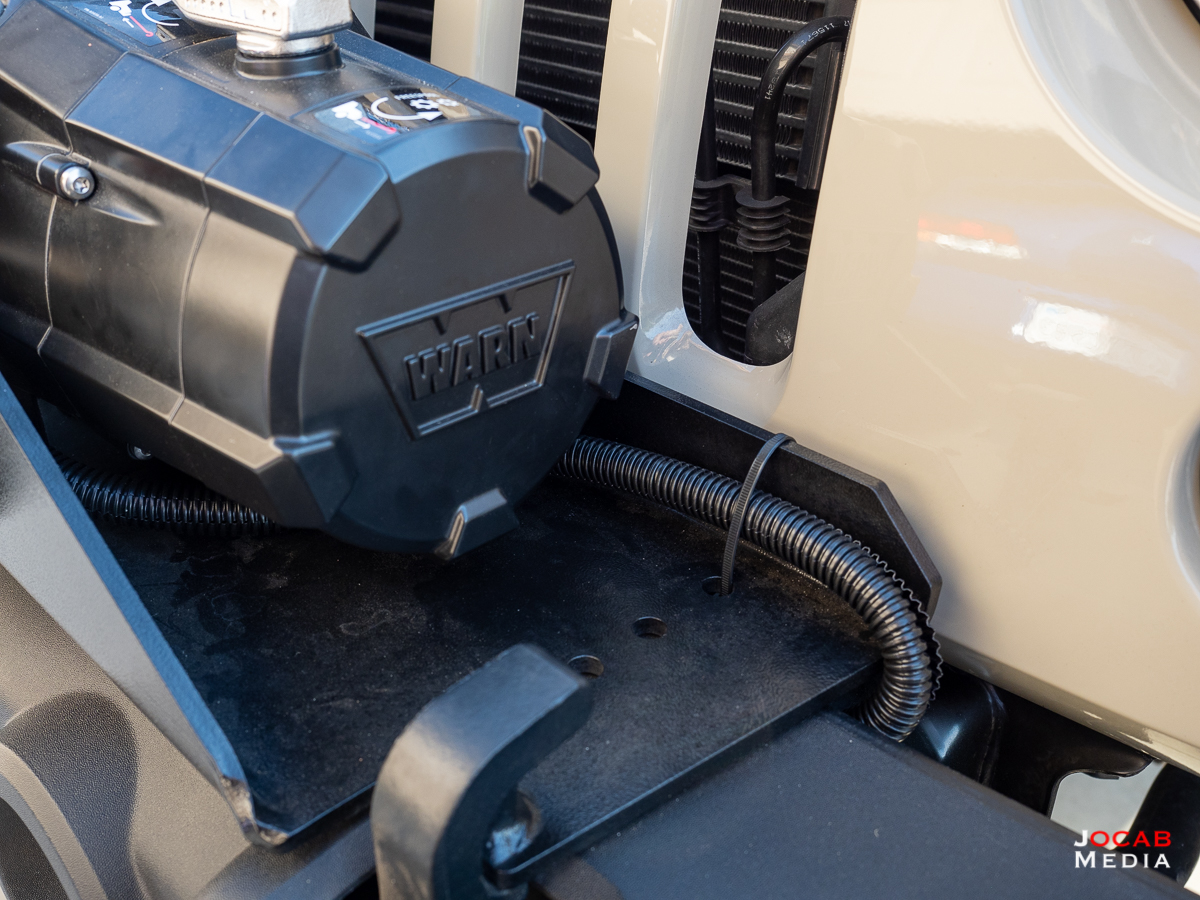
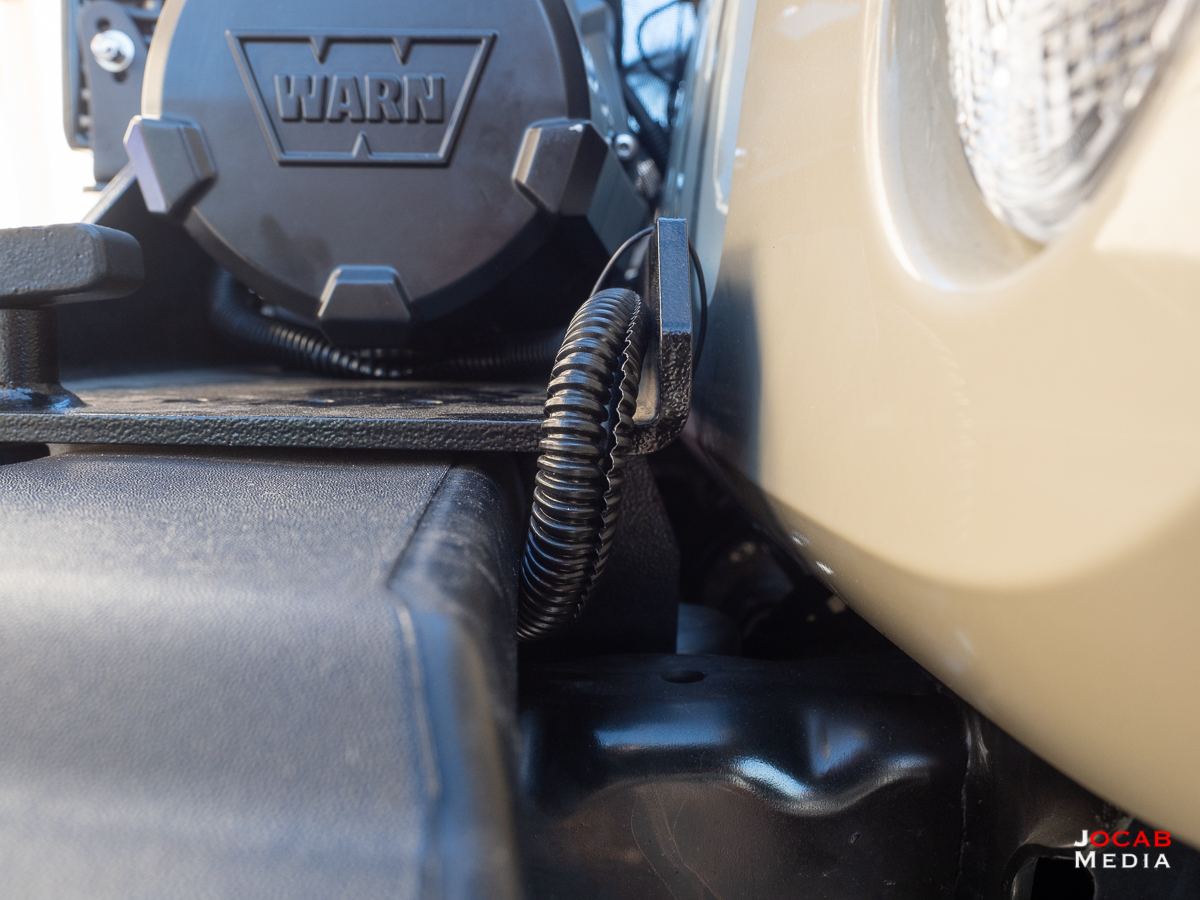
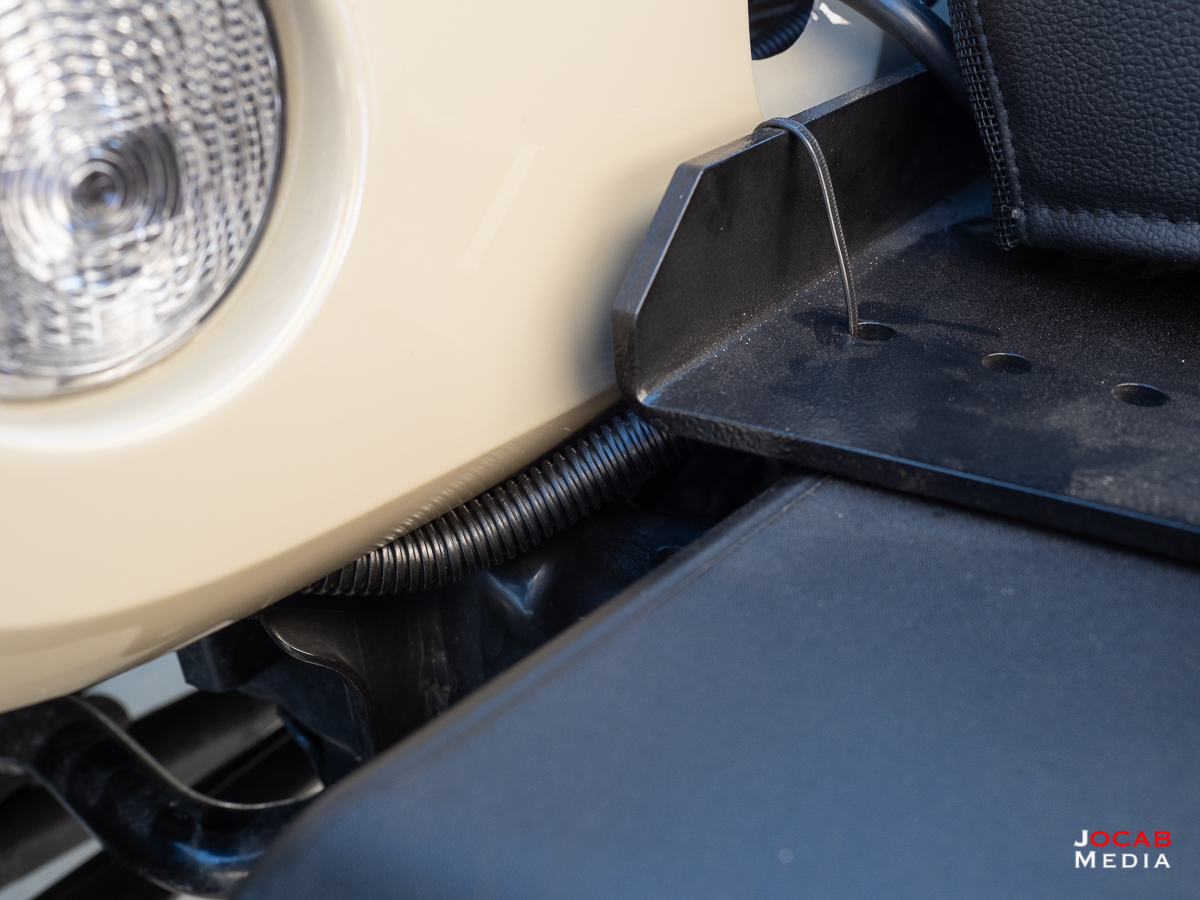
I used a few zip ties to keep the split loomed wiring tight to the winch plate and/or bumper as it went along side the frame rail. It was a very straightforward wiring process.
From there I had a direct path to the sPOD. The wiring was just a tad short to make it to the terminals for switch #1, so I added four inches of 16 AWG wiring that I cut from the leftover portions of the unused wiring harness included with the Rigid Industries light bar.
Although, one minor issue is that the plug to go from the harness to the back of the E-Series PRO light bar would not fit between the back of the mounted light bar and the front face of the winch while the light bar was in place. The light bar sits very close to the winch with Poison Spyder Hawse Fairlead Rigid 10″ LED Light Bar Mount.
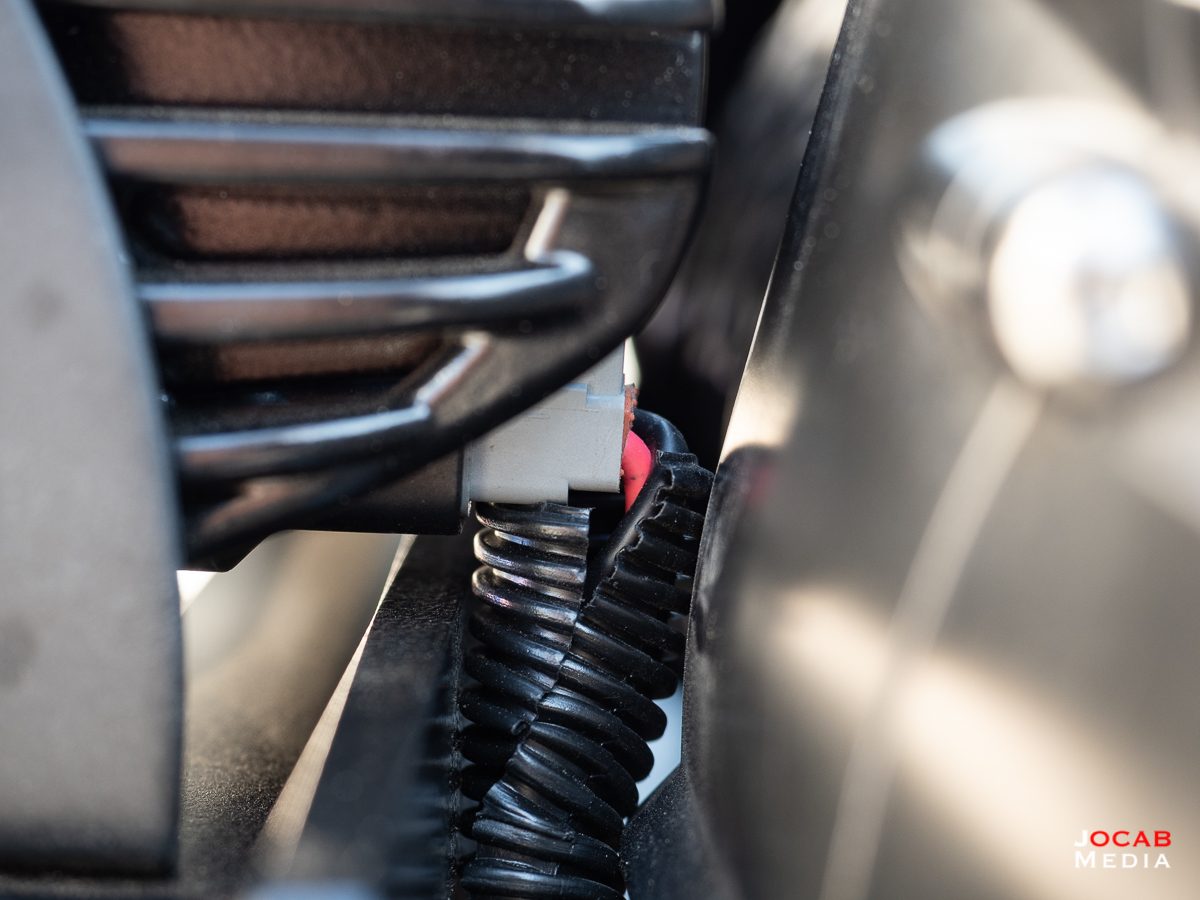
So I had to remove the bolt holding the driver’s side light bar bracket to the Poison Spyder mount in order to swivel out the light bar and get clearance to plug in the harness, and then remount the light bar into its final position.
Note: The specific Poison Spyder Hawse Fairlead light mount is referred to as a Rigid 10″ LED light bar mount, or model number 45-28-R10. According to Poison Spyder, this one was designed to place the Rigid 10″ LED light bar closer to the winch. In retrospect, the other Poison Spyder Hawse Fairlead light mount, model number 45-28-020, might provide a little extra clearance for the plug to be insert/removed while the light bar is mounted.
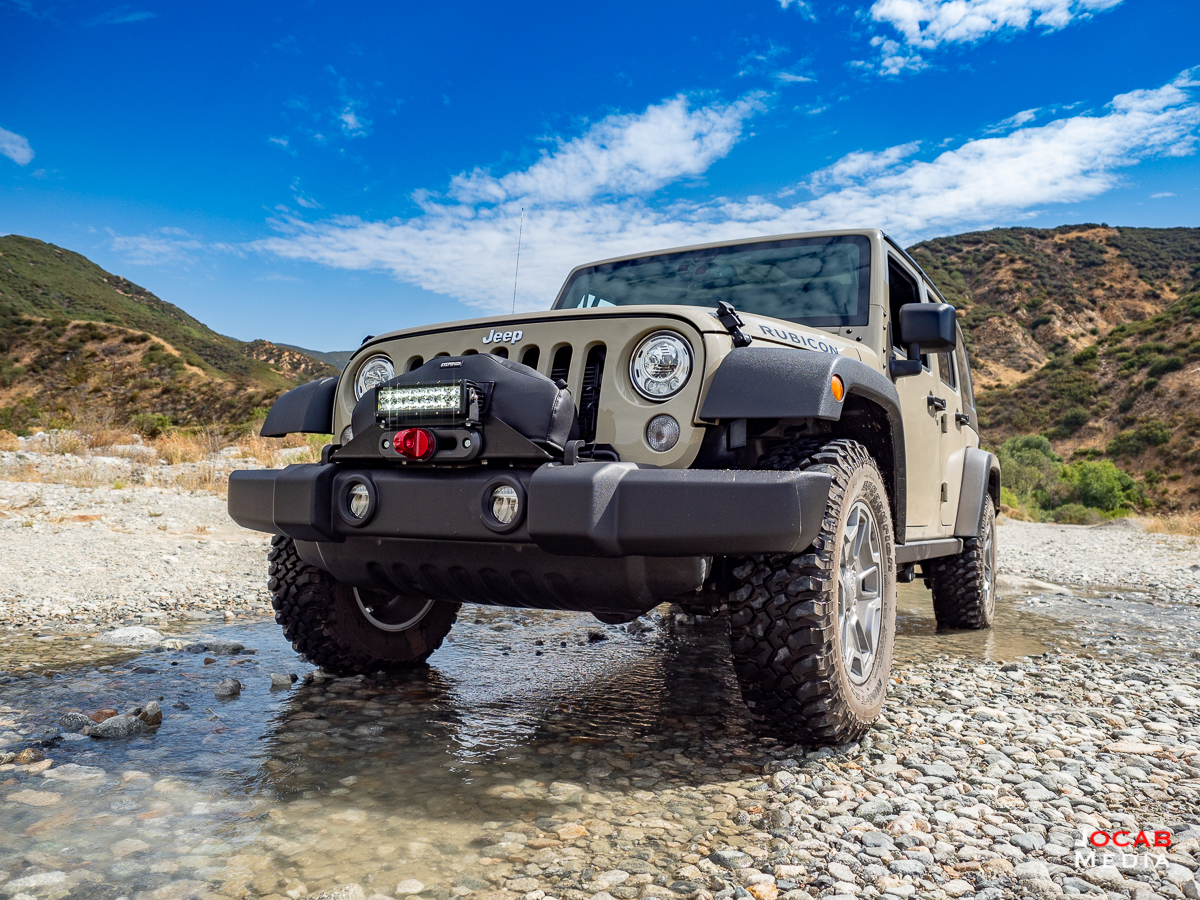
After it was all installed, the Rigid Industries E-Series PRO 10″ Spot/Flood combo light bar looks pretty slick.
I really like the 10″ light bar in front of the grille / on the bumper because it is fairly small compared to the 20″ light bars often seen on Jeep Wrangler hoods or the 50″ light bars often seen on the top of windshields.
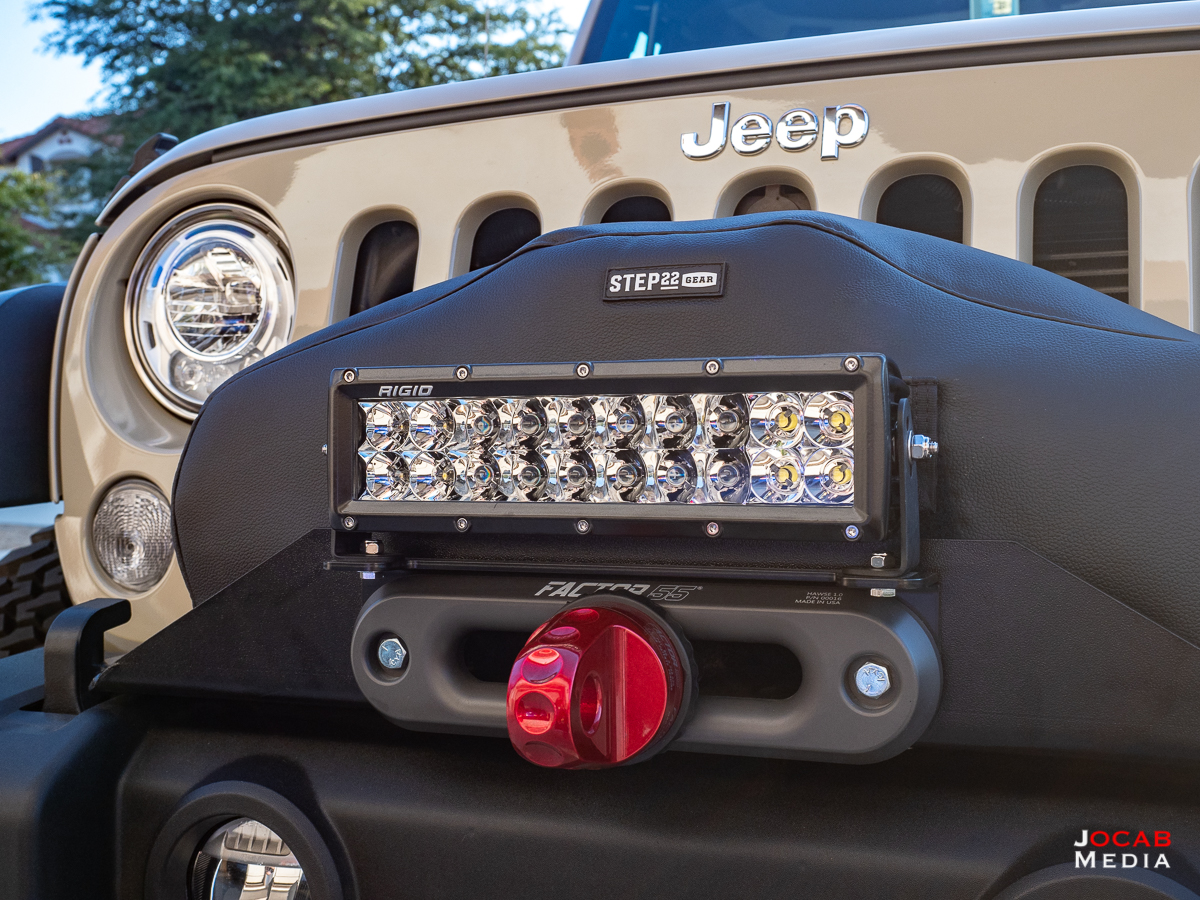
While the 10″ light bar is comparably small, it still packs a punch. The Rigid Industries E-Series PRO Spot/Flood Combo (110313) is rated at 15840 raw lumens with a beam distance of 447.5 meters (~1468 feet), and a 2002.67 lux at 10 meters (or 2002 lumens per square meter at 10 meters).
I opted for the spot/combo because it seemed to be a nice balance in terms of focused beam for distance and a flood for some peripheral lighting. As you can see in the some of the front view photos earlier in the article, there are two rows of LED bulbs with ten bulbs per row. The middle six bulbs are in a spot pattern, where as the outer two bulbs on each side are flood.
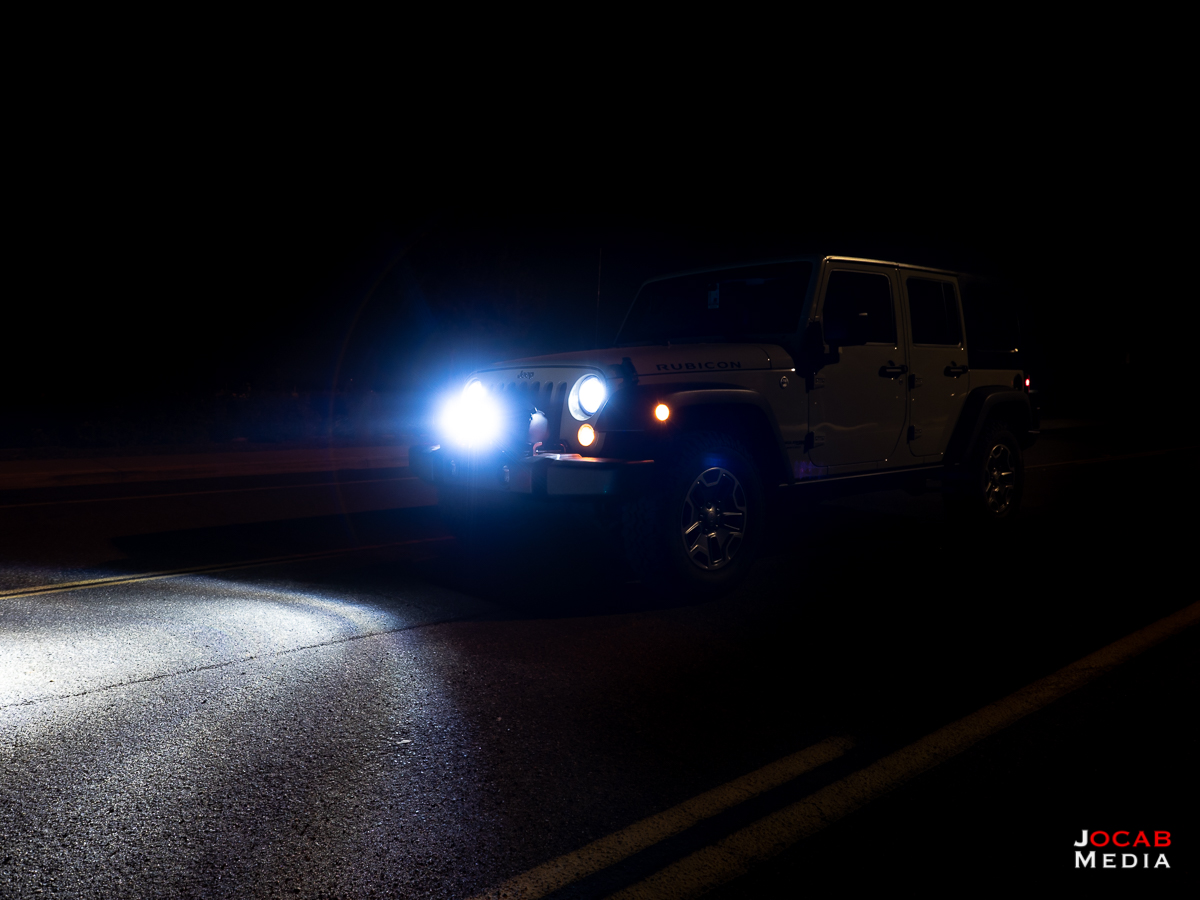
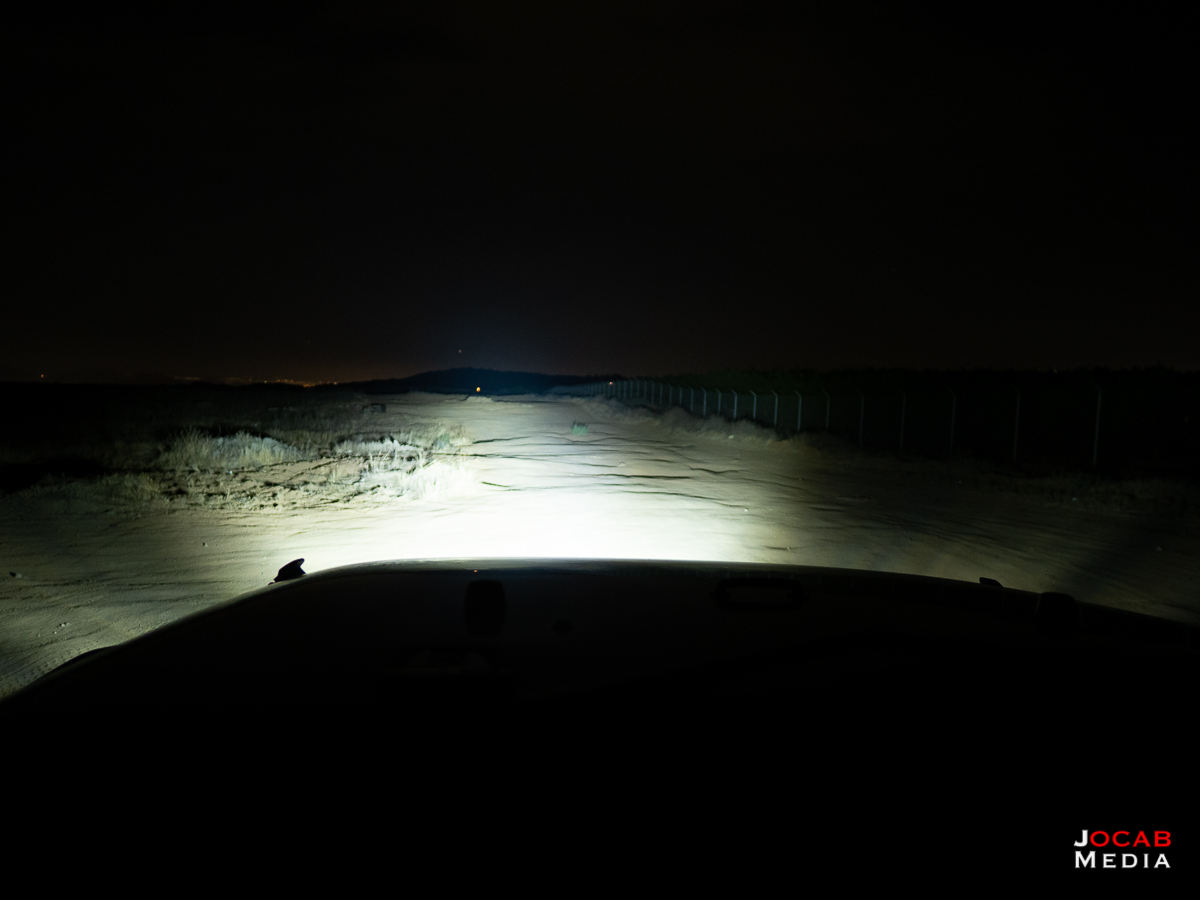
The driving pattern gives a wider angle of coverage, but I did not want that much side coverage with the 10″ light bar. As far as the actual view from the driver’s seat, the output from the E-Series PRO 10″ light bar is quite distinct from the standard head lights.
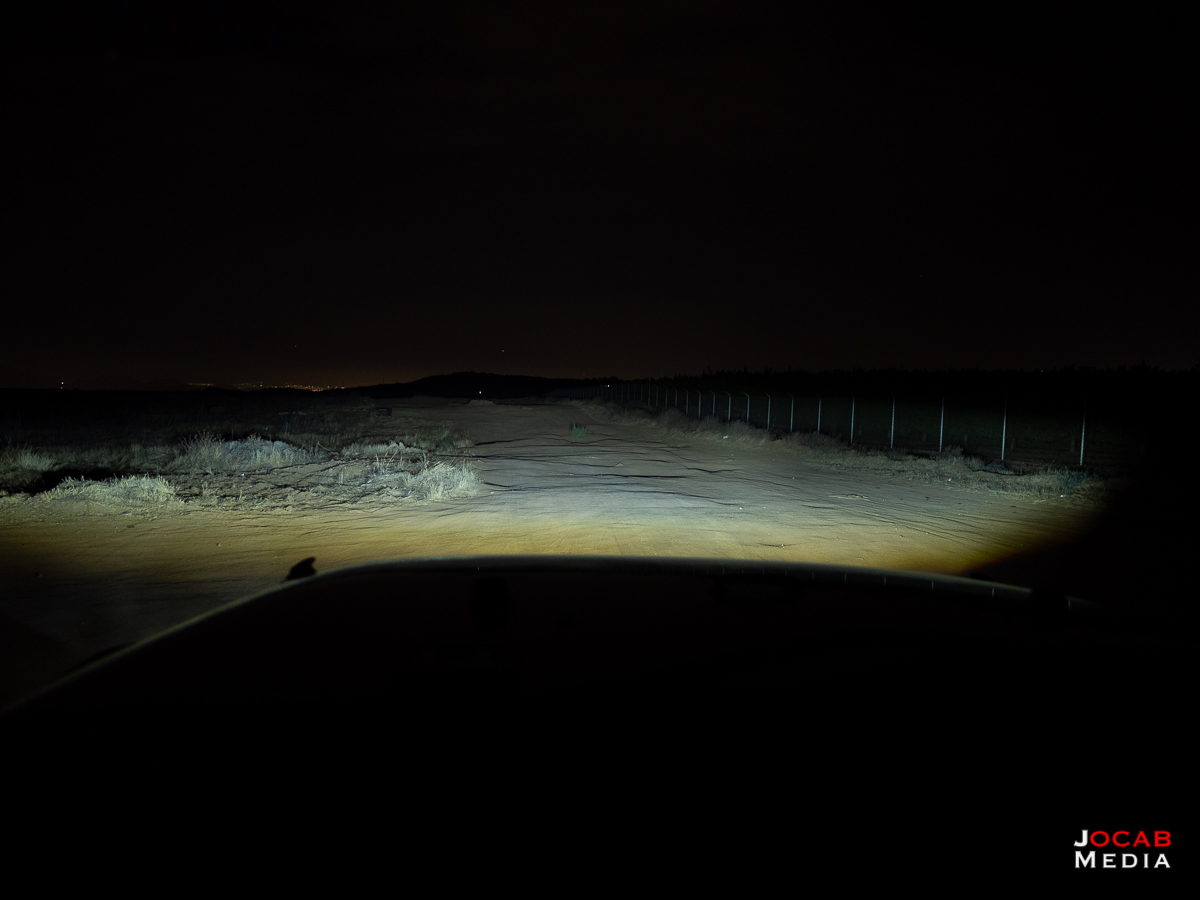
-
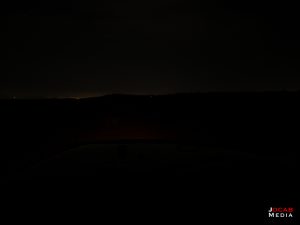
- Lights off.
-
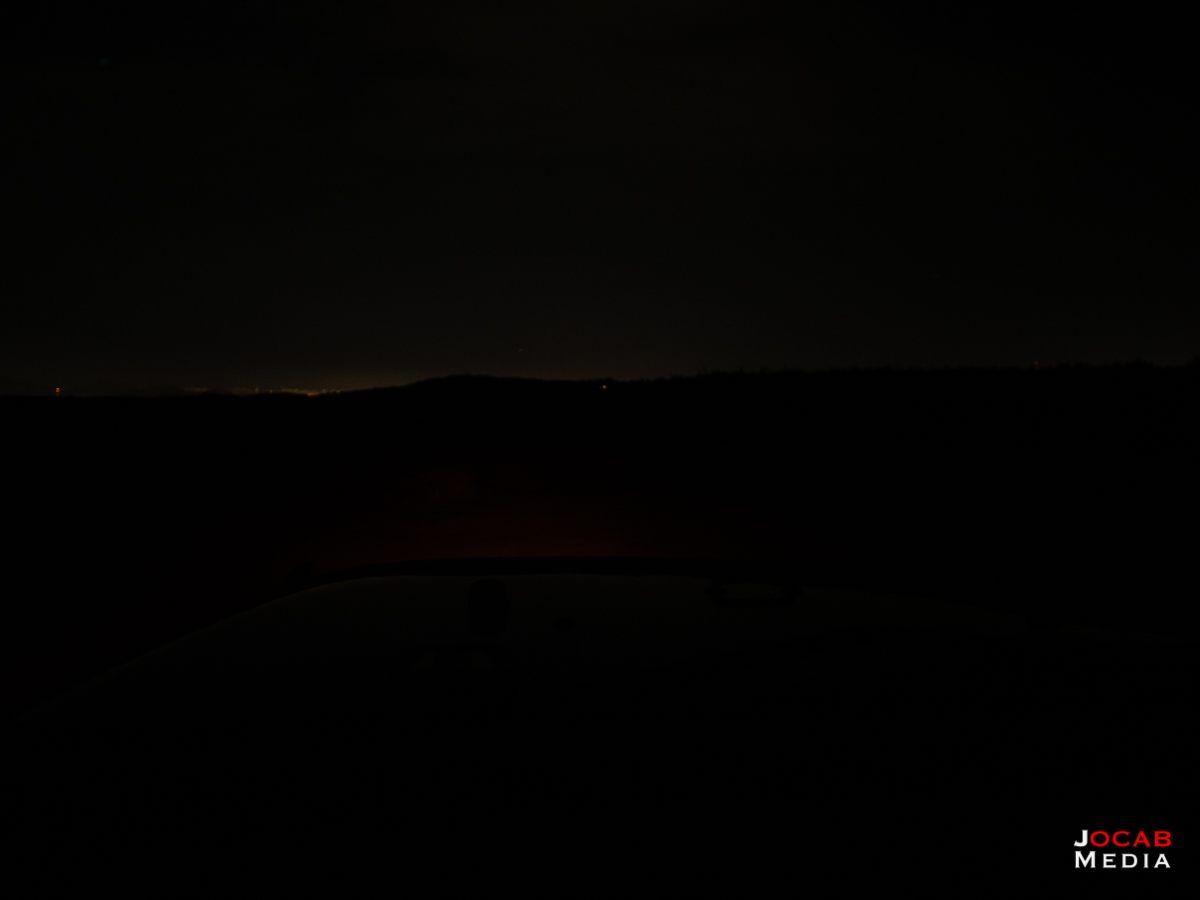
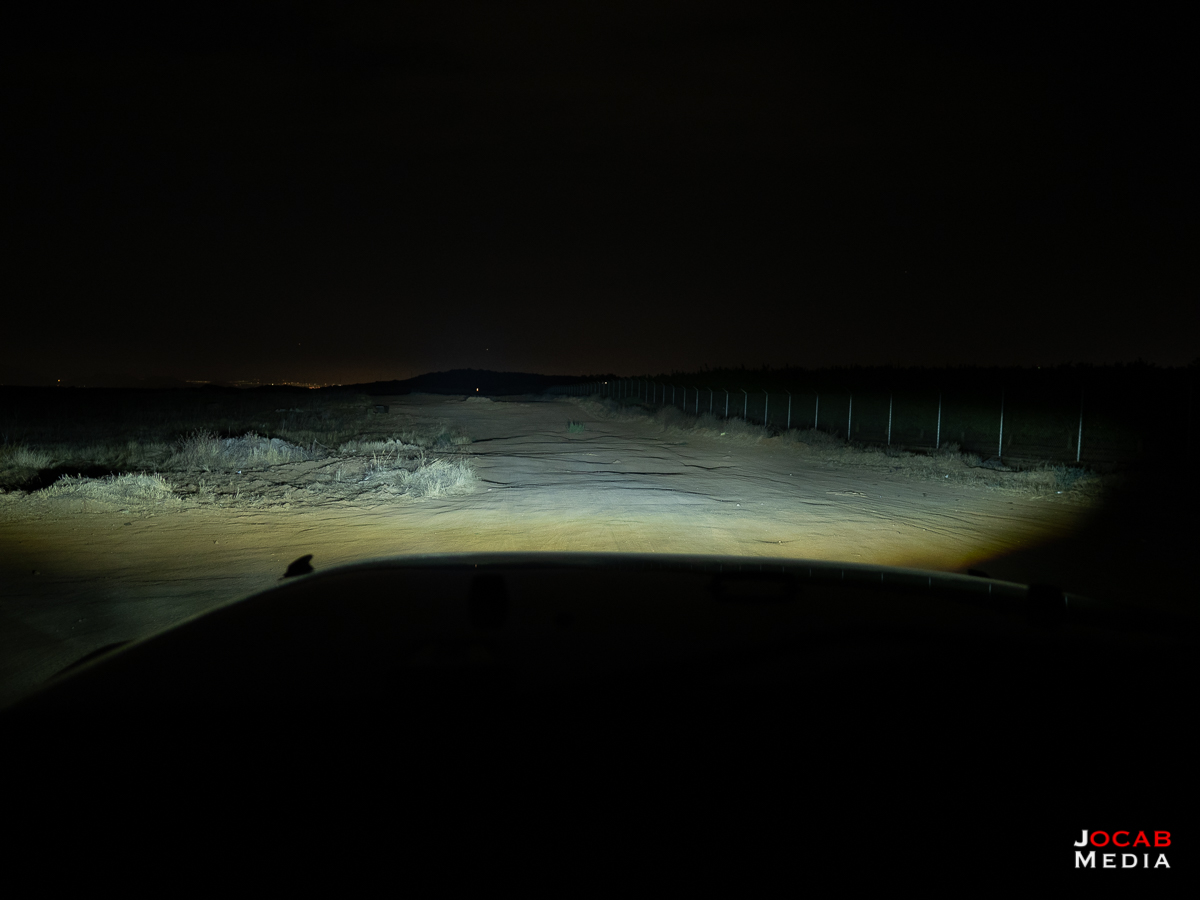
- Low beams only.
-
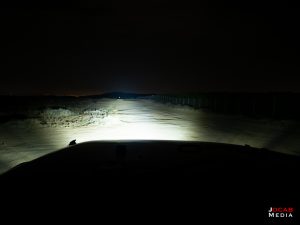
- High beams.
-
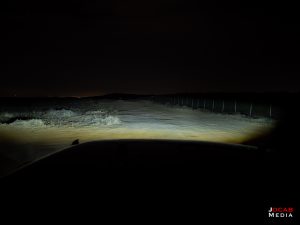
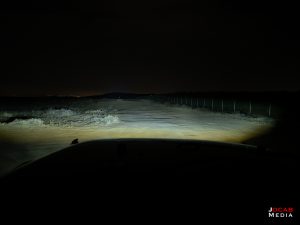
- Light bar only.
In the previous four photos starting from the top moving left to right, it is the unlit scene in front of the vehicle (top left), with the low beams only (top right), followed by the high beams (bottom left), and then the Rigid Industries E-Series PRO 10″ Spot/Flood combo light bar only (no headlights).
If you look closer, you can see there is less spill from the Spot/Flood light bar, with a very strong focused output towards the front out far of the vehicle.
One accessory I did acquire for the Rigid Industries E-Series PRO 10″ light bar is an amber cover.
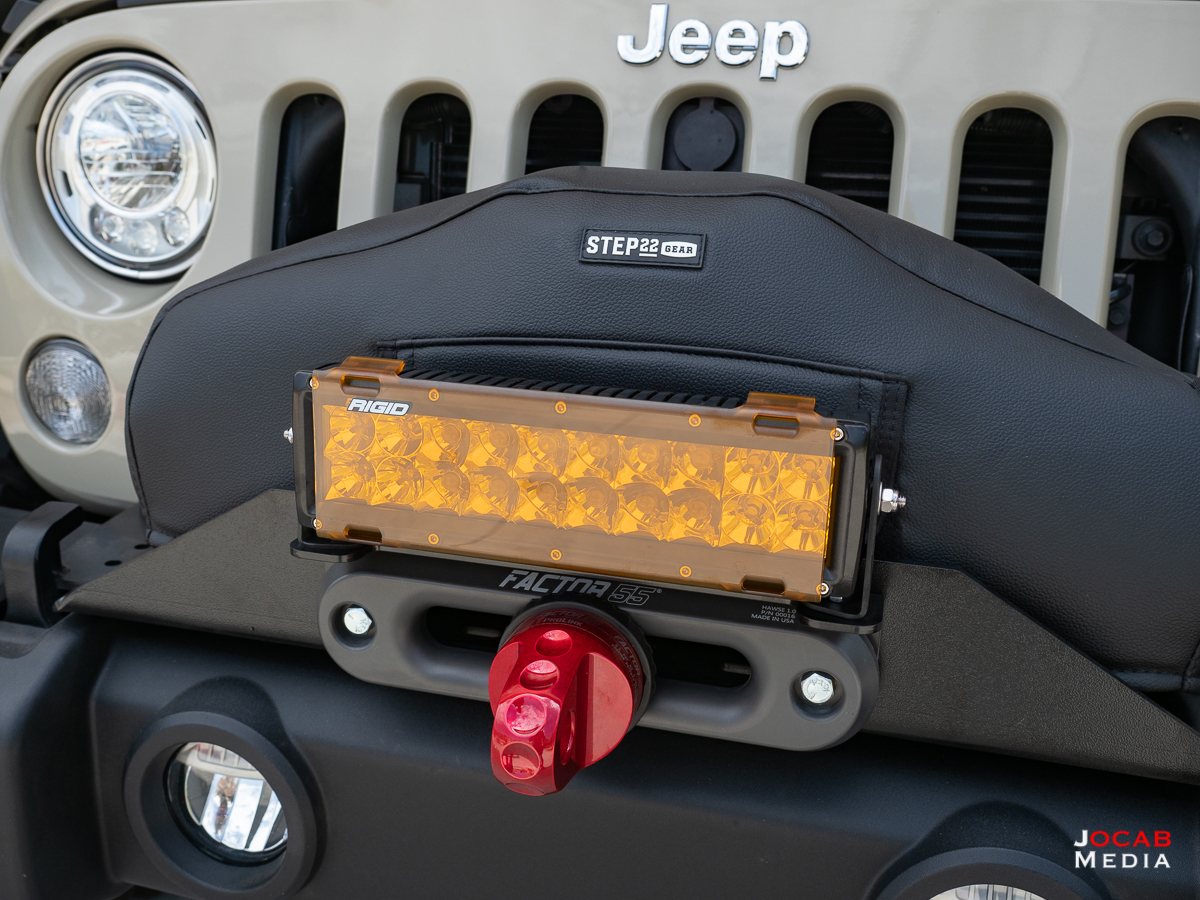
It is a translucent amber polycarbonate cover that simply snaps onto the light. It provides protection for the lens, but also turns the light into an amber color. Amber light is better for dusty or foggy conditions. You actually lose light output with a translucent cover, and you are better off getting an actual amber light (amber reflectors and LEDs). But I preferred the standard white light for the 10″ light bar, with the option of turning it amber on the fly by popping on the cover as conditions dictate.
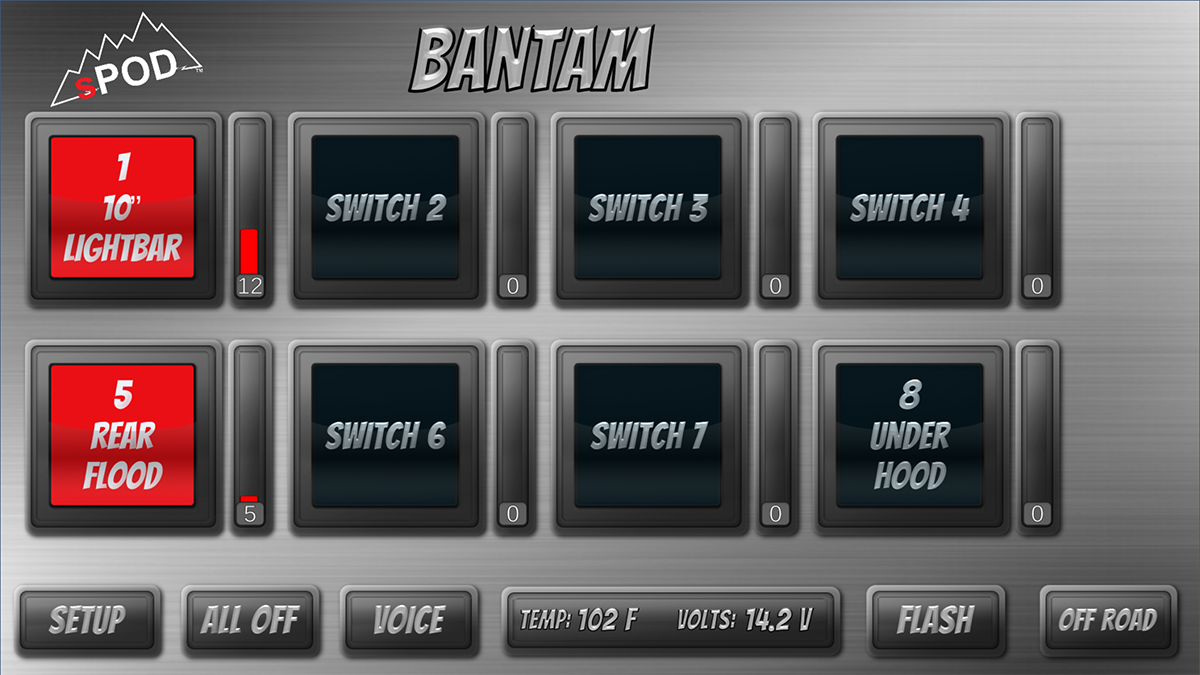
So my sPOD Bantam now operates at one form of front and rear lighting on my vehicle (along with the under hood).
As far as future sPOD controlled devices, I am thinking about getting the KC HiLiTES Rock Light Kit which is essentially a set 4 or 6 Cyclone LED lights with brackets, hardware, and wiring. Ground lighting would be nice to have when night shooting at my primary shooting range facility. I am also considering a pair of amber colored Rigid Industries D-Series surface mount flood LEDs to mount on the front bumper. I figure I could drill mount a pair of D-Series LEDs on the top of the bumper, towards the ends of each side, for true dusty offroad conditions lighting. Then of course I am still trying to figure out a way to mount a couple of KC HiLiTES Cyclone LED lights in the rear cargo area for cargo lighting.
I am mildly considering a hood mounted 20″ light bar, although I really want to try one out at night in person in order to gauge how bad hood glare will be even with a spot beam configuration.
Anyway, that sums up the Rigid Industries E-Series PRO 10″ Spot/Flood Combo light bar with a Poison Spyder Hawse Fairlead Rigid 10″ LED Light Bar Mount on my 2018 Jeep Wrangler JK Unlimited Rubicon.
Comment on this post