
I wanted to post a minor update to the Brownells 10/22 Takedown Rifle Project since I made a few revisions since I last posted a blog article about the 10/22 Takedown.
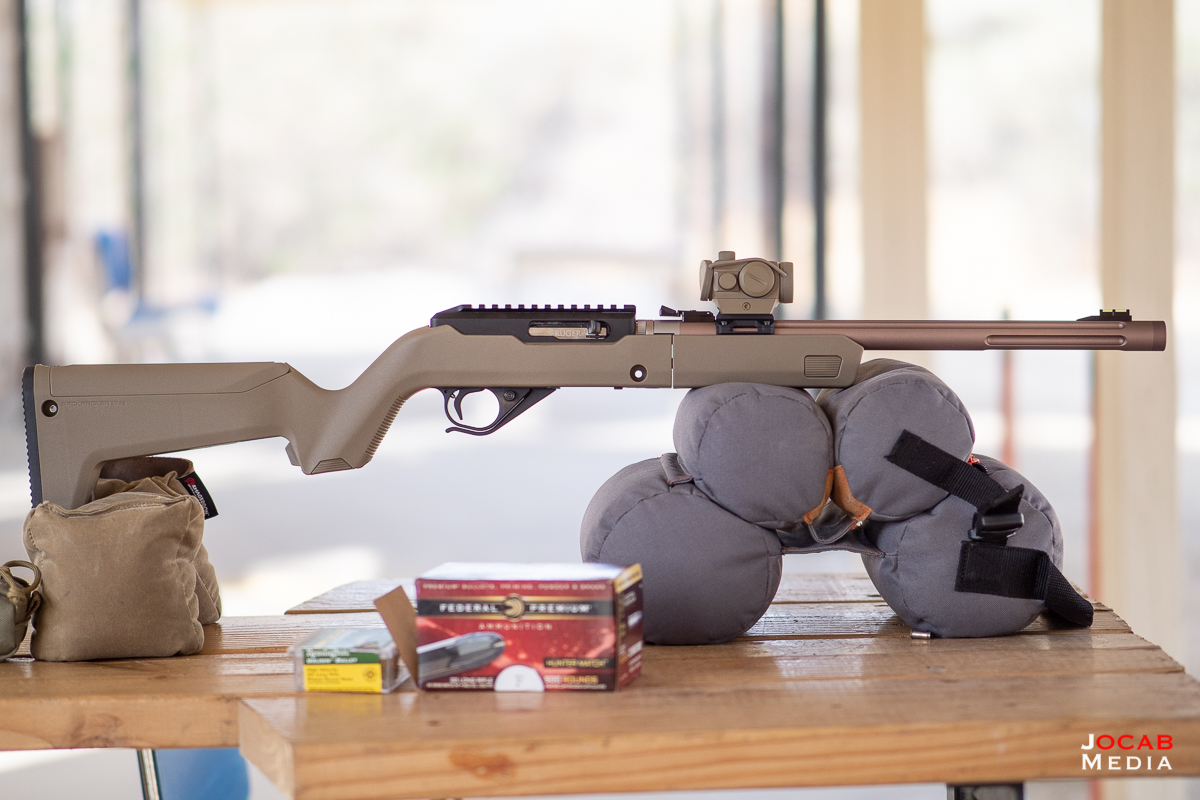
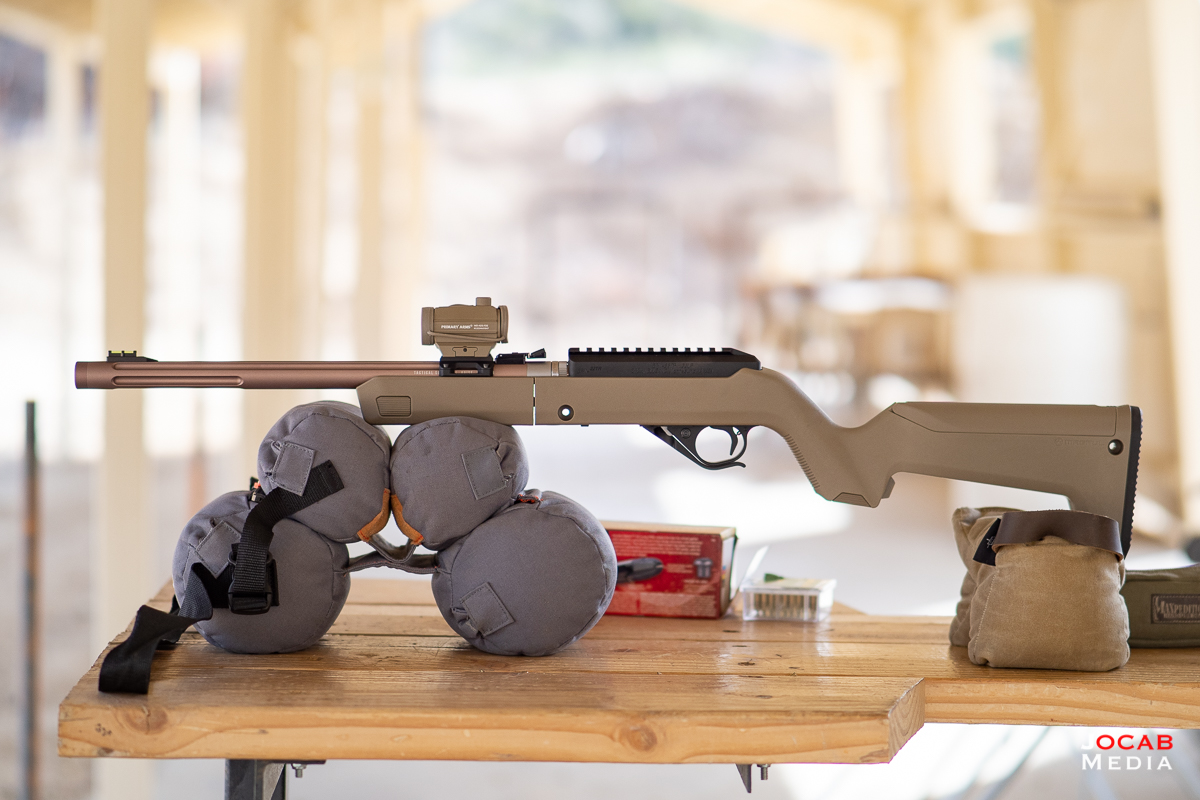
The most notable revision is that acquired the Magpul X-22 Backpacker Optic Mount to move the Primary Arms Micro Red Dot sight from the receiver to the barrel.
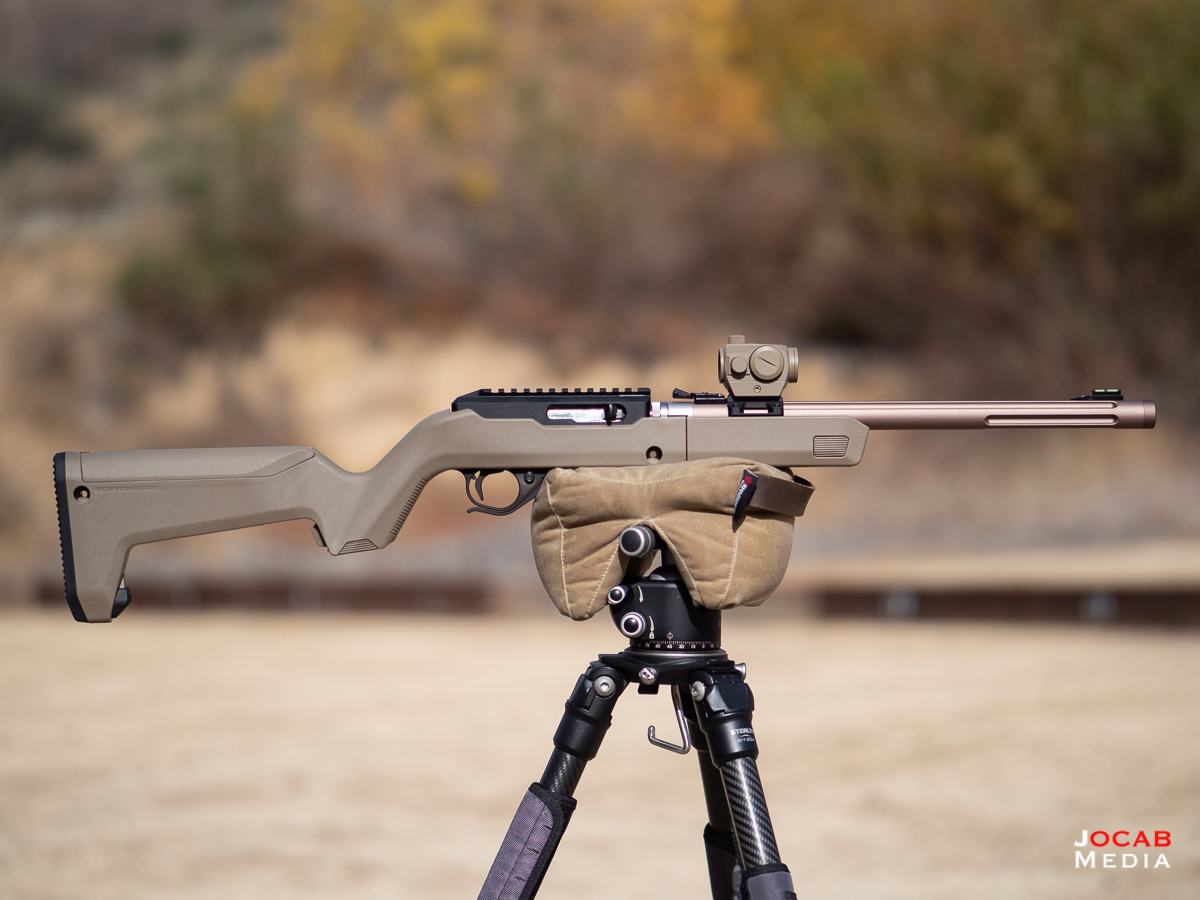
I decided to try this out since it seemed to make more sense from a repeatability standpoint. Since the optic is always going to be in line with the bore, any inconsistency between the barrel and the receiver when reassembled after taken down should not affect return to zero.
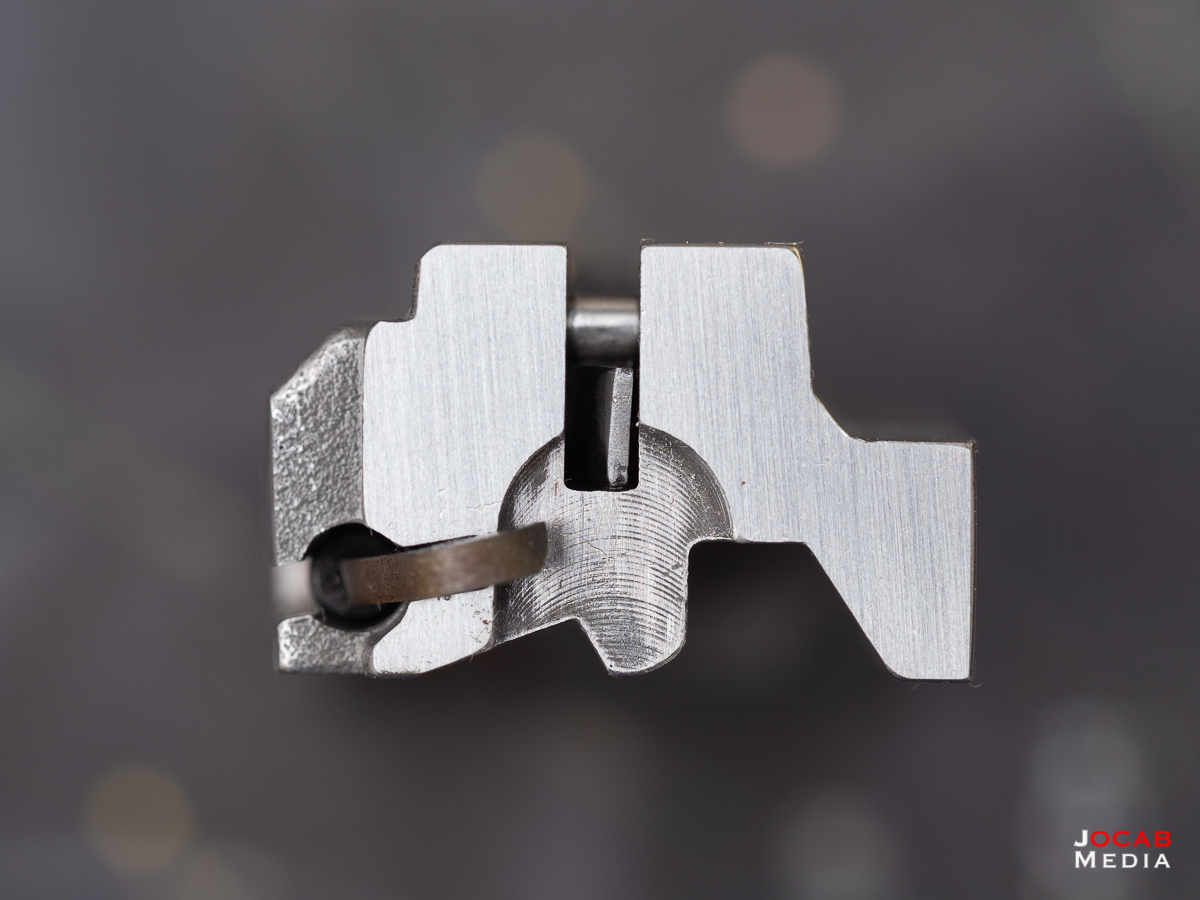
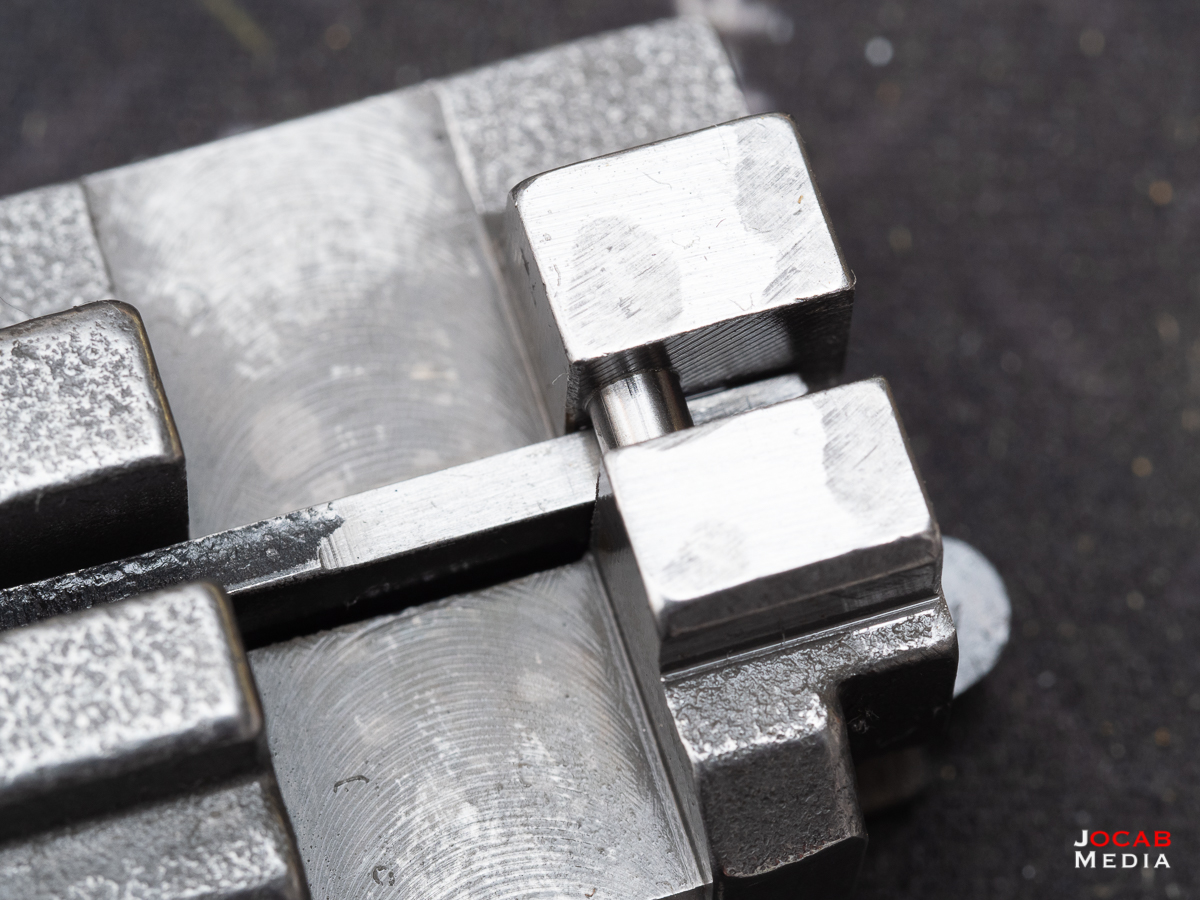
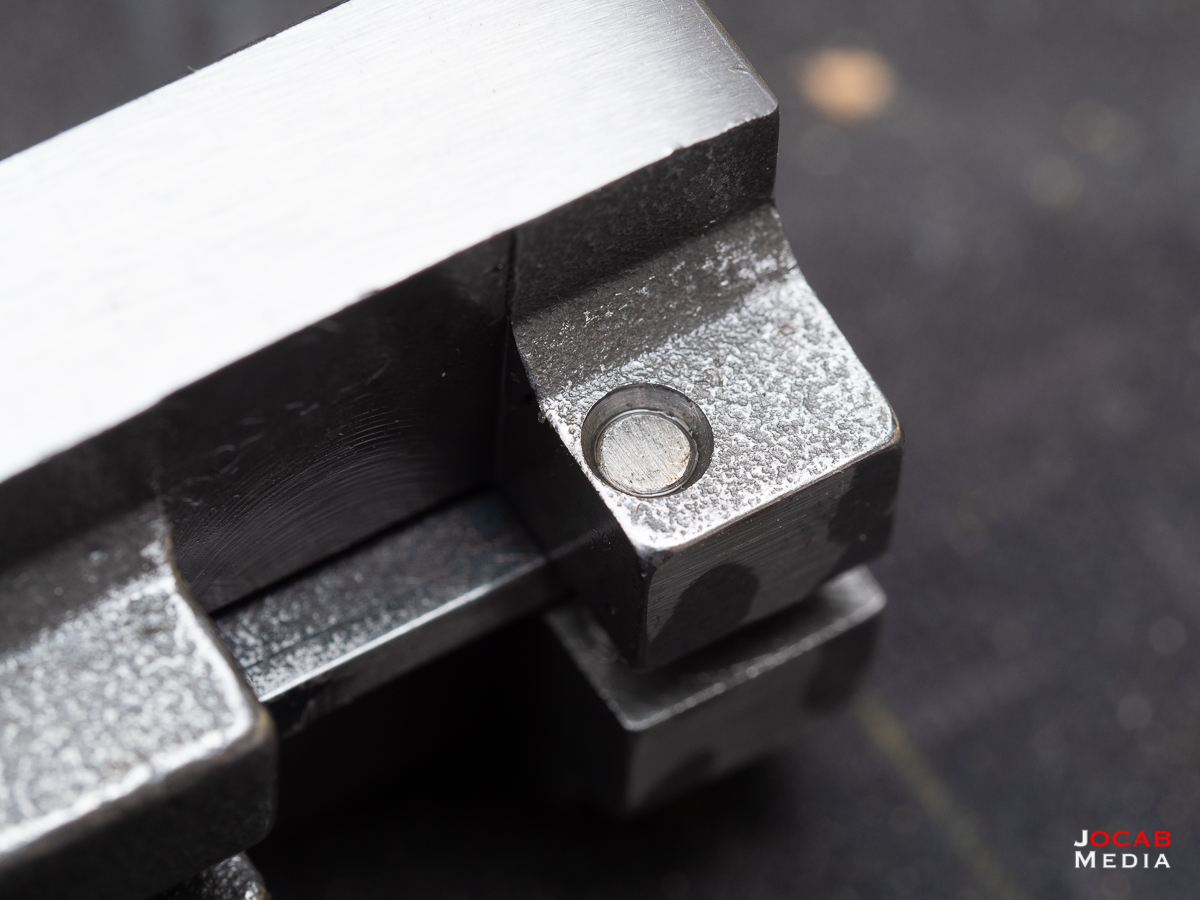
The next other revision I made was a reworked factory bolt. I came across 10/22 bolt rework services being done by Connecticut Precision Chambering (or CPC), specifically with regards to 10/22 bolt headspacing. Aftermarket bolts tend to be cut to minimum headspace for better consistency and accuracy, and it is possible to rework or clean up a factory bolt to address long headspacing. I looked at the CPC website and saw the work they offered and decided to try them out.
I ended up just getting a brand new factory bolt from Brownells and sending that straight to CPC to get the bolt reworked with an EDM extractor. The work by CPC was $60 total (which included the return shipping). I could have just sent the existing bolt that I had in the rifle, but I wanted to see if another OEM bolt would be just as dirty and rough as the one I originally got from Midway. The one sourced from Brownells looked a lot cleaner.
Anyway, the turn around from CPC was actually really good. CPC cites about two weeks turnaround for bolt rework, but CPC had the bolt in the mail back out to me the next day after receiving my bolt.
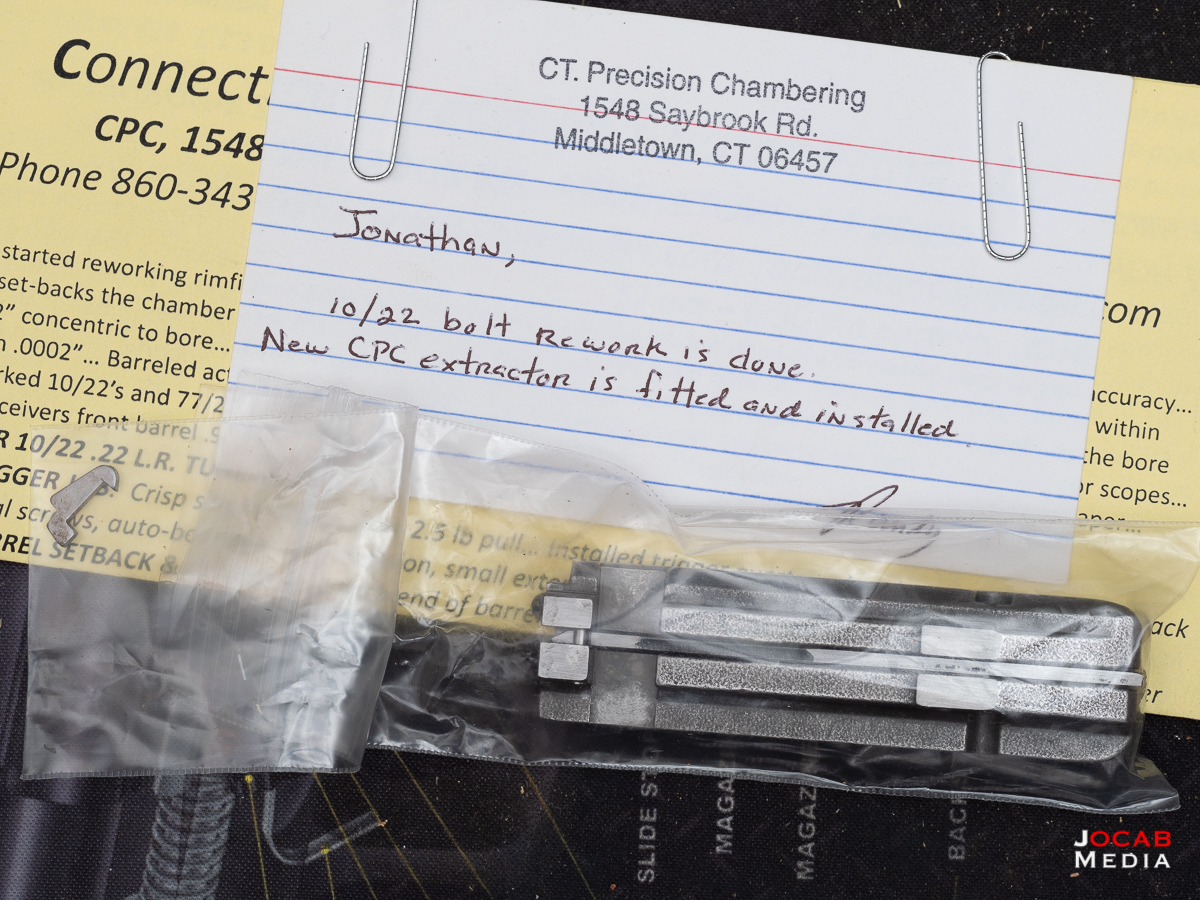
Aside from installing a better extractor, the primary items that the CPC 10/22 bolt rework entails:
- Headspace is surface ground and squared to a .0425 rim depth
- A hardened ground solid dowel pin is pressed in over the top of the front of the firing pin. This new dowel pin keeps the front of firing pin from raising up and causing flyers and gives more consistent firing pin strike.
- Firing pin is reworked and surface ground flat.
- Rear / bottom of bolt body is full radiused for smoother/better bolt function with standard and high velocity ammo.
The above list is pulled straight off the Connecticut Precision Chambering website.
http://www.ct-precision.com/
This work above is actually $43 + $7 for return shipping, but I paid the extra $10 for a new extractor since I would have had to buy one on my own had I not opted for one from CPC.

The bolt is definitely much cleaner in terms of the bolt face side after work by CPC.
As far as the dowel pin controlling the firing pin movement, I have actually never heard of this technique before. But it appears to be a sound idea.
I went to the range to verify the functionality of the rifle with the new bolt and it appears to have slightly more consistency at 25 yards. Not to mention out of 100+ rounds, I only had one failure to eject and feed.
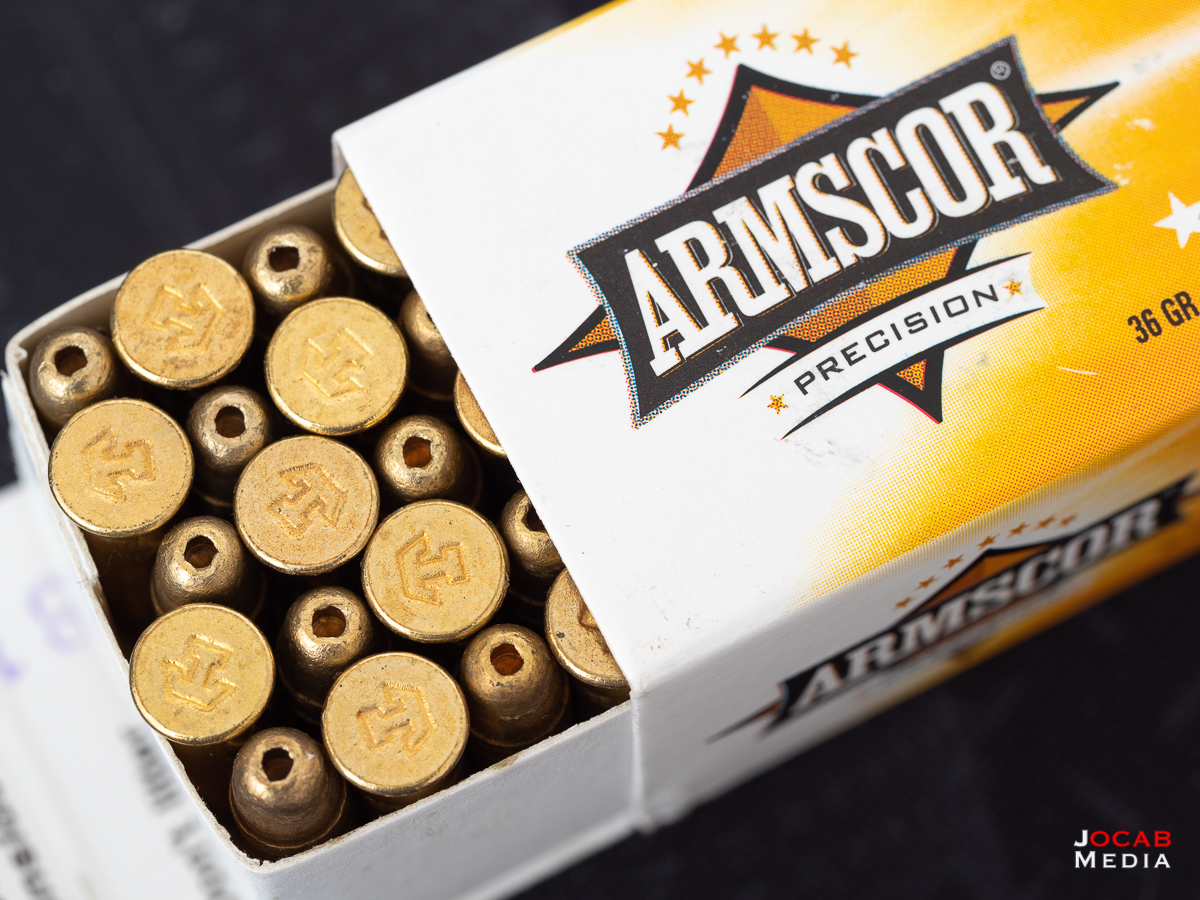
I retested several ammunition types that I already tried previously, including Armscor which I had not tried before because I forgot I had a brick of it that Target Sports USA sent to me for free a couple years back.
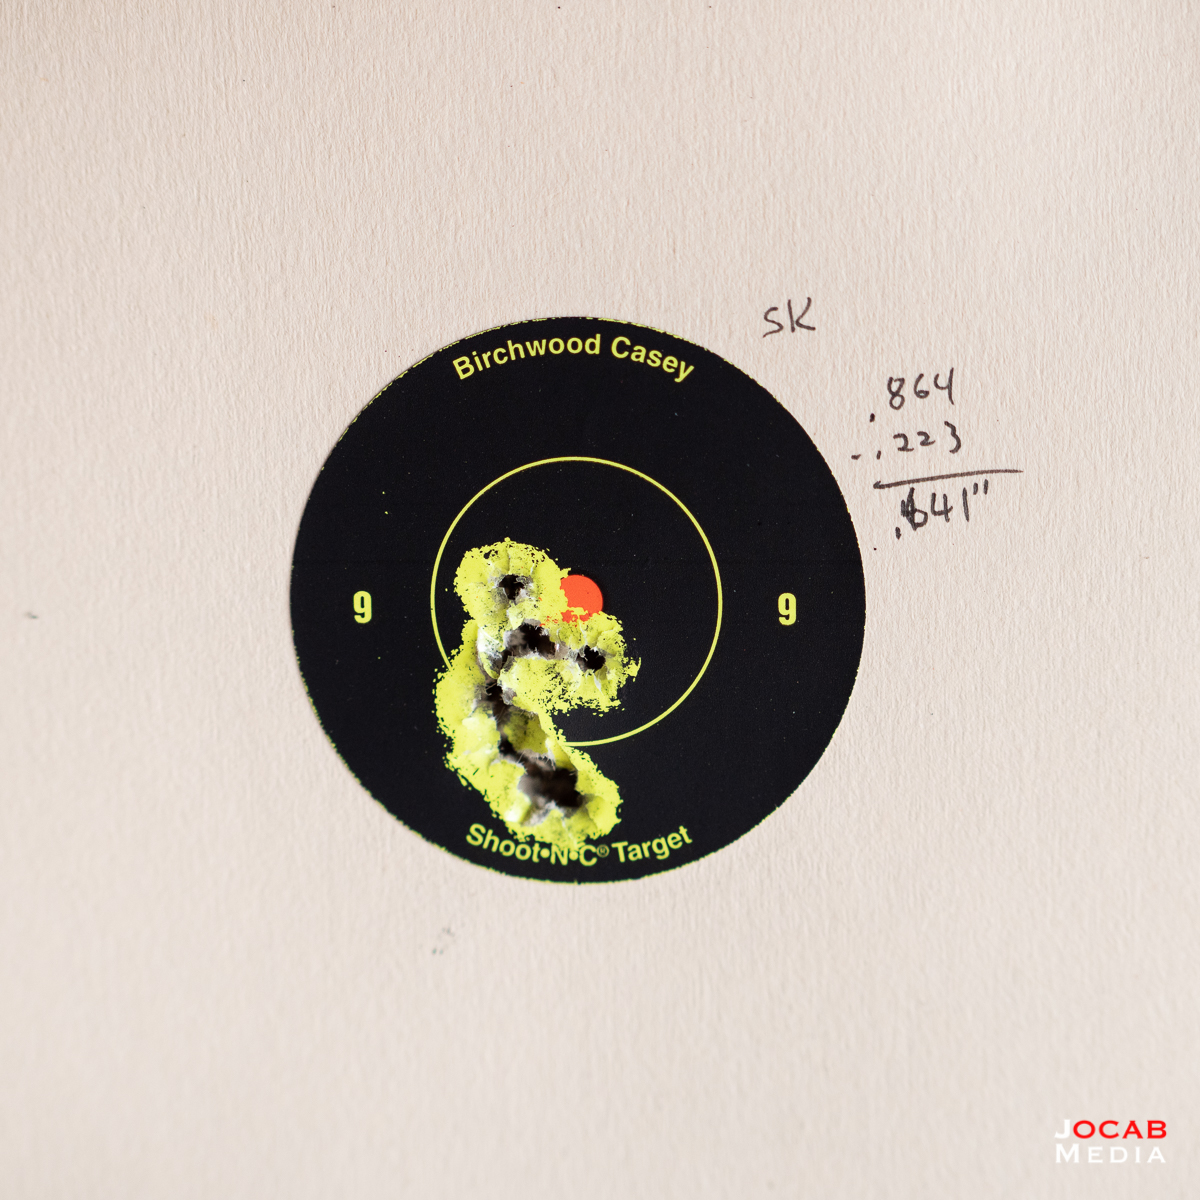
SK Standard Plus: Avg MV 988 fps 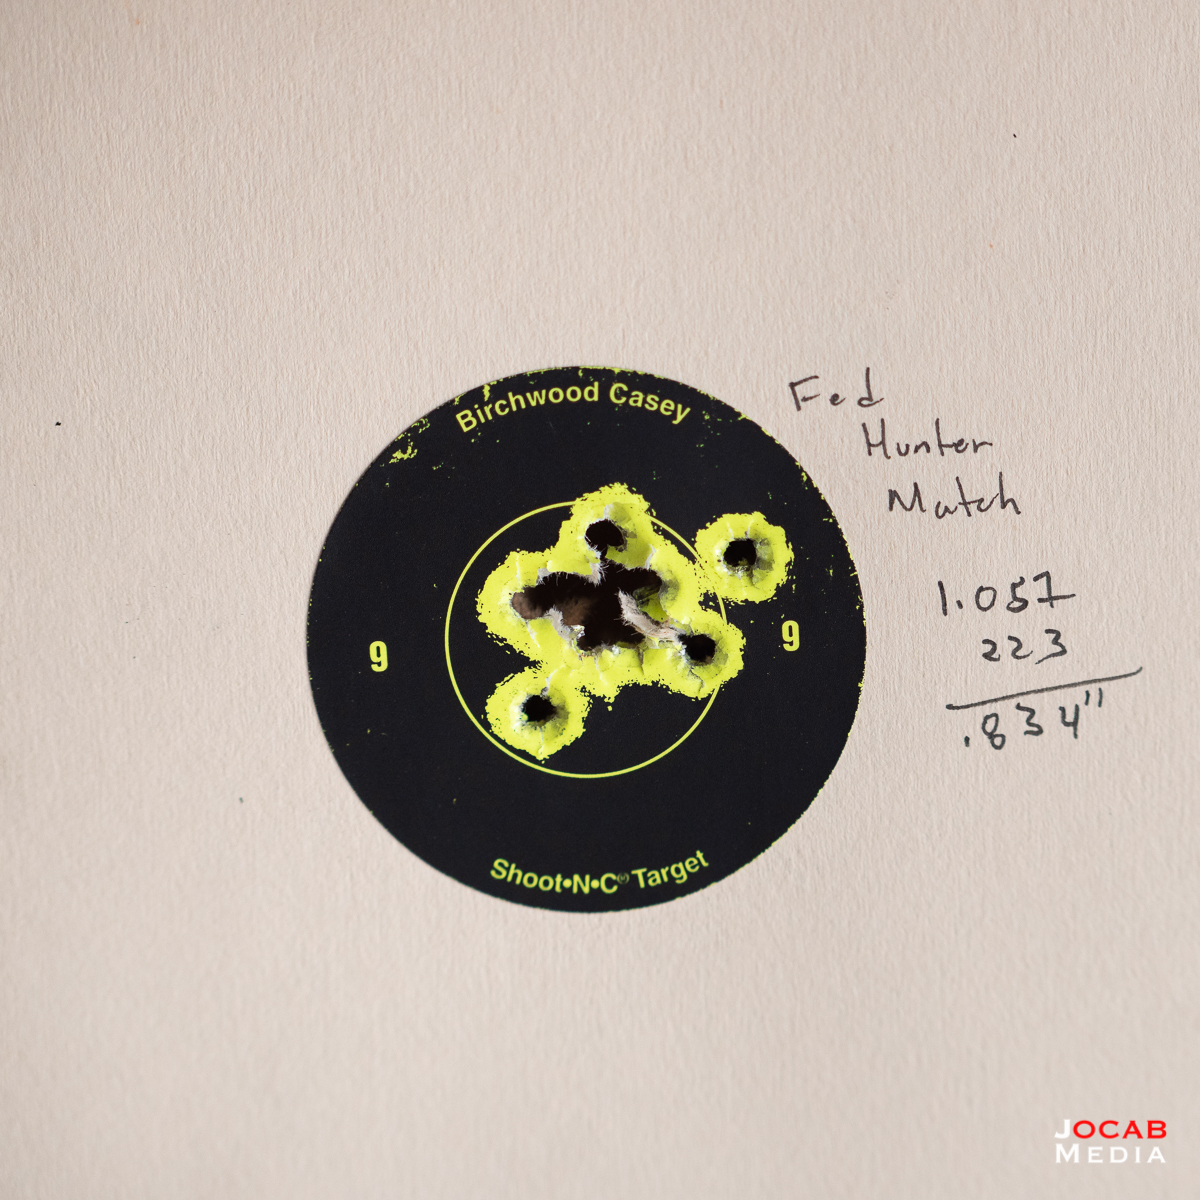
Federal Premium Hunter Match: Avg MV 1177 fps 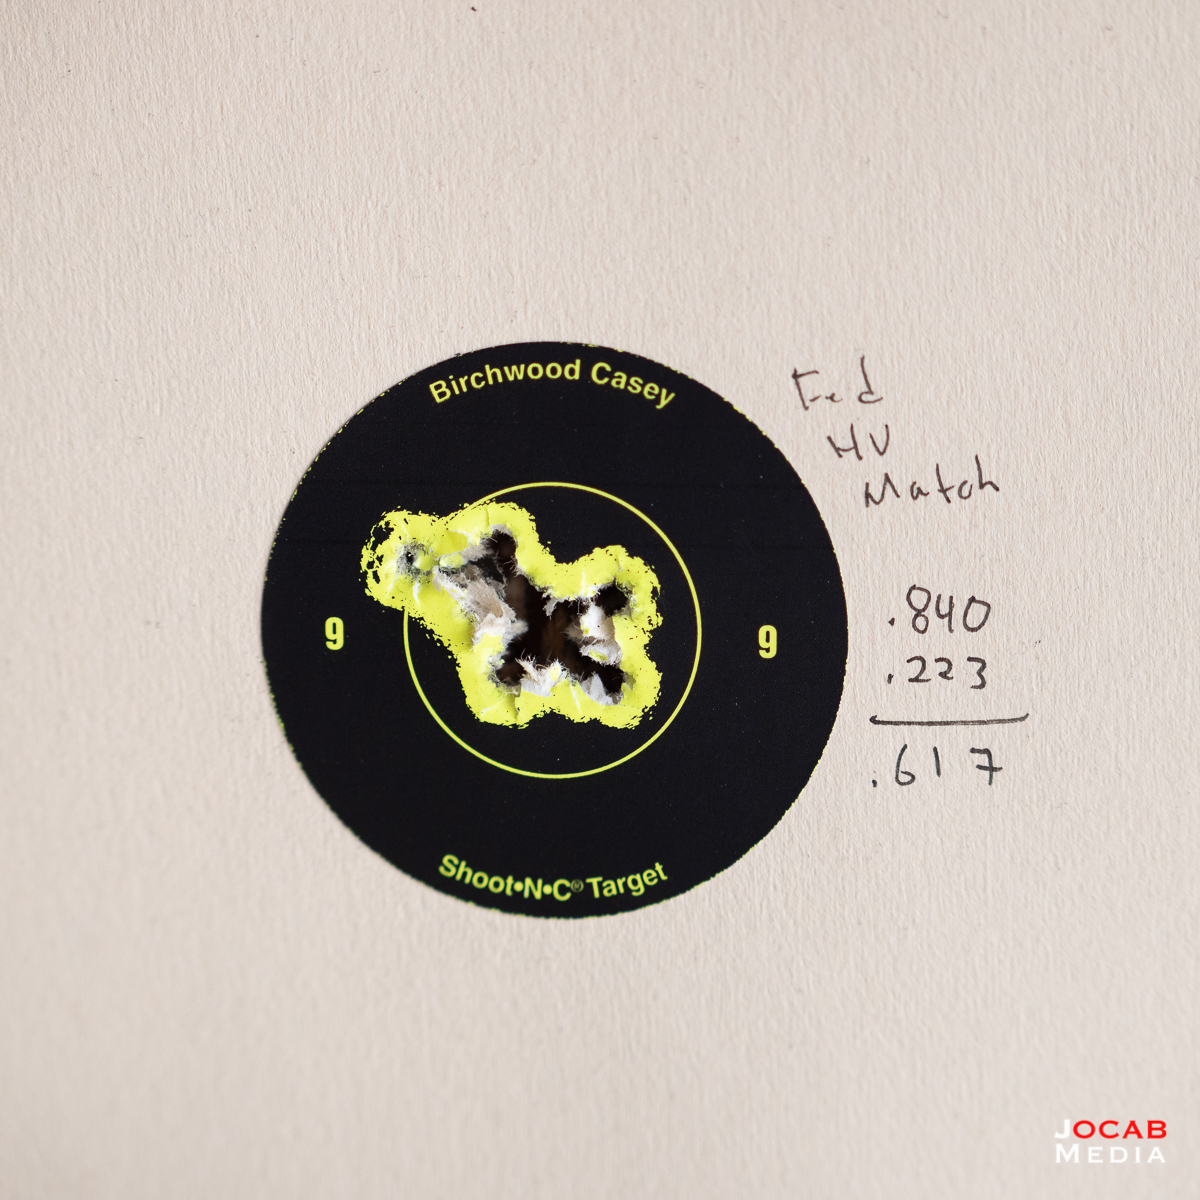
Federal Premium High Velocity Match: Avg MV 1138 fps 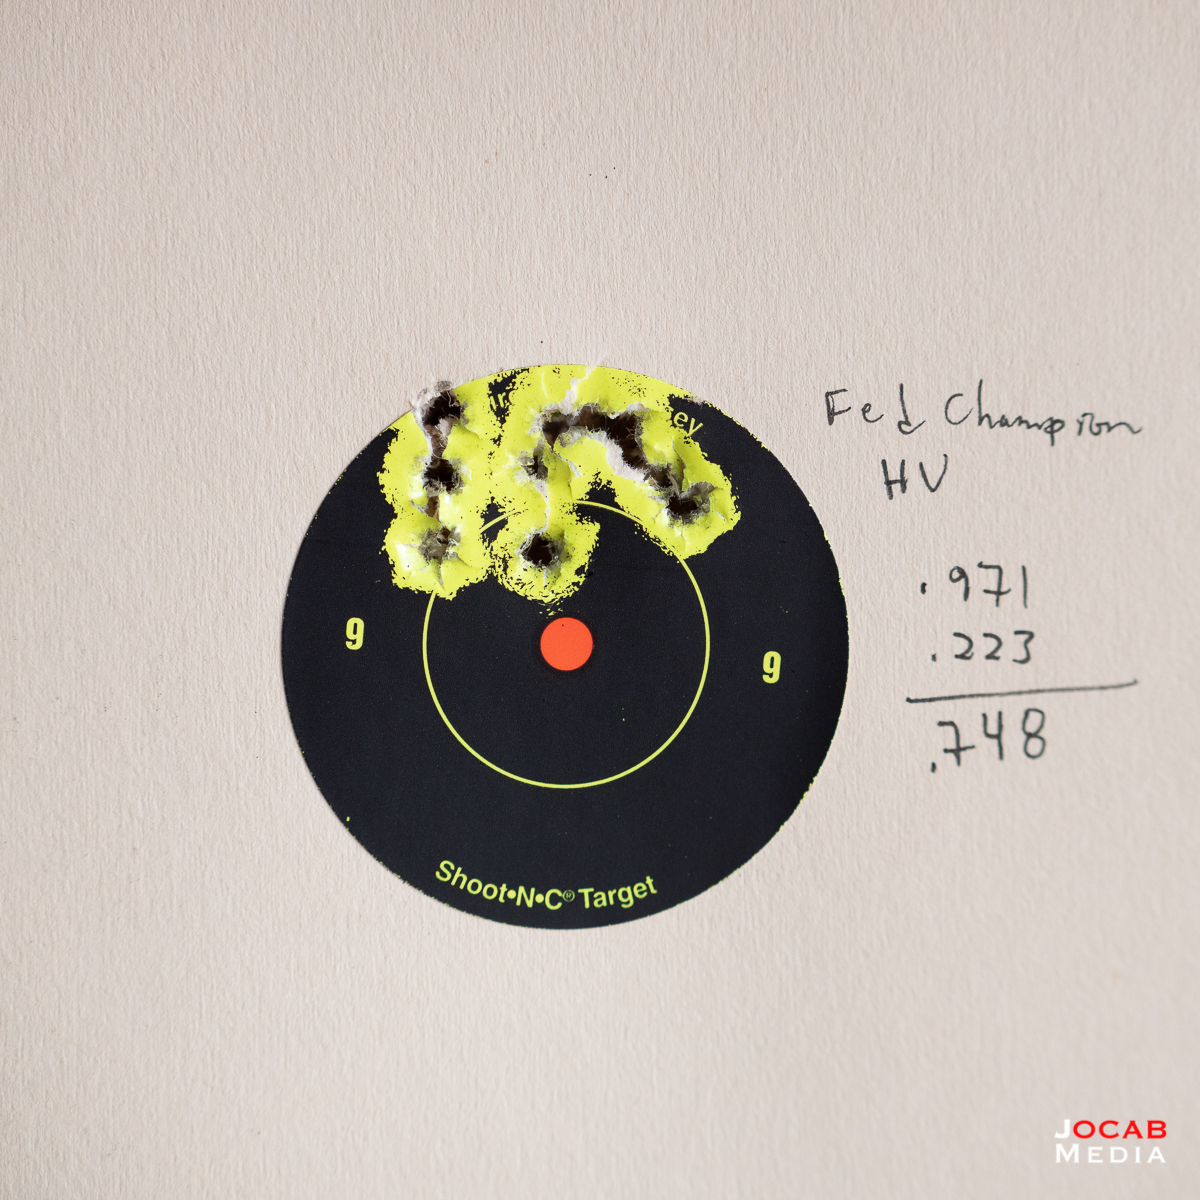
Federal Champion High Velocity: Avg MV 1239 fps 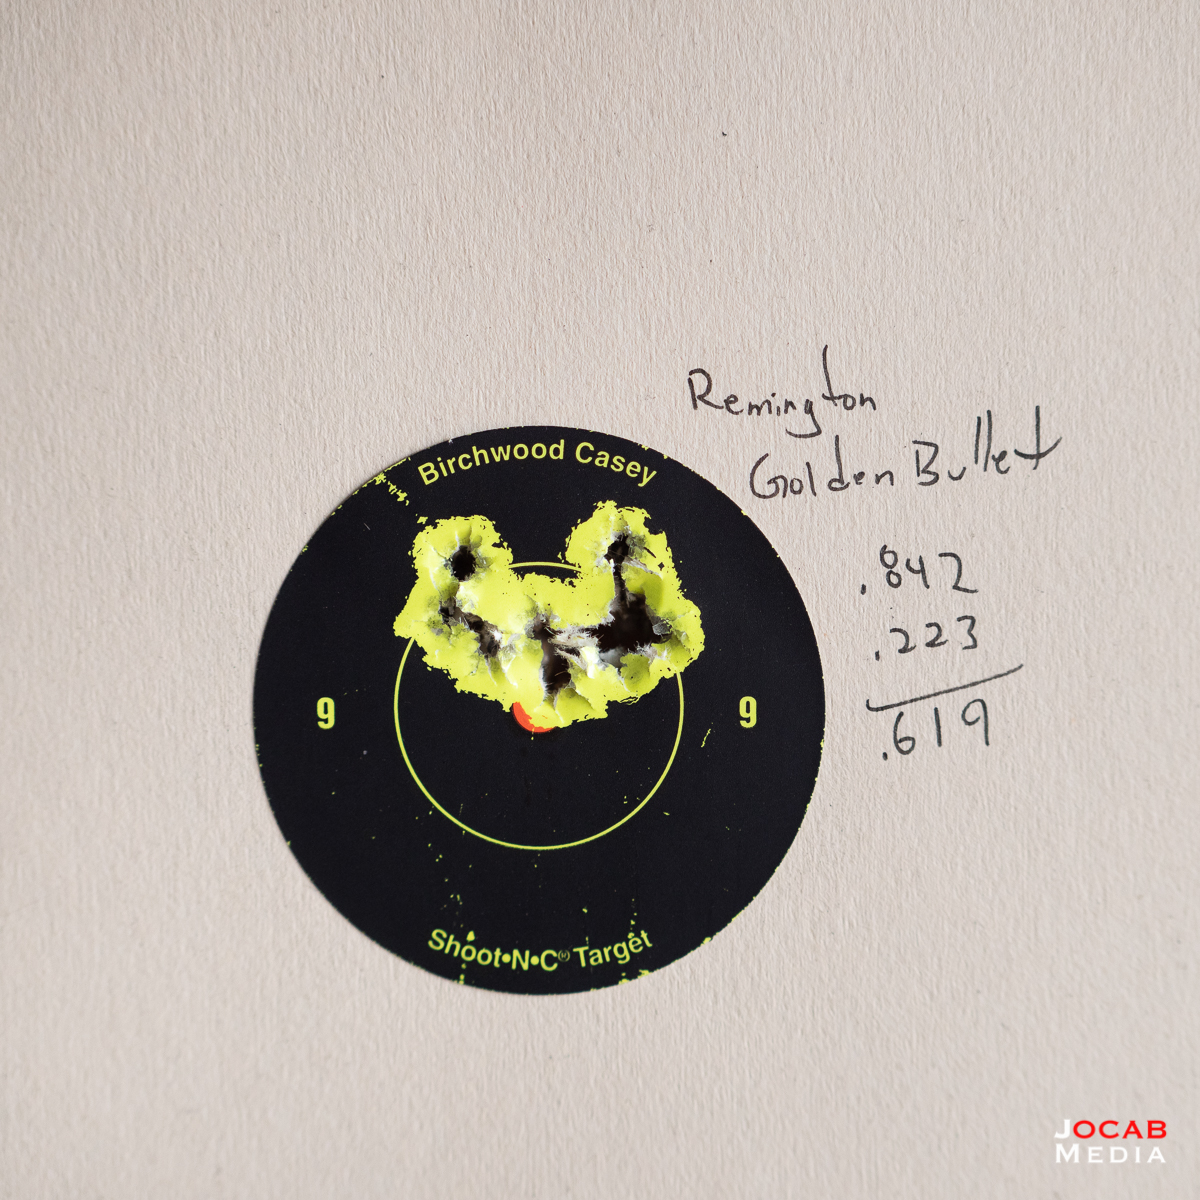
Remington Golden Bullet 40gr: Avg MV 1176 fps 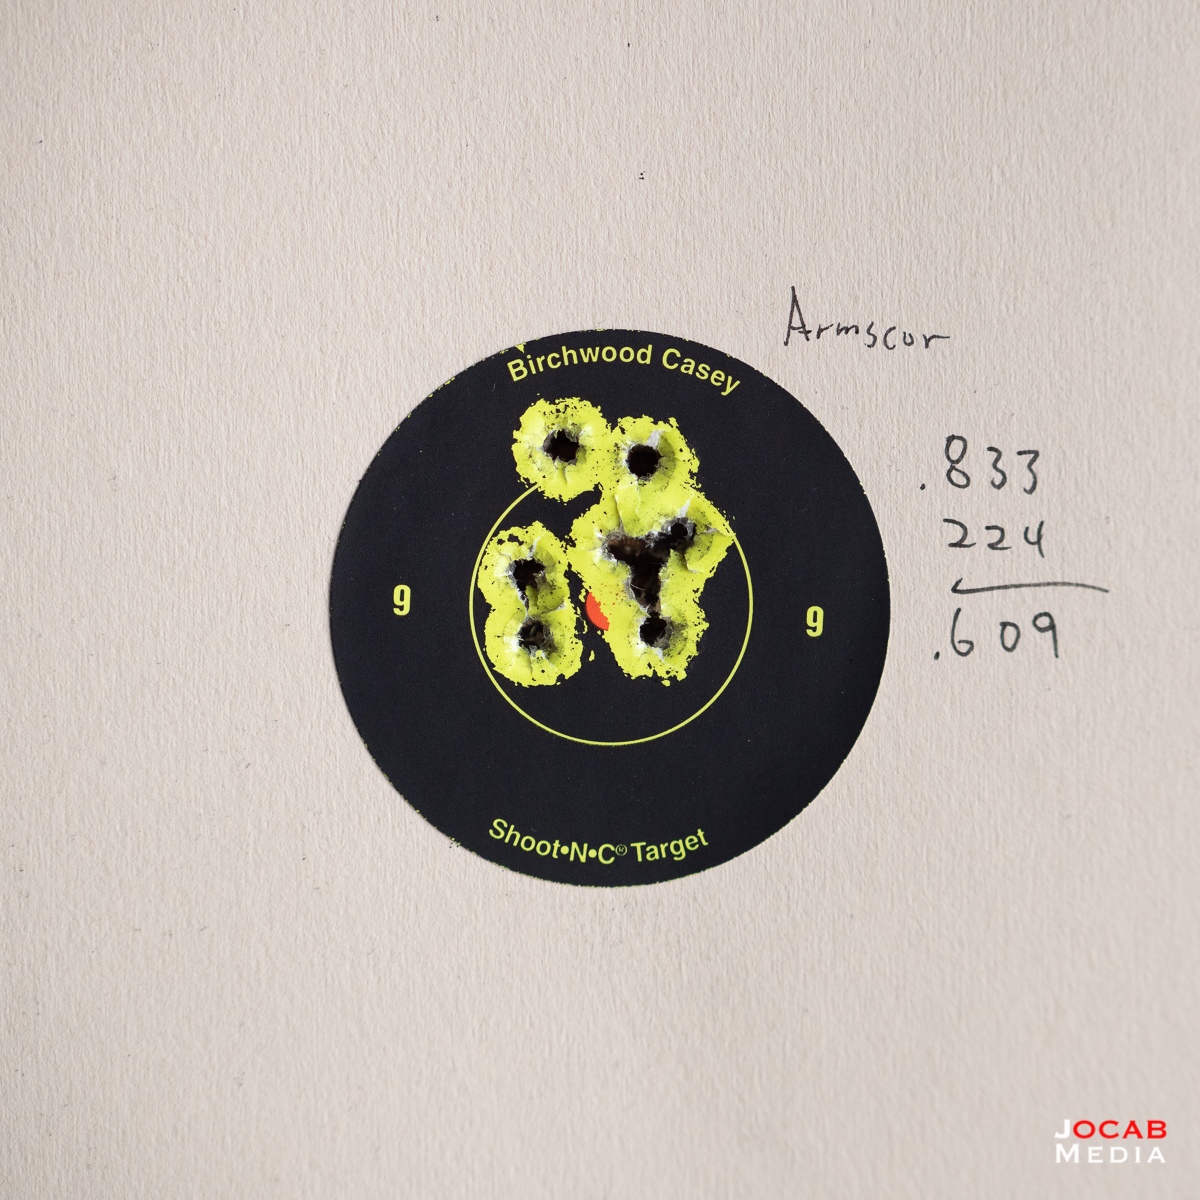
Armscor High Velocity Hollow Point: Avg MV 1158 fps
These 25 yard groups are between .6″ and .8″ inches, so three-quarters of an inch give or take. Obviously, these groups could be tighter with a magnified optic as opposed to a 2MOA red dot. But after the bolt swap, it seems like the ammo across the board is shooting with much more consistency. In previous range outings, the Federal Champion High Velocity ammunition printed on paper with larger groups (closer to 1″ at 25 yards).
Anyway, I think this is pretty much the last of the tinkering with my Brownells 10/22 Takedown Rifle. For what this rifle is, I am actually happy with the performance. I have seen that I can print 1/2″ at 25 yards with this rifle using CCI Mini-Mag and will probably stick to that ammo for this gun. But the high velocity Federal Premium options seem to hover around .6″ to .7″ with regularity.
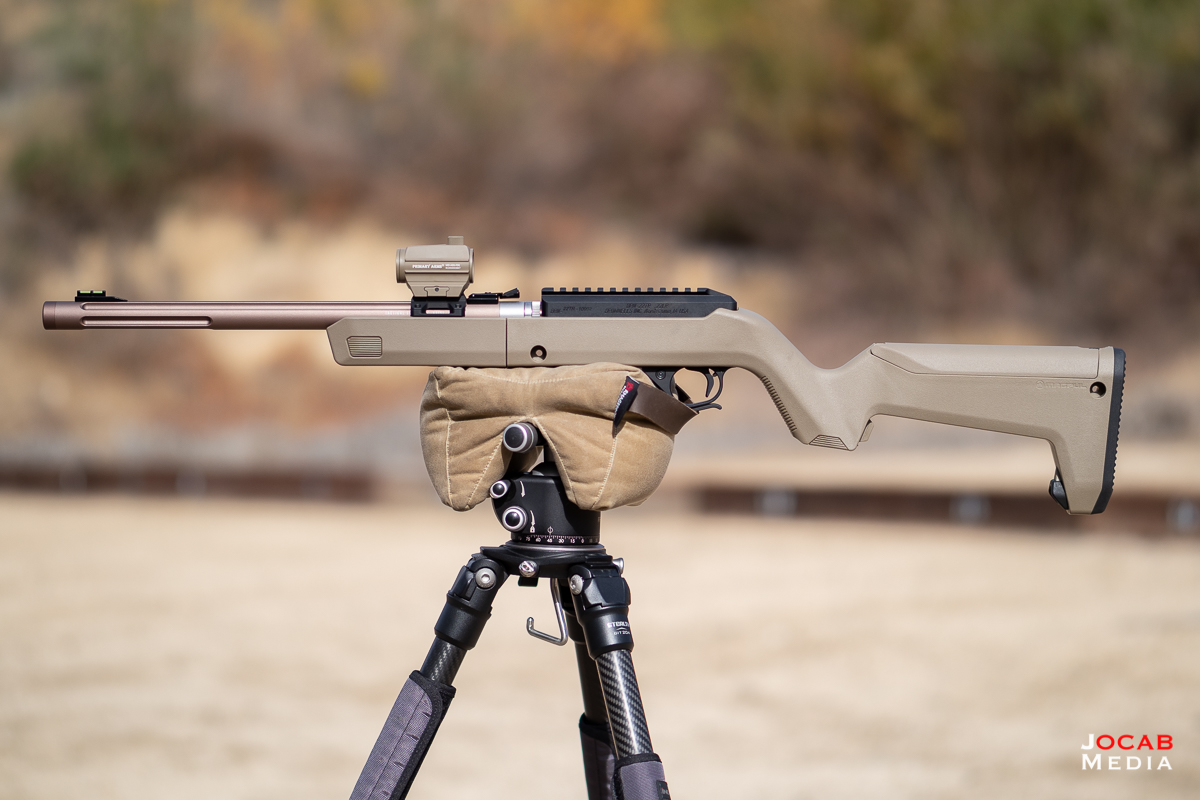
There is one lesson learned with this build. I should have just bought the plain top receiver (BRN-22T) as opposed to the Picatinny railed version (BRN-22TR). Since I went with a micro red dot on the barrel mount, the Picatinny rail is wasted, especially when it blocks the sight line for the iron sights on the Tactical Solutions barrel. Note that I discovered why the Tactical Solutions rifles do not have the same issue with the iron sights. The Tactical Solutions Takedown receivers have a milled cut straight down the center of the Picatinny rail which provides a channel to see through the rail and have sight line to the iron sights.
So if anyone is looking to build a 10/22 Takedown from scratch, keep the above information in mind if you decide to get a Tactical Solutions barrel with iron sights.
One last note, I did acquire a case to hold the 10/22 Takedown which was recommended to me on Reddit.
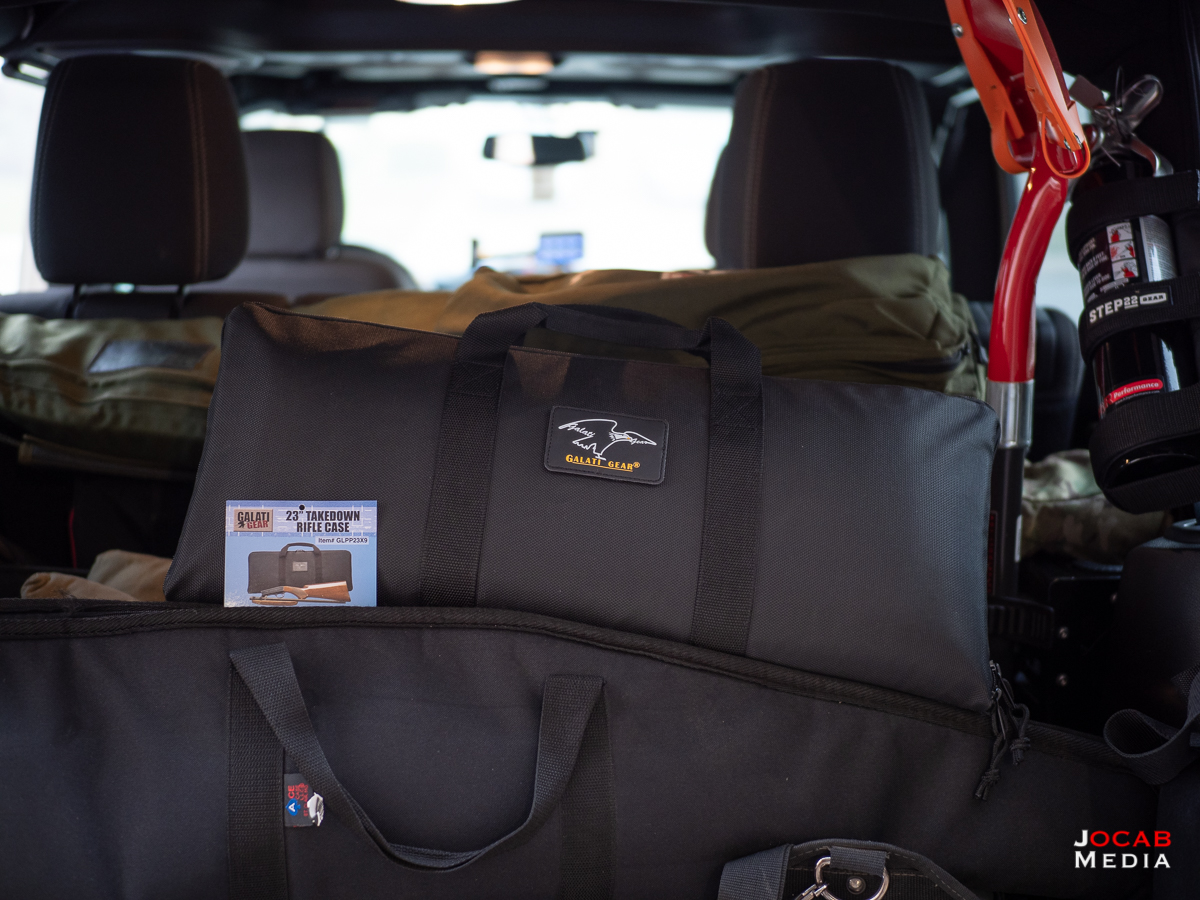
This is a Galati Gear Takedown Rifle case that measures 23″ x 9″. It holds the 10/22 Takedown in the X-22 Backpacker configuration perfectly. It is a good minimal case for this platform.
Miguel Valdez
Did you have any issues fitting the barrel mount? Curious if the rear sight was in the way at all?
Jonathan Ocab
The Magpul optic mount? No, there were no issues.
Miguel Valdez
Yep. Thanks. Just wanted to make sure it fit well with the barrel and the rear sight since it looks so close.
2022 SHOT Show After Action Report – Part 5 – ocabj.net
[…] $299 and you can go direct to the Desert Tech website to get on a waiting list (free). Even though I already have a 10/22 Takedown that I built, I actually signed up for the Trek-22 waiting list and will probably order one when it is […]